We carry out restoration of old chairs with our own hands - master class and step-by-step photos. The advantages of restoring chairs, simple and affordable methods How to restore an old chair
Chair restoration has become a popular business in the 21st century. Many people, when furnishing their apartments, strive to fill them with antiques. But not everyone can afford to buy antiques. And therefore, the owners prefer to update the old furniture that they inherited and, in memory of the past, was not thrown into a landfill.
Unpresentable-looking interior items, which have been collecting dust in dachas and attics for a long time, are handed over to professionals in order to then decorate the rooms of their home with furniture that has found a second life. But in order to renew the dilapidated upholstered part, back and legs, it is not necessary to turn to the craftsmen, because the owners can do this themselves. 
Similar articles:
How to update a chair?
Restoring old chairs with your own hands is an interesting and easy task. Knowing some of its subtleties and armed with the necessary tools and materials, in just a few hours you can turn a shabby and faded object into a bright and unique element of the interior of your own home, cottage or apartment.
The main problems with all solid wood chairs are:
- peeling paint and varnish;
- holes made by small insects;
- scratches and cracks;
- drying out of parts, as a result of which the object began to wobble.
All these problems can be easily eliminated by coating the damage with wood glue, painting with special compounds and varnishing each wooden element.
To restore a chair consisting not only of hard, but also of soft parts (seat and back), the fabric or leather material of which fades and becomes damaged over time, you should replace the filler in the leaky element and decorate the upholstery with fashionable fabric.
Methods of restoration by decorating a chair
To give an antique piece of furniture a fresh and attractive look, the following methods are used:
- Applying several layers of varnish or paint to wooden elements.
- Application of decoupage technique.
- Decorating a piece of furniture with fabric material.
- Frame repair and upholstery reupholstery.
Restoring an old chair with your own hands should be done carefully and without haste, so as not to damage or break it.
Decor using fabric
Among the types of restoration work carried out on furniture, decor using fabric is often found. It looks unusual and can be used for both temporary and permanent transformation of the chair.
This method consists of decorating parts of a wood product with ribbons and satin stripes of one or more colors. You can either simply cover individual elements with them, or make luxurious flowers and butterflies out of fabric, tie bows and decorate the back of the item with them. This decor is often used to decorate a festive event (themed party, birthday, New Year's Eve).
DIY chair restoration can be done using jute rope. For this purpose, you need to remove the soft parts of the product, and instead wind a rope around the frame, weaving it with a mesh or using the macrame technique.
Before decorating old furniture with fabrics, it should be updated (repaired and painted), since the material will not completely cover the entire product. An interesting option for updating a piece of furniture would be to sew a cover for it. You can make several versions of the product and change them periodically.
Decoupage technique
Decoupage is the decoration of interior items with ornaments or pictures cut from special napkins, wallpaper or paper and pasted onto a previously prepared surface.
To transform an antique chair using decoupage, we restore its solid parts step by step:
- All old layers of paint or varnish are removed from the wood.
- The top of the product is leveled with putty.
- A primer is applied to the elements of the object.
- Furniture is painted with a composition of a suitable shade. For the decoupage technique, it is better to make the wooden surface lighter than it was (it is worth painting the product white or cream, then the design will look more impressive).
- The desired picture is cut out of paper and glued to the area to be decorated.
- The pasted pattern is painted over the edges with a translucent composition.
- The entire product is top coated with acrylic varnish.
The decoupage technique is not difficult. But this work takes more time than other methods of decoration, because one layer of coating (primer, paint, etc.) must dry completely, and then another layer can be applied to it.
Chair restoration by staining
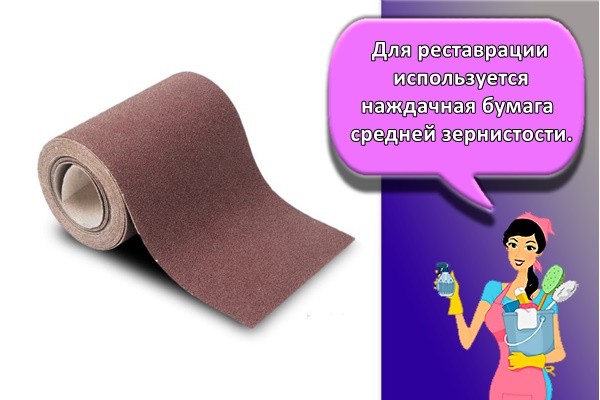
The fastest way to restore a wooden chair is by painting it. Before this, the surface of the product must be cleaned of the previous coating with sandpaper. When sanding parts of an interior item, you need to move the sandpaper in the direction of the wood fibers so that they do not stand upright. Dust generated during this process should be removed with a dry cloth, otherwise the paint will lie unevenly. The next step is to coat the surface with a primer. After it has dried, you can start painting.
The product is covered with stain, oil, enamel, acrylic and chalk paints. Using a brush, they are applied in several layers to the hard parts of the chair with the back so that the compositions lie evenly. If you want the interior item to shine, then apply varnish over the paint.
Restoration by reupholstery
For both elaborate Viennese and simple furniture, upholstery of the soft part is often used. For fresh upholstery, you can use a variety of materials: microfiber, jacquard, flock, chenille, etc. The main condition is that the fabric for restoring the chair should be dense to the touch, durable, easy to clean, wear-resistant and not fade in the sun.
To reupholstery, you need to remove the old material. It will be useful as a template for a pattern. Place the seat on the foam rubber, trace the base with a felt-tip pen or marker, and cut it out along the drawn line. Place faded or torn fabric on a dense material and perform the same action as with foam rubber.
If you decide to restore an old chair yourself, turning a solid wooden piece of furniture into one that is comfortable to sit on, then for the upholstery, allocate an amount of material that is 5-6 cm larger than the size of the foam rubber. The allowance is needed to tuck the fabric under the seat. When the material is cut, lay it on the foam rubber, slightly stretching it, and even out all the folds. Then secure the upholstery to the soft element using staples.
Step-by-step instructions for restoring stool
Proper restoration of a chair, performed at home, includes the following operations:
- Prepare the tools and materials necessary for the work.
- Clean and wash all parts of the product from dust and dirt.
- Dry the piece of furniture thoroughly.
- Disassemble the product.
- Repair wooden elements: legs and frame.
- Sand hard parts.
- Assemble the frame.
- Coat the wood with paints and varnishes.
- Decorate with fabric, ribbons, jute rope.
If you need to turn a hard chair into a comfortable one, then while the wooden parts are drying, make a comfortable seat or reupholster it. Then the soft elements of the furniture are connected to its frame.
Old furniture is reminiscent of the past and has a different design from modern modern furniture. Peeling paint, worn upholstery, loose legs - how to use such products? You can send them for repairs, which will not be cheap. At the same time, it is not difficult to restore chairs, which anyone can do. The work does not require cabinetmaker qualifications. It is enough to carefully and carefully perform simple operations, having a set of tools and materials at hand.
Repairing and restoring chairs with your own hands will cost much less than reconstruction in professional workshops. Antique chairs are made of natural wood.
Chair elements requiring restoration:
- destruction of the paint layer of the surface;
- scratches, cracks;
- violation of fasteners;
- failure of the casing, soft lining.
In addition to the financial side of the issue, the opportunity to do the restoration yourself, showing yourself in a new capacity: a carpenter and designer, is also important.
Improved appearance
To give an antique chair an attractive look, several restoration methods are used:
- repainting, lamination;
- repair of elements or the entire frame;
- upholstery reupholstery;
- decoration with various materials.
The entire structure, including the backrest and seat (without upholstery), can be given a natural wood tone or painted in bright colors. Soft seats and the back of the chair are upholstered with new material. Restoring a chair is more complicated than a chair. A high-quality reupholstery is required with a complete analysis of the structure, with replacement of the backrest and seat lining. Restoring leather products can be done by professionals.
It is not difficult to restore an old, dried out stool. The restoration consists of strengthening the legs, seat and repainting all elements.
New elements in decor
The chairs of the Soviet period were devoid of special decor. Modern materials and technological techniques make it possible to restore chairs using:
- tapestry;
- flock;
- decoupage;
- craquelure;
- sesal;
- shabby chic.
During reconstruction, it is possible to use any color scheme of paints and upholstery fabrics.
Minimum costs
Restoring chairs does not require significant financial expenditure due to the affordable prices for finishing materials and the insignificance of volume.
How to restore with your own hands
To restore chairs, you need to prepare tools and materials. Which ones exactly depend on the design of the restoration.
Tools and materials
Wood products are processed with special compounds and tools.
Quick drying varnish
For wooden surfaces, polyurethane varnishes are used that are resistant to moisture, chemical and mechanical stress.
Dye
Enamels are used to restore chairs:
- Acrylic. They create a durable, elastic coating that retains its properties for 3 years. The painted surface does not fade in the sun, does not lend itself to abrasion, is easy to clean, and dries in 24 hours.
- Alkyd, containing varnish. Drying speed – 2-3 days. The treated surface is protected from rotting, resistant to water, chemicals, and abrasion.
- Polyurethane. They form a protective layer that protects the wood for a long time from moisture, scratches, and chemical exposure. A solvent must be used before use.

The most budget-friendly painting option for restoring chairs is the use of acrylic enamels. Good quality coating is combined with a low price and the ability to combine with color.
Upholstery fabric
Before decorating old chairs with new fabric, they need to be repaired and painted so that the updated upholstery does not look dissonant against the background of dull paint and wobbly legs.
Tapestry
For upholstery of chairs, a single-sided tapestry of light density is used. Advantages of the fabric:
- high wear resistance;
- decorativeness;
- durability.
The quality of tapestries is determined by the manufacturing method: 2- or 3-layer weaving from natural and artificial fibers. The fabric does not wrinkle.
Flock
Flock is a pile material obtained by spraying artificial or natural raw materials onto a dense base. The soft, wrinkle-resistant fabric is water-repellent, breathable, and easy to clean.
Flaws:
- electrifies, attracting dust;
- destroyed when processing alcohol-containing liquids;
- some varieties wrinkle.
Flock is used as upholstery:
- mixed (sprayed nylon, base – cotton with synthetics);
- polyamide;
- polyester.

Mixed flock has the best qualities.
Mat
Matting is a material woven from natural fiber.
Advantages of matting upholstery during restoration:
- wear resistance;
- softness;
- breathability;
- ease of care;
- not susceptible to dust mite infestation.
The disadvantage is that cats “love” to sharpen their claws on it.
Foam rubber
When choosing a layer for restoration, you need to pay attention to:
- by thickness;
- density;
- strength;
- elasticity.
Foam rubber for the seat should be 3-5 centimeters thick, have increased rigidity and density. Foam rubber of the HL, EL brands is used for chairs. The density and degree of compression are indicated by the adjacent numbers.
The most popular marking is 2536, which means a density of 25 kilograms/cubic meter; deformation resistance – 3.6 kPa.
Plywood
Plywood is a multi-layer material made from natural wood veneer. When replacing a seat during restoration, a plywood sheet with a thickness of 3 to 4 millimeters is used.
Sandpaper
Metal washers and bolts
Furniture bolts made of carbon steel can be zinc-plated or chrome-plated. The kit includes washers and nuts.
Springs
Replacing springs in antique chairs during restoration should correspond to the original version: flat snake, bonnel.
Scissors
To cut upholstery material and foam rubber, you will need tailor's scissors made of special steel, of a special shape and with a sharpening angle.
Roulette
The small size of the structural materials allows the use of a metal tape measure up to 1 meter during restoration.
Wood hacksaw
A classic hacksaw of a standard shape allows you to make cuts in the longitudinal and transverse directions. A tenon saw may be needed to cut the grooves. The tooth pitch is 3.0-3.5 millimeters. For curved cutting of plywood, use a jigsaw.
Screwdriver
A hand-held power tool will allow you to quickly and efficiently tighten the fastening material using a special attachment.

Screwdriver
In inconvenient places, use a screwdriver of the appropriate diameter to tighten screws and self-tapping screws.
Strengthening bolts
If there are cracks or chips, they must be repaired using wedges or putty.
Replacing a seat at home
The frayed seat is replaced in stages. To begin with, free it from worn out upholstery elements and foam rubber.
Cutting a piece of plywood to size
A template is made using the old outline. Transfer it to a new piece of plywood and cut it out using a jigsaw. Clean the ends with sandpaper.
Sticker on the foam base
Glue foam rubber onto the base with an overlap of 3-4 centimeters. The corners are aligned with the contour of the seat.
Plywood fasteners
Secure plywood around the perimeter.
Stretching upholstery fabric
Tightening the base with foam rubber with an overlap of 4-5 centimeters on the bottom side with alignment at the corners. The tension is made either along the outer contour of the seat, or along the perimeter of the seat inward.

Final consolidation
Using a furniture stapler and staples, attach the upholstery around the entire perimeter.
Decoration
Various methods of designing the seat and back are used.
Coloring
The fastest restoration method is staining. The prepared surface of the entire structure is primed. The paint is applied in 2 layers.
Lamination
A two-layer varnish coating is called lamination. The chair can have the color of natural wood, any color scheme.
Decoupage
Decoupage is the application of appliqués to a hard seat or back. The picture is cut out of paper and glued to the surface.
Final fixation occurs with a varnish coating.
Adhesive tape or film
Adhesive tape and film have different textures:
- polymer;
- paper;
- from foil.
Thanks to it, the chairs acquire a durable, beautiful coating.
Artistic painting

Craquelure
To give the chair an antique look, the technique of artificially aging the paint layer is used. With the help of special varnishes and coloring agents, cracking of the selected thickness is simulated.
Veneering
Veneer can be glued to the seat and back of chairs in the form of a geometric pattern. For finishing, planed or peeled veneer, up to 1 millimeter thick, is used.
Updating details
You can refresh the product by adding appliqués made from materials unusual for furniture to its design.
Sisal
Agave plant fiber is sold in craft stores in the form of rope of various thicknesses, plates and skeins. Using PVA glue to create a picture. After drying, it is transferred to a chair and varnished.
Wool yarn
Wool threads are used for decoration in a similar way to sisal. They are less durable and absorb moisture. It is preferable to create original compositions on the back.
Shabby Chic
A style of fashion and decor, the essence of which is to create the illusion of antiquity. All furniture should be designed in this style. Shabby chic means painting in pastel colors with traces of several layers, worn-out images of angels and roses.
Elimination of defects
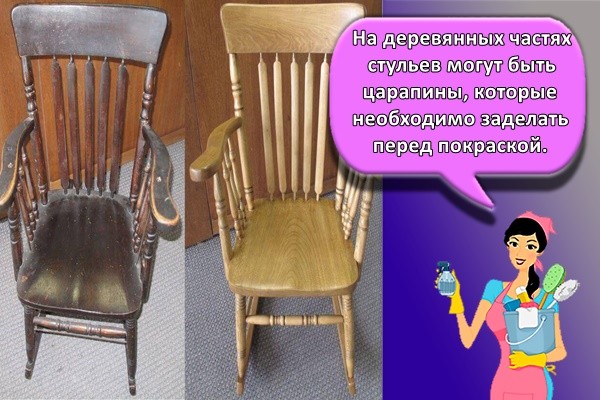
Small shallow scratches
Small scratches will not be noticeable if they are treated with iodine solution.
Small cracks
Cracks up to 1 millimeter are filled with putty that is compatible with subsequent painting.
Deep scratches
Deep cracks are covered with mastic made from turpentine and beeswax (3:4).
Replacing broken parts
Chips from the legs, back, and frame are glued together using wood glue, following the instructions.
Restoration of frames
A frame undermined by a bug can be repaired using putty. The resulting cavities are cleaned out and filled with a wood treatment product. After drying, they are sanded.
Features of working with Viennese chairs
For restoration, old chairs are completely disassembled, with parts numbered.
When restoring antique chairs, the following must be observed:
- combination of upholstery color and frame tone;
- use of foam rubber as a filler;
- uniform style for chairs of the same type.
In order for the varnish-enamel coating to be of high quality, careful sanding is required, applying 2-3 layers after complete drying.
Master classes
Chair reconstruction includes several stages:
- Preparatory. Selection of tools, purchase of materials.
- The seat is removed from the frame, freed from upholstery and filling.
- Frame elements are inspected and repaired.
- Putty is applied. After drying, the surface is cleaned with sandpaper.
- The frame is painted step by step: 2 times the legs and the lower part; 2 times back and top contour.
- A seat is cut out of plywood according to a template.
- Foam rubber is cut out according to the template with an allowance of 3-4 centimeters.
- Foam rubber is glued to the base.
- The upholstery fabric is stretched over a base with foam rubber, with an overlap of 4-5 centimeters on the underside. Secured with a stapler.
- The upholstery is fixed around the entire perimeter.
- The finished seat is inserted into the frame.
The next stage begins after the putty, adhesives, paint, and varnish have completely dried.
Sometimes there is no point in buying new chairs at an inflated price. Often, exquisite designer furniture is created from old pieces restored beyond recognition. Restoring chairs with your own hands will help you “breathe” a second life into the decoration of your apartment with the help of subsequent instructions and advice from experienced craftsmen. Ultimately, you will get a product that is durable and comfortable, knowing how to repair it. An updated Soviet chair will become a real asset to your home interior.
Even high-quality furniture elements are subject to mechanical breakdowns and surface abrasion. Often, through our fault, favorite pieces of home furniture become unsuitable for further use. The legs and back suffer the most - other parts are more or less unharmed. Old chairs are often twisted and decorated into first-class poufs and armchairs. It costs a lot of money when ordering a service from a professional designer to restore a chair.
At home, you can restore wooden chairs with backs and stools without the help of a professional carpenter - it is not necessary to have extensive experience in decorative and applied works. It is enough to see at least once how to reupholster the soft part. What you see will help you figure out how long it will take to restore your chair.
The experience gained will help you experiment in the future with more complex designs (hallway, sofa, closet, table, bed, chest of drawers and other wooden attributes of the house). A completely unnecessary and aged item can be turned into a real functional decorative element. All this can be done from an old chair in a new way.
Craftsmen know different ways to restore furniture - remaking a chair and restoring a stool depend on the degree of damage to the parts. The most common chair breakdowns:
- damaged legs, loose back, loose seat, other defects in wooden parts;
- worn out upholstery of old furniture;
- severe abrasions to the paintwork.
The repair scheme should be selected depending on the presence of certain problem areas. In many cases, it is enough to fasten the parts with new fittings. The same renovation trend extends to worn upholstery. Worn fabric and foam rubber need to be replaced with new elements: sheathed with a new flap. In fact, there are no antique chairs that are unsuitable for restoration, even if your grandmother painted them. In the master class below you will learn how to update an old chair and how to tastefully paint its surface.
Upholstered chairs “Before and After”
1
2
3
4
5
6
Refreshing the color and design of old wood
The complete or partial transformation of a restored chair directly depends on the availability of certain tools and materials. Not many people know how to properly restore old chairs at home. In the process of restoring kitchen furniture, you cannot do without a drill (screwdriver), a small hammer, two different types of screwdrivers, scissors, a brush, a clamp, a stapler with mounting brackets, sandpaper, a small mallet and scissors. As the last component you will need:
- self-tapping screws;
- wood glue;
- foam pillow;
- varnish and coloring agents;
- a piece of upholstery fabric.
At the first stage of repair, the surface should be restored. The furniture is cleaned of dust and thoroughly wiped with a wet sponge. Next, the seat and back of the body are removed and the components are disassembled. Sometimes it needs to be fixed. Use a rubber mallet instead of a metal hammer to avoid damaging the parts.
If the chair is assembled with screws, the structure can be disassembled without much effort with your own hands. It is enough to unscrew them for complete dismantling. You need to fold them in such a way as not to confuse them later. To clean any remaining epoxy glue, use a dampened rag, then carefully scrape it off with an old dull knife. The cleaned frame is left to dry for some time. Only then is the structure restored and remodeled.
To remove epoxy adhesive in labor-intensive areas, use steam jet pressure instead of water. In the absence of a special device, a proven “old-fashioned” method is used to perform the delicate procedure - using a hose with a tip that is placed on the spout of a kettle to transform the tree.
Changing the look of furniture: the best example
The step-by-step process of restoring the old stool should be carried out as follows:
- Treatment with putty against all kinds of chips and cracks.
- Sanding wood with different types of sandpaper (first coarse-grained, then fine-grained).
- Inspection of the complete structure being repaired (correction of looseness by gluing and other methods).
- Restoration of the seat (with soft upholstery or hard seat).
- Decorating the surface of a wooden chair base (varnishing or painting).
Removing old varnish A sanding machine will speed up the process of removing the old layer. You can securely fix the legs using wooden scarves. You will also need studs with nuts and washers. Polishing and painting is best done in the fresh air
We stretch the upholstery, securing it with a construction stapler at a distance of no more than 1–2 centimeters. Depending on the shape, the fabric at the corners can be fixed like this. Another way to secure the fabric at the corners
How to Repurpose and Paint an Old Wooden Chair
Do-it-yourself restoration of old chairs is aimed not only at updating the frame. The upholstery of an antique chair can be decorated in different ways with your own hands:
- Fabric covering of the soft part or removable top cover.
- Updating the back with a decoupage pattern to match antique chairs.
- Restoring the back with durable textiles (a piece of denim, rope, tapestry, jacquard or velor).
- Additional decoration for upholstery - macrame.
- Re-upholstering the too soft back with belts (you need to remove the old upholstery, replace it with a simple mesh with square cells).
On the Internet you can find a huge number of photos and videos of different ideas of craftsmen who restore furniture. The new back of an old piece of furniture can be decorated with a hand-sewn fabric cover. Individual capes and covers can be changed based on the interchangeable design of other home attributes. Each master decides for himself what can be done using old wooden chairs. By choosing what to paint, you will restore the product in an individual style.
While cleaning your dacha/house, you found your favorite wooden chair. Of course it’s sad that it’s old and all cracked, but its condition is still excellent. You don’t want to throw it away (and there are a lot of memories associated with it), so you decide to repair it and use it again. How will it look like?
Option #1. A trip to a carpenter's shop to make repairs (not necessarily a good one).
Option No. 2. The most common one is “I want it reliably and for a long time, so I’ll do it myself.” Yes, repairing old furniture with your own hands is the most successful in terms of saving costs on restoration and the opportunity to feel like a Master (that’s right, with a capital “M”). Without much praise, we suggest moving on to the restoration repair of a wooden chair with your own hands.
The basic material is already there - a chair. To bring it into proper shape, we take the following “ingredients” for work:
- Furniture foam rubber for the seat (choose the thickness according to your level of love for sitting - hard, not very hard or soft);
- Brushes 45 mm wide, hard, 2 pieces;
- A sheet of 4-layer plywood for the seat (replacement is required if you don’t want to fall like at school);
- Furniture glue “Moment carpentry”;
- Clamps for fastening chair elements;
- Furniture tapestry (sold in furniture and regular fabric stores);
- Hammer, wooden mallet, grinder, screwdriver, drill, jigsaw;
- Screws, metal corners to strengthen the structure;
- Five free days for the work itself (we assume that the glue needs to dry, like the varnish and stain, every day).


Does the set inspire concern only by its listing? For a novice craftsman, this is only a small part (for more experienced ones, this list can reach up to fifty items, and the work of restoring a chair with decoration can take a month). Let's move on to the enjoyable part of any job.
Master class on restoring a chair with your own hands (step-by-step instructions with photos)
Are the tools ready? Chair and are you ready? Forward!
1) Let's see how the chair was fastened together. First of all, you need to disassemble everything that “moves”:
- Where there are screws, carefully remove them,
- We carefully remove the wooden dowels on the legs with a drill (we just drill them out),
- Very carefully pull out the nails (if the chair was knocked together).


2) We number all the details that exist. Necessarily. The numbering goes from the legs up. Accordingly, you should have at least 10 parts, depending on how the chair was made:
- legs,
- Crossbars for legs,
- Seat,
- Two slats for the back,
- The back itself.
We carefully inspect all parts for cracks (you can’t see everything at once, don’t worry). If you doubt your memory, take a regular photo when restoring furniture. It helps, honestly.

3) Glue all the cracked parts together. Excess glue will be removed after sanding.
To ensure that the parts stick together well and are guaranteed to last longer, we compress them with clamps
4) We pay special attention to the repair of the chair seat:
- We simply trace the old plywood seat onto a new sheet of plywood, carefully cut it out with a jigsaw,
- Glue the foam rubber (also cut to the shape of the seat) onto the new plywood seat as carefully as possible.
- Be sure to secure the foam rubber along the edges with a furniture stapler and leave it to dry for a day.
If you want to make the seat softer, then you attach each new layer of foam rubber along the edges, without gluing it.
We throw out the old seat.

4) After gluing the parts, carefully sand them with a grinding machine and sandpaper (round and small parts cannot be passed through with a grinding machine). Remove any remaining fine dust with a slightly damp cloth. We inspect everything again for cracks.
Here is a video on restoring an old chair from one home craftsman, you might be interested:
5) Finishing the seat. At restoring an old chair is no less important than the repair process. We staple the tapestry on the widest part of the seat, pull it forward very tightly, and fold the edges under the seat. There should be at least 5 cm of fabric along each edge. We fasten the fabric with a furniture stapler at a distance of 1-2 cm. We repeat the procedure on all sides of the seat.
The result is a kind of drum, inside of which there is not emptiness, but foam rubber.

Continuation of the video from a home craftsman, do-it-yourself seat restoration:
6) We cover all the parts with stain, and after a day we paint them with 3-4 layers of varnish so that the chair does not become covered with cracks the first time a guest sits on it.

7) Assembling the chair. When gluing the parts, we do not spare the glue; we very carefully wipe off the excess and remove it with a slightly damp cloth.
We reinforce the connecting parts of the seat and legs, crossbars and backrest with metal corners mounted on screws!
Nails do not have the desired “longevity” effect.
8) Apply another layer of varnish to hide the unevenness and that’s it - your chair is restored and ready to use again!

End of the video on chair restoration from a home craftsman:
As you can see, everything is very simple. The main thing is not to rush, to approach all stages of restoration carefully, and not to miss the details. And then everything will work out, the restored chair will be better and more beautiful than the new one!
Video: DIY chair restoration
Watch an excellent master class on restoring and decorating a chair from the better half of humanity - as you can see, not only men can do this!
To cheer you up before the upcoming work, we offer some ideas for inspiration.
Art Nouveau lovers can “play” from the basic form to the one that comes to your mind.

The simplest options for restoration of wooden chairs are Provence and Country. We advise you to start with them.
Another option for restored chairs:

Here's an interesting idea to restore old wooden chairs and make a stand out of them for feeding your pet:

And, finally, an original option for using an old chair near the house or in the country:

Happy restoration!
Russia, Moscow region, Moscow +79041000555
DIY chair restoration: design ideas, master classes
Takes ~5 minutes to read

Save
If you have old chairs in your home, there is no need to throw them away. They can still serve you for several years if they are properly restored. You can do this yourself. This way you will save your money and have an interesting time.
In this article we will tell you how to restore old chairs with your own hands, and also consider ideas for upholstering them.
How to restore an old chair
Required tools:
- Scissors.
- Paint brushes.
- Polishing machine. If you don’t have one, then you can get by with simple sandpaper.
- Putty knife.
- Electric drill and drill bit.
- Face mask.
- Copy paper.
- Power saw.
- Paper.
- Pencil.

Save
Restoration stages:
- First you need to get rid of those parts of the stool that cannot be restored. For example, use a jigsaw to remove slats and loose pieces on the backrest.
- Now places a thick sheet of plywood on the seat. Using a pencil, we mark the intersection with the vertices of the back, since the sheet can be very large. Using carbon paper, transfer the pattern onto the workpiece. To easily cut out patterns, drill holes in the plywood.
- A sheet of plywood must be secured between boards or on a workbench. Using a power saw, make the shape of the back of the stool. Place the finished part in place. Using a pencil, mark the places where the screws should be placed to hold the wooden planks and plywood. Using a drill, make holes narrower than the screws themselves. Insert the screws and seal the holes with putty.
- Give it time to dry. After which everything needs to be leveled. Sandpaper is used for this.
- If you need to paint a chair, you first need to apply a layer of acrylic primer to the surface. Wait until it dries. When processing, special attention must be paid to the back of the product, since all edges and lines must be processed carefully. Now you can paint. After the paint has dried, the chair is varnished.
Seat trim
There are times when restoration of the stool seat is necessary. To do this you will need the following materials and tools:
- Stapler for furniture.
- Staples.
- Screwdriver.
- Foam rubber 5 cm thick or 2 pieces of fabric 2–3 cm thick.
- Thick fabric for seat upholstery and backing fabric.

Save
So, how to reupholster the seat of a wooden stool:
- We take out the seat and upholstery. We don't throw away the base.
- Turn the chair over and remove the fastenings that hold the seat in place.
- We remove the factory brackets and take out the frame with the spring. There will be filler on it, or rather, the remains of it. We remove all this.
- Cut out a rectangle. The upholstery should extend beyond the edges of the seat by 6–8 cm.
- We place a backing made of thick fabric on the springs. It needs to be fixed with a stapler to a wooden frame.
- We put the filler. Acceptable thickness is 4–5 cm.
- Making upholstery for a chair. It is best to perform this action together. For upholstery, linen, leather or textile materials are used.
DIY restoration of old chairs
The process of restoring an old lacquered stool is slightly different. First of all you need to prepare:
- Acetone.
- A sponge.
- A brush.
To restore a wooden stool, it is necessary to remove the old coating. To do this, treat the surface with acetone. Thereby removing the old coating in the form of varnish.
Using a brush, coat the stool with new varnish. Leave it for a while. After this you can use the chair again.
Some tips (master class):
- To cover small cracks, you can use homemade putty. To make putty you need to take flour and PVA glue. The mixture should be very thick and resemble plasticine.
- To freshen up a wooden stool, you can use stain. It has different shades. Be sure to seal the stain with varnish. Otherwise, you won't wash your clothes.
How to decorate an old chair in an original way - master class

Save
At home, you can paint the stool however you like. If you choose the right design for a chair, it can complement the interior of your home. For example, choose two colors for painting, the first is turquoise, the second is white. Now let's move on to the back. It needs to be treated with fine-grained plaster. A “worn” effect will appear. Choose the upholstery material so that it matches the color of the product.
If you want to make a vintage stool, then choose cream, blue, pink paint. Then paint on the chair. You can paint the entire stool or individual parts. Now you need to apply the gold paint. Small cracks in this case will be in order. They will create an antique effect.
If you need to make a chair in the Empire style, then choose a milky color for the upholstery fabric. Floral prints are also allowed on it. The frame is covered with gold paint.
If you don’t want to bother with paint, you can sew a cover. It will completely cover all the shortcomings of the old stool.
You can replace the regular upholstery with leather straps. Take about 30 leather belts of different colors and intertwine them together. You need to intertwine according to the “basket” principle, and then fix it from below with self-tapping screws.
Restoration: patchwork technique

Save
Each of us has a whole package of unnecessary things that we definitely won’t wear again. This is the kind of material that will be useful for creating a stool design in a patchwork style. You need to decide on the range and select suitable materials from the items.
It is worth noting that there is no need to use elastic materials. Choose simple things without complex patterns. Use old upholstery as a template.
If you are restoring chairs for the first time, then you need to choose square or rectangular elements for upholstery.
Cut the required number of flaps and distribute them over the surface of the seat. The flaps may vary in width. This will create a “mosaic” effect. Sew a ribbon from pieces of fabric. To do this, you can use a machine or do everything by hand. Collect the resulting strips into a single canvas. Try the template on the seat. Cut off any excess. Secure the upholstery.
Decoupage technique for the design of an old chair
This technique will help turn monotonous stools into original and beautiful objects that will decorate the main interior of the house. To create a design you will need napkins, fabric with a pattern, you can use leather appliqués. If you can get to the store, you can buy special cards for such equipment.

Save
After you sand the chair, you need to seal all the cracks with putty and cover everything with water-based emulsion. Cut out the picture, apply glue and attach the drawing. Gradually you need to move from the center to the edges , thereby smoothing out the pattern. Let the surface dry and then varnish it.
Restoring an old chair with your own hands is not that difficult. The main thing is to do everything step by step. An old product can look like new if you pay attention to its design. You can paint it, make different upholstery, sew covers, or use different design techniques. Then the chair will not only perform its functions, but will also become an addition to the interior of the room.
Don't rush to throw away old things. They can be useful for restoring an old stool. We've looked at different options for stool designs that anyone can make.
 (1 ratings, on average: 5,00 out of 5)