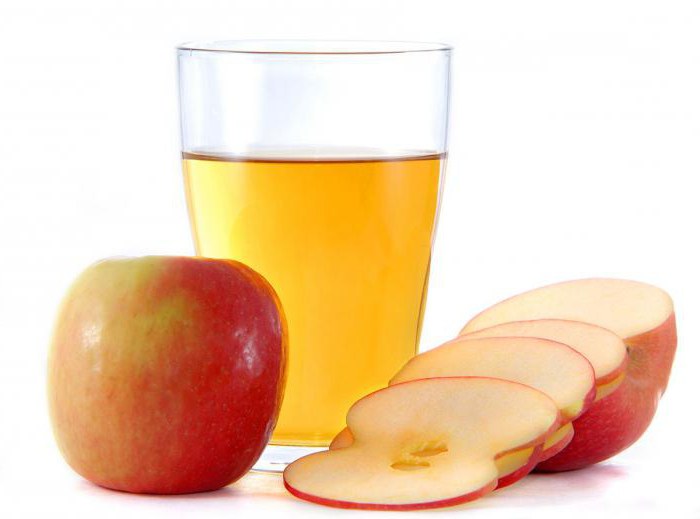
Homemade berry vinegar. Apple cider vinegar: properties, production, use and treatment

For Apple Cider Vinegar to Work Most Effectively, you need to use a quality product, and such a product can only be natural unrefined vinegar, preferably prepared at home. Of course, if you don’t have time and need treatment urgently, you have to buy apple cider vinegar in the store, but you need to know how to choose vinegar. It should not contain any other components except apple cider vinegar. If there are additives, then this vinegar is synthetic. This vinegar is not suitable for treatment. In addition, industrial apple cider vinegar is more acidic than homemade apple cider vinegar (pH4 - pH6). This must be taken into account when using it for food and for treatment: it must be diluted with water in larger proportions than indicated in the recipes (all recipes are given for homemade vinegar with pH2 acidity).
There is another significant difference between homemade vinegar and store-bought vinegar. Industrial vinegar is made from the peels and cores of various apples, that is, from the remains of other production. The homemade product must be prepared from whole apples, and only sweet varieties. The sweeter the apples, the higher the alcohol content in the wort and the easier it is for acetic acid to form. Apple cider vinegar is actually fermented apple juice. During the fermentation process, foam appears at the top - this is the so-called “vinegar mother”. It is very useful, so you should not remove it; on the contrary, you should mix it with the rest of the liquid. In order not to damage the “vinegar queen,” you should not move the vessel with the vinegar being prepared from place to place.
So, making apple cider vinegar is quite simple. There are several recipes. Choose the one you like.
The strength of natural industrially produced apple cider vinegar is 4–5%, and that of homemade vinegar is slightly lower.
SUGAR CAN BE REPLACED WITH HONEY
Recipe No. 1
We collect apples - very ripe (even overripe) or carrion. It would be good if these were apples from your own garden, grown without chemical fertilizers or treatment with harmful chemicals.
Wash the apples well, chop them very finely or crush them in a mortar. Place the entire mass in an enamel pan, add granulated sugar per 1 kg of sweet apples - 50 g of sugar, if you take sour apples - add 100 g of sugar. Pour the mixture with hot but not boiling water (about 70 °C). The water should be 3–4 cm above the level of the apples. Place the pan in a warm place, but not in the sun. Periodically, at least 2 times a day, stir the mixture so that it does not dry out on top. After two weeks, strain the liquid through cheesecloth folded in 2-3 layers and pour into large jars for fermentation, but so that 5-7 cm remains to the top. During fermentation, the liquid will rise. Leave it for another two weeks. The vinegar is ready.
Carefully pour the finished vinegar into bottles, without shaking and keeping the sediment at the bottom of the jar. This sediment can be filtered through several layers of gauze and added to bottles. There should be some space left to the edge. Seal the bottles well (it is better to fill them with paraffin) and store them in a dark place at room temperature.
Recipe No. 2
Preparation of apple cider vinegar according to D.-S. Jarvis
American doctor D.-S. Jarvis invented his own recipe for making apple cider vinegar, which preserves and enhances all the best qualities of its components. Vinegar prepared according to Jarvis is a rich source of potassium.
This method of preparation takes longer, but the resulting vinegar meets the highest quality requirements.
Select ripe or overripe apples, wash them well and remove wormy and rotten areas. Grate the apples together with the peel and core on a coarse grater or pass the apples through a meat grinder. Place this entire mass in a large glass jar, clay pot or enamel pan and add warm boiled water in a 1:1 ratio. For each liter of mixture add 100 g of honey (honey restores potassium deficiency), 10 g of bread yeast and 20 g of dry black bread . This is necessary to speed up the fermentation process of apple juice.
Do not cover the container with the mixture, but only cover it with a napkin. Place it in a dark and warm place (temperature about 30 °C), away from the sun. Keep for about 10 days, stirring the mixture 3 times a day with a wooden spoon. After this, strain the liquid through cheesecloth. Pour into a vessel with a wide neck and weigh, subtracting the weight of the bottle, that is, determine the volume of liquid obtained. Then for each liter of liquid add another 50-100 g of honey (in extreme cases, sugar can be used) and mix well. Cover the vessel with gauze folded in several layers and keep warm to continue the fermentation process.
The fermentation process is very long. The containers must stand for 40–50 days. When the vinegar becomes clear, the fermentation process is over. Strain the liquid again through cheesecloth and pour into bottles.
Recipe No. 3
Select ripe, preferably sweet apples, cut them into large slices and leave them on a dish in the light so that they darken (the process of iron oxidation occurs under the influence of oxygen). Then squeeze the juice out of these apples. Pour the juice into a glass or clay bottle and place a rubber ball or glove on the neck.
Place the container with juice in a dark and warm place (with a temperature of about 30 °C). During fermentation the ball will inflate. This period lasts from 1 to 6 weeks. When the ball is completely inflated, it must be removed, and the liquid, along with a film of yeast-like fungi (“vinegar mother”), must be poured into a wide clay or wooden bowl - the larger the surface of contact of the liquid with air, the faster the fermentation will proceed. The liquid should not reach the top of the vessel 7–9 cm, since during fermentation it will increase and may overflow. Cover the dishes with a napkin or tie them with gauze and leave for secondary fermentation. The foam must also be preserved because its medicinal properties are three times higher than those of apple cider vinegar itself. In addition, without the “vinegar mother,” the fermentation period will drag on for a longer time.
Place the container with the liquid in a warm, dark place for another 40–60 days.
Fermentation is considered complete when the liquid stops bubbling, the turbidity disappears and it becomes clear. Filter the finished vinegar through cheesecloth and pour into bottles. Homemade apple cider vinegar should be stored in a dark place at a temperature of 6 to 15 °C. You can store it in the refrigerator or on a shelf in a cool pantry. The longer the vinegar sits, the healthier it becomes. A precipitate in the form of reddish flakes is quite acceptable; it can form over time (after several months). In this case, when using the vinegar, you need to additionally filter it or carefully drain it so that the sediment remains in the bottle.
Having become more familiar with apple cider vinegar, having learned about its wonderful properties and recipes, you can proceed to the most important thing - using this product for specific purposes: for treatment or weight loss, maintaining health and beauty, and perhaps for excellent well-being and a great mood. After all, vinegar helps in both, and in the third, and in the fourth. It is important to know what you want to achieve and act strictly according to the recipe and recommendations. As a rule, a person who begins to be treated with apple cider vinegar can no longer refuse it even after his recovery. He uses vinegar in cooking, in cosmetology, and for general vitality. Apple cider vinegar becomes its integral companion and assistant.
Apple cider vinegar has many healing properties - apple cider vinegar is used for weight loss, treatment, cellulite, stretch marks, hair... Many people are interested in how to take apple cider vinegar, when and how much to drink it. But first of all, you need to figure out how to make apple cider vinegar at home. After all, homemade apple cider vinegar is the most natural and healthiest.
Here are 4 recipes for making apple cider vinegar.
Apple cider vinegar is a fermentation product of apple juice. The fruits must be prepared in the same way as for natural apple juice without pulp - sort the apples, rinse, remove damaged parts and cut into small pieces with a knife or rub on a vegetable grater or pass through a meat grinder. You can add pulp to chopped apples after the first extraction of juice intended for other purposes. Place the crushed mass in a glass, clay or enamel bowl, preferably lower and wider, add boiled, cooled water, honey, baker's yeast, dry black bread. Mix everything thoroughly. Leave the container with the well-mixed mixture open and keep it at 20-30 °C for about 10 days, periodically (2-3 times a day) stirring the mass with a wooden spoon. Then transfer the contents into a gauze bag and squeeze out. Filter the resulting juice again, pour into a wide-necked container, add honey or sugar (the second part), mix well, tie gauze on top and place in a warm place. Acetic acid fermentation lasts 40-60 days, depending on the quality of the raw materials and room temperature. Apple cider vinegar is self-clearing. It must be drained from the sediment, filtered through gauze folded in several layers, pour homemade apple cider vinegar into clean bottles, seal with stoppers, and fill with paraffin or wax. And use apple cider vinegar for your health!
boiled water 1 l
apple 800 g
honey 200 g
yeast 20 g
black bread 40 g
honey (second part) 50-100 g
or sugar 50-100 g
Homemade apple cider vinegar is natural and very healthy. I'll give you a few DIY recipes.
Apple vinegar has a variety of healing properties. It is widely used for treatment, weight loss, and even for appearance care. It is not surprising that many people are interested in how to properly take and prepare it.
Recipe for making apple cider vinegar at home
Making quality apple cider vinegar at home is very easy. You just have to be patient and time. For cooking, I recommend using sweet apples.
When fermentation takes place, a useful foam appears above the liquid, which is called the “vinegar mother”. I don’t recommend removing it; on the contrary, it needs to be mixed with liquid. You should not rearrange the vessel, as carelessness can damage the useful “vinegar queen”. Now let's talk about cooking recipes.
As a raw material I use fermented cider, which does not contain sugar. Under normal conditions, bacteria in the air convert alcohol into acetic acid. Using the described technology, preparation takes about two months.
Another useful tip. If you don't have fermented cider, make it from apple juice. Fresh apples can be found at any time, but I recommend using fall-picked fruit.
Preparation:
- Wash the apples, cut them and crush them in a mortar. I put the resulting mass in a saucepan and add sugar. For one kilogram of sweet apples I take 50 grams of sugar. If the fruit is sour, I double the amount of sugar.
- Pour boiled water over the resulting mass. It should be several centimeters higher than the apples. I put the pan in a warm place. I stir the mixture several times a day.
- After 14 days, I filter the liquid and pour it into large containers for fermentation. It is important that there is about five centimeters to the top, since during the fermentation process our liquid will rise. After another half a month, my vinegar is ready.
Video recipe
How to make apple cider vinegar with yeast
INGREDIENTS:
- boiled water - 1 liter
- apples - 800 grams
- honey - 200 grams
- black bread - 40 grams
- yeast - 20 grams
- sugar - 100 grams
Preparation:
- Carefully sort the apples, cut out the damaged parts and rinse with clean water. After this, finely chop, mince or grate.
- Place the resulting mass in a bowl, add black bread, water, yeast and honey. Mix everything well. There is no need to cover the container with the mixture with a lid. In this state, the resulting mass should stand for ten days. I recommend stirring the mixture several times a day.
- Transfer the contents of the vessel into a gauze bag and squeeze well. Re-filter the resulting juice, pour it into a wide-necked container and add sugar. After thorough mixing, leave the mixture to ferment for 50 days.
I note that over time, the apple cider vinegar will begin to lighten. This means he is ready. I pass it through cheesecloth, and then bottle it and seal it with corks. Now it can be used in culinary recipes.
Video of making real apple cider vinegar at home
Caring for your appearance and body with apple cider vinegar
Apple cider vinegar has long been my favorite natural product. This is because this substance retains the beneficial properties of the raw material - apples.
- Hair . I use vinegar to rinse my hair. It makes hair silky and shiny, eliminates brittleness and nourishes the roots. I add a tablespoon of vinegar to a cup of water and rinse my hair after washing.
- Teeth . This excellent natural remedy can whiten your teeth and remove stains from them. After brushing my teeth, I first rinse my mouth with vinegar and then with clean water.
- Skin of hands. If you mix apple cider vinegar and olive oil in equal quantities, you will get a remedy that will get rid of rough hands. In the evening before going to bed, I rub it into the skin of my hands. Next, I put on fabric gloves at night.
- Fighting sweating. Even a high-quality medicinal deodorant is not always able to cope with excessive sweating. However, apple cider vinegar does it. First I take a shower. After this, I wipe my armpits with a towel soaked in vinegar diluted with water. This product destroys bacteria that cause unpleasant odor and restores the acid balance of the skin.
Wellness and detoxification with apple cider vinegar
According to qualified nutritionists, apple vinegar is a highly effective remedy against excess weight. I think they are right. Dilute a tablespoon of vinegar in a cup of cool water and take it daily on an empty stomach. I do this in the morning.
Food poisoning is a common phenomenon, the fight against the consequences of which is sometimes very difficult. However, this natural remedy will quickly solve the problem. For one liter of water I take two tablespoons of the product. Mix well and take throughout the day.
So my article has come to an end. Now you know recipes for making apple cider vinegar at home, how to use it to take care of your appearance, and how it helps your body heal.
All tips related to the use of apple cider vinegar for medicinal and preventive purposes are provided for informational purposes. Before using vinegar, you should consult your doctor.
It would seem like such a small thing - a teaspoon for salad and a couple of tablespoons for marinating - and that’s it, the dish is radically transformed! Besides the obvious reasons, there are many more possibilities for adding vinegar. A few drops of vinegar will help bring out a new familiar taste, be it the taste of a stew, a roast, or a side dish of beans. It is the acidity of the vinegar that will enhance the spicy accents of the spices. And only it, vinegar, will give the dish completeness and gastronomic chic.
But there are, as they say, vinegars and vinegars. There is table vinegar - an aqueous solution of essence, produced using a certain technology. And there are fruit and berry vinegars obtained as a result of natural fermentation, the most famous of which are wine, balsamic, and apple. Such vinegars can be prepared from almost any fruit. Moreover, you can cook it yourself, at home. And if you take into account the price of high-quality fruit and berry vinegar, then the matter also becomes economically feasible.
About homemade vinegar in a nutshell
Making homemade vinegar takes time. However, “passive” time. It takes several months to ripen, which is spent mainly on waiting. In general, everything is very simple. The main condition for preparing good vinegar is choosing the starting raw materials. The rule is: the riper the berries, the better.To prepare vinegar, the berries are not washed to preserve the “wild” yeast. The berries are crushed and mixed with sweet water, after which they are left for active fermentation in an open container (jar, enamel pan). The fermentation process should take place away from direct sunlight so that it does not suppress the growth of yeast, which will turn the berry base into vinegar. Active fermentation lasts 2 weeks + 4 days.
After the active fermentation stage, homemade vinegar is filtered and left to passive fermentation. This takes from 4 to 6 weeks. During this time, acidity increases in the vinegar and it becomes transparent. When the ripening process is completed, it is recommended to bottle the vinegar. You can prepare a large batch at once during the season - fruit and berry vinegar will be stored for 8-9 years.

What kind of vinegar will we prepare today? Homemade vinegar made from a mixture of red and black currants.
So, meet: currant vinegar. It has a characteristic subtle, not too strong aroma, which makes it an excellent universal vinegar for adding to many dishes.
Preparation time: approximately 2.5 months / Yield: approximately 1.5 liters
Ingredients
- red currants 500 g
- black currant 250 g
- sugar 120 g
- water 1.5 l

How to make homemade vinegar
Stage I. Active fermentation
Pour a glass of water from the amount indicated in the ingredients into a saucepan and bring it to a boil. The rest of the water should be cool, but it also needs to be boiled first (or use filtered water).
Pour sugar into a three-liter jar.

Pour boiling water into the sugar and stir until completely dissolved.

Then pour all the remaining cool water into the jar. The temperature of the water in the jar should eventually be room temperature.

Now get to the berries. Place them in a deep bowl.

Use your hands or a pestle to crush all the berries.

Place the pulp along with the juice in a jar of sweet water.

Cover the jar with gauze folded in 4 layers or with a piece of glue-free non-woven fabric. Place a rubber band around the neck to prevent anything from getting inside the jar (for example, midges that will try to get inside when the fermentation process begins - oh, how active they are!).

Place the jar in a dark place. Stir the mixture daily for 2 weeks. During this time, the vinegar will go through the stage of active fermentation. At first, the berries will float to the top and numerous air bubbles will be visible.

Then gradually, as the yeast produces sugar, fermentation will begin to fade, and the pulp will sink to the bottom.

After two weeks of stirring, leave the vinegar alone for another 4 days. All the berries will settle to the bottom.

Filtration
Strain the vinegar through a sieve lined with cheesecloth to filter out the liquid.

Squeeze out the pulp thoroughly and pour the vinegar into a clean jar. At this stage, the vinegar will still be cloudy and weak - it will taste only slightly sour.

Stage II. Passive fermentation
Cover the jar of vinegar in the same way as you did it first - with gauze or non-woven fabric. Remove the jar of vinegar from a dark place and leave it alone for 4-6 weeks. Now the stage of passive fermentation begins, during which there is no need to stir the vinegar.
During this time, the vinegar will become transparent (can one say so?), a sediment will form, and films may form on the surface. Make sure that there is no mold on these films - this will indicate that the vinegar is spoiled and you just need to throw it away.
Why does mold form? Mold can form if, at the time of filtration, the vinegar has not reached the required degree of acidity, and the acid does not suppress the development of mold, as it should happen during the normal process of making homemade vinegar. That is, the technology regarding fermentation time is simply broken.

When the vinegar becomes clear, use the dripper tube to carefully remove the sediment from the vinegar.

Bottle the vinegar, cap, and store at room temperature (but not too hot).
Be sure to taste your homemade vinegar - it should be distinctly sour. Storage benefits vinegar - it makes it even stronger.

Apple cider vinegar has a very pleasant taste and brings undeniable benefits. Eating it is not the only way to use it. It is popular in folk medicine for the treatment of various diseases of internal organs and skin. There are many recipes for preparing ointments, creams and compresses using vinegar from fresh apples.
Naturally, store-bought vinegar has virtually no resemblance to homemade vinegar. Its acidity is much higher, sometimes reaching 7%, while in homemade vinegar it cannot be higher than 5%. And also manufacturers often replace natural apple juice for harmful flavorings that have nothing to do with traditional ingredients. Making homemade apple cider vinegar is an opportunity to be completely confident in the naturalness of the finished product.
Before you start preparing aromatic essence from fresh apples, it is important to familiarize yourself with all the features of this process, so that the result obtained only brought joy and benefit to the body.

 As a result of cooking, the vinegar turns out opaque. A thick sediment can be found on the bottom of the container. This shouldn't scare or bother you. Since the product ferments during the infusion process, the sediment is quite impressive. It is as a result of fermentation acetic acid is released. The main element that you need to wait for to appear is the vinegar mother. Outwardly, it looks like a jellyfish and forms on the surface of the infusion. It is strictly forbidden to remove or move this film!
The uterus is useful together with vinegar and separately from it. You can make tea or infusion from it to treat or prevent various diseases. It is impossible to see the uterus or sediment at the bottom of the container in purchased vinegar. . They can only be formed in the process preparing a product from natural ingredients.
Recipes for making apple cider vinegar at home
There are several options for making apple cider vinegar at home. They differ from each other in the list of ingredients and cooking times.
Quick Apple Cider Vinegar Recipe
Perfect for those who are looking for the fastest way to make apple cider vinegar at home. The process takes no more than one month. I'm pleased with the speed and minimum amount of products required for infusion: you only need sugar and homemade apples. The amount of sugar needed for cooking will vary depending on the type of apple and its sweetness.
So, to make vinegar at home as quickly as possible, you will need:
- 3 kg of apples (it is advisable to choose sweet varieties);
- 200 g sugar;
- water (the amount depends on the juiciness of the apples).
Fruits must be thoroughly washed under running water and cut into small cubes. To let them release juice, you can lightly crush them and place them in a prepared glass jar or enamel pan. The top of the apples is completely covered with sugar. and fill with warm water. The water level should be at least 3 cm above the fruit.
The dishes are placed in a warm room without access to sunlight. To prevent the mixture from drying out, you need to stir it with a wooden spoon 2 times a day.
After 14 days, the apples are filtered through a fine colander or cheesecloth, and the liquid is poured into large bottles.
After another 2 weeks, the vinegar will be ready and can be poured into sterile bottles. It is important to leave some space under the neck because the vinegar may continue to ferment, causing the liquid level to rise.
When all the liquid is in the bottles, you can drain the remaining sediment from the bottom of the pan and add it to the resulting vinegar. After this, you can tightly close the bottles and put them in a dark place for storage.
Homemade American style apple cider vinegar
This method appeared in America on the recommendation of Dr. Jarvis. It uses additional products that make the vinegar even more useful, while increasing its preparation time.
For Dr. Jarvis' vinegar you will need:
- 2 kg apples;
- 2 liters of water;
- 300 g linden honey;
- 20 grams of yeast;
- 40 grams of bread.
 Apples must be chopped as much as possible. It is better to make a puree from them by grating them or passing them through a meat grinder directly with the skin and core. Transfer the resulting mass into a glass container and add water and dry ingredients, which make the fermentation process quick. Cover the top of the container with paper or cloth and place in the shade. The room should be very warm.
The first stage of fermentation lasts 10 days. All this time, the workpiece must be stirred with a wooden stick or spatula. Then you need to strain the infusion through a colander or gauze folded in 2-3 layers.
The mass is weighed and placed in different containers of 1 kilogram each, sugar is added to it and covered again, placing it in an isolated warm place. In this form, the workpiece will stand for almost 2 months until it becomes transparent. This will mean complete readiness for use. The product can be stored in the refrigerator.
Apple cider vinegar from fresh juice
 In search of an answer to the question of how to make apple cider vinegar at home, you should consider the method of preparing it from fresh juice . Total weight of raw materials will depend on the variety, juiciness and sweetness, so it may vary. Apart from fresh apples, no other ingredients are required for the vinegar.
The fruits need to be coarsely cut into pieces and placed on a piece of cloth in an open space so that they oxidize. After darkening, the juice is squeezed out of them using a grater, juicer or ordinary gauze.
The juice is poured into glass bottles, with a thin rubber glove attached to the neck. Then they are placed in a dark place where the temperature does not drop below 30–32 degrees. During the fermentation process, air from the bottle will fill the glove and inflate it. When it is completely inflated, it must be removed. This usually occurs within 2–4 weeks.
The infusion is poured from a bottle into a wooden one or a clay container along with a vinegar uterus. There should be 8 to 12 centimeters of free space left to the edge of the dish. This way the area of contact with oxygen increases significantly, which causes the product to ferment even faster. The dishes must be covered with cloth or paper.
The completion of the fermentation process will be indicated by the transparency of the infusion and the complete cessation of the formation of bubbles on the surface. Typically the entire process takes 6 to 8 weeks depending on the cooking conditions.
Strained clear vinegar is poured into small glass bottles and stored with the lid closed in the refrigerator.
Apple cider vinegar with honey
This method allows you to prepare vinegar, similar to the one described in the previous recipe, but much simpler and faster. It does not use bread. The product contains:
- 1 kg of ripe apples (you need to choose the sweetest variety to use less sugar);
- 1 liter of cold boiled water;
- 200 g honey;
- 150 grams of granulated sugar;
- small package of yeast.
Puree is prepared from carefully washed fruits. To do this, they are passed through a meat grinder or grated on a fine grater. Honey and yeast are added to it, and the mixture is poured with cold boiled water on top. The ingredients are thoroughly mixed, the container is covered with a cloth and stored in a warm place for 2 weeks. To make the fermentation process faster, apples need to be stirred daily with a wooden spoon.
After 14 days, the mass is squeezed out, the resulting juice is mixed with the infusion. Granulated sugar is added to the liquid and placed in heat again to continue fermentation. It will last from 6 to 8 weeks. The transparency of the vinegar will indicate readiness.
Apple cider vinegar infused with sugar
This is one of the most popular ways preparing a healthy product. Making vinegar according to this recipe is not difficult even for beginners. The most important rule is control over the terms and conditions of production.
For vinegar with sugar you will need:
- 2 kg of ripe, sweet apples;
- 250 grams of granulated sugar;
- 2 liters of cold boiled water.
Apples, along with their skins and seeds, are useful for cooking. The fruits should be pureed using a grater or meat grinder and placed in an enamel pan. Add half the total amount of granulated sugar and water to the puree.
Cover the pan with a cloth or paper napkin and leave it warm for 20 days. Every day you need to check the workpiece and stir it with a spoon. In the process of infusion to the mass add the remaining sugar and place the mixture in wide-necked glass jars.
The container is left for another 4-5 weeks for the second stage of fermentation to take place. Once the vinegar becomes colorless and clear, it is ready to use.
Apple cider vinegar with yeast dough
 Yeast dough accelerates the natural fermentation process and acts as a good natural catalyst in this method. This reduces the vinegar preparation time significantly.
List of ingredients for cooking:
- 2 kg of large, sweet apples;
- 1 tsp. granulated sugar;
- 1/4 small packet of yeast;
- 4 tablespoons of warm boiled water.
Using a juicer or a fine grater and gauze, squeeze the juice from the fruit and pour it into a glass jar. In a separate glass, mix water, yeast and granulated sugar and leave for a while to obtain a foamy dough. When bubbles appear in the glass, add the dough to the fruit juice and put a medical glove on the jar.
When the glove is completely filled with air, it can be removed and the can left in the open air for another 8 weeks.
Important to remember that vinegar matte is the main ingredient of the product. From it you can make a new infusion, which will ferment much faster, improve the taste and add a lot of useful properties to vinegar.
Apple cider vinegar is a medicinal product that can be consumed during a cold. This is especially true in the fall, when the body is weak and more susceptible to viral and infectious diseases. It's also a diet drink., which helps to get rid of excess weight.
Attention, TODAY only!
How to make apple cider vinegar with your own hands? What's good about it? You will find answers to these and other questions in the article.
Apple cider vinegar is known to be a multifunctional product. It is used in cosmetology; it is an excellent aid for weight loss, which helps to improve the health of the human body. However, you should not shift all responsibility for your health and beauty to apple cider vinegar. This remedy can help improve your well-being and appearance, but its beneficial qualities appear only when its purpose for use is precisely defined, and also if there are no contraindications to it.
Where can it be used?
Have you made your own apple cider vinegar? When treating serious illnesses, he can work a miracle. Of course, here you need to follow the dosage. Before you start using it for health, first consult a doctor who will advise you on how to use it.
Apple cider vinegar, prepared by yourself, can be used in cooking. It improves the quality of food, improves its taste and biological value. The product is in demand in the preparation of various sauces, homemade mayonnaise, and canning. In addition, it can be served with vegetables, fish, meat, potatoes and other dishes.
Amazing product
Making your own apple cider vinegar is not at all difficult. It should be noted that every housewife should have it in her kitchen, especially in the summer. After all, it can be used to rinse fruits and vegetables, destroy intestinal infections, and disinfect various food products. If you soak meat in it, it will become tasty, safe and healthy.
However, it must be remembered that when using such vinegar to treat ailments, and not in the form of a culinary spice, the following concepts should become basic: accuracy, duration and gradualness. Please remember that this substance is not a safe product. If you overdo it, you can even harm yourself.
Every housewife dreams of making her own apple cider vinegar. It must be of high quality. Unfortunately, during its factory refining and capping, all useful substances disappear. Next, we will tell you how to make apple cider vinegar with your own hands correctly.
As it turns out?
It is known that apple cider vinegar is an acid that is obtained naturally, without the addition of “chemistry”. The process of transforming apples into vinegar looks like this: juice is squeezed out of the fruit, which retains all its most valuable qualities.
Apple juice needs to ensure good fermentation. For this purpose, bread crusts (or bread yeast) are used. Under their influence, fruit acids found in apple juice release alcohol, from which cider is formed - a special alcohol-containing drink. The cider is saturated with oxygen and specific acetic bacteria, which create an environment for an acidic reaction, during which it is converted into acetic acid.
Nuances of the cooking process
It should be noted that apple juice, when converted into vinegar, does not lose its delicious qualities inherited from apples. Moreover, it acquires new organic acids (acetic, citric, oxalic-acetic) and mineral substances. All this is “inherited” by apple cider vinegar created at home.

But the basic mass of beneficial substances providing healing qualities is, unfortunately, destroyed if the product is subjected to improper cleaning to give it a marketable appearance and storage (as we have already discussed). Therefore, you need to know how to make apple cider vinegar yourself, and prepare it annually for personal purposes.
First recipe
We present to your attention the first recipe for apple cider vinegar, made by ourselves. Collect apples of any variety that are well overripe (they are also called carrion). If you have a personal dacha, then this is great, since you probably do not treat your plants with harmful chemicals. Next, wash the apples, cut them into small pieces and make a puree from them.
Immediately transfer this entire mass into an enamel pan. Add sugar here in the proportion of 50 g of sugar per 1 kg of applesauce. If your apples are very sour, then you can increase the amount of sugar to 100 g per 1 kg. Then fill the mixture with hot water (about 70 degrees) so that its layer above the puree is 3-4 cm. Next, send the pan to a warm place.

Sometimes the mass needs to be stirred (at least twice a day). This way it won’t dry out on top. Leave it for several weeks, then strain the liquid through cheesecloth (fold it in several layers) and pour it into large jars in which it will begin to ferment. By the way, the liquid should not reach the neck - it is necessary that there is a gap of 7-8 cm. This is dictated by the fact that as fermentation proceeds, the liquid will begin to rise. The jars will sit like this for two weeks, after which you will get a great apple cider vinegar prepared at home.
Second recipe
Now we’ll tell you how else you can make apple cider vinegar with your own hands. This is a simple recipe. To create the product, you need to coarsely chop the unpeeled sweet apples and leave them for 30 minutes until they turn dark. Then squeeze the juice out of them and pour it into a glass container. Next, seal the neck of the jar with a rubber glove.
You can also wrap the neck with adhesive tape to contain air entry. Leave this jar in a dark and warm (at least 26 ° C) place for 6 weeks.

When the rubber glove is fully inflated, remove it. At this stage, yeast-like fungi form a film on the surface of apple cider vinegar, which is called the “acetic mother.” Next, pour the vinegar along with the film into a wide bowl (wooden or clay) and cover with a cloth. Leave the product for 7-8 weeks for secondary fermentation.
Remember that during fermentation the liquid increases in volume. Therefore, leave a space of 7-9 cm for it, otherwise it will spill out of the jar. By the way, you cannot throw away the film, since without it fermentation will occur slowly. In addition, its healing properties are higher than apple cider vinegar.
As soon as the liquid is cleared of turbidity and stops bubbling, we can say that fermentation is complete. Now you can filter the vinegar through a gauze cloth and bottle it. It should be stored at a temperature of 6 to 15°C in a dark place. The product retains its beneficial properties throughout the year.
Vinegar according to Jarvis
It is known that natural vinegar is softer than synthetic vinegar from the store. After all, when the amount of acid reaches 6%, they die. Do you know that the famous American doctor D.S. Jarvis came up with a unique recipe for making apple cider vinegar with your own hands? It’s not difficult to do this step by step. If you make vinegar this way, it will be a rich source of potassium. The creation method is very time-consuming, but you will get a high-quality product.
So, you need to have apples, brown bread, bread yeast and honey. To create Jarvis apple cider vinegar, follow these steps:
- Using a coarse grater, grate the apples along with the core and peel or pass them through a meat grinder.
- Place the resulting puree in a large glass jar, enamel pan or clay pot and pour boiled warm water in a 1:1 ratio.
- Add 10 g of bread yeast, 100 g of honey and 20 g of dry black bread for each liter of mixture. This is necessary to speed up the fermentation process of apple juice.
- There is no need to seal the container with the preparation. Place it in a warm (temperature about 30°C) dark place for 10 days. Stir the mixture every day 3 times with a wooden spoon, then strain through cheesecloth.
- Measure the volume of the resulting liquid and pour it into a vessel with a wide neck.
- Add another 50-100 g of honey (sugar is possible) for each liter and mix well.
- Cover the dishes with gauze folded in a couple of layers and keep warm for another 40-50 days.
- When the apple cider vinegar becomes clear, strain it again through cheesecloth and fill the bottles with it.

Dill
You can also make dill vinegar. To prepare it, you need to have 1 bunch of herbs, 0.5 liters of apple cider vinegar, and a pinch of sugar. This product will be ready in 3-4 hours. So, mash the dill with sugar until moist, pour in vinegar. The product must be infused and strained. This vinegar is good for making sauces and for dumplings.
Crimson
How to make raspberry vinegar? You need to prepare 0.5 liters of apple cider vinegar, 1-2 tbsp. l. granulated sugar, 0.5 kg of raspberries (can be frozen).
Mix raspberries with sugar and mash lightly. Wait until the sugar dissolves. Pour vinegar into the resulting mixture, close tightly and leave for a couple of days. After this, filter and store in a dark place. In the same way, you can prepare vinegar from cherries or sea buckthorn.
 (1 ratings, on average: 5,00 out of 5)