Is it always necessary to prime and putty the walls before gluing wallpaper? Plasterboard putty. How to putty drywall correctly Finishing putty on walls for wallpaper
Many people are perplexed about the need to putty the walls after plastering them, because the plaster seems to have been applied along the beacons, so the surface turned out to be perfectly smooth, and you can glue wallpaper on it, apply paint or finish it with other materials. Plastered walls do not need puttying only if tiles are subsequently laid on them, MDF boards or fiberglass wallpaper are glued. But these materials practically create new surfaces. And putty allows you to create the most even base for finishing with paint or more traditional wallpaper.
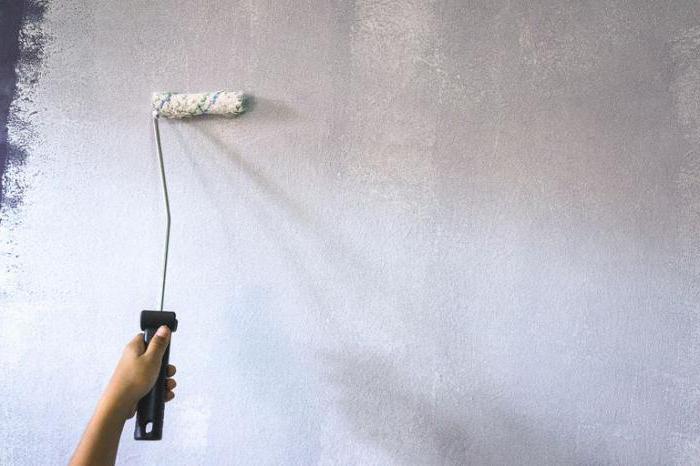
The most important task of putty is to level out all the depressions and irregularities on the surface.
Why do you need puttying?
So, you need to putty the walls for at least 2 reasons.
- All pores of the plaster layer are rubbed with putty. This improves the contact of the finishing coating with the surface to be finished, reduces the consumption of the adhesive mixture and prevents the finishing layer from peeling off the wall or ceiling.
- Puttying allows you to level out all the unevenness and repair microcracks that remain, albeit unnoticeable, even after the most skillful plastering. In addition, the putty prevents the gradual disintegration of the cement-sand surface.
Scheme for applying putty to the wall.
After wallpapering or applying paint, all the slightest irregularities will stick out very clearly. In addition, the particles of the top layer of plaster are weakly adhered to each other. Plain coatings will not be able to hide these defects, and textured finishes or coatings with a pattern applied to them will only partially mask the unevenness.
You should immediately preempt the possible question of whether it is necessary to putty drywall (after all, it is a very even and smooth material) with an affirmative answer, since the sheets of drywall are joined together and attached to the profile with self-tapping screws. During installation, dents, extra holes, etc. may form on them. In addition to sealing seams, irregularities, and holes, puttying creates a single leveled surface on the gypsum board that interacts with the coating equally over its entire area.
By the way, the joints of any board materials (plywood, OSB) prepared for subsequent finishing with paint, varnish, etc. are puttied.
We must not forget about one more reason for puttying surfaces. It is carried out (even if you have not re-plastered them) after washing off the whitewash from the walls or ceiling, cleaning the surfaces of paint or old wallpaper. In any case, after removing the old finishing materials, the planes need to be leveled. We can only hope that the answer to the question of whether it is necessary to putty walls and ceilings was comprehensive.
Why putty is clarified. It remains to figure out how to do this correctly so that the walls under the wallpaper or the ceiling become truly perfectly smooth. First of all, it is necessary to select the correct leveling compounds that are best suited to certain operating conditions.
Return to contents
How to choose putty
Well-known brands of putty mixtures.
Today, manufacturers offer dry and ready-made mixtures. Both have their advantages and disadvantages. Dry formulations can be stored for a long time, but when diluted they are only good for a short time. At the same time, dry mixes are cheaper, but also have high versatility. Ready-made solutions have a long shelf life, but are more expensive than dry solutions. In addition, putties diluted by the manufacturer tend to shrink.
Mixtures are also divided according to such indicators as the binder component. They are:
- gypsum, which are easy to apply and process, practically do not shrink, but are afraid of moisture;
- cement, suitable for work in rooms with high humidity, but losing volume when hardening;
- polymer, providing better leveling and elimination of surface defects; in addition, these putties are very elastic, but they are also the most expensive.
Putty mixtures differ in one more feature - their purpose for a certain stage of work. They are divided into:
Table of characteristics of putty solutions.
- leveling (first layer), which are used for preliminary application;
- finishing (second layer), used for final leveling;
- universal ones, which are laid both as the first layer and as the final one, however, their versatility is achieved at the expense of deteriorating characteristics in relation to “narrow-profile” mixtures.
Choose putty compositions that are most suitable for your “work area”. The recommended area of application of the putty is marked by the manufacturer on each package of this product.
Return to contents
How to putty correctly
Return to contents
Puttying under wallpaper
It is not difficult to putty walls under wallpaper. Putty is put on a spatula and stretched over a certain area. But in order for the work to be carried out efficiently, you need to follow the recommendations.
Scheme of grouting joints with a spatula.
- The wall must be cleared of grains of sand.
- The surface is primed. As a result, a dense crust forms on the wall, which also improves adhesion.
- The putty is applied after the primer has dried. The thickness of the leveling layers should not exceed 2 mm, otherwise when drying the coating may crack and crumble.
- Start putting putty from one of the corners of the wall. Start leveling from the bottom.
- Apply putty to all corners of the wall. You can use an angle spatula. The mixture is not applied to it, but using a syringe gun directly into the corner. The spatula only smoothes it out.
- After finishing the corners, start working on the main surface.
- Apply the mixture onto a spatula in small portions. For now, use a narrow tool. Once you get better at it, you can use a wider spatula. Remember that a wide tool will level a large area, but it will be somewhat harder to work with it due to the increase in the mass of the mixture.
- Work with 2 spatulas. Apply the narrower putty to the main one. In addition, with the second spatula you can adjust the amount of mixture on the first one, remove excess from the spatula, move the putty towards the edge, etc.
- The putty is applied in diagonal movements. Each subsequent portion of the leveler is overlapped with the previous one.
- After the first layer has dried, which lasts at least ½ day, the surface is sanded with a special abrasive mesh attached to a block or jointer, since the edges of the spatula leave marks on the wall in the form of grooves and sagging.
- The wall is primed again.
- The putty is applied one more time. This is done only to correct the remaining unevenness, and not to create another layer.
- The surface is cleaned again. Dust is removed from it. The walls are primed, but only for wallpapering.
Return to contents
Leveling for painting
List of basic tools for puttying walls and ceilings.
Still, wallpaper is less demanding on the condition of the surface than paint. The walls under it should be finished with greater care. True, water-based coatings are to some extent capable of hiding minor surface imperfections, while enamels, on the contrary, will stick them out. Therefore, puttying for painting is carried out with a large number of leveling layers, with a spatula of smaller width, and sanding is carried out with a thinner abrasive.
It should be noted that defects may remain invisible or, conversely, appear at different lighting angles, so sanding of each layer should be carried out under the light of a lamp brought close to the surface. There is another way to determine how correctly the plane is formed: a rule is set on it, and a flashlight is turned on on the opposite side near it. All surface curves will be clearly visible. Excess putty is removed with sandpaper or a spatula, and the depressions are outlined with a pencil. After this, the unevenness is sealed with a leveling mixture, and a new layer of putty is applied.
Return to contents
What is needed for puttying
So, you don't need many tools for puttying. It is enough if you have:
- a set of several spatulas with a blade width from 80 to 600 mm;
- corner spatula;
- a rubber spatula, which may be needed in hard-to-reach places;
- abrasive mesh;
- the jointer on which it is attached.
As you can see, not much is needed to make the walls or ceilings smooth. Just be patient and carry out the work with due diligence. A positive result will not be long in coming.
Similar materials


The entire puttying process can be divided into main stages:
I'll say right away thatIt is imperative to plaster walls, partitions, and plasterboard ceilings. It is necessary to putty not only the seams and screw heads, but also the drywall itself. And apply 2-3 layers. Read below why to do this.
How to putty drywall?
Anyone who has ever watched the work of drywall workers has probably been surprised at how easy and simple it is, and why is their work so valued? You can find the answer yourself if you putty the drywall yourself. This work is very painstaking and requires certain skills. Before you begin the main body of the wall, you should practice for some time, somewhere in a closet or garage, or even specially mount some kind of stand from scraps of GC sheets, where there are more than enough joints, and try to “create” an ideal plane.
Tools and materials needed for processing drywall
As for any other construction and installation operation, for puttying and finishing plasterboard surfaces you will need a set of tools and materials for specific purposes. This:

It is advisable to purchase professional-grade tools. The technology for puttingtying drywall is not very complicated, but all stages can be completed with the appropriate level of quality only with the help of convenient professional tools. If the spatula bends and vibrates on the handle, and the knife does not cut, but tears the paper covering of the sheet and crumbles the plaster, there can be no talk of quality work.
The materials required are a dry putty composition for the plane of the sheet and, separately, for sealing the seams. Specialized stores sell ready-made putties in jars, but this is a material for professionals. At our qualification stage it is too early to use them.
Tip 1. Preparation of putty:
The mixture must be prepared in such quantity as to work it out before it begins to set in the container. This is determined experimentally, depending on your qualifications. The mixer speed should be low or medium. When stirring at high speeds, the quality of the putty deteriorates, especially for sealing joints.
Good to know:
Water should not be added to the solidifying mixture. This putty can peel off.
Gypsum, cement or polymer putties are equally suitable for use. But in kitchens or bathrooms it is better to use cement or polymer ones.
Preparatory work for puttying drywall
 Putty work begins with preparing the surface of the drywall. All connections need to be checked, tighten or twist low-quality screws, the heads of which protrude above the plane of the main frame or are too recessed, check whether all joints are made correctly. The joining of the sheets, regardless of whether they are joined by a factory cut or made by you, must be done on a metal profile to which both sheets are screwed.
New cuts at the seams are processed using a knife in such a way as to create a groove with side walls inclined at 45° and a depth of about 2-3 mm. This is necessary for a better connection of the putty with the gypsum mass.
Seam putty
Primer of all joints required. When cutting the edges, you need to make sure that the paper does not lift up and the plaster does not crumble. If this happens, crumbs and rags must be carefully cut off. Everything will be filled with putty during further operations.
Important!
When filling seams, you need to use a special putty for seams (for example, Knauf Uniflot). Regular finishing putty is not designed for this. It will simply crack. This is especially critical if the putty is done before painting!
The tape is glued so that it equally covers the joining sheets of drywall. The seams are puttied in the longitudinal direction relative to the seam. Two spatulas of different widths are used. First, the putty is applied narrowly, then the wide one is smoothed along the length of the seam.
After the first layer has dried, it is sanded with sandpaper or a special mesh, then cleaned of dust and re-primed. You can process it a second time after a few hours, when the primer has dried.
Tip 2. Seam alignment:
When working, you should achieve maximum compliance between the filling levels of the seam and the plane of the sheet. If you get grooves or bumps, they cannot be removed after the putty dries.
Video instruction
Puttying screws and corners
Preparing drywall for puttying includes such stages of work as puttingtying corners, slopes and screws. This work is not difficult, but it requires maximum care and a lot of time. You should be patient and distribute the work so as to avoid forced downtime, when, for example, you need to wait for the putty to dry.
The easiest way to deal with sealing screws. First, run a clean putty knife along the screw line. It shouldn't touch any hats. If this happens, the screw needs to be tightened or twisted, but in a different place, at a distance of at least 5 centimeters from the previous place. The depth of penetration of the cap into the sheet should not exceed half the thickness of the HA. Places where previously removed screws were located or where they were screwed in too deeply must be filled with putty separately to the level of the sheet plane.
All screws are puttied crosswise. This ensures the highest quality filling of the slots in the caps, and the screws become invisible.
Window and door slopes are first reinforced with an aluminum corner, which is secured with a stapler or placed on putty. First we apply a small layer of putty, and then place a corner on it and press it. Another 1-2 layers are applied on top to make the structure even.
The corners are puttied on each side alternately. First, a layer of putty is applied to one of the walls, then, after it has completely dried, the second wall is treated. It is worth recalling that before these operations the wall is primed.
Wall putty
After completing all the protracted and monotonous work on preparing corners, joints and slopes, the time comes for more active work. Before you putty the plasterboard walls, you need to check again that all the joints have been processed, that the paper is not peeling off from the gypsum mass, and that the seams are not cracking.
Work begins with applying a primer. To the question: Do I need to prime drywall? The answer is only positive. Not just necessary, but necessary. Increasing the adhesion of drywall will not only strengthen the putty layer, but also make the work easier. The putty sets more slowly and there is always the possibility of a second pass to eliminate minor imperfections.
Tip 3:
Alkyd compounds are not used for drywall. These are incompatible materials.
Video instructions for puttying plasterboard walls
GK putty for painting
Plasterboard putty It is done much more carefully than under wallpaper. The finishing composition must be thoroughly mixed until the consistency of sour cream, without lumps or foreign inclusions. The amount of putty ready for use should be enough for about half an hour of work.
Finishing putty of drywall is carried out in such a way that the wall is completed in one stage. If you leave part of the wall untreated, microcracks are possible at the junctions of the sections. The consumption of putty per square meter of drywall is small - about 1 kilogram of dry mixture per m2.
Important!
Each subsequent layer of putty is applied after the previous one has completely dried.
When using polymer compounds, you can limit yourself to a weight of half a kilogram. But each brand of putty has its own characteristics, so it is best to calculate consumption using the instructions on the packaging of the material.
GK putty for wallpapering
Plasterboard putty requires less careful processing, but before gluing wallpaper it is necessary to completely prime the wall plane with a water-soluble primer, which increases the adhesion of the surface layer and the depth of penetration of the adhesive deep into the sheet of plasterboard. Puttying of plasterboard walls for wallpapering is done in such a way that the walls are completely dry before wallpapering begins. Wet putty will not hold the glue, and the wallpaper will peel off, especially with the start of the heating season.
The technology for puttingtying the ceiling is no different from working with walls, but it is important to take into account the fact that you need to start from the ceiling. For this, two spatulas are used - 45 -70 cm wide and 10 -15 cm wide. A spatula is also useful for processing corners.
First, in the direction from the window, apply the first layer of putty no more than 2-3 mm thick and carefully level it. The second layer is applied after 12 hours, when the previous one has dried. It is thinner - about 1 mm. Its goal is to level out all the features of the ceiling “relief” that were admitted during the first pass.
Sanding is done using sandpaper or mesh attached to a special holder. After this, the ceiling is thoroughly cleaned of dust and primed again. Putty in three layers involves applying a finishing putty on top of the previous two and sanding again with a fine mesh. Before painting, the ceiling must be primed again. When sanding the ceiling, be sure to use a respirator!
Repair is not an easy task and requires compliance with certain rules in order to obtain a high-quality result that will delight you for many years. Therefore, before finishing the walls, many people wonder whether it is necessary to prime the walls before puttying? The answer to this and other questions of interest is below in the article.
To prime or not to prime - that is the question
Do I need to prime the walls before applying putty? Applying primer is a must for any repair that involves finishing walls. A properly treated surface before finishing guarantees long-term preservation of an attractive appearance. The primer will be useful in the following cases:
- Regardless of the material from which the wall is made (brick, wood, plasterboard), it contains microcracks and irregularities. The primer smoothes them out. The result is a more even structure, onto which subsequent finishing fits much better.
- The composition of the primer mixture improves adhesion to the paint, so it looks good and does not crack even several years after application.
- When using primer, the level of putty consumption is significantly reduced.
- When the primer mixture hardens, it forms a film that prevents the appearance of various stains on the treated surface.
- It is much easier to apply and evenly distribute the putty onto the treated wall surface.
- The soil may contain a variety of additives that have antiseptic, antifungal, anti-mold and moisture-proof properties.
Do I need to prime the walls before finishing putty? Of course, the mixture has a lot of useful properties that will help preserve the appearance of the renovated room for many years.
Types of soil
The modern market offers a large number of different soil mixtures for use in construction. There are 3 main types:
- Concentrate.
- Dry mixture.
- Ready to use primer.

For independent use, acrylic-based primer is considered the best option. It is universal, so it is suitable for any surface. In addition, acrylic primer does not have an unpleasant strong odor, dries quickly and forms a durable surface.
In addition to acrylic, there are several other types of mixture:
- Alkyd- ideal for wood processing, as they have anti-corrosion properties. However, they are not suitable for drywall and plaster surfaces.
- Mineral- characterized by a high rate of hardening (2-3 hours). Suitable for all surfaces.
- Quartz- form a rough surface that is ideal for subsequent paint.
The choice depends on personal preferences and requirements for the final result.
Selecting soil for different types of walls
Experts advise choosing a primer depending on the material from which the walls are made.
- A smooth concrete surface requires the application of mixtures with abrasive particles, which make the treated surface rough.
- The metal surface is coated with anti-corrosion compounds that prevent the appearance of rust.
- Wooden walls are coated with water-based compounds. For these purposes, you can use drying oil or shellac mixture. It is important that the primer contains substances that repel bark beetles and other pests, and also protect the surface from mold.
- For rooms with high humidity or insufficient heating, materials that have an antibacterial effect are used.

For ease of use, many manufacturers indicate on the primer packaging its compatibility with different types of walls.
Preparation for application
After we have figured out whether it is necessary to prime the walls before puttying, we should properly prepare the surface. To do this, it is thoroughly cleaned of dust, dirt and old coating.

It is also important to ensure that the walls are dry. Primers are applied exclusively to a degreased surface. Failure to comply with this point may cause uneven application, cracks, detachments and other troubles.
Preparing the primer
To prepare the mixture for application, you should follow the instructions that are available on any packaging of the composition.
- Ready-to-use mixtures just need to be mixed and poured into a convenient container.
- The dry mixture is diluted with water in the proportions specified by the manufacturer and mixed thoroughly.
- The concentrate should also be diluted, following the instructions on the packaging.
It is important that the mixture is homogeneous, without lumps, and not too liquid, otherwise the result will be unsatisfactory.
Application technique
How To get an ideal result, follow these guidelines:
Compliance with the primer application technology is the key to a good result and long-term preservation of the subsequent finishing coating.
Primer after plastering
Do I need putty? Definitely yes, since its structure allows you to level out a rough surface.
Before applying a layer of primer, you should make sure that the plaster is completely dry, otherwise cracks may appear on it in the future. This process can take several weeks if builders used it to level the walls. Therefore, these repairs are usually carried out in the summer, when dry and warm air accelerates the drying process.

The consumption of the solution when applying it to the plaster will be significantly higher, since the surface absorbs a large amount of moisture, so you will need to dip the roller into the container often. It is recommended to apply several layers to achieve the best result.
Nuances of work
Do I need to prime the walls before applying putty? This question is asked by many beginners who are faced with repair work for the first time. Of course, soil must be used, but the following nuances should also be taken into account:
- After cleaning the surface, 2-4 layers of primer should be applied to the wall. It should stop dusting, be smooth and have a uniform color.
- The solution must be applied in a thin layer in order to avoid the formation of drips.
- After the primer has dried, putty can be applied.
- When the putty layer has completely hardened, it is recommended to apply several more layers of finishing primer to make the surface more durable.

These rules apply to walls made of any materials. Before starting work, it is important to know whether the plaster needs to be primed before plastering the walls. The mixture is a fixative for any finishing layer, so it must be applied after each stage of work.
Should I prime the walls before applying putty? Experts answer positively. They also recommend adhering to the following tips when carrying out repair work:
- To process drywall, mixtures with a high degree of penetration are used, this significantly reduces the material’s ability to absorb moisture.
- Walls made of fresh wood treated with shellac will not release resin and have differences in shade.
- If a primer is applied before puttying in order to ensure better adhesion of the material, then afterwards it allows you to increase the durability of the coating and the density of the layer.
- It is recommended to carry out work at temperatures from +5 to +10 degrees.
- It is important to use compounds from the same manufacturer, as they may differ in composition, which will adversely affect the strength of the coating.
- After applying primer or putty, temperature changes should be avoided in the first 3 days, otherwise the coating may crack.
- For convenience, you can apply the primer using a spray bottle, this way you can achieve a more uniform layer.
Do I need to prime the walls before applying putty? Experts agree that this must be done. This way you can get a more resistant, durable and durable coating that will serve you for many years.
Priming walls, plastering, puttying are basic operations in the process of bringing surfaces to the stage of readiness for further painting or wallpapering. A simplified scheme of work is as follows: plastering, priming after plastering, puttying, sanding, coating with paint and varnish material or applying wallpaper. Puttying the walls after plastering is considered the final preparatory operation.
Even due to the fact that today plastering is provided by a wide choice of materials for interior work and exterior decoration, and having done the work, you can achieve an ideal plane (there is no question whether it is possible to putty the walls, for example, after finishing with gypsum plaster - the procedure is not necessarily included in the order performing repair work) - the financial costs of such plastering work are extremely high.
The classification of putty materials is carried out according to several criteria. The grouping sequence is determined by the key factors and properties of the putty, combining the mixtures into the following classes:
- Oil-glue. If you need the cheapest mixture, this group is suitable. It is unknown whether oil solutions will continue to have a future, since they are already considered a thing of the last century. The main disadvantage is the appearance of yellow spots through the paint layer and wallpaper.
- Gypsum cement. The materials are much more expensive. Designed for a full range of general finishing operations. Domestic products most often contain more cement than gypsum. Based on the cement and gypsum base, the main purpose of the powder was determined for the craftsmen - having covered the layer of plaster with soil, you will most likely putty the walls with the composition for further wallpapering.

- Water-dispersed. Also from the category of gypsum cement, however, they are necessarily produced in a batch with an aqueous polymer emulsion, respectively, containers - buckets. The advantage is that you don’t need to study on the packaging what to do and in what proportion to dilute the putty - the product is already ready for use.

- Acrylic. After puttying with a similar composition, all the advantages of the above groups (except oil) will appear.

Workflow Stages
Surface cleaning
When walls are puttied after old plaster, old wallpaper and layers of paint must be removed. A special remover helps remove the remains of unnecessary material. After the manipulations, the walls must dry - they are left for about a day.
Drying is followed by a thorough visual inspection: missing small parts are cleaned off with a mounting knife or a thin spatula.

Relief inspection
The relief plane is inspected with a flashlight, using the construction rule: it is applied to the surface, and the flashlight is shined along the wall. The smallest recesses and protrusions are obvious. Rough bumps should be beaten off on the spot with a plane or a sharp spatula, and the grooves should be marked along the contour with a simple pencil.
Related article: Features of fiberglass wallpaper for painting

Preparing tools
Before starting the repair process, the entire set of tools is carefully wiped from dust with a rag, washed with dishwashing detergent and dried with a thick cloth that does not leave fibers on the items being wiped. It is worth carefully making sure that there are no residues of solutions from previous batches on the mixer from the drill and mixing container - lumps of old solutions need to be picked out.

Preparation of putty mixture
The process of preparing the solution is not complicated:
- Fill the container with running water (a construction bucket is filled a quarter full, a regular bucket is filled a third).
- Dry powder is added little by little until the tip of the “iceberg” is above the water.
- Wait up to 30 seconds until the powder absorbs water and sag: no dry formations should remain.
- With a quick, precise movement using a drill attachment, knead for 2 minutes. (drill is preferable, but manual work is also acceptable).
- Wait 30-60 seconds..
- Repeat kneading. The consistency has been brought to perfection – the solution is ready.

Under no circumstances should the prepared solution be diluted with additional water or dry powder. We'll have to work with what we got. In case of defects, the putty composition will tolerate excess liquid; after hardening, there is always the opportunity to go over the area with abrasive and reapply where necessary.

Do not forget about the shelf life of the finished solution after mixing: it is better to mix several portions. Each portion is placed on a wide spatula with smaller ones, calculating the amount needed for one stroke.
Leveling the terrain
Small recesses and cracks are covered with a medium or wide spatula, depending on the size of the defect. Grouting is done with wide crosswise movements with the same force until a smooth surface without sagging or scuffing.

A common mistake among inexperienced craftsmen is to slowly, applying pressure, pull out the spatula. Putty of any brand is endowed with a thixotropic characteristic, which leads to rapid, correct dispersion with periodic equal force exposure from several sides.
In the video: the process of puttingtying a wall with your own hands.
Hardening of the putty layer
When hardening the putty, it is necessary to use all precautions as for hardening plaster: through air flows, direct sunlight, heat waves from a fan heater or hair dryer are absolutely contraindicated. Cracks in the wall as a result of drying are already unpleasant, but a putty layer damaged by improper drying can warp, which will only appear at the stage of wallpapering or painting.
Indoor air circulation should be adjusted to avoid drafts and temperature fluctuations. More specifically, you can open the room door, but leave the balcony door closed. For the corridor - allow air to circulate from the living rooms by tightly closing the doors to the street, kitchen and bathroom.
Instructions for use most often indicate a drying period of up to 16 hours for the coating, but in reality it is 10-12 hours. However, it is advisable to sand the layer no earlier than a day has passed: the putty will dry out reliably, harden, and subsequent operations will be easier.

Puttying under wallpaper
For the purpose of further wallpapering, the putty is initially carried out with a wide spatula, covering with each subsequent layer up to ¼ of the previous one. The resulting “sausages” are not ground. Holding the spatula at an angle of 21-30 o, maintain constant pressure, which will help distribute the material in an even layer of 2 to 4 mm. The smaller the angle of inclination, the more it leads to the formation of a thick layer, the more it leads to the formation of a thin layer. However, the dependence is typical for variations in the specified degree interval; when going beyond its limits, bumps and breaks form on the surface.

The next step is drying the layer, removing beads with a jointer and abrasive and checking the smoothness using a building code and a torch. The resulting defects are eliminated: protrusions - with abrasive, recesses - with additional lubrication. It is possible that an inexperienced master can approach the wall up to 5 times until the surface becomes perfect.
At the end of the manipulations and long hardening, they go over the wall with a jointer with a mesh size range of 80-120 (with an increase in the number, the abrasive grain decreases). Initially, the entire surface is worked with circular movements, after which, loosening the grip, movements are criss-cross in order to remove the contours of circular manipulations.
Then the wall is again checked according to the building rules with the lantern. If there are no lingering reflections from the rule, the surface is ready, after a day the walls are primed and you can start gluing.

Puttying followed by painting
The technological process is different from puttying followed by wallpapering in one operation: after final leveling and rubbing with an abrasive material, the wall is covered with finishing plaster. Particular attention is paid to the wall, if it is to be painted with enamel, in particular acrylic, then the finishing mixture must be white, durable and specially designed for this purpose.
Grouting is done with an abrasive with a fine grain of at least 150.

For mirror painting, the wall is also polished with a polishing trowel with suede material (felt and felt pieces are not suitable). A used suede cover will not cope with the task - it will have to be replaced with a new one. Also, for painting, the wall must be primed in accordance with the instructions indicated on the packaging of the material.
Related article: Technology of puttying concrete and plasterboard ceilings
The nuances of puttying corners and slopes
Inexperienced craftsmen are often recommended to apply more than the required amount of material to the corners, followed by rubbing with an abrasive product. But when it is planned to apply silicone to any area with a gun before puttying, physical costs can be reduced, while at the same time increasing the efficiency of the result.

Work plan:
- When the silicone is used up, you need to unscrew the tube, remove the residue and wipe it with a rag soaked in vinegar solution.
- During puttying, the corner is bypassed, leaving unfilled.
- When the wall is dry, you need to fill the tube with putty and slowly squeeze it into the corner crack. It is recommended, if possible, to do the procedure from bottom to top in one approach.
- Next, they work with an angled spatula, resting on the surface, similar to plastering on beacons.
- After drying, the protrusions will need to be removed with an abrasive mesh.
Instead of a silicone tube, you can use a syringe used when baking cakes. With rubber or foam pads and fixation with electrical tape, the pastry syringe is fixed in the gun like a glove.
At the corners of the slopes, the master works with an angular trowel of his choice using any of the methods known to him, knocks down the protrusions with an abrasive mesh, and checks the smoothness using the construction rules. There is no significant difference in the process of laying the putty layer on the walls and in the corners, but the corners are difficult to bring to the ideal - a professional will need to step up to two times.
Tips from experts on puttying (2 videos)
What you might need (25 photos)


You can paste wallpaper on almost any wall. The main thing is that they are dry and even.
When the last condition is not true, the surface is plastered and leveled at the same time. And here the question arises: is it necessary to putty the walls before wallpapering or can you do without this procedure? We answer.
Remember what wallpaper used to be like? Paper, with edges that had to be cut off on one side and overlapped. This made it possible not to worry too much about the smoothness of the base; most often, the walls were covered with old newspapers before the final finishing.
Today, old newspapers have already been abandoned, but the unevenness of the walls still requires some tinkering to get the wallpaper to fit as it should. That is why many people prefer to immediately entrust these chores to third-party craftsmen who will do it faster, without unnecessary nerves and with high quality.
Modern wallpaper is glued end to end. And the slightest hole or protrusion at the junction of adjacent canvases leads to a poor-quality seam. Ideally, it should be completely invisible, which is why the base needs to be carefully leveled.
But the role of putty is not only this.
Functions of putty
In addition to the final leveling of walls or ceilings, finishing putty allows you to solve other problems, which include:
- Elimination of defects such as cracks, chips, large scratches, etc.;
- Giving the base greater strength;
- Increasing the adhesive properties of the base - its ability to firmly adhere to the finishing coating;
Note. Primer compounds fully possess this property, and in some cases it is enough to use only them if other qualities of the putty are not relevant in your case.
- Reducing the ability of the wall material to absorb moisture. This is important for high-quality wallpaper stickers and allows you to save glue;
- Leveling the surface color. White putty will reliably protect the wallpaper (see Decorating walls with wallpaper in the correct form) from stains that can show through it from an untreated wall.

With the walls as white as in the photo, it’s not scary to cover them even with thin-layer light wallpaper
As you can see, putty has many functions, and any of them can play a decisive role in the quality of the finish.
Putty of different materials
Now let's figure out whether putty is always needed and how it depends on the base material:
- Brick walls definitely need leveling. If the masonry is fairly smooth, you can do without plaster, using several layers of starting coarse putty, and finishing the preliminary finishing with a thin finishing layer.

- But concrete walls can be so smooth and strong that they do not require the application of putty. Especially if they have an even color, you have chosen fairly dense, non-translucent wallpaper, and the room will have a constant temperature and normal air humidity.
But it is absolutely necessary to prime them before pasting - this is required by the instructions. The primer will improve adhesion and create a moisture-proof film on the surface.
For reference. If there are small potholes and chips on the concrete surface or joints between slabs, it is enough to fill only these places with putty.

A high-quality surface is a rarity for concrete, so more often it still has to be puttied
- Plaster. Plaster mixtures are quite rough. And even if the surface turns out to be smooth, it is unlikely to be smooth. Sand particles make it rough and unsuitable for wallpapering.
- Plasterboard walls still cause the greatest amount of controversy on the topic - whether they need to be puttied or whether it is possible to limit ourselves to only sealing the seams. After all, they are used precisely for leveling walls instead of plaster.
In this case, putty is also needed, but to protect the plasterboard itself (see How to putty a plasterboard ceiling and avoid mistakes), or rather, its outer paper covering. If you stick wallpaper directly onto it, then during the next repair the paper will be removed along with the old wallpaper, exposing the gypsum core, which will lead to the need to completely replace the sheets.
It is clear that the cost of such repairs is incomparable with the cost of putty.

For drywall, first the joints are puttied, and then the entire surface is covered with a thin layer.
- Wooden surfaces - made of plywood, OSB boards and other similar materials - also require puttying. The reason is their high absorbency. Water from wallpaper glue can cause the base to swell, causing the wallpaper to fall off.
Note. Before you putty the walls before wallpapering, they must be primed with a resin-based composition to protect them from moisture.
 (1 ratings, on average: 5,00 out of 5)