What should a compost pit be? Do-it-yourself compost pit at the dacha: options for making a compost pit, step-by-step instructions. What you can and cannot put in compost
At the dacha there is always a lot of waste that can be easily turned into fertilizer. All that is required is a compost heap or a DIY compost pit, into which you need to regularly collect plants and organic waste. After two seasons, they will rot and turn into compost, suitable for fertilizing all garden plants and gardens. Detailed instructions on how to properly build a compost pit and heap can be found in the article below.
Benefits of using compost in your summer cottage
Although creating compost is time-consuming, the effort is always worth it. The benefits of making compost in a DIY compost bin are as follows:
- Environmental friendliness. Compost is a natural fertilizer for plants.
- Improving soil quality. Thanks to the use of compost, clay soils become looser and allow more air to pass through. If there is a lot of sand in the summer cottage, thanks to compost it will retain more moisture, which will increase its fertility.
- No need to pay money. Compost can be obtained free of charge from food waste and plants that grow in your summer cottage. But you will have to pay for manure and mineral fertilizers.
- The ability to profitably dispose of organic waste and keep the area clean. Grass, weeds and leaves will in any case grow on the dacha plot and to maintain cleanliness they must be taken somewhere or burned. If you throw them into a compost pit or on a compost heap, useful compost will be formed without any extra effort, and will be transformed into an attractive place for relaxation and growing vegetables.
How to make a compost pit and heap with your own hands?
First of all, it should be noted that a compost pit and a compost heap are not very good ideas for producing compost. If you create a waste pit directly in the soil, the compost will take a very long time to create, since the rotting process will slow down due to the presence of moisture and lack of ventilation. If you simply pour organic waste in the form of a heap, the decay process will proceed unevenly, and a lot of heat will escape into the atmosphere.
A proper compost pit or heap is a structure (box) made of wooden planks, buried 50 cm into the soil and raised 1 meter above the ground. Organic waste and garbage from your summer cottage must be thrown inside such a box. Under the influence of heat, it will gradually begin to rot and after six months, nutritious compost will be formed from the garbage.
But before you make a compost pit, you need to remember a few rules:
- To enhance the rotting process, the compost bin must be built in a shaded area away from the house (it is worth remembering that rotting produces a very unpleasant odor). You should not organize a compost pit near trees - an excess of nutrients in the soil can cause their death.
- The compost pit should be located at a distance of 25 meters from the well so that substances formed during the decay process do not get into drinking water. But it can draw water from a well located in close proximity to the compost pit.
- You should not make a compost heap in an area where water collects. This will slow down the compost formation process.
- The ideal pit dimensions are 1.5 by 2 meters. If you make the pit small, the waste in it will not warm up, and the rotting process will proceed slowly. A very large hole will require a lot of waste.
- It is recommended to divide the compost pit into 2 sections. The first section can be used immediately after construction, and waste should only be thrown into the second section starting next year.
- You cannot lay polyethylene at the bottom of the pit. It is better to throw hay or small branches there.
- It is necessary to build a lid on top of the compost pit or cover it with a piece of roofing felt. Can be used for mulching.
- About twice a month, the contents of the pit must be mixed so that the rotting process occurs evenly.
You can use compost from a self-made compost pit in the new season. But for it to be as nutritious as possible, rotting must last at least 2 years.
What kind of waste can be sent to the compost pit and compost heap?
A self-built compost pit is intended only for plant waste. You can drop there:
- leaves and thin branches that are raked from under the trees;
- wood sawdust, shavings and bark;
- cotton rags;
- cardboard and paper;
- plant roots;
- ash;
- cut grass;
- flower stems;
- all food waste of plant origin, including tea bags and eggshells;
- scraps of pet hair.
The compost heap should not contain animal products and animal feces, mineral fertilizers, or weeds on which seeds have already ripened. The compost should not contain plants with a long period of decay (this includes potato tops and tomatoes). Also, you should not throw bushes of plants affected by diseases into the compost pit - it is better to dry them and burn them directly in the beds.
If you have a summer cottage or garden plot and you constantly buy manure or fertilizers, then this article is for you. In it I will tell you how to make a compost bin and turn waste that is usually thrown away into good fertilizer. Choose the most suitable type of structure and make it on your site. It will not take much time and will not take much effort, but it will give an excellent result.

I'll talk about four options you can implement:
- The simplest pit on the site;
- Wooden box;
- Brick building;
- Ready plastic container.

Main features of the structure location
First you need to figure out the location of the compost heap, since there are a number of requirements:

- There must be at least 30 meters to a source of drinking water or reservoir. In this case, the pit should not be located on a hill so that sediment from it does not flow down to the well;
- To prevent the unpleasant smell from bothering you and your neighbors, it is better to place the structure in the far corner of the site. You should not place it near the road;
- The compost pit should not be placed in a sunny place. It should be in the shade or partial shade to improve the process of overheating the components.

Option 1 - the simplest pit
Let's figure out how to properly make a compost pit in the country:
- To begin with, a suitable location is selected taking into account the above requirements. Then a hole is dug 50-60 centimeters deep, 1 meter wide and 3-5 meters long. You can also make a smaller version if you have little organic waste;

- Then the walls are reinforced with old slate or roofing felt. You can leave them like that, but over time they will begin to crumble, and a lot of nutrients will leave around the perimeter. The old slate is simply placed around the perimeter, so that it holds, you can drive a couple of pegs from the inside. The sides can be made 30-50 cm above the soil level to increase the capacity of the pit;

- You can also use other available materials: pieces of tin, plywood, etc. It is important to make a container so that everything that will be folded does not fall apart;

- The finished structure can be filled with waste. It is best to lay a 15-20 cm thick layer of branches or straw at the bottom for drainage, and then layer by layer with compost materials. The optimal installation scheme is shown in the figure below.

Option 2 – wooden box
A more practical type of design. Manufacturing options can be very different, I will tell you about the simplest of them.
Instructions for doing the work yourself look like this:

- To begin with, you should find a place according to the recommendations indicated above. After this, you need to decide on the design of the box. Since compost takes 2 years to mature, a reasonable solution would be to build 2, or better yet 3 sections. Its length can be 3-5 m depending on the number of compartments;
- A design drawing is created. There is no need for accuracy, the main thing is to indicate the width and length. As for the height, it should not be more than a meter. But if you make a hinged door or put boards on one side in grooves, then you can make the structure higher;

- Making a compost pit with your own hands is simple and quick. The bars are placed in the corners. You can assemble the structure separately, or you can dig the elements into the ground, this will make the work even easier. After this, boards are packed between the side walls to the height you need;


- The upper part is made in the form of doors to open them if necessary. The front walls are clogged to half the height. Next, doors are made, which are attached to the curtains and secured with latches. There are no special requirements here, do as you please, the cracks are not scary, this will allow air to penetrate into the container and accelerate the maturation of the compost;

- Lastly, the structure is treated with an antiseptic inside and out, and then painted. A recess of 40-50 cm is made inside, this increases the capacity of the structure and facilitates the penetration of earthworms, which are an important part of the fertilizer ripening process.

The three-section option allows you to obtain ready-made compost every year. One compartment is filled with fresh contents, the second is matured, and the third is used. Everything is very rational and competent.

Option 3 – brick construction
This type is highly reliable, but it will also be more difficult to build. The materials required for the work are listed in the table.

Let's figure out how to build a compost pit at the dacha with your own hands:
- First of all, you should dig a hole of the size you need. Its depth should be 50-60 cm, and its width from one to one and a half meters;
- Next, walls are built from bricks or blocks. They are raised to a height of up to 1 meter above the soil level, no more is needed, as it will be inconvenient for you to get the compost;

- If desired, you can make the walls at an angle to make access to the pit easier. A cover made of boards or mesh can be laid on top of the structure; there is not much difference.

You can make the front wall from boards that are inserted between two slats. This is convenient because, if necessary, you can quickly remove the partition and take out the compost.

Option 4 – ready-made structures
If you don’t have space on your site or want to solve the problem more simply, you can use ready-made compost containers. They are made of plastic and are very light weight. In addition, this material does not decompose and remains durable for many years.

- The volume of the structure may vary, choose the containers that suit you;

- To ensure that you always have fertilizers, you need to place 2-3 containers;
- An important advantage is the presence of an unloading hatch at the bottom, through which you can get the finished composition quickly and easily;

- The cost of the structures is 2-3 thousand rubles, which is not much. And if you take into account their durability, the benefits of such an acquisition become obvious.
Regardless of which option you implement, you need to remember a few basic rules for preparing high-quality compost.
First, let's look at what can be put in the pit:
- Weeds, fallen leaves, plant stems and;
- Wood waste, twigs, sawdust;
- Manure, peat;
- Paper waste;
- Leftover tea, coffee, food;
- Vegetables and fruits, including rotten ones.

As for restrictions, rubber, plastic, polyethylene and other non-degradable components should not be placed in the pit. Do not pour out liquids containing detergents and chemicals.
In order for the composition to rot as best as possible, it should be stirred periodically and the layers should be sprinkled with peat or manure. During the dry season, the contents of the pit must be watered periodically to prevent the components from drying out.
If you don’t want to wait 2 years, then you can use special preparations called bioactivators for compost. They quickly decompose organic waste and allow you to obtain high-quality fertilizer in just a couple of months.

In order for the bioactivator to work with maximum efficiency, the mass must be constantly stirred and watered with warm water.
Conclusion
Using the tips from the review, you can easily make a compost pit with minimal time and money. The video in this article will clearly show some of the points discussed above. If you have questions, write them in the comments below.
If you have bad land on your plot where nothing wants to grow, start enriching it. The easiest way to bring black soil is, but it’s not always possible to get it, especially in urban areas. Adding chemicals in abundance is also unprofitable: in the end, you yourself will consume it. There is only one thing left: to make nutritious soil yourself. Or rather, learn how to prepare healthy compost. It is only ignorant people who are afraid of compost pits, because they think that they emit a stench that spoils the air in the entire area. In fact, compost does not smell if it is laid correctly and bacteria are kept active. Let’s find out how in more detail.
So, the first step is to select a convenient place on the site for a compost pit. As a rule, it is assigned an area in the backyard of the garden, behind outbuildings, where the appearance of a pile of waste will not spoil the overall landscape. The only caveat: during heavy rains, look where the water flows. It should not run towards the well (if there is one), otherwise rotting waste products may get there, which will affect the quality and taste of the water.
There are two options for arrangement: you can dig a deep hole and put raw materials for compost in it, or knock down a wide box from wooden planks with a removable wall for ease of use.
Pit creation technology
A deep hole is more convenient because all the plant material will be hidden in the ground and will not hurt the eye, but the compost takes longer to prepare in it, and it is more difficult to mix it. If, however, only this option suits you, arrange the pit correctly, because oxygen and ventilation are necessary for the normal decomposition of organic matter. But the dense earthen walls and bottom will not let any air through. Therefore, the hole is dug as follows:
- They take out soil no more than a meter deep, three meters long and one and a half meters wide.
- They retreat 20 cm from the walls of the pit on each side and knock down a wooden box, digging 4 posts in the corners and nailing planks to them.
- There is a distance of about 5 cm between the boards so that all layers of compost are ventilated.
- Divide the hole into two equal parts using a wooden board to fill only one half.
- The bottom is covered with thick tree branches, bark, spruce branches and straw (whatever you find). This will be drainage, removing excess moisture and helping the compost to ventilate from below. The height of the drainage layer is 10-15 cm.
Plant waste is stored in one part of the compost pit, but during the season it is transferred several times from one half to the other to saturate the pile with oxygen.
The hole can be made halfway in the ground, rather than completely buried, then it will be easier for you to stir up the contents and air access will improve
The second option for storing compost is in a box made of unpainted wood (or a factory-made one made of plastic). In appearance, it is absolutely identical to ordinary boxes, only several times larger. When creating the frame, do not forget to leave gaps between the planks and make one side removable to make it easier to lay and mix the raw materials. Alternatively, you can hang the door.

The plastic composter has perforated doors on each side at the bottom, through which the contents are ventilated, but you will have to moisten the waste yourself
Since such structures are usually made to last for many years, the floor can be concreted and drainage laid on top (the same as in the pit). Some owners put wooden or plastic shields on the bottom. True, over time the tree will become unusable, but nothing lasts forever.
Now all that remains is to fill the prepared area with the right raw materials, which will rot into high-quality compost.

Two compost bins located side by side are convenient because you can transfer waste for ventilation from one to the other without littering the nearby area
Features of proper waste disposal
In order for your pile to successfully rot and turn into nutritious soil for the new season, you need to throw only plant waste into the compost: leaves, mown grass, remains of root crops and fruits, turf, weeds, finely chopped branches of trees and shrubs.

By putting waste from your own garden into a compost pit, you thereby solve the problem of removing plant waste and get fresh, high-quality soil
To make the composition of the compost even more nutritious, put in it everything that you didn’t eat yourself: leftover soups, coffee grounds, tea leaves, yesterday’s salad, etc. In a word, place another container in the house next to the trash can for vegetable waste, and you'll be surprised how quickly it fills up. Old cardboard boxes, newspapers (black and white), and worn-out items made from natural materials (cotton, wool) are suitable for composting.
Unwanted Ingredients
Now let’s focus on waste that is harmful, from the point of view of experienced gardeners. It is strictly forbidden to put the remains of animal products into the compost: dead birds and animals, old lard, fats, intestines, spoiled milk, sour cream, etc. All this, when decomposed, begins to emit an unpleasant odor and will attract harmful insects, neighbor's dogs, cats and crows to the pile. . In addition, putrefactive processes in animal remains proceed more slowly than in plant remains, and your compost will not have time to ripen by the next season.
But the summer residents still haven’t decided on the sea inhabitants. Some do not add them, so as not to attract animals to the pile, but others are happy to throw into the compost everything that remains when cleaning the fish (heads, scales, entrails), citing the fact that they contain phosphorus, valuable for plants. You just need to bury such waste deeper in the pile so that cats don’t smell the smell.
Indeed, fish supplements are useful. Therefore, we advise everyone who is sorry to throw away a valuable product: do not put them in compost, but bury them directly under the trees, in the circles around the trunk. Just dig a deeper hole. This way you will feed the garden and will not attract stray animals.

If you build a compost bin with an opening roof, then feel free to put fish waste inside, because animals will not fit into such a container
You cannot put plastic, glass, metal objects, rubber, washing water, etc. into the pit. They are harmful to the soil. All paper products with a laminated base or with colored designs will not be useful either. There is too much paint and chemicals in it.
An undesirable ingredient in compost is tomato and potato tops. In the fall, it is completely infected with late blight, and the spores of this disease will be transmitted with the compost to healthy plants.
Weeds that have begun or completed their flowering period should not be added to the compost. For example, if a dandelion has managed to form a flower, the seeds will still ripen, even if it is picked and placed in a pile. Therefore, try to mow the weeds before the flower buds appear.
If there is nowhere to put the nightshade tops and large weeds that have already become seeded, lay them out on a solid base (concrete, linoleum) near the compost pit and let them dry. Then throw all the vegetation into an iron barrel and set it on fire. Everything will burn, along with diseases and seeds. Useful ash will remain. Add it to your compost pile.
How to compost waste?
In order for waste to decompose quickly, moisture, oxygen and accelerators of putrefactive processes are needed. You provide moisture yourself by watering the pile abundantly during periods when it is hot outside. Oxygen will penetrate into the compost more actively if you arrange the layers of raw materials correctly. So, dry waste (potato peelings, straw, hay, fallen leaves, husks, etc.) should be alternated with green waste (tops, fresh grass, rotting vegetables and fruits), soft with hard, to avoid excessive compaction. It is very important that the compost is prepared from brown and green components, added in equal parts. Fresh waste is the main source of nitrogen needed by all plants. Brown (i.e. dry) act as a layer that prevents the compost from sticking together. They are considered a kind of fiber that makes the soil airier and lighter.

Try to put green and brown waste in equal proportions, as too much green will cause compaction, and too much dry material will suck the nitrogen out of the compost.
If you need compost for next spring, add decomposition accelerators to it. These can be concentrates purchased at a garden store, which must be diluted with warm water and activate the beneficial bacteria contained in the preparation.
Fresh manure (horse or cow) is an excellent accelerator. They find a couple of flat cakes in the field, place them in a bucket of water and let them brew for two days. Then the prepared solution is poured into the compost and the contents of the heap are mixed. If you don’t have this stuff near your dacha, finely chop dandelion leaves, nettles, legumes, add a bucket of warm water and place in the sun. After 4 days the mixture will begin to ferment. Then pour it into the compost.
To avoid nitrogen erosion, the top of the compost heap is covered with non-woven material or black film. When closed, rotting occurs faster, and a sign of this will be the active release of heat. The temperature inside the compost should be at least 60 degrees.

It is extremely undesirable to cover a wooden box with film from top to bottom, because by doing so you will block the path of oxygen, and the quality of the finished compost will be much worse
During the season, the pile is shoveled 3-4 times to ensure uniform rotting of all layers. By spring, plant waste will turn into rich, loose soil with the smell of earth, which can be applied under trees, mulched for strawberries, or mixed with garden soil to improve its composition.
» Medicines
The annual use of the site for growing various crops greatly depletes the soil. To restore its fertility, it is necessary to periodically apply fertilizers. One of the most accessible types of food, which has a rich composition of nutrients, is compost. This fertilizer can be made at the dacha with your own hands.
Compost is one of the types of organic fertilizers that can be prepared independently using various household and vegetable waste. A high-quality composition containing minerals and valuable trace elements is equivalent to humus. The nutrient mixture reaches readiness as a result of the decomposition of organic matter under the influence of heat and moisture. A compost heap is identified with a living biological reactor. The process of converting waste into a valuable nutritious product occurs thanks to intensively developing microorganisms.
Preparing compost is not a labor-intensive process, but the technology still has some features. Only the right composition can restore the vitality of the soil, increase its fertility and improve its structure. There are a great many recipes and methods for preparing organic fertilizer. Each experienced gardener has his own exclusive secrets, which consist in the use of various additives, the combination of certain components, etc.
For those who did not take care of setting up a compost pit in advance, bagged humus is offered. But before purchasing, you should collect information about the manufacturer, otherwise you may get a neutral or negative result after fertilizing the land.
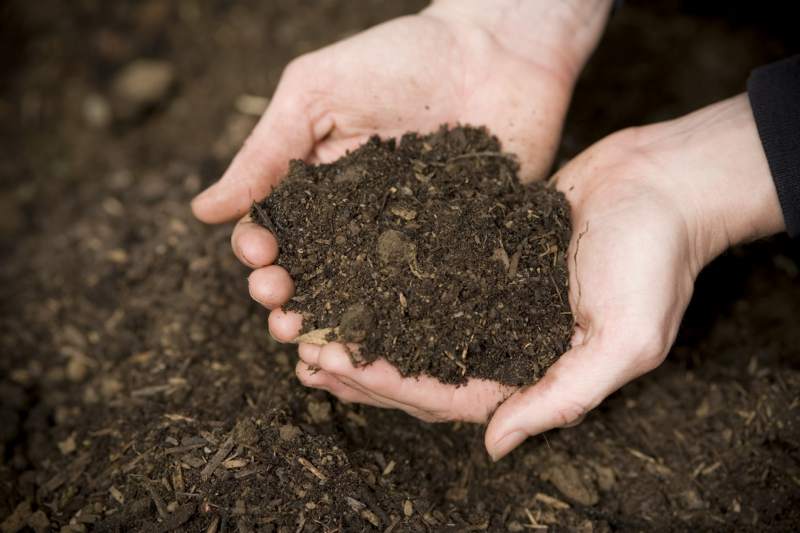
 Natural compost is rotten organic waste
 What is it made from?
No matter how tempting the offers to purchase ready-made compost may be, you can only fully trust a product you prepare yourself. To obtain organic fertilizer you can use:
- waste and peeling of vegetables/fruits;
- eggshells (only from eggs that have not undergone heat treatment);
- tea leaves, coffee grounds;
- mown grass;
- dry leaves;
- peat;
- domestic animal manure, bird droppings;
- thin branches, stems;
- paper, natural fabrics, feathers (raw materials in crushed form);
- straw, shavings, seed husks.
All or part of the ingredients are filled into a box or pit in a certain order. To start the fermentation process, it is necessary to create a favorable temperature regime and high humidity.
 Compost is prepared from the remains of fruits, vegetables, eggs, straw and other things.
 The following ingredients should not be placed in a composter or pit:
- vegetable waste and heat-treated fruits(there are practically no useful microelements in them, the composition will turn out to be non-nutritious);
- weeds(all types of weeds contain poisonous or toxic substances that pose a danger to the soil and cultivated crops);
- plants affected by any diseases or pests(compost with such a component will provoke the spread of the disease on the soil and plants);
- synthetic material(it is not subject to the process of decomposition and rotting);
- citrus waste(essential oils inhibit decomposition processes; a large number of crusts can increase the acidity of the soil).
According to popular rumor, you can add dog and cat feces to compost, as well as used toilet filler. Experts do not recommend using this type of waste, since animal waste products may contain worms that are dangerous to human health. Being in a warm and humid environment, they survive well, and then successfully colonize raspberries, strawberries and other fruits.
Advantages and disadvantages
To appreciate the full benefits of using compost, you need to consider its effect on the soil environment and plants.
- Compost contains a large amount of valuable minerals and trace elements in the correct proportion. When it enters the soil, a rapid metabolic process occurs, as a result of which the deficiency of missing substances is instantly compensated.
- Organic matter, when combined with soil, forms a single structure. After heavy watering or rain, micronutrients remain on the surface, unlike mineral fertilizers, which settle into deeper layers of the soil.
- Compost allows moisture and air to pass through well, which allows it to improve the soil structure in the upper layers. This is important for the normal development of the root system.
- The fertilizer contains a large amount of humus, which increases the fertility of the land.
- It is almost impossible to overfeed plants with organic matter. All components are of natural origin. They undergo natural decay processes without contaminating the soil with various toxins.
- Compost from organic fertilizers is the most accessible a way to enrich the soil with useful substances.
 Real compost has virtually no downsides and mixes completely with the soil.
 Compost has virtually no disadvantages. However, it is worth noting that when arranging a compost heap or pit, you need to choose a place away from the recreation area and home, since the process of rotting is accompanied by the release of an unpleasant odor. In addition, this object attracts flies, ants and other insects. Arranging a special box equipped with doors will help to avoid problems with such a neighborhood. Insulating a compost heap in this way also has aesthetic value; the corner of the site will not look dull.
How to make a compost bin with your own hands
To organize a place for collecting organic waste in order to obtain fertilizer, it is recommended to use a compost box. Making a storage unit is not difficult at all, following simple rules.
Requirements for construction on site
In order for the manufactured container to meet all requirements, it is worth considering important points when assembling it:
- the side walls must have holes to ensure air circulation (2 cm gaps can be left between the boards);
- there is no such element as the bottom in the box;
- the presence of a lid will limit the flow of water during heavy rains (excess moisture will provoke the development of fungus);
- the lower part of the box should be opening to ensure the intake of fertilizer (the composition ripens faster from below).
Materials for making organic fertilizer
To make a compost bin, bars and boards are selected. You can also use wooden shields. Instead of a wooden lid, a frame covered with plastic film or polycarbonate is often used. Fixation of individual elements of the container is carried out with hardware and hinges (unlocking fragments).
Optimal box dimensions: height – 1 m, width – 1.2 m.
Manufacturing instructions
- Clear the area under the compost bin from plant debris and remove the turf layer. Mark according to the drawing.
- Dig holes 35-50 cm deep in the corners to install supports.
- Install the supports in the holes, level them vertically and fill them with gravel to half the depth. The part remaining to the soil surface is filled with cement.
- 1-2 days after the cement has hardened, fill the cement fill with earth.
- Connect the supports at the top and bottom with bars (on 4 sides).
- Cover the frame with boards around the perimeter, leaving 2 cm gaps for air access. The board needs to be attached to hinges on one or both sides at the bottom so that it can open to collect fertilizer.
- The top should be equipped with an unlockable lid made from several boards without gaps.

How to make a compost heap
As an option, prepare a compost heap in one of the secluded corners of the site. A heap does not mean a random dump of garbage, but a systematic collection of organic waste. It is better to choose a place in the shade; in the sun the components will dry out. A shady shelter provides the necessary humidity, which has a beneficial effect on the decay process. Worms, wood lice and other microorganisms also contribute to decomposition.
The right materials

These products are made from natural ingredients and will not cause any harm to the soil or plants. For example, the drug Embiko Compost (Gringo) ensures the ripening of fertilizer in just 6-8 weeks.
How to determine when compost is ready
Ready compost can be identified by the characteristic dark color of the composition. It should be crumbly, moist, and not smelly. The ripened fertilizer has the smell of forest soil.
By following the rules for making compost, you can regularly replenish the supply of nutrient mixture for your garden with your own hands, without spending additional money on ready-made fertilizers.
At a summer cottage where vegetables, fruits and berries are constantly grown, additional feeding is always needed. It is not advisable to use conventional mineral fertilizers for your family, except in small quantities. They change the physical and chemical parameters of the soil and contribute to acidification of the site.
Organic fertilizers are more expensive, but they restore soil well and stimulate crop growth. One of them - compost - can be made from components that can be found in abundance in any country house, and setting up a compost pit with your own hands will require small financial costs and a little time. But at any moment there will be something to feed the plants on the site.
The benefits of compost and how the fertilizer works
Compost is plant residues processed by soil microorganisms and earthworms. Passing through the digestive tract, beneficial nutrients - nitrogen, potassium, phosphorus and other trace elements receive an organic shell.
In it they are better preserved and better absorbed by plants. People have learned to produce such fertilizers using artificial methods. They are called chelate, but they are expensive. A large plot requires many complex mixtures, which significantly increases the cost of the crop.
If you make a compost pit correctly and learn how to lay compost for maturation, you can significantly reduce the cost of renewing the land and increase the yield for free.

Raw materials for composting
Everything can be composted:
- leaves;
- green freshly cut grass;
- manure;
- branches, sawdust, bark, paper;
- algae and other pond plants;
- peat;
- fecal matter from the sewer.
It is better to take several components. It is desirable that the composition include nitrogen and carbohydrate ingredients, as well as soil from the site. Nitrogenous substances include: fresh grass, manure or droppings, fresh vegetables, fruits. Carbonaceous components include paper, dry grass, sawdust, straw, and cardboard.
Ash adds nutritional value. To make the compost more saturated, you can add complex or single-component mineral fertilizers at the end. In any case, compost will help increase the amount of humus in the soil and revitalize the soil with the help of bacteria.
Composting methods – with and without oxygen
There are two methods of composting – aerobic and anaerobic. In the first case, microorganisms work that require oxygen to live. Such bacteria live in the soil and decompose plant debris - grass, roots, manure.
To obtain aerobic fertilizer, you need to know how to properly make a compost pit with your own hands to ensure air access. In addition, the mixture must be periodically loosened and turned over so that oxygen reaches all components. The disadvantage of the aerobic method is that some of the nutrients are eroded or oxidized and are not beneficial, as well as time-consuming.
Video: How to make a compost pit with your own hands
Another method is anaerobic. This is the fermentation of components without air access. How to make a compost pit at your dacha like this: to prevent oxygen from penetrating inside:
- the material should be tightly knitted, and the inside can be lined with film;
- the components are stacked tightly and compacted to remove excess air.
The top of such a collar is sealed with a film, which is pressed to the ground with heavy stones or earth. Further, the process occurs without human intervention. The advantage of this method is that almost all nutrients are preserved. The downside is that it is difficult to achieve complete sealing of compost pits. Sometimes it is better to buy a container for storing raw materials.

Types of composters
A simple DIY compost bin can be made in one day. No special materials or tools - whatever is at hand will do - boards, slate, plastic panels, plexiglass, mesh.
It is necessary to decide which method of making compost will be a priority: aerobic or anaerobic. If the first, then there are more options for making a compost heap with your own hands. If it is anaerobic, then every effort will have to be made to make the structure airtight. You may have to use concreting, but such a collar will last a long time.
Classic earthen pit
A compost pit is made in the ground as a recess no more than 50 cm, to make it convenient to care for the ripening mixture. The sizes are arbitrary. You can make any length and width.

More often, this design is used for anaerobic fermentation, but for this it is necessary to concrete the walls and bottom. The fact is that when plant residues decompose, liquid flows down. If the bottom is left open, the nutrients will disappear and be absorbed into the soil. But if you put a layer of earth, straw or peat on a closed bottom, they will be preserved and will benefit the plants.
The easiest way to make a compost pit is from a concrete ring. For this:
- Digging a shallow hole - 60 cm.
- The bottom is filled with solution and allowed to dry.
- A concrete ring is installed using a crane or tractor height 90 cm.
- Plaster the connection between the bottom and the ring.
The convenience is that the edges will rise above ground level and prevent sediment from getting into the compost. The concrete can be painted any color or decorated as you wish to create a beautiful compost pit - you can plant tall plants around the concrete ring with your own hands, and they will hide the storage. If desired, a ceiling with a hole for a hatch is installed on the ring.

Slate pile
If you have old slate lying around, you can strengthen it on boards and make walls for a compost pit. This will not be quite a hole, since it is located on the surface of the earth. More like a pile or a heap, but decorated and protected. A do-it-yourself slate compost pit is suitable for the aerobic (oxygen) method of making compost.
Stages of work:
- Select a location and make preliminary markings - length, width. The height of the collar should be no higher than 1.5 m. At higher altitudes, air will be less able to get inside and ripening will slow down. The raw materials may even rot or sour.
- Dig holes in the corners with a drill and place pillars.
- Nail boards between the posts to hold the slate.
- Using a drill, carefully make holes in the slate and attach it to the boards.
On one side, the height is made smaller to make it convenient to get ready compost. The roof must be done, because rain will disrupt the maturation of the mixture.
The bottom is made as desired - open or closed. Peat, soil, chopped branches or sawdust, and straw can be used as drainage.
DIY board composter
A DIY compost pit made from boards is the most common method. First, markings are made and corner posts are installed. Below is one of the options:
- the arrangement of the boards is dense, without holes for air - more suitable for cold storage of manure or anaerobic composting;
- with air holes - they can be up to 5 cm wide.
It is better to make the composter mobile - on wheels, so that it can be hidden in a warm place in the winter. When the temperature drops, bacteria slow down their activity and the maturation of the mixture is disrupted. In warm weather, the process continues and by spring the fertilizer will be ready.

When using worms for composting, the most effective type is California red worms. They reproduce quickly and eat a lot, but cannot tolerate low temperatures. They die in mid-latitudes. Vermicompost is prepared in a warm room with good ventilation. In summer the box is put outside, and in winter it is kept warm.
Mesh compost pile
An economical version of the composter is made from ordinary metal mesh. It is secured to poles or metal pipes dug into the ground. The advantage is that the collar is completely open on all sides to air. To speed up the maturation of compost, it is advisable to add a solution of EM preparations when forming layers.

Sealed plastic container
Sealed containers are used for anaerobic fermentation of components or silage of grass. Such composters look presentable and aesthetically pleasing and do not spoil the appearance of the site. The downside is that you cannot increase the volume, and you will also have to loosen the layers when preparing aerobic compost.

Septic well as a composter
There is a technology in which fecal matter is processed by anaerobic bacteria and becomes organic fertilizer. But for this you need to comply with the following condition: do not pour water with detergents and chlorine into the well, as these substances cause the death of microorganisms.
 (1 ratings, on average: 5,00 out of 5)