How to plaster walls - we discover ourselves in a new construction role. How to plaster walls with your own hands Methods for plastering walls
Plastering is the restoration of a surface for subsequent finishing. At this stage, defects are sealed and the base is leveled. To perform plastering, you must have experience in carrying out this type of work. They hire a team of professional craftsmen. However, even a beginner can perform restoration using a solution. To do this, the amateur should familiarize himself with the videos “Learning to plaster walls: video tutorials”, and also carefully study the recommendations given below.
Before considering the question of how to learn how to plaster walls (video instructions will be given at the end of the article), you need to find out whether it is necessary to plaster the surface.
The use of the material is advisable if the surface has cracks, potholes, drops and other defects. In this case, the solution helps to get rid of imperfections in the building base. However, professionals recommend using plaster even if there are no defects on the surface. The material protects the building foundation from the destructive effects of moisture and other negative environmental influences.
What should you consider when restoring a foundation?
Hobbyists who plaster surfaces with their own hands are advised to consider the following points:
- for restoration of the building foundation, only high-quality material should be chosen;
- Before use, the mixture should be stored in a dry place;
- the solution must be prepared in strict accordance with the instructions.
Choosing a mixture for plastering
Before you learn how to plaster, you need to understand how to choose the material for restoration.
According to the degree of readiness, they are distinguished:
- Ready-made compositions. Such materials do not require preparation. The products are used immediately after opening the package. The disadvantage is the high price.
- Dry mixes. This product needs cooking. After mixing, the solution is used within half an hour. Because of this, you have to prepare the mixture in small portions and apply the material in several approaches. This is the main drawback of the product. The advantage of dry mixtures over ready-made materials is their reasonable cost.
The following types of material are distinguished by purpose:
- Ordinary composition. Designed for leveling surfaces and masking defects.
- Decorative. Used to apply the finishing coat. The material has an unusual texture, due to which it creates an original texture on the surface.
Classification of material by composition:
- Sand-cement composition. This is budget material. The product is easy to apply, but will require an industrial mixer or a drill with a mixer attachment. Non-professional finishers are recommended to work with this composition, since the product is affordable and easy to use.
- Gypsum composition. The material creates sound and heat insulation of the surface, does not shrink and does not crack after hardening. Disadvantage: it absorbs moisture, so it cannot be used for facades or in rooms with high humidity. The material can be used by non-professional finishers.
- Acrylic material. The operational period of such coating is 50 years. The product is recommended for use even by beginners.
- Silicone plaster. This is ready-made material. The product is suitable for surfaces of any type. The product is easy to apply, does not shrink and has a long service life. However, beginners who are just thinking about how to learn how to plaster walls are not recommended to use such a tool. The product is expensive, so it is better to practice on another product.
- Silicate composition. It is characterized by increased strength and resistance to mechanical damage. The product contains liquid glass, which means it hardens quickly. For this reason, the material is not recommended for use by beginners mastering plastering work.
Types of dry mixture
Types of dry mixture:
- Simple material. The surface differences after shrinkage of the product are 3 mm. The product is recommended for use in finishing rooms where aesthetics are not important. These include warehouses and garages.
- Improved composition. After the material shrinks, the surface differences are 2 mm. The material is used for finishing institutions - schools, administrations and other institutions.
- High quality mixture. The surface differences after shrinkage of the product are 1 mm. The material is used for finishing residential buildings and apartments.
Required materials and tools
The video tutorial below demonstrates how to learn to plaster walls. However, before starting finishing, you should prepare the necessary materials and tools:
- plaster;
- a clean plastic bucket for preparing the material;
- lighthouses;
- falcon;
- scraper;
- grater and industrial grater;
- trowel;
- rule;
- Master OK;
- level;
- plumb line
Rules for plastering a building base
If you want to learn how to learn how to apply plaster, it is recommended that you familiarize yourself with all the stages of finishing.
Preparing the premises
To prepare the room for plastering the walls, you need to remove the interior items. If the floor covering will not be changed, then the floor is covered with film and the material is fixed with boards, bricks or other weights. It is also recommended to remove the lighting fixtures and cover the wires.
Surface preparation
Instructions for preparing the construction base:
- dismantle the old covering;
- tap the walls to identify unstable areas and get rid of them;
- increase surface defects, treat cracks and potholes with a primer and fill with repair mortar;
- Clean the walls from dust and dirt.
Priming the base
Priming is a mandatory step before applying plaster and should not be neglected. The primer protects the building base from mold and mildew, and also improves the adhesion of the wall to the material. The primer is applied with a brush, roller or spray, as shown in the photo below. It is recommended to treat the walls twice with a break for the composition to dry.
Installation of profiles
Rules for placing beacons:
- step back 3 cm from the floor and ceiling and 5 cm from the corners of the wall and screw in the screws at these points;
- a fishing line is tied to the fasteners vertically and horizontally;
- under the vertical fishing line, the solution is fixed in small sections at a distance of 10 cm from each other;
- a beacon is attached to the train;
- profiles are fixed along the entire perimeter of the wall in increments of less than 1.5 m.
Preparation of the solution
Only dry mixtures need to be prepared. According to the instructions, the material is combined with water, the solution is mixed using an industrial mixer or a drill with a mixer attachment. The proportions of dry mixture and liquid are indicated on the packaging.
The thickness of the solution depends on which layer the material is being prepared for. For the first and third layers, prepare a material with the consistency of sour cream, and for the second – a dough-like mass.
Application of the composition
The video in this article demonstrates how to properly apply the solution to a surface. This is done as follows:
- Using a trowel, sketch the material onto the surface. This will be the first layer, which is called the spray.
- Using a wide spatula, apply the second layer of mortar - primer. The material must extend beyond the profiles. Level the composition as a rule until the solution hardens. Remove excess product with a spatula.
- Apply a third layer of material. This will be the cover.
Completion of plastering
- After applying the last layer, until the solution has hardened, dismantle the beacons.
- Fill the voids with the solution and level the composition over the surface using a spatula.
- Using an industrial float, grout the material. To do this, moisten the surface with water, press the tool against the wall and use circular movements to eliminate imperfections.
- Apply the primer, wait for the product to dry and proceed to decorating.
To ensure that the finish lasts for a long time, consider the recommendations of professionals:
- if the surface has a porous structure, then the primer is applied in two layers;
- if gypsum material was used for restoration, then grouting of the surface is carried out within 4 hours after completion of plastering;
- after applying the solution, the profiles must be dismantled;
- if ceramic tiles are laid after plastering, then the material does not need careful leveling and you can get by with one layer of material;
- if the walls are being prepared for painting, then the paint and varnish material should be applied 14 days after treating the surface with gypsum and a month after applying cement-sand plaster.
You can learn how to plaster using the video tutorial below.
Plastering the surface is a finishing stage that even a beginner can learn to perform. The main thing is to familiarize yourself with the rules for selecting and applying the material.
Plastering walls | photos, videos, step-by-step instructions. During construction or renovation work, you always have to face the need to finish walls with plaster. This process cannot be called creative, so most people don’t like it. At the same time, correctly and accurately applied plaster guarantees a problem-free finishing of the walls. But how to do everything yourself and without flaws? The video of plastering walls with your own hands using cement mortar is intended to teach you how to do this.
Plastering walls with your own hands is quite possible
Main types of plaster mixtures and their preparation
There are three main types of cement plaster used in both new construction and renovation work. They differ in the composition of the plaster mixture:
- Plaster based on a cement-lime mixture. It is prepared by mixing equal parts of lime and cement. Add 10 parts of sand to this and dilute with water to the desired consistency. Rooms with high humidity are ideal for plastering with this solution. These include kitchens and bathrooms, basements and garages. This type of plaster is indispensable for working on wooden walls, since lime has good adhesion to wood.

Proportions for preparing cement mixtures for plastering walls
- If the main component of the solution is sand, and the binder is cement, then such plaster is called cement-sand plaster. This composition is convenient for leveling both internal and external walls. Just be aware that sand does not like moisture. For this reason, this type of plaster is not recommended for use in areas of excessive moisture. You can prepare a mortar for brickwork in a ratio of 1:5 for plastering walls with your own hands. A video of mixing a cement-sand mixture will help with this.

Dry plaster mixture is added to water and mixed using a construction mixer
- Gypsum predominates in the composition of gypsum plaster. The ability of this mineral substance to set quickly allows this type of plaster to be used on ceilings and other places with difficult access.
Mortar for plastering walls, proportions: video instructions Today, few people independently prepare plaster mixtures from individual ingredients. Ready-made dry formulations are available for sale, which simply need to be diluted with water according to the instructions and mixed thoroughly. Mixing can be done with a drill with an attachment.
Helpful advice! When preparing your own plaster mixture, you need to take into account the brand of cement. The higher it is, the more sand will be required. Better adhesion will be ensured by PVA glue, which can be added to the solution.

Tools that you may need to independently plaster walls with cement mortar
Plastering walls with cement mortar: preparatory work
Plastering walls with your own hands with cement mortar necessarily includes preparatory work. If this is a new construction, and there are walls made of ordinary ordinary bricks, then there is no great need to prepare them for applying the plaster mixture. You just need to cut down the protruding bricks with an ax, if any. This will help you avoid applying too thick a layer unnecessarily.

The cement mortar is first spread onto the wall using a trowel, then the mixture is evenly distributed using the following rule:
If the wall is made of facing bricks, then you need to drive nails between the rows and tie everything together with aluminum wire. It would be even better to secure the plaster mesh. The wall itself must be primed and tile adhesive applied to it using a notched trowel. Only after this can the mixture be applied. Concrete and foam concrete blocks also require preliminary priming and application of glue. A special plaster mesh will help make high-quality plaster on such walls. Otherwise, the plaster mixture will bounce off them.

Applying plaster cement mixture to the wall
Wooden walls are much more difficult to plaster. To do this, you definitely need to attach a sheathing of slats or a ready-made mesh sold in stores to them. You should also prime it.

For plastering walls, a rule of 1.5 - 2 meters in length is used
In the case of repair work, before preparatory work, it is necessary to completely dismantle the old coating to the very base. If parts of the old plaster remain on the walls, the quality of the new work cannot be guaranteed. Do-it-yourself wall plaster shown in any video , It always begins with preparatory work, the quality of which determines the success of the entire repair.
Helpful advice! Walls that are too dry do not allow the mixture to stick. Therefore, before plastering, it is necessary to wet the bricks well.
Algorithm for plastering walls
As in any construction process, plastering walls has its own specific rules and sequence of actions. To apply plaster to a prepared brick wall, you must:
- Attach the plaster mesh to the wall using dowels driven in in a checkerboard pattern. The mesh must have an anti-corrosion coating. Otherwise, traces of rust will appear on the wall before the plaster has completely dried. The dowels are connected to each other with Z-shaped patterns using knitting wire.

Plastering a wall using reinforcing stacks
- Guiding beacons are installed. A smooth surface can only be created by plastering the walls along beacons with your own hands. A video of such a process is proof of this statement. Wooden slats can be used as beacons, but professionals use perforated slats, sold in stores. Beacons are installed strictly according to level.

Scheme of optimal placement of wall beacons
- The plaster mixture is applied and leveled along the beacons.
- The plaster is being grouted.
The process of applying the mixture is the longest and most labor-intensive. The mortar is thrown onto the wall using a trowel or ladle, whichever is convenient for you. Throwing movements must be made from bottom to top. It is necessary to fill all the space between two adjacent beacons. Then, using a special rule, we level the applied mixture. In this case, the ends of the tool should slide from bottom to top along the surface of the profiles.

One of the difficult processes in plastering walls with your own hands is the design of internal corners. To make the task easier, you can use a homemade corner level from a building profile
During this movement, the rule must be moved sharply to the right and left. This allows the solution to be evenly distributed over the wall, compacting it. The result is a smooth wall. Having completed the first segment, we move on to the next. We repeat all movements again. In the video of plastering walls using beacons with your own hands, you can see in detail what movements are made by the rule.

An example of attaching a construction beacon to a wall
When the walls dry out a little, they need to be rubbed down. For this purpose, a floor or grout board is used. These tools move across the surface in a circular motion. The process continues until the surface becomes smooth. If the plaster has dried out too much before grouting, it can be moistened.

Grouting of dried plaster is done using a polisher
To obtain a smooth surface without cracks, it is necessary to strictly control the drying process. Firstly, high indoor temperatures are unacceptable. Secondly, the walls need to be periodically moistened with water. Thirdly, you should always immediately repair any cracks that appear. Correct drying control guarantees high quality plaster.

The solution does not stick to the tool soaked in water, which makes plastering work easier.
Helpful advice! During all work, the tool must be moistened with water. This will prevent the solution from sticking, which will allow you to carefully and competently plaster the surface.

When the plastered walls are dry, you can begin to putty them.
Although the procedure for applying plaster to walls is labor-intensive and unpleasant, the quality of its execution should not be in doubt. Unevenness on the walls will not allow you to create a beautiful finish or will force you to take additional leveling measures, which will entail additional costs.
Plastering walls with your own hands: video instructions
In addition to decorative purposes, according to all modern trends, plaster has a number of significant advantages:
- Prevents moisture from entering the room and does not prevent air from entering;
- The special composition gives the coating heat-insulating and noise-absorbing qualities;
- A wide selection of textures allows you to give the coating a very different structure;
- Has the ability to make visual changes in the future.
Plastering the external walls of a house will be an excellent way to make the building brighter and more noticeable against the general background. Plaster mixtures are:
- Silicate;
- Silicone;
- Mineral;
- Polymer;
- Self-cooked.
In addition to the main components, all these compositions are allowed to contain:
- Polymer particles that provide heat retention;
- Stone chips for visual effect;
- Glass sand will add shine;
- Small particles of crushed stone will help create an original texture.
How to plaster external walls? It is necessary to consider in more detail:
- Silicate solutions are ready for use immediately after hiding the original packaging. Such mixtures are not presented in the widest range of colors. Full use of the product is necessary, since it can no longer be stored once the container is opened. This type of plaster is a reliable barrier to moisture penetration and can withstand moderate mechanical loads;
- Silicone mixtures are also quite elastic, have good resistance to various atmospheric phenomena, and are prone to self-cleaning. The plaster coating has high performance characteristics. The disadvantages include the rather high cost in comparison with other finishing options;
- Mineral mixtures. Cement is the main component. Dry components require dilution with water according to the manufacturer's recipe. Plaster mixtures of this type are inexpensive, “breathe” well, and are easy to work with. The disadvantages include not very good elasticity, and high requirements for the surface that will serve as the basis for the plaster layer.
If you are a beginner and don’t know the best way to plaster the exterior walls of a house, use polymer plaster mixtures. They are suitable for almost all substrates, are resistant to temperature changes, and create an attractive cladding that has a long service life.
Such properties are made possible thanks to the artificial resins included in the composition.
You can also make your own mixture. To do this, you will need to take cement, fine sand and water, and then mix them in the proportions specified in the recipe. This is an affordable, but quite labor-intensive method, which is very attractive for its financial accessibility.
It is important not only to know how to plaster external walls, but also on what surfaces the solution will adhere well:
- Stone surface;
- Wooden;
- Reinforced concrete;
- Monolithic concrete.
A separate approach is required for concrete pavement. When choosing what to plaster the outer walls of a house with, you need to take into account the fact that the material both absorbs moisture and releases it back. It turns out that the exterior finish should be softer than the main surface. Such measures will help prevent cracking, and the correct product will not lead to evaporation and condensation.
Plastering external walls made of gas silicate blocks should proceed differently than brick or concrete surfaces. It is unacceptable for plastering of external block walls to be done with cement-sand mortar, since in this case it is not necessary to disrupt the vapor permeability and internal climate in the house.
Plastering of external walls made of aerated concrete is carried out using special lightweight plaster mixtures. One of the best options is a mixture of lime, sand, and a small proportion of cement.
And if the external walls are made of plaster, what should I use to plaster them? For such a base, gypsum will be the best option. You can also use gypsum mixtures with the addition of lime. Cement mixtures are not suitable for these purposes, as chemical incompatibility occurs.

Plastering external walls with your own hands requires careful preparation of the surface. This stage is very important, since the final result and further service life of the surface will depend on it. The process includes:
- Removing the old layer of plaster material;
- Inspecting and checking the base for integrity and strength;
- Removing visible contaminants such as dust and oily stains. Creating a dry and clean surface will ensure good adhesion to the applied product;
- When working with a brick wall, you will need to additionally enlarge the joints and create holes that will improve adhesion;
- Next, the surface needs to be treated with a primer. You can use a brush or roller to apply the product. Give preference to deep penetration formulations;
- Now you need to install the painting mesh on the wall, and remove all detected irregularities and cracks with putty. The use of a reliable and proven method is also encouraged - installing beacons. By strictly following all the rules for their installation, you can get a perfectly flat surface.
The technology for plastering external walls includes fairly simple steps. If you have some experience in repair work, you can do everything yourself.

To plaster the outer wall of a house, you need to learn certain steps:
- Spraying. To complete this stage of work, you will need to prepare a liquid solution into which liquid PVA glue is added. The resulting composition is sprayed onto the surface using a small ladle. The process should take place in a measured manner. The more roughness there is on the wall, the better the entire material will adhere. Before continuing work, you need to wait for it to dry;
- Applying the base layer. The finished composition should be like thick sour cream. Application occurs by applying between beacons. The layer should not exceed 5 mm. Having attached the narrow side of the rule to the beacons, move it from side to side, and then smoothly moving upward;
- The finished composition should be like thick sour cream. Application occurs by applying between beacons. The layer should not exceed 5 mm. Having attached the narrow side of the rule to the beacons, move it from side to side, and then smoothly moving upward;
- To finish grouting the coating, you must use a special grater, which will help smooth out small cracks. We move in a spiral from a small circle to a large one;
- Drying also needs to take a certain amount of time. It will take about 5 days to set;
- The plaster, which gives the wall texture, is not applied in a continuous layer of mortar, but at small intervals. They close by stretching the solution when it begins to dry out.

For those who have decided to learn all the information about how to plaster a wall on the street with their own hands, you need to learn about how the material is applied to the base and corners of the building.
The basement is one of the special areas of the house that require special protection. That is why it is coated only with moisture-resistant cement-based compounds. Also, at the boundary between the wall and the plinth, the installation of waterproofing materials will be required. If this area is solid, then it is plastered with the wall, which is not typical for a protruding one.
Work on the corners is left for later. To finish them, it is necessary to use polymer types of decorative plaster, which is characterized by a high degree of resistance to mechanical stress.

No one will argue that external plastering of walls is important during construction. The materials used for this do not always provide high-quality results if important requirements and technologies have not been met.
Those who are so interested in the question: how to plaster an external wall with their own hands should adhere to a number of rules:
- On a newly built house, the process of applying plaster becomes possible after a couple of months. Ideally, this period will increase to six months. Otherwise, cracks may appear as a result of shrinkage of the building;
- Plastering on the outside is carried out only after interior work has been completed with full finishing;
- Before plastering the outer wall of the house, it is important to complete all types of repairs - carry out all communications, eliminate all holes, fill openings if necessary;
- It should be taken into account that the base must always be stronger than the material being applied. The opposite situation should not be allowed to happen. Cement mixtures can be classified as strong plasters and lime-based materials as weak;
- Having chosen a specific plane for finishing, it is necessary to gradually complete the entire range of work without interrupting the finishing;
- Monitor the outside temperature during repair work. It should be moderate and not fall below 5 degrees Celsius. This is explained by the fact that the plaster will not adhere properly to a frozen wall, but if it is too hot, it will simply slide off. If the air outside is still hot, spray the plaster with water to prevent cracking.

There are a number of the most popular types of plasters that are successfully used to create the original facade part: textured, cement-lime, thin synthetic. They have significant differences in composition, but they are all equally suitable for wall decoration.
The pebble structure can be considered the most popular finishing option. This plaster looks nice, but also has good practicality. To obtain a specific result, the plaster layer can be processed almost immediately after finishing and after hardening.
The crumbs can be present both in the composition and on its surface using a special sprayer. After drying, the surface is secured with glue, which promotes good adhesion and creates a damage-resistant surface.
A very original solution would be to imitate a wooden surface damaged by a bark beetle. To create this effect, the top layer is processed with a grater, which is held at a certain angle.
Colored cement-lime plaster looks very colorful. You can replace lime with marble dust, and then the effect will be simply amazing.
This option is not particularly cheap. However, complete surface decoration may not be performed. It is enough to select some important areas and, for example, cover the rest with pebbles.
Thin-layer plasters are very plastic, and allow you to make thin plaster due to the reduction of layers. They are different in composition and suitable for use on a wide variety of surfaces. Silicate plaster can also be classified as thin-layer. It is excellent for treating large areas of façade buildings.
After reading this article, you will know how to plaster external walls with your own hands. This process is doable. The main thing is to follow the prescribed instructions. By following the recommendations, you will definitely achieve positive results, and the beautiful facade of your home will delight you for a long time.
How and with what to properly plaster the external walls of a house with your own hands: video
Any, even the most expensive and high-quality finish will look completely ridiculous on crooked walls. And not any material will “lie” on an unprepared surface. In addition, curved walls cause a lot of problems when arranging or hanging furniture and other interior items. Therefore, the problem of carefully leveling all surfaces to be finished is relevant in the vast majority of cases of renovation in an apartment or house.
And you absolutely cannot do without applying plaster if you have to deal with a “bare wall,” for example, brick or block masonry. Here you have to apply a layer that will become both protective and leveling at the same time. And such cases are all too common both in modern new buildings and when building your own home.
The work of professional plasterers costs a lot. Therefore, many homeowners, wanting to save money, try to perform most of the finishing operations themselves. They need to be prepared for the fact that it may not start working out right away - this operation cannot be called simple, even if one wants to. And all the more important it will be for them to learn in advance how to properly plaster walls, so that they can soberly assess their own capabilities and make a decision in favor of one option or another.
How much work remains?
The owner of the apartment (house) must answer this question in advance. The complexity of its implementation and the amount of materials that will need to be purchased will depend on the assessment of the scale of the work.
- It is necessary to measure the dimensions of the room - this, by the way, will help to draw the diagram on paper. The requirement is optional, but still the graphic image very often becomes an excellent help when a novice master begins to estimate the thickness of future plaster layers on each wall.

- The initial parameters will be the lengths of the sides of all walls. In a rectangular room, ideally, opposite walls should be the same, but, alas, this does not always happen. Measuring and comparing the diagonals immediately shows how distorted the correct configuration of the room is - the diagonals of a rectangle must be strictly equal.
- The height of the walls is measured - this will allow you to determine the area of each of them. Naturally, window and door openings should be subtracted from this area. Based on the known area values, it will be possible to estimate how much material will be required for plastering.
To help those who have problems determining surface area.
Walls are not always rectangular in shape, and determining the area of more complex shapes can sometimes become difficult. For example, when finishing attic rooms, areas in the form of trapezoids or even non-rectangular triangles are often encountered. There may also be more complex ones, for example, arched configurations. Various cases are discussed in detail in a special publication dedicated to.
- It is clear that the task of plastering the walls in any case will be to bring them to a vertical plane. Using a long rule and a building level, you should immediately assess how much the wall plane differs from the required vertical one. To do this, the rule is pressed against the point most protruding towards the room. These readings (direction of deviation and its magnitude) can also be plotted on the diagram with symbols that are understandable to you. In the illustration above, they are indicated by blue arrows as an example. That is, the distance from the vertical line to the wall surface is measured, for example, using a ruler or square.

If you don’t have a long rule for the entire height of the wall, then you can hang the plane with a regular plumb line. After hanging it, the distances from the wall surface to the thread at the maximum and minimum points are measured, compared, and their difference shows the magnitude of the level difference.
Plaster prices
plaster

The obtained difference values will also be useful for conducting preliminarycalculationsrequired amount of materials for plastering.
- It was already mentioned above that the shape of the room may differ from a rectangle. Plastering can also eliminate such a drawback, if this is fundamentally important for the owners. Knowing the values of the measured diagonals and lengths of the sides of the room, it is easy to make a drawing diagram and try to fit a rectangle into it, assessing how much the thickness of the walls will have to be increased in different areas.

At the same time, they try to choose as a starting line the wall on which there is a doorway - the width of the walls of this opening (slopes) after plastering should be the same on both sides, otherwise it will look extremely unsightly. And if you start such an alignment from an arbitrary wall, then just at the level of the doors (or, in a variation, a window opening) a very significant distortion may well appear.
When choosing this alignment path, it must be borne in mind that it must be justified by practical considerations. It should be correctly understood that every extra centimeter of thickness of the plaster layer results in tens of kilograms of solution and a significant complication of the work. In addition, the area of the room is reduced. So it is often wiser to draw the walls exactly vertically and put up with small deviations from the rectangular shape of the room, which will not be particularly noticeable, rather than to bring them to the ideal. However, it is up to the owners to decide. The diagram drawn up should help them make such a decision.
How to plaster walls
Today, consumers are offered a very wide range of different compositions for plastering walls. They differ in the basic component and, accordingly, in the scope of application.
- Gypsum-based plasters (which often contain polymer additives) are the most popular when leveling walls indoors. They are very easy to use, have high plasticity, and provide a high-quality surface for further finishing.
 "Knauf Rotband" is a typical example of high-quality gypsum plaster for interior use
 The disadvantage of such plasters is their instability to high humidity, due to the characteristics of gypsum. That is, they are suitable only for interior work and only for rooms with normal humidity. Sometimes, however, reservations are made that their use in bathrooms and kitchens is permissible if a continuous covering with ceramic tiles is planned with careful sealing of the seams. But this is still a rather risky option - due to the fact that tile adhesives usually have a cement base, “conflicts” are possible.
- For rooms with high humidity and for external work, cement-based plasters are used. They create a reliable basis for any type of subsequent finishing.

True, working with cement plasters is much more difficult, although many of them are enriched special polymer plasticizing additives. Material consumption is also significantly higher. But at the same time, the cost of cement compositions is about a third lower than gypsum ones.
Prices for Knauf Rotband plaster
plaster "Knauf Rotband"
- A very successful solution is the use of combined cement-gypsum plasters, which combine the advantages of both of the above types. Such compositions are the most universal.

Such compositions are convenient to work with, as they have the plasticity of gypsum mixtures. And, at the same time, the plaster layer easily tolerates conditions of high humidity. And the only drawback is that their acquisition will cost more.
- There are also ready-made polymer-based compositions. But we will not consider them, since their use for internal leveling of walls looks completely unprofitable - their prices are quite “impressive”. And on top of that, most often polymer-based plasters involve some kind of plastering, that is, they are usually used for facade finishing.
The table below shows, as an example, several popular brands of plasters that are well suited for leveling various types of walls indoors. Please note that the manufacturer stipulates not only the scope of application, but also the permissible layer thickness for a single application - this can also be very important when planning work.
| Image | Name, type of binder | Scope of application | Minimum and maximum thickness of a one-time applied layer, mm |
|---|---|---|---|
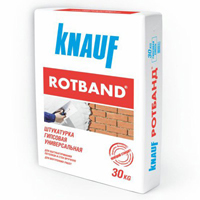 | Gypsum plaster "Knauf Rotband" bags 5 or 30 kg | For leveling ceilings and walls with a solid base made of concrete, brick, including those covered with cement plaster, polystyrene foam, cement-bonded particle boards. It is used in rooms with a normal level of humidity, as well as in kitchens or bathrooms, if a waterproof finish is installed (ceramic tiles with sealed seams). | from 5 to 50 mm, with the possibility of re-application after the first layer has dried. |
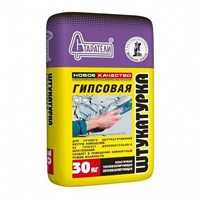
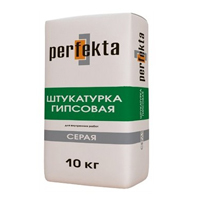 | Gypsum gray plaster "Perfecta" bags 10 or 30 kg | For plastering walls and ceilings made of concrete, gas and foam concrete, brick, stone and any gypsum surfaces in rooms with normal humidity levels. | from 5 to 50 mm |
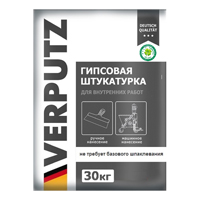 | White gypsum plaster "Verputz" 30 kg bags | For leveling the walls of rooms with normal humidity levels. Apply to any solid base made of concrete, brick, stone, including those covered with old cement or gypsum plaster. | from 5 to 50 mm |
 | Gypsum plaster "Volma-Canvas" 30 kg bags | For plastering indoors with normal humidity levels. Apply to any hard base. | from 5 to 30 mm |
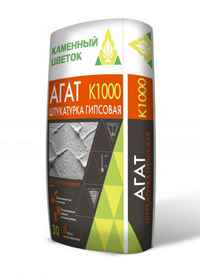 | Gypsum gray plaster “Agat TM Stone Flower” 30 kg bags | from 5 to 30 mm, It is recommended to apply once in a layer of up to 20 mm |
|
 | Gypsum gray plaster “Prospectors” 30 kg bags | For plastering walls and ceilings in rooms with normal humidity on any hard base. | from 5 to 50 mm, locally it is allowed to increase the thickness to 80 mm |
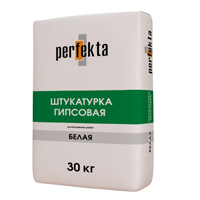 | Gypsum white plaster "Perfecta" 30 kg bags | For plastering walls and ceilings in rooms with normal humidity. Can be used on all hard substrates made of concrete, brick, stone, aerated concrete and foam concrete. | from 5 to 60 mm |
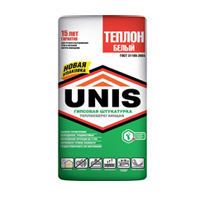 | Gypsum white plaster "Unis-Teplon" 30 kg bags | For plastering walls and ceilings in rooms with moderate humidity on any hard substrate. Has increased thermal insulation properties. | from 5 to 50 mm |
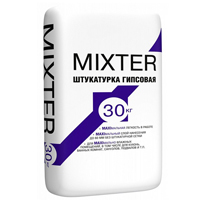 | Gypsum-cement plaster “Prospectors Mixter” 30 kg bags | For plastering in rooms with normal and high levels of humidity on all solid bases made of concrete, cellular concrete, brickwork, including old cement plaster. | from 5 to 60 mm local application up to 100 mm |
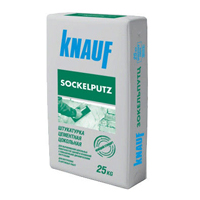 | Base cement plaster “Knauf Sokelputz UP 310” 25 kg bags | For plastering plinths, as well as rooms with high levels of humidity and high dynamic loads. Suitable for use on hard concrete and brick substrates. | from 10 to 35 mm single application in a layer of up to 15 mm. If the total layer thickness is more than 15 mm, galvanized plaster mesh should be used. |
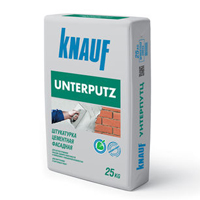 | Leveling cement plaster “Knauf Unterputz UP 210” 25 kg bags | For plastering facades and hard surfaces of concrete and brick in rooms with high humidity. | from 10 to 35 mm with a single application, a layer of up to 20 mm. |
 | Light cement-sand plaster “Starateli” 25 kg bags | For external and internal use. For plastering facades and surfaces in rooms with normal and high humidity. It is used on bases made of concrete, brick, cement plaster, cellular concrete. | from 10 to 20 mm, There is the possibility of repeated application with drying of intermediate layers. |
The cost of mixtures can vary significantly, and not only by specific brands, but also by sales regions - the location of production lines and logistics features affect. So it is better to clarify this parameter specifically by location.
One of the characteristics indicated by the manufacturer is always the estimated mixture consumption. Most often it is expressed in kilograms - it shows how much composition will be used to apply a plaster layer 10 mm thick over an area of 1 m².

This allows you to calculate the volume of material purchases in advance. In this case, of course, one should also take into account possible losses, which due to inexperience can be very significant. So, it would be useful to include a reserve of about 10%, and if plastering will be performed for the first time, then the entire 15%.
Using mortars, decorative and protective surfaces are created and walls are leveled. They are used for various reasons, and... The correct use of universal technologies allows you to successfully solve various functional and aesthetic problems. This article talks about how to plaster walls with your own hands as a beginner. Videos, step-by-step instructions, comments and other materials will help you learn the nuances of professional techniques.
Read in the article
What is plaster: learning general information
The purpose of using this technique is to create a durable layer that eliminates unevenness and other defects of the original surface.

Homogeneous solid plaster provides good protection from wind and other adverse external influences. It performs full-fledged work and improves economic performance during the operation of the property.

This is a suitable base for pasting. In the process of work, they create high-quality external and internal corners, connections with frames, floors and ceilings. On such surfaces it will not be difficult to attach other parts later without the formation of cracks.

This photo shows an example of a spectacular one. The unique appearance was created based on techniques that are discussed in detail in this article.
Related article:
Composition and types of coating, manufacturers, examples of using decorative mixtures, how to prepare it yourself, instructions for application - in this material.
From the examples above, it is not difficult to understand the basic requirements for a suitable mixture:
- To securely adhere to a variety of surfaces, it must have good, but not excessive, adhesive characteristics. Otherwise, the composition will stick to the tools, which makes it difficult to accurately perform work operations.
- The appropriate consistency is determined in the same way. As a rule, they prefer to use a thickness similar to that of full-fat sour cream.
- After hardening, it is desirable to obtain a surface that is resistant to mechanical stress. This will prevent damage due to careless handling.
- Health safety is a must. Wall plaster is used inside residential premises, so maximum attention is paid to environmental cleanliness.
- Washable, color, antiseptic properties can be provided with appropriate additives. But in any case, the durability of the layer will come in handy. Its creation involves labor-intensive wet processes, so it will be beneficial for any owner to increase the interval between.
A mixture of sand, water, etc. meets the listed criteria. It is supplemented with lime and gypsum to improve ductility and adhesion to a certain surface. Below are popular "recipes". Using them, high-quality wall plaster will be created. Video lessons along with written step-by-step instructions will help you independently understand the important nuances of technological processes.
What is the difference between plaster and putty: the correct use of construction technologies
Not only the composition, but also the application features are similar. What is the difference is described in this part of the article. In both versions, the main components are sand, cement and water. However, on large areas it is more convenient to work with relatively large fractions of fillers. Putty is used for sealing small cracks, joining elements from, and other “delicate” operations. In this case, small components that form a smooth surface are useful.

The plaster is applied sequentially, in layers up to 10 mm. For thicknesses greater than 30 mm, reinforcement is used. As noted above, this technology can provide good insulation from external influences.

This tool is most often used for masonry. However, it is also used for plastering walls. Stir with a trowel, scoop up and throw the solution onto the wall. Using the narrowed part, work operations are performed in corners and cracks are sealed.

The narrowed trapezoid shape is well suited for neatly filling seams with the mixture. In particular, such a tool is used when forming surfaces from sheets. It is also convenient for them to separate old plaster and remove dirt from cracks.

This tool is used to work with figured pilasters and other complex elements. The tapered front part of the blade is well suited for dosing and distributing solution in hard-to-reach places and on curved surfaces.


This tool received this name from the name of the special technology of decorative finishing. walls are made using plastic mortars. Apply thin layers with careful leveling of the smallest irregularities. For high-quality and fairly quick reproduction of work operations, a perfectly smooth large work surface is useful. The rounded corners of the trowel prevent scratches.
For your information! Experienced craftsmen purchase identical blades in several sizes. Large ones are used for stirring and spreading, creating the first plaster coating. To apply subsequent layers and perform “jewelry” work, compact tools are used.


From this photo it is not difficult to understand the principle of working with the tool. It is moved with support from the beacons to form a flat surface.


This tool removes uneven surfaces. The photo shows a grater with a replaceable blade.
Use specialized mechanization tools


To perform certain operations, in addition to gloves, you will need a respirator. Other personal protective equipment. The list of necessary purchases is compiled after selecting a specific technology, taking into account the characteristics of the property and other important factors.
How to prepare a solution for plastering walls
- When plastering walls with your own hands using factory mixtures, use the official instructions of the manufacturer.
- The created solution should be well fixed on a vertical surface.
- It is necessary to obtain such a consistency that there are no difficulties when smoothing with the rule.
- A mixture that is too dry will form lumps and uneven surfaces. If the moisture concentration is excessive, the solution flows down.
- Be sure to specify the period within which the finished composition must be completely used. If you lack qualifications, it is better to prepare a small amount for the work cycle.

If there are no special instructions for creating a solution, use the following algorithm of actions:
- Prepare a container of the required size. A light plastic bucket is suitable, which is not damaged by a construction mixer and can be quickly cleaned of dirt. Unlike metal analogues, it does not produce loud sounds when in contact with metal working tools.
- First, pour in clean water. There is no need to boil it, but it is necessary to exclude colored impurities and strong odors.
- Dry ingredients are added gradually, mixing thoroughly.
- When the lumps are eliminated, leave the solution for 3-4 minutes. Next, check the viscosity, add water and other components in the correct proportions until the desired consistency is obtained.
For your information! For standard cement-based formulations, wall plastering in one batch should be completed in 45-60 minutes. If the composition contains gypsum, the work will have to be completed twice as fast.
The most important stage of finishing work: preparing walls for plastering
- The base for applying a new layer must be strong, so the old and other coatings are removed.
- Check the condition of the walls. If detected, cracks are sealed and elements to strengthen the load-bearing frame are installed.
- If dampness is detected, eliminate the source of its occurrence. They repair and install high-quality equipment.
- Next, you need to prevent the walls from absorbing moisture from the plaster mortar. For this purpose, they are used depending on the wall material.
- Special compounds improve the adhesive properties of the surface. If mechanical processing is used for this, the final stage is to remove contamination from the working area.


How to plaster walls without beacons with your own hands: video and useful tips
This technology is used in basements, technical rooms, attics and other objects where it is not necessary to create an ideal surface.
| Photo | How to level walls without beacons: step-by-step instructions with expert comments |
 | If you do everything correctly, you can ensure high quality with economical consumption of building mixture. It should be noted that such techniques are indispensable when working in cramped conditions, when it is necessary to plaster walls behind pipes and. |
 | Pre-remove the solution build-up and seal large holes. The brick is old, so the standard solution (wetting with water) will not work. Careful processing required. |
 | There are corners in the design. They will need to be covered with plastic or metal covers. |
 | To create the first layer, no casting is used. Use sequential treatment of small areas, rubbing small doses of the solution into the wall. It is at this stage that all voids in the masonry can be filled. A wide spatula makes leveling the surface easier. When performing smooth movements, it is not difficult to notice and eliminate depressions and bumps. |
 | Next, the rule is to check the evenness of the wall section and install the corners. Mark the places (recesses) where unevenness needs to be removed. |
 | Start applying the second layer. After fixing the plaster on the wall, they again use the rule to control the surface. They can also use excess solution. |
 | After 30-40 minutes the finishing layer is applied. At this stage, small doses of the solution are used, since in fact only corrective actions are needed. On a fairly flat surface, the material consumption is small. It is especially important here that there are no lumps or foreign bodies in the mixture. In a real situation, the time is set taking into account the characteristics of a certain recipe. |
At the final stage, after hardening, the top layer is treated with a grater. Experienced craftsmen remove small defects with a spatula. When plastering walls with your own hands without beacons, you can save consumables. But here you will have to spend more effort and time to get good results. But in some cases, perfect quality is simply not necessary.
Video of siten plastering without beacons using gypsum mortar:
What are the differences between plastering walls with your own hands using beacons: video with professional comments
| Photo | Plastering walls using homemade beacons: step-by-step instructions |
 | After removing old decorative and insufficiently durable coatings, construction defects are eliminated. Next, apply the primer with a paint roller. |
 | Mark the installation location of the beacons in such a way that when performing work operations, the rule rests on two reference lines simultaneously. |
 | Marks are made at a distance of 5 cm from each edge of the instrument. If the 250 cm long rule is selected, the distance between the beacons should be 240 cm or slightly less. |
 | Holes are drilled according to the marked marks. Plastic dowels are driven into them with a hammer. |
 | Screw in self-tapping screws with wire rings. Similar operations are performed on the other side of the wall. |
 | To accurately set the desired level, wooden pegs are used. The dimensions of these elements and the corresponding position of the string are selected taking into account the position and geometric features of the wall. |
 | Use a bubble level to control the vertical. If necessary, change the position of the strings. When suitable pegs are selected, screw the screws until they stop to tighten the wire tightly. |
 | Mix the solution in accordance with the manufacturer's official recommendations. This procedure does not require the ideal state of the finished mixture, but it is more convenient to work with high-quality consumables, without lumps. |
 | Using a plaster spatula, apply the solution near the string. Remove excess parts from the surface of the tensioned wire. After hardening, remove small irregularities from the surface of the created beacons with a spatula. |
 | Start mixing the ingredients. Dry ingredients are poured into water. Next, use a construction mixer. At this stage, you should create a high-quality solution with a uniform structure and optimal density. |
 | Apply the mixture using trowels (trapezoidal trowel). For preliminary smoothing, use a wide spatula. |
 | Next, the rule is applied. They use it to pull the solution to the side. Lighthouses serve as longitudinal supports. Small movements up and down make this operation easier. |
 | Continue plastering the walls in the same way. After completing the treatment of the entire area, it is necessary to wait 10-15 minutes until the top layer “sets.” Afterwards, remove small irregularities with a grater or a wide spatula. |
Watch this video of lighthouse plastering for beginners:
It shows how this technology creates a high-quality, flat surface. It can be painted and wallpapered without additional processing after drying.
In this video, leveling the wall using beacons with your own hands is done with preliminary reinforcement:
This technique can be used instead of creating special irregularities. The mesh will also provide increased resistance of the layer to mechanical stress.
Additional consultation: setting beacons without errors

A drawing of the premises will help to accurately establish the placement lines of vertical beacons.

The locations of their installation are marked in the figure, taking into account the length of the rule. As with the strings, here you need to make the distance less than this leveling tool. It is necessary to leave a sufficient distance to internal corners and other obstacles.

This figure shows the principle of field construction. Instead of nails, it is more convenient to use self-tapping screws that are screwed in to the required depth. First, install screws at points 1 and 3. A cord is pulled between them and elements 7 and 8 are installed. Verticals (1-2; 3-6-4) and others are controlled using a plumb line. If necessary, change the position of the screws to obtain a clear line.

Diagram (1) shows installation using specialized fasteners. Bubble (2) and laser (3) tools are used to check surfaces. Using a stretched string (4), the exact level of one line is established.
Correct selection and use of different materials
It will be possible to find out in the apartment after a detailed familiarization with the features of different recipes. It is quite convenient to work with ready-made building mixtures. They are sold dry, so subsequent dilution with water and mixing will be required. The main advantage is the carefully selected composition. The disadvantage is the relatively high cost. With the right choice of ingredients, you can create a professional-grade solution.
Features of plastering walls with your own hands with cement mortar: video and written instructions
The first layer of wall plaster is called “spray”. It is applied with a liquid solution to fill the smallest pores and cracks as evenly as possible. When setting occurs (but before it dries completely), apply a second, thicker one. A rough surface is created on it. The mixture for the next layer is created from fine sand with the addition of lime. This will increase ductility. The following table shows the technical parameters and quantities of ingredients. Knowing the proportions, you can change the parameters taking into account the characteristics of a particular project.
| Ingredients/Layer Options | Layer of wall plaster | ||
| First | Second | Third | |
| Cement (M-400), kg | 10 | 25 | 5 |
| Sand, kg | 81,2 | 274 | 81,6 |
| Hydrated lime, kg | 5,6 | 21 | 5,6 |
| Water, l | 16,8 | 53 | 15,4 |
| Layer thickness, mm | 3-4 | 10-15 | 1-3 |
The video shows an example of plastering walls with cement mortar using beacons:
How to plaster walls with gypsum plaster: video, important nuances
When using mixtures on this basis, rapid hardening must be taken into account. It should also be noted that it is slightly less resistant to moisture without special additives. In this case, a more dense structure without pores is obtained, which worsens the insulating characteristics. However, the surface is smooth. It should be noted that it is easy to apply to different surfaces.

The accompanying documentation for factory dry mixes indicates:
- Minimum and maximum layer thickness.
- Operating temperature to which individual parameters correspond.
- Consumption per 1 sq.m.
- The amount of solution that is obtained from one package;
- Time:
- maturation and life of the solution in an open container;
- drying a layer of a certain thickness;
- set of nominal strength.
- Density and strength of the finished layer.
- Grain.
- Color and shelf life of plaster in original packaging.
For interior work, you can use homemade plaster with an increased setting time. Create two separate solutions from water and one/three parts of gypsum/lime, respectively. Then they are mixed and used for their intended purpose.
In this video, the master talks about leveling walls with gypsum plaster:
How to make finishing plaster on walls with your own hands: video, basics of quality work
For high-quality plastering of walls, you need to create an ideal, flat surface. At the same time, good adhesion is needed for reliable fixation of the finishing decorative coating. You can solve this problem using the following recipe:
- For 5 kg of gypsum take 15 kg of chalk (powder). The ingredients are mixed.
- Next, a solution (5%) of wood glue is added to the container.
- The required amount of liquid is determined experimentally by stirring the mixture until smooth with the consistency of very thick sour cream.
Important! Without sufficient experience, it is better to work with a small amount of solution, as it sets very quickly.
Lime is added to them if outdoor work is planned. Similar solutions are used for other rooms with high humidity. Plastering brick walls is often preceded by removing the old coating. Such surfaces have a lot of unevenness, so you should count on a relatively large consumption of materials. When creating thick layers, mesh reinforcement is used.
How to plaster a brick wall indoors with your own hands is described in this video:
Concrete walls: smooth, durable surfaces are not always good
When preparing such coatings, the joints between the slabs are carefully sealed. Smooth factory products have low adhesion, so you will have to use a special tool (bush hammers, hammer drill bits) to create special damage. The necessary adhesion is ensured using primers, and gypsum is added to the solution. The listed operations increase the cost of plastering walls. However, it should be noted the high strength of the corresponding building structures and the absence of deformations during operation.
Preparation and high-quality plastering of wooden walls
In this case, removing old plaster is not difficult. To secure the mortar, a lattice structure of slats is used. Such a base does not provide high strength. The entire structure is quickly destroyed. The only inconvenience is a large amount of dust.
Instead of slats, use a chain-link net with a wire thickness of 2.5 mm or more. Pre-clean the surface freed from outer layers. Wooden parts are treated with preparations that protect against rotting.
For your information! Pay attention to the fiberglass mesh. This material provides the necessary reinforcement strength, but is not damaged by corrosion processes, like metal products.


Using this video, you can quickly figure out how to plaster a house with your own hands:
No matter how accurate the theoretical knowledge is, in this case practical experience is necessary. In order not to waste time and money on correcting deficiencies, it is better to practice in small areas in advance. Separate experiments are carried out before plastering the walls with your own hands on new (complex in shape) surfaces.
Do not use instructions for the composition of building mixtures as immutable dogmas. Of course, there are certain general limitations. However, it is impossible to provide for various humidity and temperature conditions and the technical parameters of individual components. The skill of the performer and personal preferences for the consistency of the solution also matter.
Taking into account the creative component, it makes sense to get more data on plastering walls. Use the comments on the article to communicate and share experiences. Ask questions. This mechanism for obtaining information will help eliminate errors.
 (1 ratings, on average: 5,00 out of 5)

