Stretch ceilings and their installation. How to install a stretch fabric ceiling with your own hands. Preparation of tools and materials
- an excellent finishing option for any kitchen, because this lining is practical, durable and aesthetic. And it is natural that everyone who makes a choice in her favor is interested in the question - how to install the ceiling with your own hands? And is it even real? The answer is unequivocal - yes, the stretch fabric can be installed without the help of professionals. The main thing is to know the technology and understand all the stages of work. Next, we invite you to learn about these rules, as well as watch the accompanying photos and videos of installation, which will greatly facilitate your task of transforming the kitchen.
Mounting tools
To install a stretch ceiling in the kitchen, you will need the following tools:
- heat gun;
- building level;
- perforator;
- gas cylinder for a gun;
- ladder;
- self-tapping screws and dowels;
- Screwdriver Set;
- hammer
- fixing locks;
- knife with a set of blades of different formats;
- scapula.

After preparing the necessary tools, proceed to the selection of materials. First, calculate the area and perimeter of the kitchen ceiling, and then go buy baguettes, ceiling canvas and soundproofing materials.
Baguettes are plastic or aluminum strips that together form a fixing profile. If you want the ceiling in the kitchen to please with its functionality for as long as possible, do not save money and choose an aluminum profile - it is stronger and more reliable than plastic.
The ceiling sheet is a fabric or vinyl material that will be stretched over the profile. For the kitchen, vinyl is better, as it is more practical.
Soundproofing materials are mineral wool or slabs that will protect you from noise from the neighboring upper apartment. It should be noted that soundproofing is only a matter of comfort, since even without it, ceilings will successfully cope with their immediate functions.
Preparatory work
The second stage of arranging a stretch ceiling in the kitchen is rough procedures. First you need to free the room from furniture and appliances that cannot withstand the effects of a heat gun. Then it is necessary to clean the ceiling from the old coating and all sorts of contaminants.
If there are tile joints, they should be filled with mounting foam. The entire surface of the ceiling must be treated with a primer - it will protect the surface from fungus and mold. If the ceiling is too deformed, it is better to sheathe it with drywall - this way you get a perfectly even base for the stretch fabric.
At this stage, sound and heat insulation is also installed, if necessary, and air ducts for ventilation and other communications are equipped.
Advice. Decide in advance where and how the ceiling lights will be attached - it is important to install the mortgages for them at the stage of draft procedures, so that in the future there will be no problems with the installation of the lighting fixtures themselves.
Installing a profile
The third stage is the installation of baguettes. You can install them in two ways: to the wall or to the ceiling. We recommend choosing a wall mount, since with a ceiling mount it is impossible to hide the necessary kitchen communications and wiring under the tension structure.

The procedure for installing baguettes includes the following work:
- determine the height of the future ceiling and, using the building level, make markings on the walls around the entire perimeter of the room;
- according to the finished marking, attach the first baguette to the wall surface and drill holes in it for self-tapping screws;
- install the dowels in the prepared holes and fix the bar with self-tapping screws;
- install the second baguette butt to the first and also fix it with self-tapping screws;
- install all subsequent slats in the same way.
Advice. To ensure that the ends of the planks fit as tightly as possible, saw them in advance at a slight angle - approximately 30 degrees. And the ends of the corner baguettes need to be cut at 45 degrees.
Ceiling sheet installation
The fourth stage of work is the direct tension of the canvas. Before starting the procedure, be sure to warm the room with a heat gun to 40 ° C. Further work is performed in this order:
- Unpack and straighten the material. Warm up the cloth with a gun.
Attention! If you are using a fabric rather than a traditional PVC sheet, you cannot heat it!
- Fasten the first base corner using "crocodiles" - special clips covered with soft material that prevents deformation of the canvas. What kind of ceiling angle is the base one is indicated in the instructions for the stretch ceiling. It should also come with clamps.
- Fix the second corner - opposite to the base one.
- Fasten the third and fourth corners.

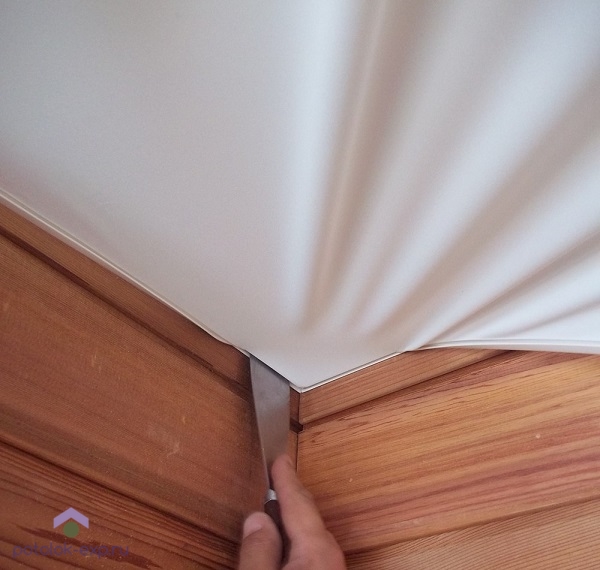
- Gently reheat the canvas again. Remove the clip from the base corner. Insert the spatula into the blade shell through a special groove. Start slowly winding the canvas into the baguette and secure it with locking locks. Insert the canvases into the profile in the same way at all other corners.
- Fasten the canvas in the profile along straight sections using the same locks and spatula.
- Unfold the canvas and check all fasteners.
- Install the fixtures: in the right places where the mortgages are prepared, carefully cut the holes and mount the fixtures.
As you can see, installing stretch ceilings in the kitchen with your own hands is not an easy task, but absolutely doable. Adhere to proven technology and do not neglect the installation rules - this is the only way you can get a quality result that compensates for the effort, money and time spent.
Stretch ceiling installation: video
Do-it-yourself stretch ceiling: photo


It is nowhere easier to learn how stretch ceilings are installed: just once to look at how professional installation teams do it. However, this is not always possible, and the visibility does not always give an exhaustive idea of the solution of a particular issue. Therefore, if you have a desire to stretch such ceilings at home with your own hands and save a lot of money without resorting to the services of third-party specialists, pay attention to our material - especially for you, we reveal the nuances of all stages of work, backing this up with informative photos and videos.

Advantages
- fast installation;
- a small amount of dust and dirt, waste from the materials used;
- wide decorative possibilities.


How much time will it take?
The exact answer to the question depends on the specifics of the room in which the installation is planned, as well as on a number of other factors. However, the approximate duration of the installation, which will serve as a guide for you, can still be displayed without any problems. We reflected it in the form of a compact and quite visual table:
The following factors also affect the duration:
- the number of lighting fixtures planned for mounting on the canvas;
- ceiling height;
- strength of wall structures;
- additional installation of a ceiling cornice;
- the presence of pipes and alcoves;
- the nature of the structure;
- the presence of an extract.


Some facts to know
- if the ceilings in your room have a height of more than 3 meters, then the installation time is increased by 2-3 hours;
- installation of one lamp automatically adds 15-20 minutes to the installation time;
- installation of multi-level stretch ceilings in a medium-sized room takes more than 10 hours.


What will be needed?
- roulette;
- level for precise marking;
- dowel;
- perforator;
- screwdriver for fastening profiles;
- self-tapping screws;
- metal detector for detecting pipes in wall structures;
- heat gun for heating the canvas;
- spatula for fixing the canvas to the profile;
- mounting profile for the entire perimeter of the room;
- pvc mounting rings for fixtures;
- ladder;
- U-shaped baguette.

Three methods of installing stretch ceilings are widely used:
- harpoon- with fixing the profile around the perimeter and then fixing the panel with already welded plastic harpoons to it, this method is considered the most common and reliable, but it has an objective disadvantage - the installation time increases significantly due to the need to fix the harpoons along the edges of the canvas, and in in the case of fabric canvases, it loses its relevance;

- clip-on- the technology of installing fabric stretch ceilings, which is difficult for beginners, with the active use of a clip-on lock, no additional elements are welded to the canvas, and the exceptional convenience of this method lies in the fact that the canvas can be removed from the fasteners and inserted back as many times as desired;

- wedge- professionals install stretch ceilings in this way quite often: the wedge perfectly fixes the canvas in the groove and is closed with a plastic insert. When choosing this method, you will need a U-shaped aluminum baguette with a corresponding groove.

Work order
In order to know exactly how stretch ceiling structures are installed, you should take all the information below seriously, paying attention to the sequence of work. You should also pay attention to some features of the technological process, which objectively affect the overall course of work as a whole.
measurements
An integral part of the installation of stretch ceilings, which allows you to determine the exact amount of material for installation. There are important nuances in this case:

- in a room with right angles, in addition to the length and width, one of the diagonals of the room must also be measured - far from always the declared right angle turns out to be such in practice;
- in a polygonal room, be sure to measure the distance from any corner to all the others;
- in rooms with a large number of corners, it is advisable to break it down into several triangles - in this case, the measurements will be more accurate.
Ceiling surface preparation
The exceptional convenience of stretch ceilings lies in the fact that you don’t have to mess around with the base surface: the film will reliably hide all the flaws of your ceiling base. However, there are a number of specific points that are simply impossible to pass by:
- if peeling of old plaster or whitewash is observed on the ceiling, then it is necessary to remove the obsolete layer in order to avoid the risk of damage to the already stretched canvas;
- do not forget to treat the ceiling base with an antiseptic if the room in which you plan to install stretch ceilings is characterized by high humidity - this is how you protect yourself from the appearance of fungus;
- think over places for future lamps, and also ensure the output of the necessary wiring.


Room preparation
If there is enough furniture in the room that could potentially interfere with installation maneuvers, it makes sense to move it to another room for a while. In the case when the dimensions are not particularly modest, it is enough just to move the furniture away from the walls and cover it with a film.
markup
- determine the lowest point of the ceiling and at a distance of 2 centimeters;
- make a mark - this is how you determine the zero level;
- draw a straight line around the perimeter.


Profile mounting
- make holes in the aluminum profile in increments of 50 centimeters;
- in the case of using a plastic profile, the step is significantly reduced - up to 10 centimeters;
- we apply the profile to the wall and mark the fixation points;
- using a perforator, we make holes in the wall with diameters of not more than 6 millimeters and hammer in the dowels;
- we make direct installation of a fixing profile.


Installing the stretch fabric
The most important stage, which essentially does not differ in any increased complexity. But after it, you will already know exactly how ceilings are installed and why everyone can do it.
- with the help of a heat gun or a building hair dryer, the room warms up to 40 degrees;
- the canvas prepared in accordance with the measurements taken is unfolded and heated by the same gun already up to 60 degrees;
- you need to start from one corner and continue the opposite, after that - move towards the already remaining corners of the room, thus stretching the canvas diagonally;
- depending on the selected installation method, the vinyl material is tucked into the profile with harpoons "welded" to its edges or inserted into the baguette groove and fixed with a wedge / clip;
- the correctness of the final installation - without sagging and dents - depends on whether you can withstand the set temperature in the room when performing the above manipulations;
- installation of stretch ceilings in large rooms requires the installation of additional stiffeners - to make the structure more reliable and prevent collapse;
- after stretching the ceiling, you can proceed with the installation of fixtures, the placement of which over the entire area of \u200b\u200bthe ceiling had to be prepared in advance (read the article about
Stretch ceiling technology was developed in Europe for interior decoration. In fact, a stretch ceiling is a thin membrane-panel stretched over a solid frame-profile. The shape of the installation is determined by the profile, the general appearance depends on the panel itself, which is made in any color, finish and degree of gloss.
Advantages of a stretch ceiling
The installation of a stretch ceiling consists in fixing a lightweight, durable film or fabric made from high quality material in a framing structure that will keep the panel taut. According to the material of the panel, stretch ceilings are fabric or made of polyvinyl chloride (PVC) film.
- Plain weave fabric looks like a canvas and can be made using seamless technology up to 5 meters wide. B O Larger widths will require stitching the canvases or using a special dividing profile. The fabric is made from polyester and treated with a special polyurethane coating. This material is lightweight - one square meter of fabric weighs from 180 to 250 grams. The thickness of such a canvas is 0.35–0.44 mm.
- At PVC films many more color options, it can be matte or reflective, layered and include decorative lighting elements. The thickness of the film membrane reaches 320 mm, the width is less than that of the fabric web and reaches 2.5 meters. Wider panels are welded, forming an almost imperceptible joint. Often a printed image is applied to the material. An illuminated ceiling can give the impression of a starry night, a stained glass window, or a southern sunny sky. Such a panel is modern and high-tech, it will retain a fresh glossy look for many years.
Stretch ceiling is an environmentally friendly design with waterproof, dustproof, anti-allergic properties. The material is non-combustible, easy to clean, allows repainting in the future and the additional installation of sound-absorbing materials.

Mounting profiles for membranes are created in various shapes, including rectangular, oval, curved, three-dimensional. The web tension profile is usually made of rolled aluminum or PVC with a special fastening system that ensures a smooth, wrinkle-free tension of the membrane. A 3D ceiling will require the installation of a specially designed curved frame. The flexibility of mounting such a ceiling gives freedom for the realization of creative abilities, allowing you to create an arbitrary design.
Stretch ceilings are suitable for installation in rooms from living rooms to large commercial centers. Such ceilings have a thermal insulation function, forming a layer of air insulation in the ceiling space, thereby reducing the heating and cooling needs of the room. Modern technology improves indoor air by preventing dust and bacteria from settling on gypsum or concrete ceilings, justifying the demand for such ceilings in medical facilities.
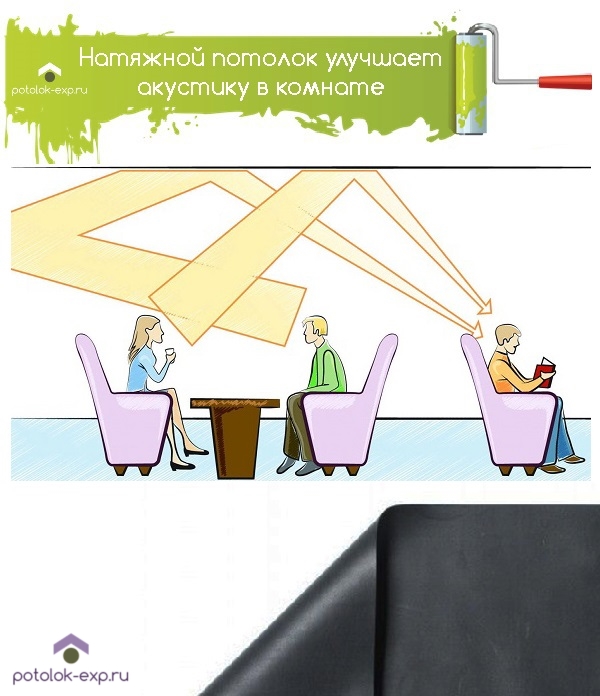
Another advantage of this design is that it improves the acoustics of the room.. The canvas after installation can withstand significant loads without breaking - up to 100 kg per square meter. If the membrane is stretched by an external force (for example, water has accumulated from a broken pipeline), it will completely restore its shape after the external load is removed.
Characteristics of stretch ceilings in comparison with other types of ceilings are shown in the table. Given the short installation time and the lack of specific installation equipment, the stretch ceiling can be installed by hand.
Table. Comparison of stretch ceilings with other types of ceiling structures.
| Characteristic | Stretch ceiling | Paneling | Suspended ceiling | Plasterboard sheathing | Boarding |
|---|---|---|---|---|---|
| moisture resistance | Yes | No | No | No | Yes |
| Installation time (20 sqm) | 2 hours | 4 hours | 15 hours | 20 hours | 5 o'clock |
| Room height loss | 2.5 cm | 1.5 cm | 10 cm | 5 cm | 5 cm |
| Update | Not required | 2–3 years | 3–4 years | 2–3 years | 3–4 years |
| Life time | 10 years | 3 years | 2 years | 15 years | 3–4 years |
| Multi-level capability | Yes | No | No | Yes | No |
Choice of fixing profile for PVC film
The choice of frame for stretching PVC film is determined by its size and thickness. Several different profile types can be used.
Stretch ceiling prices
stretch ceiling


Types of profiles for the frame under the stretch ceiling: 1 - Universal aluminum profile, 2 - Wall-mounted aluminum profile, 3 - Ceiling aluminum profile, 4 - Dividing aluminum profile
The listed profile types use the so-called harpoon fastening of the panel, which requires preliminary welding of the ceiling membrane with a special clamp.
When installing a stretch ceiling yourself, you will have to use other types of mounting profile with a wedge or bead fastening or order welding with a harpoon fastening from a PVC film manufacturer.

When choosing the dimensions of the panel, it should also be taken into account that the PVC film stretches up to 6% during installation. This ensures that the ceiling remains flat and does not sag.
Prices for fabric stretch ceiling
fabric stretch ceiling
Read on for all of this. You may also be interested in material about which ceiling is better -.
Choice of fastening profile for fabric web
The fabric ceiling is produced in the form of a wide-format panel, the weight and elasticity of which differ from the properties of PVC film. Therefore, to install such a ceiling, a different type of frame is needed. Most often, two types of profiles are used for fabric stretch ceilings.
- Plastic AP profile used for linear perimeter sections and provides a very thin air layer between the membrane and the ceiling slab (1 cm). This profile guarantees the stability of the panel in case of drafts and gusts of wind. The profile is attached with the wide side to the ceiling and may have a thin plastic part on the wall side of the profile, which seals the space and prevents the accumulation of dust, moisture and bacteria.
- Plastic AM profile used when extra space is required between the membrane and the ceiling. The height of such a profile is 30 mm. One of the most common uses for this profile is for additional acoustic isolation of a room using sound-absorbing materials.

The fabric web is prepared 10-15 cm larger than the width of the ceiling and fixed in the grooves of the profile without a harpoon method using a special plastic wedge or glazing bead. Excess fabric is carefully trimmed after mounting the entire panel.
Preparing for installation
Installing a stretch ceiling does not require much effort. The only prerequisite for the preparation of premises - electrical wiring must be completed prior to ceiling installation. The location of the fixtures can be marked with a marker on the floor below the corresponding position of the lamp on the ceiling.
Stretch ceiling kit prices
stretch ceiling kit

The ceiling slab, which will be located behind the membrane, does not require additional processing. Finishing work after installation is also not needed, since the ceiling does not require the use of adhesive materials, plaster or painting. If there is furniture in the room, it is better to remove it when installing a PVC ceiling, since the room will heat up to at least 40 degrees, which can adversely affect the condition of some materials.
Installation of a stretch ceiling will require the use of some construction equipment.
- Spatula or spatula for attaching the ceiling panel to the profile - you may need several spatulas of different shapes.
- Mounting profile along the length of the perimeter of the room.
- Clamps according to the number of corners in the room for the initial stretching of the panel.
- Perforator, screwdriver and self-tapping screws for fixing the profile on the wall or ceiling.
- Stepladder providing height access to the ceiling.
- Level, water or laser, for marking the location of the mounting profile.
- Air heater (only for PVC ceiling) - ceiling installers bring a heat gun and a gas bottle to work it. When installing the ceiling yourself, you can use a room heater to heat the room and a hot hair dryer to smooth out wrinkles on the canvas.
- Mounting PVC rings are used to strengthen the ceiling panel around pipes, fixtures and other utilities.

It is recommended to provide ventilation grilles in the stretch ceiling panel, which will provide ventilation in the interceiling space and protect this area from condensation and mold development. The location of the ventilation grill is usually chosen in an inconspicuous corner of the room.
Profile and panel preparation
Before direct installation of the ceiling, it is necessary to prepare a profile for attaching the panel.


Video - Preparing the room before installation
Installation process
As a rule, the entire installation process takes about two hours and leaves no debris. The essence of the installation is to tension and fix the membrane to the attached profile.

Installation of fixtures
Light fixtures, fans and other objects hanging from the ceiling should have an independent suspension mechanism that is attached to the ceiling plate so that it does not rely on the support of the tension web. A stretch ceiling is an interior design element, not a structural component.
To decorate the lamp you will need:
- mounting PVC ring;
- cyanoacrylate glue;
- sharp knife.
After installing the ceiling, it is necessary to make holes for lighting fixtures. If there are several lamps, it is better to make projection markings on the floor directly under the lamps in advance. Apply glue to the mounting ring and stick it to the film in place of the lamp so that the centers of the ring and the lamp coincide.
Prices for ceiling lights
ceiling lamp

Installation of fixtures in a stretch ceiling
After the ring has bonded to the film, carefully cut the film inside the ring. Adjust the height of the lamp so that it is at the level of the ceiling panel and screw in the lamp. Use conventional lamps with a power of not more than 60 W or halogen lamps up to 35 W to avoid strong local heating and deformation of the panel in the luminaire area.
Video - Installation of a stretch ceiling
Stretch ceilings have proven to be viable options for decorating the interior of almost any space. Today, various ceiling design options are presented. The main thing is the right choice of materials and installation technology.

Peculiarities
Do-it-yourself installation of a stretch ceiling makes a special impression. This is where creativity and craftsmanship matter. It is also important to take into account the features of the work, for example, a stretch ceiling is made out before wallpapering, after which they usually proceed to walls and floors.
Stretch ceilings made of PVC film are installed in one of the most common ways - bead or harpoon.


Each installation option has characteristic differences, therefore, certain rules must be observed in the process of work:
bead method
This type of installation of stretch ceilings involves reliable fixation of the building fabric in the profile due to fastening with special elements (glazing beads). Previously, they were made of wood. Subsequently, the technology was modernized, more durable and easy-to-use plastic parts began to be used.
Bead installation is the cheapest option for ceiling design. In addition, the performance of work does not require special training and complex calculations.


The choice of a glazing bead installation method is an opportunity to use economy-class ceiling sheets from Russian and Chinese manufacturers.
When choosing this method of fastening tension webs, remember that such an installation is performed once.
If installation is necessary, all work is carried out again, as well as the purchase of materials. Such inconveniences are due to the fact that the mounted ceiling has edges clamped with a glazing bead, which will no longer be usable after operation.


Harpoon method
Particularly popular is this type of installation of stretch ceilings in the room. In this case, the canvas is simply “cut” to fit the dimensions of the room, taking into account the configuration and area. The fastening of the canvas in the second way is carried out in a profile placed on the walls. Due to this method of installation, you can get a smoother surface that is not prone to deformation. Thus, designers manage to create the desired forms of ceiling covering, for example, two-level, made according to a special sketch.
The method, if necessary, allows you to hide electrical wiring and communications.


This method of installing stretch ceilings is not cheap. However, the canvas can be easily dismantled if you have to change the device, and then mounted back.
Types of ceilings
Practical and moisture-resistant stretch ceilings made of modern materials are distinguished by decorative characteristics. This way of decorating the ceiling fits perfectly into any interior.
A wide range of stretch ceiling models is distinguished by a variety of textures, colors, combined materials. It can be plasterboard ceilings, installations made on multi-level structures. With so much variety, it's easy to get confused.

Varieties of stretch ceilings by materials
PVC film
Among the most common materials for tension threads, fabrics and PVC film are distinguished. It is welded from strips using a special technology, obtaining a canvas for installation.
Before installation, the room is subjected to heat treatment from a heat gun (up to + 60–70 degrees). In the process of decorating the ceiling at the initial stage, the film stretches and begins to sag slightly. At the next stage, the canvas is stretched over the mounted frame. After cooling, the film ceiling will remain stretched and completely smooth. By type of film, you can choose the texture of the surface of the new ceiling.
Color and print also play a big role.


fabric ceiling
Today, special elastic fabrics are used to finish the ceiling, which, in their texture and appearance, are similar to the material for making stockings.
The color of the fabric is obtained through a special technology of coating the surface of the fabric with polymers. Lacquer coating provides moisture resistance. As a result, you can get a safe, weightless, visually pleasing ceiling with a long service life.
It is also believed that such a ceiling "breathes" like any installation on floating, fabric structures. For decoration, fabric canvases of any width are used.


Varieties of stretch ceilings by type of construction
Design options for the ceiling vault are reduced to a common technique: all designs have a similar mounting system. Structural elements are attached to the walls with baguettes. For this, a special profile is used, which is installed around the entire perimeter of the room. The canvas is inserted into this profile.

Simple single-level ceiling design
This is the easiest and most budgetary method of decorating the ceiling. A single-level ceiling is able to serve for a long time without losing its original qualities. It is little affected by temperature changes, it almost does not react to a decrease or increase in humidity. The ceiling does not require complex maintenance, because it is enough to brush off the dust from the surface. The choice of a single-level ceiling is influenced by a wide range of colors of materials.


You can pick up canvases with a simple pattern, but there is also a more original solution, for example, photo printing to order.
Modern materials are distinguished by the fact that they are malleable, they can be easily combined. As a result, you can get an organic combination of materials of different types, for example, to divide a room into functional areas. And all this can be achieved through a simple single-level ceiling.


The complex design of a multi-level ceiling
You can go further and mount the ceiling from several levels. In this case, choose one of two installation methods. The first method involves the use of plasterboard structures. In the second case, you can prefer special profiles on which tension webs are installed. This method is considered to be technologically cleaner and quickly implemented.
For mounting the structure, fabrics of different texture and color are used.. By combining them, you can achieve interesting results. When designing, a wide variety of structural elements are thought out, up to lamps. As a result, you can get the desired shape - with straight or curved lines, with smooth transitions or contrasting inserts. One of the advantages of a multi-level stretch ceiling is the ability to hide any technical defect. The most popular are two-tier structures.


Ceilings with soundproofing effect
Most modern multi-storey buildings do not differ in soundproofing characteristics. Therefore, residents are practicing new ways of soundproofing their homes. This issue must be approached comprehensively, so it is worth isolating not only the floors and walls, but also the ceiling.
For this purpose, a special tension structure with acoustic properties made of polyester fiber is installed (the fabric structure has numerous holes). A kind of membrane, installed under the ceiling, absorbs unwanted sound waves through mineral plates.

Popular ceiling "Starry sky"
The ceiling of this type is a flat glossy surface with special lighting equipment. The “sky” above your head right in your apartment glows due to the connected fiber optic cable. It turns out a very similar effect of stellar twinkling and a sense of reality. To achieve this effect, a light generator is required, which is hidden under the tension surface.
The "star" ceiling is made using two technologies: the installation requires or does not require a puncture of the canvases. Each method has separate merits. The canvas without a puncture looks solid and has a glossy and satin texture. The puncture of the canvas involves the use of fabric materials that weakly transmit light.

Varieties of forms of stretch ceilings
The appearance of the stretch is different in shape. Flat, multi-level, arched, undulating and cone-shaped structures affect the overall design of the room.
Flat surface ceilings
This is one of the most common forms for ceiling decoration, one might say, a classic of ceiling design. A stretch ceiling of this type will easily hide possible defects and irregularities, mask cracks or uneven coloring. A flat surface ceiling is parallel to the floor, but other configurations are possible, such as the plane being at an angle to the floor.


Multi-level designer ceilings
The number of ceiling levels depends on the concept and design idea. There can be many levels, as well as colors or shades. For greater originality of design, you can experiment with textures.
This method of designing ceilings is the most effective for zoning rooms.


arched ceiling
To design a stretch in an arched style, you do not need to follow straight lines with strict transitions. The rectangles here are clearly superfluous. The arched shape is used with the expectation that the design is no longer boring.
For example, the original smooth flow of lines overhead may resemble a domed structure or a vaulted ceiling. For such a solution, the presence of walls is important. You can experiment with the height of the arch and the radius of curvature. Arches will also help to remove communications from the eyes.


Ceiling "waves"
This is another result of a successful experiment with textures and color. "Crests of waves" on the ceiling look very original. Waves can vary from a slight swell to a storm. Thus, the "waves" can have different heights and amplitudes, passing along or along the perimeter of the ceiling. This form looks good on a dark glossy surface.


cone shape
This stretching option is usually chosen for rooms with columns. The ceiling of this type may differ in color, texture, diameter. When looking at the ceiling, it seems that the lines flow smoothly from each other, and the cone "suddenly appears" on the plane. Visually, the cone-shaped ceiling is a separate decorative element.
At the base, the shape of the ceiling covering has a drop-shaped, diamond-shaped, round or oval shape. The ceiling itself may consist of several cones.


Popular ceiling "Road in the dunes"
In continuation of the wave-like theme, it is worth noting the shape of the "dune". The design of the ceiling in this style can be changed in diameter and depth to achieve the desired effect. Competent lighting will add exclusivity. It is good to apply this ceiling design technology on a glossy plane, and lighting to perform at different angles for an unusual reflection of light. What is attractive about this technology is the ability to interleave different elements in the design.


Different types of ceiling designs
Modern stretch ceilings are mainly united by texture. It can be gloss or satin, flat and matte surface. Of the economical options, matte stretch ceilings are used.. At first glance, it seems that this is a plastered ceiling surface. Upon closer inspection, it becomes clear that this is one of the popular types of ceilings, which successfully combines materials with direct flat design and classic interiors. Matte ceilings can have a rough surface, a comfortable design.


Glossy (lacquered) textures have their advantages - such ceilings visually make the room larger.
This design is more suitable for a bathroom or a small bedroom. The glossy surface looks good in combination with a small amount of furniture in the room. When looking at a satin ceiling, it seems that the surface is painted and therefore has a slight sheen and reflective effect. Sleeping under a "silky" ceiling is a pleasure. Such a ceiling can hardly be called "mirror". This is a simple, homely stretch that is often seen in bedrooms.
Caring for the surface of the ceiling is not difficult: just walk with a slightly damp cloth.


Stretch ceiling colors
A variety of shades of ceiling sheets allow you to create the most successful combinations in the design of the installation. The main thing is to choose one of two color directions: warm or cold. A warm palette (solar colors) is preferable to use in apartments with windows to the north. A cold palette in blue-violet or green shades visually expands the space.


The choice of color depends on personal preference, so as not to get a color that will become the main irritant in the design of the room.
More dense color textures are suitable, for example, for a hallway. The bedroom and nursery should remain in more muted, soothing colors. Even a white ceiling would look better here.
It is worth dwelling in more detail on how color affects the perception of space:
- Light gray tones soften sharp transitions, emphasize the refinement of the taste of the owners.
- Bright colors from red and orange to lemon turn the room into a cozy home.
- To visually increase the space, white and black, blue or purple hues are suitable.


Photo printing
Creative ideas in the design of the ceiling allow you to find your own way of decorating the room. For example, effective photo printing can be applied to fabrics or PVC film. This interior design will definitely become exclusive. This is technically possible with a wide format printer. To decorate the kitchen, for example, choose still lifes.
The fashion for using family photos in design came to us relatively recently, but has already managed to attract many people with a non-standard approach to decorating their own homes. There are some nuances here. You can use your favorite pictures or frames from cartoons in the nursery. The main thing is that high-quality paint is used in the manufacture.


Dimensions
Technically, stretch ceilings are a solid polymer sheet, ready for installation. With the influence of temperature, the canvas is securely fixed to the ceiling. In fact, this is a special type of construction, consisting of an elastic web, which is specially stretched along a profile made of aluminum or plastic.
The presence or absence of connecting seams allows you to use the maximum size of the stretch web. It is worth noting that although seams are inevitable and almost invisible, their number should be minimal.. Therefore, when choosing materials, you should pay attention to the width of the canvas (depending on the type of material itself and its manufacturer). Fortunately, the choice today is simply amazing.

It remains to determine the price, properties and width of the material. The size of the stretch in length is practically unlimited. The canvas can have a maximum width of up to 5 m. But standard option - these are canvases up to 2 m wide which can be easily found on sale. It is important to remember that the wider the canvas, the higher the price for the material. The typical width of the canvases is about 1300 mm.
You can target manufacturers who provide the following standard installation options:
- French stretch ceilings - 2.2 m;
- German stretch ceilings - 3 m;
- stretch ceilings of popular brands, for example, ECOfolie - 5 m.


Stretch ceilings from European manufacturers are mainly focused on the local market and have a difference of several centimeters.
Russian consumers are invited to purchase canvases with other parameters. Accordingly, you should not trust sellers offering materials with similar Russian parameters - most likely, they are made in Russia or China. An alternative option is Belgian canvases, produced to the highest quality, which are distinguished by a low price.
Depending on the brand, Chinese stretch ceilings may differ in quality and choice of textures. The width of the canvases in this case will be about 5 m. When choosing high-quality materials, you can install seamless stretch ceilings up to 5 m wide in any configuration and complexity.

Most consumers prefer the more standard PVC stretch ceilings around 3m wide. And here fabric counterparts are predominantly 5 m wide depending on how the scheme was chosen. B
Seamless fabrics are more expensive than PVC. When choosing the appropriate size of stretch ceilings, you should focus on the lighting of the ceiling surface.

Stretch ceilings are traditionally associated with spot lighting. Accordingly, fixtures are selected for a new ceiling with installation at a certain distance.
For example, to enhance the effect, you can install additional lighting for a stretch ceiling in the style of "starry sky".


Materials and tools
In the process of working on the creation of a stretch ceiling, special tools are required. Installing the tension with professional equipment will achieve the desired quality and ensure a long service life.

Basic Toolkit
Installation of stretch ceilings is carried out using a traditional set of equipment: a screwdriver, laser levels, a heat gun, a perforator, fabrics, a set of screwdrivers and others. All work is carried out in stages. Each tool plays a key role.


screwdriver
It is used most often in the process of mounting the tension. Using a screwdriver is convenient and easy due to its low weight and the ability to work autonomously when you need to complete the fastening. Signature tool models can be used all day long with a set of two batteries.
A screwdriver is needed for the following purposes:
- for reliable fixation of a metal or plastic profile, since it acts as a base on which the canvas rests;
- for mounting brackets for lighting fixtures;
- for intermediate work, when you need to install self-tapping screws;
- in order to fix the guide elements.


laser levels
These devices guarantee high-precision mounting. You will also need a hydraulic level, although work with it differs in the degree of accuracy. Quality laser levels are essential for multiple measurements to avoid bias.
Experts advise using high-precision German instruments.


Perforator
This tool is necessary for fastening frame elements to the ceiling during self-installation. The structure is mounted on a stretched surface in several tiers. The denser the wall, the more difficult it is to drill holes for screws to install baguettes.
Here you should pay attention to such points as:
- a drill does not replace a hammer drill (unless in some cases), so a hammer drill is necessary at every stage of the work. The puncher is used for drilling holes in bricks and concrete walls;
- to install a stretch ceiling, it is enough to use a 750 W tool.

heat gun
When installing a stretch ceiling made of PVC canvases, you absolutely cannot do without a heat gun. To install PVC sheets, heating of the material is required to ensure elasticity. The heat gun works from a gas cylinder or the electric network.
Gas guns can also be used for self-assembly of the web, which is appropriate for network loads. The main element of a gas heat gun is a heat generator. The tool has a steel body covered with powder paint resistant to temperatures.


Additional devices
Additional tools include the following tools:
- ladder;
- roulette;
- pendulum saw;
- squares, rulers;
- metal detector;
- hanging holders;
- spatula (for embedded areas);
- knife, hammer;
- set of drills;
- insulating tape;
- pieces of plywood;
- silicone sealant;
- replaceable blades (for a construction knife);
- self-tapping screws;
- dowel.


It is worth noting that separate skills are only required to use the heat gun. Otherwise, construction experience will allow you to complete the entire range of work in a shorter time. Consumables are easy to replace.
Preparatory work
The long service life of stretch ceilings depends on a combination of factors. With proper installation, the ceiling structure should not sag over time, deform, and there should be no condensation. Accordingly, before installation, it is necessary to carry out a number of preparatory work.
At the preparatory stage, the following steps must be taken:
- prepare the room;
- prepare the surface;
- carry out electrical work;
- prepare the walls;
- carry out the markup.


Room preparation
Before installing stretch ceilings, it is important to prepare the room: cover or remove furniture, remove hanging shelves and cabinets, move flower pots and other items to another place that may interfere with installation work.
Bulky furniture can cause damage to the stretch ceiling canvas, this should be remembered. If it cannot be completely removed, then it is better to move it to the center of the room and cover it with a film.
If necessary, dismantle expensive flooring. Parquet can be simply covered with cardboard.

Ceiling treatment
Before installing the tensile structure, the ceiling must be prepared for coating, which includes steps such as:
- it is necessary to clean the surface of the ceiling from plaster, putty and dirt;
- in a new house, it is recommended to glue all the joints between concrete panels, for example, using PVA and a bandage;
- large gaps are treated with building foam, and small ones with sealant;
- if fungus or mold is found on the base ceiling, it should be cleaned;
- a primer is applied to the ceiling surface in two layers.


Electric installation work
Spotlights are usually placed on stretch ceilings, which are purchased in advance. The power of lighting devices for these purposes does not exceed 60 watts. Halogen lamps up to 35W can be used. LED and energy-saving lamps can be any, they do not heat up like incandescent lamps. The locations of such lamps are marked in advance for the wiring of electricity.


Walls
Before installing a stretch ceiling, it is also necessary to prepare the walls: remove the old coating, wallpaper, paint from them, level them with putty if necessary. If it is not planned to align the walls, then you should check for irregularities at the profile attachment point. You can re-glue the wallpaper only after finishing work on the ceiling surface.

markup
Before installing the web of the tension structure on the surface of the ceiling, markings must be carried out. The nature of the markup will depend on the type and shape of the coating (single or multi-level ceiling), on the height of the tension structure and lighting features. To correctly measure the ceiling, you need to put the necessary marks in the corners of the room, for example, with a laser level. The resulting points are connected in such a way that a solid line runs along the entire perimeter (a building cord will help). Between the line and the overlap, a distance is formed that needs to be measured. You also need to measure the distance from the bottom point to see the top level of tension.
Measure the height of the "step" in order to get a mark on the location of the lower level of coverage. The distance from the obtained points to the main line is measured, which is transferred to the remaining corners. When connecting the points, several straight lines are obtained, parallel to the main line (a hole is marked on the line). All remaining tiers are marked in a similar way. Marks for the location of fixtures are transferred from the drawing to the coverage, as well as the location of levels, if it is a multi-level structure.

Stages of installation and installation
Installation of a stretch ceiling in a modern design involves the installation of a PVC ceiling covering with a harpoon mount. The popularity of such structures is simply explained - they are easy to dismantle if necessary.
There are also alternative installations of stretch ceilings. The traditional installation of a stretch ceiling should be considered in detail. During work, the established order and sequence should be followed, then the structure will last as long as possible. All work should be considered in stages.


measurements
Square or rectangular rooms are measured along the length of the walls, and at least one diagonal measurement is needed to “draw” right angles (ideally right angles are, of course, an exception). The complex shape of the room in the form of a polygon is measured along all walls. From each corner, measurement is also taken diagonally. For convenience, the sketch or drawing is divided into several triangles, whose sides are measured. You can stretch the canvas only at points.
The curved ceiling is measured in two ways. In the first case, the curve is a sequence of short chord arcs. In the second, the markup is made with a coordinate grid (with a constant step), points are tied to it, along which the stretch boundary is built according to the scheme.

Checking the draft ceiling
Before installing the stretch ceiling structure, it is not necessary to completely level the floors. It is enough to carry out a series of preparatory work at this stage in order to install the canvas yourself, observing the sequence of actions. A layer of plaster is removed from the surface of the ceiling so that the canvas can be easily attached. Even a small piece of a fallen off finish should not fall on the stretch structure.. In houses with high humidity, it is required to carry out work on enhanced antiseptic treatment.
For example, it can be a primer. It is important to remember that after the main installation there will be no stretch ceiling ventilation, which can lead to the appearance of fungus if installed incorrectly. At the initial stage, marking is necessarily carried out for placing fixtures and chandeliers, wiring and a platform for appliances are prepared. Lighting has its own characteristics.


Profile fixture
When choosing between a profile made of PVC and aluminum, the latter is preferred because it is much stronger. The profile itself is attached to the ceiling, which reduces the distance from its surface to the wall.
When mounting recessed fixtures, the profile is fastened to the surface of the draft ceiling at a distance of 7 cm. Step of fastening the profile to the wall - 20 cm. There should be thickened walls without plaster. On a weak surface, fastening is carried out in increments of up to 8 cm.


If there are partitions (even light structures) in the room, the profile is mounted to the ceiling, taking into account that after cooling the canvas has a load on the wall of about 7 kg per linear meter.
Web installation technology
The process of installing a stretch ceiling is the main stage of work. This can be a traditional, wedge blade installation. When installing the canvas, follow the step-by-step instructions.
The main stages of work at this stage are as follows:
- the straightened canvas is hung out on special clips;
- with a heat gun, the canvas is heated over the entire area, while the air in the room itself is heated to +40 degrees or more. So, stretching and soldering are easier;
- corners are filled with a special spatula or a steel spatula with rounded corners;
- the sides of the canvas are refueled from the middle;
- the canvas is stretched and constantly heated so as not to cool down, especially if its thickness is not more than 0.5 mm;
- a simple way to fasten the blade with a harpoon (rigid edging of the blade): the harpoon is inserted with a spatula into the slot of the profile (baguette) in order to catch on the ledge. With a spatula, you can help move to the next segment of the edging.

Alternative mounting method
There are non-harpoon methods that are used in order to properly install when the canvas is in a straightened state and in a heated form, and then it is pulled in the process. The canvas of the stretch ceiling, of course, should be larger in size. In this form, the canvas is fixed in a baguette, the excess is cut off. On the lower border, the baguette is closed with a special element (decorated).
Cold installation of a stretch ceiling involves stretching the fabric by pressing the glazing bead into the profile structure. There is also a special self-clamping profile.


Lighting
Installation of simple and complex fixtures is carried out at the final stage of all work on the installation of a stretch ceiling. This is not an easy process.
Mortise devices are mounted in the canvas as follows:
- a reinforcing ring is glued onto the prepared site;
- a canvas is cut along the inner edge;
- slots are needed for laying electrical wiring and for connecting to the lamp block;
- lighting devices are inserted into special clamps, after which they are aligned in height;
- a suspended chandelier should be attached to the draft ceiling at the location of the hook (this should be a pre-prepared site).


When purchasing and installing stretch ceiling canvases, it is important to follow the recommendations of specialists. A few more tips will come in handy. So, almost all experts agree that modern manufacturers of stretch ceilings produce structures with canvases on drywall, which can be used in the temperature range from 0 to +50 degrees Celsius.
When installing a stretch ceiling, it must be remembered that there should not be sudden temperature changes in the room. This reduces the quality of the ceiling structure.

Before installation work, you need to measure the temperature - you can work from 10 degrees Celsius and above. So the material will not be deformed, it will not be necessary to make inserts at the joints and in the corners.
There is no need to rush to work at the preparatory stage, because it may be necessary to bypass the pipe. And also, you should not immediately proceed with the installation of the canvas, as soon as the preparatory work has been carried out. In addition, it is important to make sure that the ceiling structure will meet the quality requirements for noise, vapor and waterproofing (all these works can be carried out in a complex).
In addition to the basic materials for finishing the ceiling, you will need to choose ceiling plinths that blend harmoniously with the rest of the finish
Many of us would like to know how professionals install stretch ceilings in order to do the installation of such ceiling structures at home with their own hands. Our article will help you acquire such knowledge.

Briefly about stretch ceilings and their advantages
To understand how stretch ceilings are installed, you first need to figure out what they are and why they are so popular. Stretch ceiling structures consist of a mounting kit and the stretch fabric itself made of a film or fabric made of impregnated synthetic threads. The material is attached to the structure around the perimeter of the room and stretched. Film webs are stretched after preheating using a heat gun, and fastened without heating.
Advantages of stretch ceilings:
- High aesthetic values. A wide range of colors and textures allows you to choose a canvas for your interior. And thanks to photo printing on the panel, it is possible to achieve originality and even greater beauty of the ceiling.
- There is no need to prepare the base ceiling. The installation itself is quick and easy, without a lot of debris. Furniture during installation is not required to be taken out.
- PVC film can withstand large volumes of water, which will save your apartment from being flooded by neighbors.
- Coatings can be mounted in any room (bathroom, kitchen, living room or bedroom), humidity does not matter.
- Ceilings can be installed after finishing the room without fear that your wallpaper or panels will be damaged.
- Cloths do not attract dust, do not support combustion, are harmless to humans.
- The stretch ceiling can be washed and cleaned with detergents.
- The durability of fabrics. The service life of such a ceiling leaves 15-20 years.


Ways of fastening stretch ceilings
When answering the question of how stretch ceilings are installed, it is impossible not to mention the various ways of attaching canvases. There are the following mounting options:
- harpoon;
- clip-on;
- wedge.

The differences in the method of fastening are in how the canvas is fixed in the wall fastener - baguette. Moreover, a certain type of fastener is suitable for certain types of canvases.
Harpoon mount
Using a harpoon mount, stretch ceilings made of pvc film are installed. This is due to the fact that only on PVC films can a small thickening around the perimeter, called a harpoon, be made at the factory. For installation by this method you will need:
- aluminum or plastic profiles for wall mounting with a groove for a harpoon (baguettes);
- pvc canvas with a harpoon at the edges.
Fastening takes place as follows: first, baguettes are attached to the walls along the perimeter of the room at the desired height. Then a harpoon on a film is inserted into the groove of the baguettes and snapped into place. It turns out a reliable fixation of the canvas. By the way, the baguette can be mounted on drywall constructions.

Clip fasteners
Do you want to know how fabric stretch ceilings are installed? Yes, using a clip connection. The difference between a clip-on baguette and a harpoon fastener is that it is a single element without additional clamps. Plastic for such a baguette is very durable. It is able to withstand heavy loads. The method is named in the same way as the well-known brand of Clipso canvases, for which the baguette was invented.
The canvas is inserted into the fasteners and securely fixed thanks to the clip lock. Such a fastening scheme has one indisputable advantage - the canvas can be inserted into the fastener and pulled out as many times as necessary. This is especially useful for fabrics. After all, they are mounted without heating, which requires a good stretch and straightening of the panel.

wedge fastener
To understand how stretch ceilings are installed using a wedge connection, take a look at the photo below. For fasteners we need:
- U-shaped baguette made of aluminum;
- wedge;
- wooden or plastic fixing bar.
The essence of the method is as follows: the canvas is inserted into the groove of the baguette and fixed there with a wedge. Then the excess web is cut off, and the groove with the wedge and the baguette are closed with a plastic insert. This insert performs additional fixing functions. This installation method is the easiest and most affordable for self-execution.

Taking measurements
Before stretch ceilings are installed, measurements of the room are performed in order to determine the required dimensions of the canvas. To properly perform this procedure, you must adhere to the following recommendations:
- If your room is rectangular in plan, then you need to measure not only its length and width, but also any of the diagonals of the room. This is necessary for the reason that the angles in the room are not always equal to 90 degrees.
- If the room has a complex polygonal shape, then in addition to measuring the lengths of the walls, the distances from any corner to all other corners in the room are measured.
- Before installing curved stretch ceilings, they build a diagram of the room on paper. There are two options for drawing a diagram. 1st: the ceiling is broken by a conditional grid with the same cells. Then, on these squares, a curved ceiling line is drawn on paper on a scale. 2nd: conditional chords are built to the curved ceiling line. Then all sides of the resulting triangles are measured.

Taking ceiling measurements
Tip: if the room has a very complex shape, it is better to measure distances not from one corner, but from several. Thus, the diagram will turn out to be a room divided into many triangles with measured sides.
Surface preparation
Although we wrote a lot about the fact that before installing stretch ceilings, preparation of the base ceiling is not required, there is still something to be done:
- Remove loose plaster from the surface of the old ceiling so that it does not damage the new stretch ceiling after falling.
- If stretch ceilings are installed in rooms with high humidity, it is better to treat the base ceiling with an antiseptic solution. This will prevent the formation of fungi.
- Take care in advance of the new wiring for the lamps, as well as places for their attachment.

How to install stretch ceilings: sequence
After we figured out the fasteners, it remains to find out how stretch ceilings are installed, or rather the exact sequence of actions. As you already understood, there is some difference between the installation of fabric sheets and PVC film sheets. The most difficult installation process occurs with pvc films, since their preheating is required.

To install the ceiling, you will need the following tools:
- heat gun;
- gas cylinder;
- drill;
- screwdriver;
- laser level;
- roulette;
- putty knife;
- square.

Stretch ceilings are installed in the following sequence:
- First you need to decide on the place of attachment of the baguette. To do this, it is necessary to indent from the base ceiling at a certain distance (for fabric sheets 1.5 cm, for PVC film sheets 4-5 cm). We work with a laser level.
- Then, along the marked lines, baguettes should be fixed for the fastening method we have chosen. To do this, we drill holes along the line on the wall and hammer dowels into them. We fasten the baguettes with self-tapping screws. We install fasteners every 20 cm.
- Do not forget to lay the wiring and make the attachment points for lighting sources.
- Next, we lay out the canvas in the center of the room and, using special clamps, fasten one of its edges in any corner of the room.

- In the same way we hang other corners of the canvas.
- Warm up the heat gun. The canvas should warm up to 40 degrees.
- After that, they begin to insert the canvas into the baguettes. Stretch ceilings are installed from the middle of the baguettes, moving towards the corners.
- When the canvas is completely fixed in the baguette, ceiling plinths are mounted, which cover the installation site of the baguette.

How to install the canvas
Interesting information: a canvas with a harpoon mount in a rectangular room can be installed in 2 hours. It may take 6 hours to install a fabric web in a large room. The installation time of a two-level ceiling may be longer, because the amount of work is significant.

Cutting the canvas
Rules for fastening baguettes
How to install stretch ceilings, we have already figured out. However, there are some nuances that will be useful to you in the process. In addition, our tips will help you during the installation of profiles:
- When choosing between aluminum and plastic profiles, give preference to a more durable aluminum baguette.
- If you want to get the minimum distance from the base to the stretch ceiling, you can mount the baguette to the ceiling. Otherwise, the mounting profile is mounted on the walls.
- If you want to install built-in lighting fixtures, then at least 7 cm should be retreated from the base ceiling.
- The largest allowable pitch of self-tapping screws when attaching a baguette to solid walls without plaster is 20 cm. If the walls are thin and have a thick layer of plaster on them, the pitch is reduced to 80 mm.
- Since the cooled pvc sheet gives a load on the walls of 70 kg / r.m., you should not fasten baguettes to thin partitions. In this case, you should choose a ceiling mount.


Rules for mounting canvases
Usually, before stretch ceilings are installed using a heat gun, flowers and animals are taken out of the room. This is due to the fact that the air warms up to 40 degrees. In addition, during installation, you should adhere to the following rules:
- For mounting canvases with harpoon fastening, it is convenient to use a special spatula or spatula with rounded corners.
- During the installation of PVC, the canvas must be constantly heated with a heat gun. Otherwise, it will quickly cool down and lose its elasticity.
- Stretch the PVC fabric from the middle of the baguettes to the corners of the room.
- When installing fabric sheets, a heat gun is not needed.
- Fabric canvases are inserted into the baguette from the corners to the center.

Rules for installing luminaires in stretch ceilings
How stretch ceilings are installed, you already understood. But what ceiling will do without lamps? The process of installing lighting fixtures in a stretch ceiling is as follows:
- On the base ceiling, places for fixing fixtures are pre-made.
- After that, reinforcing rings are glued to the film in the area of the places where the fixtures are attached.
- The canvas is neatly trimmed along the inside of the rings.
- The wires are taken out into the resulting hole and connected to the lamp.
- Then the lamp is fixed on the site and adjusted.
- Heavy lighting fixtures are mounted on special hooks in the base ceiling.

For high-quality installation, knowing how to install stretch ceilings is not enough, because one inaccurate detail can ruin the whole thing. A certain experience and skill in handling a gun is needed, which give knowledge of many nuances that are useful in this matter. However, with our tips and helpful tips, you can act like an experienced craftsman. So, before installing stretch ceilings, take into account the following tips:
- The cylinder for the gas gun used in the process of installing a stretch PVC ceiling must be with an unexpired expiration date.
- Make sure that the heat gun does not blow into the place where the cylinder is.
- Do not fill the cylinder more than 80%.
- Give preference to translucent composite cylinders. It is easy to see the gas level in them.


An interesting video on how stretch ceilings are installed:
T Now you know how stretch ceilings are installed. However, if there is some self-doubt, choose fabric canvases for installation. They are denser due to the texture of the fabric, so they are more difficult to damage for inexperienced craftsmen. In addition, the installation of fabric sheets is carried out without the use of a heat gun.
 (1 ratings, on average: 5,00 out of 5)

