Stone tiles for the foundation of a house. Options for finishing the basement of a house: plastering and painting, tiling, natural and artificial stone, siding. Finishing the foundation of a house with plastic panels
The building's foundation support structures are mostly located underground and hidden from view. The base is, in general, a part of a building or its foundation protruding above the zero level. This is the area we see, literally the foundation on which the house stands. The basement area is visible in most buildings, even if the decoration disguises it as the main color and texture of the building.
The base is finished so that its appearance is in harmony with the house, without breaking out of the overall style. An untreated surface looks unfinished and worsens the impression of the object as a whole.
However, creating decorativeness is not the only function of finishing. The task of covering the basement section is similar to the task of the base itself - supporting wall structures, receiving the load, distributing it and then transferring it to the base. The cladding, like the base itself, is subject to constant pressure. It protects the basement level from the effects of negative factors.
Characteristics of the base and material for its finishing
If the height of the plinth is less than 0.4 m, it will be difficult to install a waterproofing layer that can protect the wall from moisture. The base can be flush with the surface, protruding or recessed. The most common types of protruding and level basement areas are found, although the above-ground sinking parts of the foundation last longer because they are less susceptible to precipitation. Destructive factors that constantly act on the base are moisture, temperature differences, and the deforming forces of the off-season.
Materials from which the plinth can be made are reinforced concrete, natural stone, brick. The beauty of natural stone allows it not to be covered with anything. But brick and concrete surfaces require external finishing. Facing materials can be: plastic, marble chips, ceramic tiles, siding, granite.
Why do you need to finish the base?
When choosing finishing materials, you need to realize that decorativeness is important, but secondary, in relation to the durability of the cladding and its functional characteristics. The protective functions of facade materials must be taken into account first. For example, in houses where there is no underground, the finishing of the base becomes a full-fledged support for wall structures, taking on the pressure of the soil masses. Therefore, the choice of quality materials is not only a matter of beauty, but also of safety.
If there is an underground room, cladding is a chance to improve the thermal insulation properties of the basement area. The finishing, coupled with insulators, significantly improves heat retention in the room, because it does not escape outside through the cold base.
It is also necessary to pay attention to the performance characteristics of finishing materials because wear resistance, resistance to mechanical damage, thermal conductivity, and low hygroscopicity will be important during use. The foundation of the house must not be allowed to be vulnerable to water, allow moisture to pass through, or heat to escape.
However, not all materials have the necessary parameters. To solve this problem, foam is used, combining it with finishing. The surface is insulated with foam boards, and then other coverings are installed. Foam plastic complements the properties of the cladding.
What materials can be used to finish the plinth?
Moisture transfer is the main thing you want to avoid when using a front finish. So that water vapor, passing through the wall into its outer layers and encountering an insurmountable obstacle - the decoration of the house, does not disturb your peace, the materials used must be of high quality. This will help avoid moisture condensation, smudges, freezing, and peeling of different layers of finish. The cladding must protect against the penetration of water from the outside and ensure the escape of vapors from the premises. It is important that its adhesion to the surface of the base is reliable. The following materials meet these requirements:
- siding;
- special coatings;
- brick;
- a natural stone;
- other materials (PVC, sand, polymers, decorative plaster).
Finishing the plinth with your own hands must necessarily take into account the materials that have already been used at the base of the structure. For example, paint suitable for protecting brick products is unacceptable for concrete. By the way, modern paints do not peel off from water because they have additives that allow them to last a long time.
Siding finishing of the base
When using siding, the exterior finish will be reliable and durable; it does not interfere with the normal passage of vapors. The main thing is to choose siding, the purpose of which is to cover the base. The installation technology of this material differs significantly from others. You just need to install the finishing panels, with the expectation that their surface will not have to be painted. They are already smooth, beautiful and not subject to corrosion. The temperature range for siding application is from minus 50 to +60 degrees. Private and residential construction in most regions of Russia fits into this period.

Types of siding for finishing the basement area:
- lining, block house;
- metal siding;
- vinyl siding.
Lining - This is a thin board for covering rooms. Block house - lining in the form of a rounded segment. The materials are used for external or internal work. Despite the popularity of wood finishing, the use of wood has many disadvantages, including:
- poor tolerance to temperature changes and high humidity;
- susceptibility to combustion;
- susceptibility to rotting and insect attack;
- the need for frequent care (at least once a year).
A single layer created by the lining parts provides high-quality sound insulation. Environmental friendliness, ease of finishing with boards and accessibility contribute to the popularity of wood.
Metal sandwich panels — fire resistant, not attractive to rodents and insects, and little susceptible to fading in light. The considerable price and the need to use protective special coatings to avoid corrosion can be attributed to the negative properties of metal sandwich panels. Loading/unloading the material will also be expensive, since the panels are heavy. Therefore, we advise you to use .

Vinyl siding - used for cladding the base at least as often as wood. Ease of installation, reasonable price, and lightness of the panels contribute to the use of this material in private construction. Up to 80 percent of the weight of the siding panel is the weight of polyvinyl chloride. And it's light. But, high flammability implies compliance with safety precautions, monitoring the condition of the surface when carrying out welding and similar work on the casing. This type of siding is subject to seasonal changes. Panels tend to shrink or increase in size, depending on the ambient temperature.

Special coatings for finishing the plinth
Special coatings, we are talking primarily about facade paints with properties of high impermeability to vapors, special plaster compositions. Application of these mixtures is convenient and easy, but the service life is short. But they satisfy the needs of protection well and are suitable for sinking bases. The best solution in this category is silicone plaster. The material performed well as a coating for the base and its parts. Masking of defective surfaces, high “breathing” abilities, as well as the ability of plaster to provide moisture protection during rapid temperature changes are valued by builders. The plaster mass is leveled over a metal mesh, leveling and reinforcing the surface. The top plaster can be painted.
Brick finish
Brick facing is a classic of the genre. The main disadvantage of this method is its high cost, compared to siding and special coatings. Another disadvantage is a significant increase in the load on the base of supporting structures. And the advantages include the strength of brick and its durability. In addition to bricks, we also include clinker tiles here. External similarity with less weight sometimes plays a big role in the choice.

Natural stone finishing
Natural stone has the highest strength and beautiful appearance. The stone finishing of the base is presentable, solid and status-worthy. The stone is laid if the base is monolithic or made of concrete slabs. Small cobblestones, flagstone, granite or marble - the type of stones is chosen by the owner. Installing natural stone is complex, expensive and time-consuming, requiring specific skills. If you don’t want to bother with individual stones, you can purchase a lightweight stone panel for the plinth.

Natural stone for finishing the base - applied to cement
Video - finishing the base with natural stone
Other materials for finishing the basement area
Other materials. We are talking about panels or tiles, the main material of which is sand and polymers; special PVC panels, mosaic plaster, marble chips. In principle, there are no restrictions on finishing. If only the material would give confidence that it will not collapse from moisture and cold.
When laying non-natural stone, as well as tiles on a monolithic, concrete or brick plinth surface, installation is carried out using adhesive/doweling. Faux flagstone is somewhat more difficult to install than siding. You will need to hang steel guides and stretch a wire network with certain cells capable of holding the stone. Only then do the installation itself take place.
Facing materials are made from mixtures: asbestos + cement, stone chips + cement, polystyrene foam mixtures. Unnatural tiles are made by mixing ground stone with cement.
How to perform the blind area of the basement area
The blind area also decorates the building, giving it solidity. A platform is made around the perimeter, which is covered with crushed stone or gravel so that water does not splash onto the walls. The width of the blind area is determined, firstly, by the size of the overhangs from the eaves (on the roof), and secondly, by the composition of the soil of the area. If the soil is not characterized by subsidence, the blind area is expanded by 10-15 cm. The minimum width of this perimeter area is 0.6 m.
Allows you to establish waterproofing of the base. The mesh structure is concreted, then the concrete is finished off.
General rules for finishing the base
- When choosing color combinations for decorating a house, it is worth knowing that the darker lower part of the house, which has a shade similar to the color of the roof, is better perceived.
- Typically, the design uses either the principle of a similar color palette or a combination of contrasts.
- In the case where there are walls made of timber, logs, or just a fairly flat and smooth surface above the base area, it is appropriate to cover the base with stone elements that can visually give solidity to the structure.
- An example of do-it-yourself plinth cladding: we do the design of the plinth with our own hands step by step - “plate” stone
We decide on the amount of material, color and thickness:
- We calculate the surface area for cladding. When buying flat flagstone, you need to take 5-10% more so that there is enough for adjustment.
- The color of the stone should be in harmony with the appearance of the house. The dark roof is natural sandstone with a red tint, the light roof is yellowish in color. The cheapest is gray stone. Shades of red, green or blue will be more expensive.
- A thin stone - a centimeter and a half - is the most affordable of all.
Now, the procedure for working with natural stone. Given: a flat base, for the finishing of which sandstone 15 mm thick is suitable, which can be laid on cement mortar.
- It is necessary to prepare the surface where you plan to lay the stone: remove the cement deposits in the seams, and prime the wall with concrete contact, applying it with a roller or brush.
- Selection of pieces of flagstone with a flat side that will be attached to cement. Applying cement to the wall. Instead of cement, you can use tile adhesive.
- Glue the stone tightly to the base and the adjacent stone. We tap so that the air comes out from under the flagstone.
- We select the next piece, chopping off excess if necessary. We glue it, trying to get into the same level as the previous one.
- Stone cladding is reminiscent of assembling a mosaic. On the approach to horizontal or vertical lines, we saw off the stones that are not included in the horizon.
- We fill the holes between the large stones with small parts, fill and clean the seams before the mortar dries.
- We coat the finished, dried surface with varnish and protect it with a canopy over the base so that rain does not destroy the material.
The basement is one of the most important parts of the building. This is a kind of support that is subject to constant negative influence of the environment. Finishing the basement of a private house not only gives it an aesthetic appearance, but also protects it from adverse factors. Therefore, finishing materials must be moisture-resistant, frost-resistant, reliable and durable.
Most of the building's foundation is below ground level and hidden from view. The protruding part above ground level is called the plinth. According to standards, the height of the plinth from the ground must be at least 20 cm. It is usually made of brick, stone or concrete slabs.

The construction of a stone plinth is the most practical solution, since the structure does not require additional finishing. However, it is worth considering that this is the most expensive method. Laying a brick plinth is more affordable. This material is environmentally friendly, has low and good strength characteristics.
Cladding the basement of a house is not only aesthetic. This is reliable protection of the building from external influences. Finishing materials that will be used to cover the base must have a high level of strength. Together with the plinth, its cladding will absorb the load created by the wall structures of the building and distribute it evenly over the foundation of the building. It must withstand pressure and protect the base from external factors, such as precipitation, sunlight, humidity, and temperature fluctuations.
The finishing material protects the foundation of the building from damage by mold, mildew and various types of insects. The cladding of the base is carried out to insulate the building. This is also necessary to protect the foundation from severe frosts, under the influence of which its strength decreases and the process of erosion develops.

If you leave the surface of the base without covering, this will contribute to its slow destruction as a result of constant exposure to dry or liquid dirt containing aggressive chemicals and minerals.
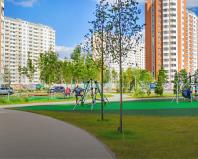
Various options for finishing the basement of a private house, photos clearly confirm this, transform the building into a masterpiece of design art, making its appearance complete and unique.
Types of basement structures
There are main variations of designs that are used for house projects with a basement:
- protruding beyond the surface of the walls;
- flush with the building;
- sinking, relative to the wall.

Most often, when building a private house, a photo of the base of the house clearly confirms this; the first two options are used. A protruding base is recommended for use when a house is being built with thin external walls, a warm underground is used, or the building has a basement. In these cases, this type of base will provide the building with additional thermal insulation.
If the basement part is made flush with the building, when thin walls are used for its construction, dampness and condensation will inevitably occur in the interior. Here the most problematic thing is to install thermal insulation and finish.
Important! When choosing these types of plinth, you should take care in advance about the arrangement of ebb tides.
The sunken base is less damaged by precipitation. Here you can easily hide the waterproofing, install insulation and cover it with the necessary materials, which contributes to a longer service life. This type of plinth is recommended for buildings without a basement. Finishing materials for the plinth will absorb soil pressure, performing a supporting function, thereby maintaining the safety of the entire structure.

The procedure for finishing the basement of a house
All work on the cladding of the basement structure is carried out at the final stage of production - the exterior finishing of the building. It is better to carry out work in warm, dry weather. Sheathing the base consists of the following actions, which are performed in a certain sequence:
- A trench 20 cm deep and 50 cm wide is dug around the entire perimeter of the building.
- Fill the space with gravel to provide drainage. Additionally, the trench can be strengthened using reinforcing mesh.
- The surface of the wall, 50-70 cm high for the future plinth, is cleaned of dirt and processed. If necessary, all irregularities are eliminated.
- Arrangement of thermal insulation.
- Decorative cladding of the base.
The choice of facing material and the method of its installation depends on the design of the base and the method of casting it.

Arrangement of ebb tides for the foundation plinth
To protect the plinth from the negative effects of precipitation, you should install a flashing, which is fixed above the protruding part of the plinth, and is a kind of delimiter between the base of the building and the wall structure. One part is in contact with the wall at a certain angle, and the other hangs over the foundation, covering it, collecting rain and melt water.
The flashings for the plinth are strips measuring 50-400 mm. The color, size and shape of the ebb should be selected depending on the finishing material of the foundation. You can make a water-repellent structure yourself using waterproof materials, or you can buy ready-made flashings for the foundation plinth at any hardware store.
Today the industry produces several types of ebb tides:
- plastic;
- metal;
- concrete;
- clinker

The type of tide is selected based on the finishing material for the facade of the building. Plastic moldings are most successfully combined with vinyl siding, which is used for cladding the building. Thanks to a wide range of colors, you can choose the most suitable option. The use of concrete or clinker flashings for the plinth is preferable for buildings that are lined with natural stone or brick. Metal canopies can be used with any type of finishing material.
Types of tides
The most budget option is to use plastic moldings made of polyvinyl chloride. The cost of the product is 50 rubles. for 1 p.m. Despite the high level of water resistance, tides show increased sensitivity to physical impact, especially in winter, when they can crack and split from the slightest blow.
Helpful advice! Due to the fact that plastic castings have increased fragility, preference should be given to more durable and expensive products.
The most durable and durable are ebbs made of metal: steel, copper or aluminum. Installation of the products is convenient and simple, and involves attaching metal strips to the walls of the building using self-tapping screws and dowels. When choosing this material from a wide range of types, special attention should be paid to the aesthetic appearance of the product so that it completes the overall design of the building. The price of the product starts from 100 rubles/rm.

Helpful advice! When installing base flashings, the planks should overlap each other by at least 30 mm. To avoid damage to the protective layer of the product, which will lead to corrosion and destruction of the material, do not cut the strips.
Metal castings are made from high-quality and frost-resistant cement M450 with the addition of river sand, granite crushed stone and plasticizers. The solution is poured into silicone molds of various geometric parameters. The result is an even and smooth product. These tides are attached to a special solution.
Flashings for the foundation plinth, the price of which is the highest and starts from 200 rubles. for 1 linear meter - these are products made from clinker tiles. This material has high strength properties, reliably protects the building from the negative influence of the environment and successfully emphasizes the design of the cladding.

Low tide installation technology
After selecting the low tide, you can begin its installation. Here it is necessary to take into account not only the material from which the ebbs are made, but also the design features of the building. So, for a wooden house, elements that will be fastened with self-tapping screws or other fasteners are suitable. Since wood has low adhesion and is susceptible to dampness, the use of adhesives is not advisable.
For buildings made of brick or facing stone, you can use flashings that will be fixed using polymer or cement-adhesive mortars.
Helpful advice! When using concrete or ceramic sills, their installation should be carried out simultaneously with the cladding of the base and walls.
If it is necessary to install flashings on a building already finished with facing material, then it is better to use metal or vinyl elements.

Before installing the drip sills, it is necessary to seal the joints between the walls and the plinth. All cracks and crevices should be treated with a water-repellent mixture or sealed with sealant. Next, you need to use a level to mark the wall. The highest point of the base is determined and a horizontal line is drawn along which the upper part of the ebb will be mounted. The part of the foundation that protrudes must be compared with a horizontal plane using a cement screed. The lower part of the ebb will rest on it.
Important! The ebb plane relative to the wall should be located with a slope of 10-15%.
Installation of metal and plastic ebbs
Installation of drip linings should begin from the corner, using special corner elements, which can be purchased together with planks of the same width and color. Next, you need to finish all the protruding parts of the building structure: columns, pilasters and others.
Related article:
What materials are used for low tides. Which of them is better to choose and in what case. Installation of ebb tides.

In the upper part of the ebb, holes are drilled using a drill at a distance of 40-50 cm from each other. Next, the element is applied to the previously marked line on the wall of the house and is attached to it with dowels and self-tapping screws. The lower part of the ebb is attached to the concrete base of the plinth with dowel nails in increments of 40-50 cm. The joint between the ebb and the wall should be sealed with putty or silicone compound.

Important! During installation of the ebb, it should be taken into account that it should protrude 2-3 cm beyond the edge of the base, which will provide better protection during precipitation.
After covering all the corners and protruding elements, you should begin installing the drip linings in straight sections. You need to start from one of the corners. Each subsequent element should be overlapped with the previous one by at least 3 cm. All joints should be treated with sealant to prevent moisture from entering.
Installation of concrete and clinker slabs
Flashings made of clinker and concrete should be installed at the stage of facing the facade of the building, since adjusting them to size during the installation process is a labor-intensive process.
These types of ebb tides are better combined with facing materials such as brick, clinker tiles, natural or. To attach them, you should use a special adhesive composition for ceramics and stone, which is intended for outdoor use. It is purchased in the form of a dry mixture created on a cement or polymer base, and with the help of water it is brought to the state of thick sour cream. The solution can be made independently using cement and construction sand in a ratio of 1:3 or 1:4.

Installation of concrete and clinker ebbs also starts from the corner. To avoid complex processing of concrete castings, they should be pre-positioned in such a way as to minimize their cutting. This can be achieved by using the correct size of the seam between the elements. You can adjust the dimensions of clinker products by using a tile cutter or grinder with a diamond cutting wheel.
An adhesive mixture is applied to the back side of each element. The ebb tide is attached strictly along the previously outlined line. After waiting some time for the solution to set, putty or silicone sealant is applied to the joints between the casting elements. After the glue has completely set, you can cladding the walls of the building.
Waterproofing the foundation plinth
The basement of the building is constantly in difficult conditions. It takes a significant load from the above-ground part of the building and comes into contact with the external environment, being exposed to moisture. In order to protect an important part of the house from destruction, it is necessary to take a number of measures, one of which is the arrangement of waterproofing of the foundation base.

Waterproofing can be horizontal or vertical. Usually a set of works is performed that includes both methods. Horizontal waterproofing is carried out before the construction of walls and is aimed at protecting them from moisture. However, in order to ensure a complete protective set of measures, it is also necessary to carry out waterproofing between the foundation and the base.
Vertical waterproof protection is aimed at preventing the negative effects of surface and ground water on brick or concrete. Such insulation can be external or internal. The best effect is provided by double-sided moisture protection.
Today, pile foundations are predominantly used in the construction of buildings. Here the base plays not only a decorative role, but also protects the house from heat loss. Despite the fact that this element is not load-bearing and does not directly affect the durability of the structure, waterproofing the base is mandatory.
Materials for waterproofing the basement from the outside
Coating, roll and injection compounds with penetrating action are widely used as materials used for waterproofing the foundation plinth.

To protect the foundation from the effects of groundwater, roll waterproofing is often used, which can be fused or glued. Fused insulation consists of a base in the form of fiberglass, polyester or fiberglass and applied mastic. The adhesive waterproofing is laid on the surface of the foundation using bitumen mastic, which is first applied to the rolled material and to the monolith, then the element is glued, pressed and smoothed.
The main advantage of rolled material for the plinth slab is its low cost and high installation speed. However, this type of waterproofing does not resist mechanical stress well and has a short service life. It cannot be used in places where communications pass or connect. Before installation, the surface should be cleaned of dust and dirt and dried thoroughly.
Bitumen, polymer, bitumen-polymer mastics, astringent plasters and cement coatings are used as coating waterproofing materials, which are applied to the surface of the foundation using a brush or roller. This type of insulation is used for water pressure up to 2.6 kgf/cm².

Helpful advice! To ensure increased strength of waterproofing after the first layer of mastic, it is recommended to reinforce the surface with fiberglass and apply subsequent layers on top of it.
The material is low cost and can be applied to a surface of any configuration. However, it is not durable and requires preparatory work and additional protection from mechanical stress.
The use of injection and penetrating compounds is the latest technology for waterproofing structures. The penetrating material is applied to the wet surface of the concrete base. Reacting with water, the composition turns into crystals that penetrate the pores of concrete, making it waterproof. The penetration depth reaches 150-250 mm.
Injection waterproofing is carried out using a liquid solution, which is injected under pressure into the cracks, pores and seams of the structure. This method can be used for waterproofing buildings made of rubble and brick. Using this waterproofing is a very labor-intensive process that requires cleaning the structure down to concrete or brick, and the complexity of the work itself requires the involvement of an experienced craftsman. In addition, such insulation is the most expensive.

Features of waterproofing a brick plinth
Ceramic brick is most often used to build a basement. Its waterproofing can be done using various methods.
Solid red brick can be used to build walls. This building material has already undergone factory processing, where a layer of waterproofing was previously applied to it. Therefore, when using this brick for the construction of a building, there is no need to install external waterproofing. Despite the fact that the cost of this material is relatively high, these costs are offset by the fact that after laying the brick, no other work is required.
The next way to waterproof a brick plinth is to use bitumen lubricant, which is applied in several layers, cold or hot.

Spraying polyurethane foam is rarely used to insulate the base. This is due to the fact that to carry out this type of thermal protection it is necessary to use special equipment, certain chemical components and the involvement of highly qualified workers. The essence of the method is that polyurethane foam is sprayed onto any surface. Expanding, it penetrates into all voids and reliably adheres to the base, forming a dense coating. This material can be used not only for spraying, but also for filling individual voids and areas.
Do-it-yourself technology for insulating the foundation plinth from the outside with penoplex
At the preparatory stage, it is necessary to prepare the foundation surface by cleaning it from old insulation, dirt and dust. Next, you should install a layer of waterproofing to protect the structure from rain, groundwater and snow water. Any type of waterproofing is suitable for penoplex, with the exception of compositions with organic components.
Work begins with insulation of the underground part of the foundation. For this purpose, PPS boards are attached using specialized contact adhesive, which is applied around the perimeter of the product and in the center. The second level should be laid with the joints between the slabs staggered in relation to the lower level. After installation, all cracks are filled with polyurethane foam.

The base insulation layer with penoplex requires additional protection from mechanical damage. To do this, an alkali-resistant reinforcing mesh is fixed to the slabs, which is subsequently plastered with a solution containing hydrophobic additives. Also, as protection, you can use wooden pinches, which are attached to the slabs using dowel nails. Wood must first be subjected to antiseptic, anti-foam and hydrophobic treatment.
The final stage is finishing the base with facing materials.
Cladding the basement of a house: which material is better to choose
Do-it-yourself finishing of the base is done using various materials that reliably protect and decorate its surface. This process must be performed before wall cladding in order to be able to hide the ebb under the finishing material for the walls.

The material for cladding the plinth must have the following performance characteristics:
- have low thermal conductivity to avoid heat loss from the building;
- provide reliable and strong adhesion to the base;
- have a high level of strength and wear resistance to mechanical damage;
- have low hygroscopicity and vapor permeability to avoid moisture penetration into the foundation and wall panels.
Today, when the question is raised about how to decorate the basement of a house, the following materials are used that fully meet the above requirements:
- clinker or porcelain tiles;
- natural or artificial stone;
- brick;
- PVC panels or basement siding;
- profiled sheet;
- decorative or mosaic plaster.

Any finishing material can be used to cover the base of a strip foundation. But when the question arises of how to cover the base of a house on screw piles, you should give preference to brickwork, siding or corrugated sheets.
Before deciding how to decorate the outside of the house’s basement, you need to take into account some nuances:
- when covering the base with thick material, it is necessary to install an ebb above the protruding part;
- If you want to expand the foundation, it is better to use brickwork;
- When installing or corrugated sheeting, you should first install a frame, the space of which can be filled with a heat insulator for additional insulation of the foundation;
- Frame-cladding technology allows work to be carried out at any time of the year.
Using plaster to cover the base
When the question is: how to inexpensively decorate the basement of a house, the answer is obvious - use plaster. However, this option is the least durable and also has an unaesthetic appearance. Such cladding is easily damaged by any mechanical influences and does not provide adequate protection of the base from external factors. However, this method is widely popular due to its low cost. It is also acceptable in the case of erecting a brick plinth on a strip foundation.

Plastering itself is not the final stage. To protect the layer from moisture and environmental influences, acrylic, alkyd, silicone paint, a water-based or oil-based composition should be applied to it, which in turn decorates the base. The photo of the house decoration clearly demonstrates the various options for using plaster.
Helpful advice! It is not recommended to use enamel paints to paint the base. They do not allow air to pass through and are environmentally unsafe.
Decorative plaster is often used, which creates the effect of a fur coat and can be colored using dye. The use of mosaic plaster allows you to create a multi-colored mosaic on the surface, which occurs due to the presence of fine chips in the composition of the original mixture. The presence of resin as a binder gives the composition increased water resistance.
Using a special silicone stamp, which is used to make impressions on the plastered surface, will help you solve the question of how to make a plinth around the house with your own hands with the effect of natural stone.

In private homes, finishing the base with corrugated sheets is widely used. The material has a high moisture resistance, is resistant to temperature fluctuations, durable, easy to process and can be easily mounted on a wooden sheathing. However, corrugated sheeting is not suitable as a finishing material for wooden buildings due to the fact that it is susceptible to corrosion under the influence of high humidity, which can lead to wood rotting.
Profiled sheets are often used to finish the base of a pile-screw foundation, where it must be covered for reliable protection from atmospheric influences.
Features of using bricks for finishing the base
One of the most expensive finishing materials is brick. However, having high strength and performance characteristics, it allows you to create strong, reliable and durable protection. This material is suitable for any type of foundation. For brickwork, slotted, hollow, hyperpressed or ceramic bricks should be used. Work begins with arranging the foundation for the masonry.

If the brick is used to build the base itself, it does not need additional finishing. However, here you should choose high-quality material in order to immediately solve two problems: utilitarian, protecting the walls of the house from external influences, and aesthetic, giving the building a decorative look. When deciding which brick is better for the foundation plinth, you need to give preference to red baked brick, which is resistant to aggressive environments.
In the case of finishing the base of a pile-screw foundation using brickwork, it is necessary to install a base in the form of a strip of reinforced concrete or a metal profile. Brick laying occurs with bandaging. To connect the elements, a cement-sand mortar is used. The thickness of the seams is 10-12 mm.
Cladding the basement of a private house is important, so you should carefully consider the choice of material for the work. It acts not only as a decorative element, but also provides reliable protection for the entire building from the effects of atmospheric and mechanical factors.
We will send the material to you by e-mail
In order for the finishing of the basement of a private house to last as long as possible, it is necessary to choose not only aesthetically attractive, but also practical materials intended for use in a humid environment. It will be better if they can withstand mechanical impacts.
The base of the building takes on a different appearance after cladding
The part of the foundation that protrudes beyond the ground usually carries not only an architectural, but also a functional load. With its help, it is possible to raise the walls of a building to a certain height, leveling and protecting them from negative influences. The distance from the ground to the top edge should not be less than 40 cm.
The plinth can be erected using:
- monolithic reinforced concrete;
- building brick of a suitable brand;
- ready-made reinforced concrete blocks.

Metal sheets can be attached directly to horizontal purlins using self-tapping screws. The presence of additional elements in the form of junction strips allows you to improve the appearance of the cladding.

Fiber cement panels for finishing the basement of private houses
The products are made from cement and wood fibers using hot pressing. The outer surface of the panels is laminated or coated with a layer of protective compound. In terms of design capabilities, panels are a promising option, as they can imitate other materials.

A photo of the finishing of the basement of a private house demonstrates the aesthetic capabilities of the presented products. In the production of fiber cement panels, dyes with increased resistance to ultraviolet radiation are used, so the colors do not fade even after prolonged use.

Finishing the side surfaces with decorative plaster
Not very costly in financial terms, but quite a labor-intensive method of facing the base is plastering. First, the surface of the structure is leveled using a cement-sand mixture, after which a decorative layer is applied on top. If necessary, dried plaster is painted with moisture-resistant paints.

High-quality has the following advantages:
- resistance to temperature changes;
- immunity to ultraviolet radiation;
- increased moisture resistance;
- possibility of tinting;
- long operational period;
- efficiency.

Note! Cement, acrylic and silicone plasters are suitable for external use. As for gypsum compositions, they should only be used for work inside dry rooms.


According to architectural canons, the plinth is the part of the building lying on the foundation, and is considered as a transition wall between the foundation base and the outer walls of the house. The complex of works on the external finishing of the entire building includes measures for finishing the basement, while the finishing materials for the basement of the house are somewhat different from the materials chosen for finishing the walls of the house. This is due to the close location of the base to the ground, where it is more susceptible to the influence of moisture and cold air than the walls of the residential building themselves. Thanks to the development of modern technologies for finishing the external surfaces of residential buildings and the creation of new finishing materials, builders of private houses have received ample opportunities to equip original and practical plinths at affordable prices.

After finishing the basement, it is even visually different from the building Source domzzz.ru
Purpose and functions of the base
Builders and architects have different interpretations of the purpose of the plinth. Builders consider the basement as part of the foundation, while architects usually consider it the lower part of the wall.
This is interesting! From the point of view of ancient Italian architects, the plinth is an independent structural element - the foot of a building, column or monument lying on a foundation (the Italian word “zoccolo” literally translates as a shoe with a wooden sole).
In accordance with building codes, the foundation walls must be raised above the ground to a height of 15 to 250 cm. This visible part of the foundation, called the foundation wall, is called the plinth. The plinth is an intermediate structure that combines the load-bearing walls of the building with the foundation. In Fig. Below is a concrete foundation with a brick base.

Construction of a brick plinth on the foundation Source vi.decorexpro.com
The main functions of the basement wall of a building are:
perception of load from the upper part of a residential building (load-bearing function);
ensuring the stability of the building, creating a strong pedestal, perception of linear deformations during settlement of the house (support function);
protection of walls from exposure to atmospheric sedimentary moisture (waterproofing function);
providing thermal protection for basements (thermal insulating function);
fencing the space between the piles and the grillage in the case of a pile foundation (enclosing function);
creation of an appropriate architectural appearance of the erected building (architectural and decorative function).
Video description
More about the advantages of the basement floor in the video:
Differences between basement and basement
The ground floor, also called the ground floor, should not be confused with the basement and imagine it as a sort of dark, damp room.
It is important! The basement floor is located inside the perimeter of the foundation walls and can be installed in buildings with any type of foundation. The basement can only be built inside a strip foundation. In some variants of foundations (such as piles), the base is simply absent. In the case of a pile foundation, the pile heads are raised above the ground to a height of at least 20 cm, and a grillage is laid on them, which serves as support for the walls of the house.
In Fig. Below is a house on a pile foundation, in which the piles protrude a considerable distance from the ground. To close the resulting free gap, a false base is formed by laying walls made of facing bricks or sheathing the piles with decorative panels such as siding. Finishing of the foundation will be inexpensively provided by using materials used for the external cladding of the facade, taking into account the peculiarities of the location of the false base.

For such a house you need a false base Source tema.ru
Using the example of false plinths, the main differences between the basement and the ground floor become clear:
The walls of the basement of a house are always load-bearing; the load from the upper floors of the building is partially distributed on them. Basement walls are not always load-bearing, but can only perform enclosing and architectural and decorative functions without bearing weight loads from the building.
The ground floor can be recessed to a slight depth or even be above ground. A basement is a room buried in the ground. The basement can be classified as a basement floor, while the basement is not always buried in the ground and cannot be considered a basement in such cases.
Ground-based options for the ground floor are preferable in regions with deep soil freezing and when building in areas with close groundwater. Arrangement of basements in such cases is very difficult and is associated with significant financial costs.
Despite such a significant difference in purpose and design, the ground floor and basement allow for practical applications identical to each other - in their areas you can equip a workshop, a garage, plan a living room and even build a full-fledged sauna.
Types of basement structures
Practiced options for finishing the base of a house take into account its location relative to the plane of the outer wall (see figure below):

Types of location of the plinth relative to the wall Source domsireni.ru
a – protruding type;
b – in one plane (flush);
c – sinking.
The following positions are indicated in the figure:
pos. 1 – external wall;
pos. 2 – waterproofing;
pos. 3 – foundation.
The protruding type of foot (pos. a) gives the building the appearance of a powerful structure with increased stability. From an architectural and aesthetic point of view, the protruding type is more advantageous than foundation walls made flush or sunken.

Appearance of the protruding plinth Source remont.kz
However, they necessarily require the construction of a protective cornice with drainage functions to prevent water from flowing from the walls to the base. The construction of a protruding type foundation wall is advisable for houses with thin walls or when building a warm underground for its thermal protection, in order to compensate with its width for the small thickness of the outer wall.
The sinking type base (pos. c), when the outer wall (pos. 1) hangs over the foundation (pos. 3), is considered more effective and reliable in terms of protecting the waterproofing layer (pos. 2) from mechanical influences and atmospheric moisture. It is more economical in terms of material consumption, since the thickness is smaller and the construction of a drain cornice is not required. But regarding its aesthetic qualities, the opinions of architects differ diametrically. Some are convinced of an aesthetic loss due to the impression created that the house has reduced stability compared to its actual value. Other designers consider the contours of the recessed plinth to be more compact and modern.

This is what a wall with a sunken plinth looks like Source domsireni.ru
Sometimes the base is built flush with the plane of the wall. It is believed that in such cases the waterproofing line is broken, and the location of the waterproofing layer itself appears random.

When constructing a flush base, it differs only in color Source 2gis.ru
Purpose of basement finishing, requirements for finishing materials
The base experiences a greater volume of loads than the underground part of the base of the building. Along with the weight load from the entire structure, it has to counteract the buoyancy forces from the soil during soil heaving, that is, the mechanical loads on the base are multidirectional.
It is clear that to finish the surface of the basement wall it is necessary to use materials with increased quality indicators compared to traditional cladding. In addition to mechanical loads, they must withstand environmental influences well:
temperature changes;
negative impact of sedimentary moisture - rain, snow, melt water, condensing fog;
exposure to solar ultraviolet radiation;
wind loads.
As a result, the finishing of the basement of the house is carried out for the following purposes:
minimizing the negative impact of environmental weather conditions on the foundation and lower layers of external walls;
preventing the penetration of dirt and chemical compounds into the materials of the walls of a residential building, provoking processes of destruction of the foundation;
protecting the foundation from possible formation of mold, mildew, and insects.
Video description
The video shows an example of how to veneer the base of a house inexpensively and beautifully on a pile foundation:
Rough base protection
In order for the base to fully perform its functions for a long time, it itself must be protected from wind loads, temperature changes, atmospheric and pervasive ground moisture. Before you begin finishing the basement wall, it is necessary to carry out a set of measures for the so-called rough protection of the basement. There are five main aspects of rough protection of the base from possible destruction and preventing distortion of the geometry of the building itself.
On our website you can find contacts of companies specializing in finishing materials for finishing country houses. You can communicate directly with representatives by visiting the “Low-Rise Country” exhibition of houses.
Laying drainage communications along the perimeter of the basement wall
To create a drainage system for the basement, a trench is dug into which drainage pipes are laid with perforations over the entire surface. Through them, moisture that gets inside will be drained to the drainage well. The trench with drainage pipes laid in a special way is sprinkled with sand and crushed stone, then filled with earth.
Video description
The video shows an example of drainage for the basement floor:
Applying waterproofing to the outside of a basement wall
The base is waterproofed after the initial waterproofing of the foundation base and reinforced belt. Sequence of work:
the foundation superstructure is coated with hot bitumen or bitumen mastic;
several layers of roofing material are applied on top;
coated with a penetrating waterproofing compound.
Production of blind areas
Blind areas are called concrete-filled inclined strips along the perimeter of the building, coming close to the basement wall. A slight slope “away from the wall” prevents water from accumulating near the foundation superstructure during rain or when snow melts. The width of the blind area should be at least 25 cm greater than the size of the roof extension. Sequence of work:
remove the top part of the soil;
lay a drainage cushion of sand and crushed stone;
a layer of concrete is poured on top of the cushion, ensuring a slope from the wall.

Blind area for the foundation Source subscribe.ru
Plastering the surface of the plinth
Performed to level and strengthen the surface. This reduces the likelihood of cracks forming, causing subsequent possible destruction. Typically, in preparation for plastering, a metal mesh is pre-stuffed and then plaster is applied. To impart water-repellent properties to the solution, a plasticizer is added to it.
Installation of ebb tides
These structural elements act as a protective canopy for the foundation wall. The ebbs can be ceramic, steel or aluminum, plastic or brick.
Upon completion of the complex of protective measures, the main finishing of the base begins.
Methods for finishing the base
Among the methods of finishing a basement wall practiced in private housing construction, the most popular are the following technologies:
applying decorative plaster, creating relief compositions imitating granite, marble or natural stones;
use of decorative siding panels;
finishing with corrugated sheets and corrugated sheets;
resin-based tile finishing;
cladding with natural or artificial stones, facing bricks, clinker tiles;
covering with thermal panels;
finishing with slate and cement particle boards.

Photo of finishing the base of the house - imitation of stone when finishing the base Source domsireni.ru
Finishing with decorative plaster
Finishing the base or facing the foundation can be done cheaply without loss of operational and aesthetic qualities using decorative plastering. The main advantages of this technique are:
fairly high vapor permeability;
resistance to temperature changes;
ease of application to the surface to be plastered;
wide variety of color palette;
good maintainability for repair and restoration work;
affordable price.
Additional Information. Experts believe that when comparing the entire set of indicators in terms of cost, quality, durability, maintainability and practicality of the coating, finishing the base with plaster turns out to be the most advantageous option.
Among the shortcomings, users note:
small operational resource;
the need for constant updating of the paint coating;
Difficulties in cleaning the surface from contamination.
Modern trends in the artistic and decorative design of the facades of residential buildings have not left the plastering of plinths unattended.

Decorative plaster can be used to give the surface any shape Source dom-steny.ru
In private homes, the most popular types of plaster are now those that create exclusive compositions:
textured compositions used to create paintings, drawings, color mosaics;
glazing compounds that help create interesting effects;
relief decoration “like stone”.
Siding finishing
When finishing the basement of a private house in Moscow with its climate and colder regions, siding panels are often used - the term “basement siding” has even entered construction practice. At its core, siding is a universal way to finish any surface of a house, however, the panels for cladding the base are somewhat different from their classic wall counterparts.
If wall sidings are represented by panels with a thickness of 0.7-1.2 mm and a length of almost 4 meters, then for the plinth reinforced panels with a thickness of 2.5 to 3.0 mm are produced (almost 3 times thicker than wall cladding!) and a length of 1 ,0-1.13 m with a width of up to 47 cm. This ensures increased resistance to mechanical damage, including accidental impacts, and rigidity with respect to temperature deformation.

Standard siding panel "brick" Source sargorstroy.ru
On the Russian market of facing materials, basement siding is represented by plastic and metal panels that imitate the texture of natural stones, wood, and brick. Plastic panels for the plinth are made from PVC and polypropylene resins, modified with special components to improve strength, resistance to fire and sedimentary moisture. Metal - made of steel and aluminum.
The main advantages of basement siding include:
increased strength and rigidity of each panel individually and the assembled structure as a whole;
resistance to the negative effects of biological factors - fungus, mold, insects;
excellent moisture resistance;
increased mechanical strength in relation to impacts and chipping;
wear resistance to the abrasive effects of dust and debris particles;
small deformations due to temperature changes, building settlement or soil swelling;
wide temperature range of application – the panels do not lose their properties both in severe frost (down to minus 50 degrees C) and in heat exceeding + 50 degrees. C);
resistance to solar ultraviolet radiation - the material does not age quickly, and the color does not fade;
excellent maintainability – panels can be easily replaced if necessary;
Easy to maintain - the panels can be easily washed from dirt.
A significant disadvantage of basement siding is the need to install a special frame, which significantly increases the cost of finishing materials and the complexity of finishing work.

Siding panels cannot be installed without sheathing Source podvaldoma.ru
Installation of basement siding panels also has its pros and cons. The advantages of the panel installation process include the following aspects:
panels can be installed on any type of plinth;
no preliminary leveling of the wall surface is required;
high culture and cleanliness of installation work;
Fastening the panels to the frame sheathing using self-tapping screws and to each other using tenons and clamps ensures rigid fixation of the siding to the base.
Installation problems for plinth panels include:
the need to correctly align the frame under the panels;
painstaking installation, the likelihood of defects when connecting panels, which can subsequently affect the appearance of the base and its performance;
the need to use special tools for cutting and fitting panels.
Finishing with corrugated sheets and corrugated sheets
Cladding the base with a profiled steel sheet is to some extent an analogue of siding technology, only the base panels are replaced with corrugated sheets or corrugated sheets with corresponding modifications to the frame. In addition to the protective function, finishing can also be performed for decorative purposes.
Video description
The video shows an example of finishing the basement of an old house:
The corrugated sheet has a more rigid wave profile than the corrugated sheet. According to their intended purpose, profiled sheets are used as roofing material, however, C13 corrugated sheeting, which has a wave height of 13 mm, is allowed for cladding the plinths of private residential buildings. The thickness of the corrugated sheet is 0.6-0.7 mm, which is quite enough to create a durable cladding for the foundation superstructure. Corrugated sheets are supplied with galvanized or polymer coating.
The advantages of profiled sheets include:
high strength qualities;
visual appeal, the ability to implement various types of design compositions;
resistance to corrosion and discoloration from environmental influences;
ease of installation, minimal labor required for installation on the base;
affordability.
It is important! Cladding the base with corrugated sheets is a budget option for finishing foundation and basement walls and is clearly superior to other technologies in terms of price/quality.
Among the disadvantages, two factors can be noted:
the monotony of the corrugated pattern, which some users perceive as an indicator of an unpresentable interior;
the need to take into account the geometry of the overall design of the building, since the wave bends of the sheets may completely not correspond to the artistic style of the building (“do not fit” into the design).
The issue of combining the patterns of the wall and the plinth is one of the main ones when finishing the plinth of a private house with corrugated sheets Source sevparitet.ru
Resin based tiles
Plinth tiles produced using resin binders have a thickness of only 3-5 mm. The tiles are easily bent at any angle, they can even be rolled, which is why this facing material is commonly called flexible stone. The length of the tiles varies from 24 to 36 cm with a width of 5 to 7 cm. Resin-based tiles are produced with a smooth and textured surface that imitates the color and texture of the entire range of natural facing materials - stone, wood, facing brick.
Facing made of “flexible stone” Source moypodval.ru
Due to their high flexibility, tiles on resin bases can be easily laid on plinths of any configuration, including arcuate geometry. The installation features of such tiles are as follows:
when laying, the tiles are glued with a special glue to the previously leveled and primed surface of the basement wall;
it is allowed to lay tiles directly on concrete surfaces and on the top layer of thermal insulation;
tiles are easy to cut with a knife and large scissors;
The time for complete drying of the glue is 2-3 days.
Finishing with stone, brick, clinker tiles
Finishing the base “like stone” or “like brick” gives the residential building solidity and monumentality. It is not at all necessary for home owners to spend money on granite, marble, rubble stone or brick. The decorative functions of finishing from natural stone materials are successfully performed by various types of facing tiles with a texture that imitates natural stones or brick.
Natural stone tiles
It is a complete decorative alternative to classic stone foundation masonry. The back side of the tile is smooth, but on the front side the stone is not processed, preserving its natural identity.

Cladding with natural stone is an excellent option for finishing the foundation of a wooden house Source moypodval.ru
Stone-like facing tiles, imitating natural stones, are produced on a cement-sand base with the addition of paint, plasticizers and protective compounds. Artificial stones have high strength characteristics, do not absorb water, and are easy to clean with a water jet. Artificial stone is more plastic than natural stone, so it can better withstand accidental impacts and sudden temperature changes.

Stone-like cladding Source piatachok.ru
Clinker
Clinker tiles are a version of facing bricks made by annealing special refractory clay. Sintered clay is very hard, and its glossy surface has high hydrophobic properties. After laying, clinker tiles create an imitation of brickwork.
It is important! Clinker tiles are highly chemically inert to negative environmental influences and are superior in durability to natural and artificial stones.

Cladding the base with clinker - as an option for finishing the foundation of a house from the outside Source tr.decorexpro.com
Facing brick is a natural ceramic product that fully imitates brickwork. It has high thermal insulation and strength qualities, which are so necessary to protect the base and the entire facade.

Basement finished with facing brick Source domsireni.ru
Finishing with base thermal panels
Base thermal panels are facing tiles equipped with insulation on the inside. The decorative facing material for thermal panels is clinker tiles that imitate natural stones, brick, shell rock, porcelain tiles or ordinary ceramic tiles with a “brick” imitation. Polyurethane foam or extruded polystyrene foam is used as insulation. The thickness of the insulation layer is 20-80 mm.
Note! Practice has shown that the use of thermal panels with foamed polystyrene for cladding a basement wall is unacceptable. This insulation option is short-lived and has weak heat-shielding properties.

Thermal panels are exterior finishing and insulation Source blogremonta.com
Finishing with slate and cement bonded particleboard
Finishing the base with flat slate is a good budget option for exterior home decoration. Asbestos fiber, Portland cement and water are used to make flat slate. It is recommended that the cladding of the basement wall be made of pressed slate, which is much denser and stronger than its non-pressed counterpart. The main advantages of slate materials include:
resistance to aggression of sedimentary moisture;
low water absorption coefficient;
resistance to low temperatures and sudden temperature changes;
resistance to open flames, slate sheets do not burn;
slate can be painted using acrylic primer and acrylic or silicone paint;
long service life within 25-30 years.
Among the disadvantages, the following factors are necessarily mentioned:
increased fragility - slate is capable of collapsing from dynamic impacts, for example, from being hit by a stone;
asbestos dust generated when cutting sheets during the installation process is extremely harmful to humans. Processing of sheets is carried out only in respirators.

Budget options for finishing the plinth Source domsireni.ru
Cement-bonded particle boards (CPB) are made by pressing wood chips with cement. The basis of the CBPB is chips of a large fraction, the top layer is formed from chips of a smaller fraction. The building materials market offers DSP sheets with a thickness of 8-36 mm. To finish the basement wall, sheets with a thickness of 16 to 20 mm are used.
The advantages of DSP are as follows:
good moisture resistance;
resistance to low ambient temperatures;
high degree of fire safety of DSP cladding;
resistance to rotting;
ease of machining.
The disadvantages include two factors:
heavy weight of each cladding element;
service life does not exceed 15 years.
Finishing the basement in a wooden house
When finishing the foundation of a wooden house and cladding the basement, special attention is paid to carefully waterproofing and thermal insulation of the entire basement belt around the building. The wood from which the walls of a home are built is susceptible to rotting and mold growth, and is vulnerable to excess sedimentary and ground moisture. Only reliable protection of the base will prevent liquid from penetrating into the wall part and preventing it from freezing in the cold season. After taking measures to waterproof and thermally protect the base, it can be finished using the technologies described above.

Finishing the base of a wooden house Source remlandia.ru
Conclusion
The long-term trouble-free operation of a residential building depends on the strength and reliability of the plinth around the building. When the basement is destroyed, a destructive reaction of the building begins, leading to a deterioration in the appearance of the building and a decrease in its strength qualities, up to local destruction of the walls and foundation. Any method of finishing the basement to a certain extent protects and improves the façade of the building. Developers are only required to achieve an optimal match between price, quality and decorative properties of the finishing material, so that the basement cladding does not stand out from the overall picture of the appearance of the building.
The plinth is the lower part of the façade foundation. It is designed to protect walls from dirt and mechanical damage, as well as raise the house to an optimal height, for example, to protect against flooding.
When it comes to the question of how to decorate the base, it is important to choose durable materials that will not only add an aesthetic appearance to the belt, but also make it more functional and easy to maintain.
Advantages and disadvantages of finishing the base
According to building codes, the height of the decorative basement of the house should not be lower than 50-70 cm, but there are cases when it is raised to a height of 150 cm from the soil surface. This is justified if there are basements and garages under the building. Do-it-yourself decorative finishing of the base solves the following problems:
- protection of the foundation and its above-ground part from the effects of moisture that reaches its surface from the atmosphere. The barrier allows you to maintain optimal humidity parameters in the basement and throughout the house;
- protection of houses from temperature changes, which allows smoothing the indoor microclimate in winter and summer;
- decoration of the facade, making the building look more holistic and respectable.
Despite the obvious advantages, the use of finishing may lead to condensation on the surface of the basement walls. How does this happen? Water vapor that forms in the interior of the room escapes to the outside, hitting the waterproof barrier that serves as the finish. The low hydrophobicity of the finishing material can also lead to its peeling off in winter.
To avoid this, you must follow the rules for compatibility of the plinth structure and finish. For example, paint is well compatible with brick, but unnatural for concrete surfaces. This must be taken into account when choosing finishing materials.
Finishing with plastic panels
The main advantage that plastic panels demonstrate is the absence of wet work. The panels are attached to the surface of the facade of a private house using a wooden or metal frame. After mounting it, a starting profile is installed at the bottom of the structure. Then the rest of the material is installed using the tongue-and-groove method.
The treatment of the base with plastic panels on the outside depends on its shape. If it is built in the form of a ledge, then it is necessary to use a special ebb; if it is built flush with the wall, then a transition strip is needed that will connect the panels and the finishing material of the upper part of the facade of the house.
When finishing the protruding part of the foundation with panels, you must adhere to the following rules:

- screw the screws into the foundation surface horizontally to avoid tilting as much as possible;
- Do not screw in the screws all the way. It is necessary to leave a thermal gap of 2 mm;
- It is better to cut the panels with a cutter, saw or jigsaw;
- if the first panel that is mounted on the frame needs to be trimmed, then there is no need to install a starting profile;
- the starting strip and curb are attached in increments of 300 mm;
- To install one panel, you must use at least five self-tapping screws.
Finishing with decorative plaster
This material consists of small grains with a diameter of 0.8 to 3.0 mm, which, when applied to the surface of the foundation of a private house, create the impression of a multi-colored mosaic. Its main component is resin, which protects the base from the penetration of moisture from the outside, but releases vapor masses from its internal part.
Before treating the wall with decorative plaster, you can prepare the surface using cement or gypsum plaster. This is not necessary, since it interacts normally with concrete. The preparatory solution is used to level the surface and improve adhesion. When using the material, it is necessary to avoid contact with lime or heat-saving plaster.
Decorative plaster is applied to the surface of the foundation of a private house manually.
The only tool that is used is a stainless steel grater. The mass is thrown onto the wall in a layer with a thickness equal to the size of the grains included in its composition. Before it dries, the mass must be smoothed evenly with a grater.
Movements of the grater should be made in one direction. To avoid the appearance of transitions between strokes of plaster, it is better to perform the work using the “wet to wet” method. After completing the work, the base must be protected with a water repellent for several days from the harmful effects of sun and rain.
Types of tiles and panels for finishing the base
Tiles are used to imitate natural surfaces - stone, brick, etc. Its advantage is a thinner surface and faster installation. The following tiles are produced for finishing the foundation:
- clinker;
- stone tiles;
- polymer sand tiles;
Clinker tiles imitate the surface of brick. It exactly repeats its dimensions, except for the thickness. When installing the material, it is important to lay out the first row correctly.
To do this, you need to calculate the layout level. The calculation is done as follows: divide the height of the base by the width of the tile, increased by the width of the seam. If you end up with an empty gap, after all the tiles have been laid, it can be sealed with acrylic or polyurethane compound.
Stone tiles are installed on the foundation of a wooden house in the same way as clinker tiles. It is laid out one by one on the surface of the foundation, fastening the material with an adhesive solution.

It is important to use special glue for working with stone, otherwise the structure may become cracked. If small-format tiles are installed, then it is customary to leave 5 mm seams between its elements, and 10 mm between large ones. At the final stage, they are sealed with frost-resistant jointing material.
Polymer sand tiles imitate torn stone or brickwork. Its advantage is its light weight, so the material can be used for finishing a wooden house. Such tiles are mounted using screws to the sheathing. It is advisable to make insulation between it and the layer of material.
Finishing the base with DSP panels
The name of the DSP material stands for cement-bonded particle boards. Their main advantage is low cost and fire resistance.
The properties of the DSP panel make it a suitable option for finishing a country house or wooden house. It is resistant to termite and rodent damage, which is also important for private homes. The material consists of cement, wood shavings, and mineralizing additives. They make the panels resistant to the spread of fungus and mold.
DSP is not only a finishing material, but also additional insulation of the base wooden structure. Insulation for the basement is important if it contains a basement.
By choosing insulation using DSP, the developer receives better thermal insulation than mineral wool or polystyrene foam provides. At the same time, the design of the DSP does not require additional decoration.
The DSP is mounted on brackets or bars. This method allows you to lay out insulation under the slab. It is secured with mushroom dowels. Then a wind barrier is installed, which is also held together by fungi. Next, the sheathing is installed. It is necessary to leave a gap of 10 mm between the frame and the wind barrier. At the end, the DSP is attached to the insulation using self-tapping screws.
Finishing the base with your own hands (video)
Covering the base with corrugated sheets
Sheathing with corrugated sheeting is advisable for arranging the base of a wooden building, since this material allows you to extend the life of wood that is vulnerable to external factors. For these purposes, galvanized sheets of the supporting type are used. Sheathing with corrugated sheets is done as follows:
- install the frame at a short distance from the surface of the base. The air cushion will provide additional insulation and sound insulation;
- cover it with corrugated sheets along or across (the vertical installation method will protect the facade from rain or snow);
- to fasten the sheets, screws are used, screwed in every 25-30 cm;
- check fasteners for strength;
- paint the joints with enamel.
If the structure is used to cover a brick foundation, then insulation is done using plasterboard, wood, or a special film.
 (1 ratings, on average: 5,00 out of 5)