White furniture with a patina effect. What do doors with patina look like in the interior? What interior style should you choose for a kitchen with patina?
Today, not only residential and utility rooms in country houses, but also city apartments are often decorated in an antique style. Living spaces decorated in the “Provence” style, which is characterized by an abundance of wooden decorations darkened by time and sometimes cracked, look especially elegant.
To form this design style, the interior must be filled with appropriate, solid wooden furniture. In order to give wooden structures an aged look, there are several technologies, but patination will allow you to age not only wooden panels or furniture, but also metal fittings and plaster stucco, which will allow you to create an interior design in a single temporary style.
Features of patination technology
The definition of “patina” originally characterized the appearance on products made of copper and its alloys of a thin film of oxides, which gave the item an “aged” appearance. Modern patination technology allows furniture elements and products in general, which significantly increases their decorative effect.
Industrial patination technology is quite complex, but there are simplified aging methods that, with available reagents and certain skills of an amateur chemist and restorer, will give objects an antique look.
In order not to spoil the furniture product, before patination it is necessary to test the chosen method on a piece of wood.

The simplest and safest way to age furniture is to rub dark wax into its surface. This gives it a natural appearance, associated not with careless care, but with time, contamination.
To increase the decorativeness and naturalness of aging, many restorers use ordinary paints that match the color, “diluting” them with bronze or aluminum powder (powder). All these materials can be found in construction and finishing accessories stores. In addition, special patination kits have recently appeared on sale, which include not only coloring and decorating compositions, but also the tools necessary to perform the operation.
On a note!
In addition to metal powder, you will need sandpaper of varying abrasiveness, cotton or foam swabs, and for aging large wooden surfaces - a paint roller.
It should be borne in mind that home patination is essentially a conventional coloring, in which, instead of standard paints, special compounds are used that do not change the structure of the wood, actually aging it, but only give the product an antique look. This coating, in case of an unsuccessful experiment or if you don’t like the appearance, can be easily removed from the surface of the object without causing significant harm.

Most often, experiments on artificial aging are carried out in relation to furniture. To do this, you can use chairs, tables, chests of drawers that have lost their visual appeal, and their design does not meet the requirements of the time.
From quite strong, functionally suitable furniture products, you can create the interior of a living space or kitchen in one of the retro styles. In addition to the applied tasks of increasing decorativeness, the restoration technology under consideration also pursues practical goals. The applied new paint layer will not only change the appearance of furniture items, but will also additionally protect the surface from adverse external influences.

Do-it-yourself patination of furniture
Patination of furniture requires not only the availability of the necessary materials and tools, but also thoroughness, accuracy and painstakingness in carrying out the work. The process itself takes quite a long time, which is explained not by the complexity of individual operations, but by their stage-by-stage implementation, in which each subsequent procedure must be preceded by the complete completion of the previous operation.

Before starting the process, complex furniture products - cabinets, chests of drawers, tables with drawers - must be partially disassembled - remove the doors, pull out and place the drawers separately. After this, all metal fittings are removed from individual elements - locks, which require a separate technology for “aging” the metal. The sequence of patination of wooden parts and furniture surfaces is as follows:
- first remove all defects from the wooden surface by sanding it with sandpaper, after which the wood is thoroughly cleaned of dust residues;
- the surface is primed with a special primer (included in the antique restoration kit) and dried for 24 hours;
- apply the first, main layer of patina paint, avoiding smudges, and dry it for a day;
- the second layer is applied with small brush strokes in different directions - when excess patina or coloring composition is formed, they are rubbed with a foam swab;
- without allowing the second layer to fully set, rub it with a dry cloth;
- after drying, if there are “rubbed marks,” they are removed by local tinting, which I also rub with a dry cloth;
- After complete drying, a finishing layer of varnish is applied to the surface.
When patination of wooden products, it is necessary to use special “fat varnishes”, which have an amber color with a purple-burgundy tint. These paints and varnishes create a fairly strong, smooth film on the surface that reliably protects the wood from adverse external influences.

Surface treatment
To patina large-area wooden surfaces - door leaves, furniture facades, wall panels, you can use a slightly different aging technology. The preparatory operations are similar to those discussed above, and the surface should be primed with a special primer based on polyurethane or acrylic.
After the primer has dried, apply one thin coat of paint for patination. The completely dry painted surface is sanded with a metallized sponge - scotch tape - with Bright.
Next, the surface is wiped and opened with colorless polyurethane, acrylic or nitro varnish. The shade of the varnish depends on the natural color of the wood being rolled. For surfaces made of walnut, birch and linden, light, yellowish varnishes are used; for oak, alder and wenge wood, darker varnishes are used.

Additional processing
Additional cracks, called craquelures by restorers, add greater decorative value to wood that has been aged by creating a patina. To use the “crackle” technique, a crackling varnish, which has the property of cracking, is additionally applied over the layer of patina varnish. In order to visualize the cracks that have formed, they are rubbed with a special contrasting compound.
On a note!
At the final stage, the product is thoroughly wiped with a damp swab, dried and additionally treated with varnish, which will additionally protect the resulting cracks from destruction.

Sets
In order to speed up the aging process of wooden products and not have to experiment independently with the choice of technologies and paints, it is advisable to purchase special kits that are widely used for independent antique restoration.
Today on the market of paint and varnish products there are a sufficient number of special sets produced in various series, bearing the general name “Patina” or “Patinating Set”. The most famous are “Idea Patina”, “Patina Verde Green” or “Patina Gold”. To age metal fittings, you can purchase “Metallic Patina Paint.”

To give products an antique look, the American company Rust-Oleum Corp produces various two-component compositions that create the following effects:
- antique gold;
- green (malachite) patina;
- old copper;
- worn patina
All kits are universal and can be used for aging wooden, metal or plaster objects. Additionally, this company produces varnishes to create a craquelure effect on a patented surface.

Video
From the review you will learn how to properly patina the facade of wooden furniture. The master class is shown by an Italian specialist.
Patination is the process of artificial aging of the external surfaces of various interior items and materials. This treatment makes the products more decorative and antique. In addition, the compositions used when applying patina can increase the protective properties of objects made of wood, plaster, copper, bronze, and iron. This property is especially valuable for old interior items, which, it would seem, have already served their purpose. Recently, there has been a tendency to give new furniture a textured, natural and aged look.
The process of aging wooden surfaces is quite painstaking; it requires effort and time. At the same time, anyone can master it on their own, and the availability of a range of special tools allows you to realize your creative potential simply at home. Try in just a few days to make a piece of furniture that you were about to take to the landfill attractive and presentable.
Patination can look like staining with further processing, after which the natural grain of the wood is highlighted with color. The products are also given a shabby, aged look. Accordingly, the latter type of decor looks like paint wear on the most prominent parts. The shading dye can be paint of any color, including those interspersed with gold, silver and bronze. Pastel blue, green, pink, brown tones are most suitable for finishing rustic style furniture, the so-called shabby chic.
You have an old cabinet of an interesting shape or a new one, but too simple in appearance - add history and respectability to it. If you don’t yet know how to make a patina on furniture with your own hands, follow our instructions.

Tools and materials
You will need:
- A wooden cabinet that you will decorate.
- The primer will help increase the adhesive properties of the decorated wooden surface.
- Paint is the main decorative material. Choose a color that will best match the interior or set it off.
- Patina is the second layer of paint. As a result of processing, there will be little left. So don't be afraid to use bronze or gold shades.
- The varnish will become the final protective coating. If you want your cabinet to really have an antique feel, use a matte varnish rather than a glossy one.
Since decorative work will be carried out at home, choose the safest paints and varnishes. Consider acrylic formulations of special water-based products. Among their advantages: environmental safety, good durability, ease of use, large selection of shades.
In addition, prepare:
- Sandpaper for sanding wood surfaces.
- Several brushes for applying patina, paint, varnish.
- A dry rag, which should be used to rub the top layer of paint to obtain the desired effect.
Description of the work process
- First of all, carefully sand the surface of the product with fine sandpaper. Pay the most attention to the doors, as they are the “face” of the cabinet. If there is any old varnish left on the wood, it should be completely removed. At the same time, try not to damage the wood grain.
- Then we carefully remove the dust formed after sanding from the surface of the cabinet being designed.
- Apply primer to surfaces using a roller or brush. This product will improve the quality of wood, form a thin layer of polymer, which will create favorable conditions for the adhesion of the surface and paints and varnishes.
In order for the properties of the stain (primer) to manifest themselves in full force during patination, the composition must be well absorbed and dry completely. Drying should take at least 8-10 hours (overnight). If you are doing patination for the first time, before you start decorating the cabinet, practice on a separate unnecessary piece of wood. Eliminate your mistakes in subsequent work.

- Carefully coat the wood with your chosen paint (in our case, another coat of stain). Leave for 12-24 hours to dry completely.
- Apply a patina of the color of your choice to the flat (non-protruding) areas of the cabinet. Pay attention to recesses (for example, panels). If you choose metallic paints (gold or bronze), do not overdo it. Furniture should be elegantly aged, and not shine like a polished samovar.

Do not patina areas that people frequently come into contact with during use. The decor in such places will wear off very quickly.
- When the patina begins to dry out, take a dry rag and carefully rub the top layer with it. This is painstaking work that requires accuracy and patience.
- After final sanding, to ensure decorative accents are preserved, coat the cabinet with a layer of acrylic varnish. While working, make light movements with a soft brush. Do not apply twice in the same place: the patina may smear. Another good option is to use spray varnish.
Complete the cabinet you made with several more items in a similar style, for example, a mirror, a bedside table. Your room will immediately be transformed - the interior will become softer and calmer.
An antique chest of drawers like this will refresh the room and bring into it a slight reminder of what once was. It’s not difficult to make it from a piece of furniture you’ve just purchased in a store or a really old one, adding antique handles, a little imagination and creativity. And after that, no one will distinguish this “antiquity” from the real inheritance of your great-grandmother.

You don't have to be a master to do this type of patination. The technology is very simple. Read the job description and you will understand everything.
Prepare everything you need to age your chest of drawers
- Wooden chest of drawers,
- dye,
- stain,
- paraffin candle,
- matte acrylic varnish,
- brushes,
- emery cloth,
- old rags.
Step-by-step instruction
- Remove handles from dresser doors and drawers.
- Sand the outer wooden surfaces with emery cloth and remove any remaining varnish.
- Remove dust from the dresser.
- Cover the surfaces to be decorated with a protective agent (primer). Leave for 8-10 hours to dry.
- Use a paraffin candle to rub the most protruding areas of the chest of drawers.
- Using rough strokes, apply a thick layer of acrylic paint in the color you want to the chest of drawers. To paint the front of the drawers, remove them. Leave the product for 12-24 hours to allow the paint to dry completely.
- Using the sandpaper, rub the paint very lightly in the areas where the paraffin was applied. After some areas have been erased, go over the surface with a dry cloth.
- After removing the excess paint, remove dust and dirt from the surface of the dresser.
- Cover the product with a thin layer of matte acrylic varnish. Leave to dry for 4-6 hours.

Bituminous varnish for aging interior items
Bituminous varnish is widely used for decorative aging, mainly of relief surfaces. This technique looks especially successful when working with carved elements found on furniture, picture frames, mirrors, and other interior items. Apply bitumen varnish over the paint layer. It is able to identify and emphasize depressions, cracks, darken the lowest located places, and give a beautiful brown tint to the elevations.
What to prepare
- Frame for a picture or mirror. Choose products with a textured surface. Not necessarily made of wood.
- Primer.
- Acrylic paint in gold or silver color.
- Bitumen varnish.
- Alcohol based shellac varnish.
- Synthetic brush for applying varnish.
- Brushes for paint, primer.
- A sponge or natural old rags.
- A little white spirit.
Decoration procedure
- First of all, coat the wood frame with primer. This is a protective substance that will make the wood whiter, more resistant to aggressive influences and improve the adhesion of the product to decorative materials. This means it will improve the quality of work. It will take 8 to 10 hours to dry.

Applying bitumen varnish to a smooth, untreated surface allows you to reveal the grain of the wood and age the material, making it darker. The shine does not appear.
- Paint the embossed frame with gold or silver acrylic paint. Leave the product to dry for 4-6 hours.
If you have chosen a plaster product for decoration, then this step is mandatory. Without first applying paint or regular acrylic varnish, the asphalt varnish will be absorbed into the porous plaster.
- Using a synthetic brush, quickly apply the bitumen varnish to the entire frame. You can cover small areas with a decorative substance and immediately rub it with a piece of rag, removing excess varnish, evenly distributing it over the surface.
If the varnish has had time to dry in uneven spots, then within 2-4 hours after application you should moisten a piece of rag in white spirit and rub it in the right place.
- After drying, the bitumen varnish remains sticky for some time. Therefore, it needs to be coated with a special fixative. You can secure the decorative design with bitumen varnish by applying alcohol-based shellac varnish over it.
Various patination technologies make it possible to obtain a wide variety of decorative effects - from solemn aristocratic classics to charming, filled with the comfort and charm of Provence. Try other methods yourself, choose the one that will make your interior more beautiful and better.
Patination is one of the favorite door decoration techniques among door industry gourmets. Patina captures the luxury of past European centuries and brings it into modern design projects and homes. Don’t think that this is just an antique effect that can only fit into interiors with a focus on the luxury of royal chambers - this is not entirely true. Patina is interesting because it can look relevant in both classic and modern interiors - after all, it can be different.
Patination techniques
Patination and brushing
So what is patina? Patina is a decoration technique that gives a piece an artificially “aged” look. This does not mean aging as a deliberate desire to quickly rub and wear out a product so that it looks “lived” (although this is precisely the setting included in the “shabby chic” style). The point is that wood changes its structure over the years, the wooden surface becomes even more textured, and the recesses in it acquire a noble dark shade. In order not to wait for the material to really age, European craftsmen came up with patina - artificial aging of wood.
The above primarily applies to the combination of two techniques: patination and brushing. Using a metal brush, the top layer is removed from the wooden canvas, thereby deepening its structure - this is brushing. Then the canvas is coated with a waxy or oily substance to further enhance the relief. Finally, the patina is applied: it penetrates deeply into the resulting recesses and creates that very effect of noble aging. The result is fixed with varnish.
Patination without brushing
In other cases, the patina is not distributed over the entire surface of the canvas, but the joints between the panels and the trim are filled with it, and baguettes are painted with it. Thanks to this method of applying patina, the door configuration becomes visually more complex, becomes more voluminous, and carries a completely different mood and appearance. This is a more delicate way of applying paint without the intervention of brushing.
Patina in the interior
What color can patina be? In essence, any, but it is customary to use gold, silver and even black patina - these are the most advantageous options. Don't be afraid that the patina of the precious metal color will make your interior too pretentious. In fact, gold noble and modestly frames restrained natural shades. Patina looks great both on simple models of doors of a brutal nature, and on models with sophisticated frames: cornices, pilasters and rosettes.
It is very easy to distinguish a new piece of furniture or furniture. Its distinctive feature is a perfectly clean and glossy surface. However, for all their beauty, some people value aged wood more. Moreover, if this is a thing that at one time was part of the furnishings in an old house.
It is quite simple to give the effect of antiquity to any item - this opportunity is provided by the technology of artificial patination of furniture.
 Initially, patina meant an oxidized copper layer, which could often be found on furniture, mirror moldings, columns and other architectural elements of the estates of wealthy citizens.
But it was very difficult to obtain such beauty - you had to wait for decades for the item to acquire the desired effect. When this moment came, pleasant changes occurred with the object - a film appeared on it bluish or greenish tint.
Time passed, and soon any plaque that appeared on metal and wooden surfaces began to be called patina. Add a modern touch to any item antique effect can be done using the following materials:
- Special paint containing particles of noble metals - gold, bronze or silver. The coating obtained using these materials is more wear-resistant than natural patina. It has a dense texture with minimal porosity, due to which it provides wood with protection from destruction.
- To create a noble surface with an antique effect, you can use any paint on a traditional basis. Moreover, the shade of the coating can be any thanks to a large selection of color options. Patina can have any color - natural gold or bright blue, red, uncharacteristic for patina, etc.
Only products made from certain types of wood can achieve such a noble effect. The wood chosen for their manufacture must have a dense structure and be resistant to moisture. Vivid examples of such material - oak and ash.
You also need to take into account that in natural conditions a noble effect appears only on solid massif, while it is impossible to wait for its appearance on modern MDF facades.
You can get the antique effect on any surface:
- from the array;
- on slats;
- according to MDF.
Types of compositions for obtaining patina with your own hands
Experienced craftsmen use the following materials for patination, which may differ in their composition:

Using these substances you can create noble surfaces different shades with special effects:
- Fragmentary improvement.
- Full coverage.
- Craquelure effect.
Depending on the consistency of the working composition, patina can be of several types:
- Thick. This patina is similar in composition to paste. It is used to process wood, which, after applying the mixture, acquires shades from yellow to red, close to the color of natural gold.
- Liquid. These compounds, which can be water-based or synthetic, enhance the grain of the wood and at the same time give it a slight shine effect.
- Faceted varnish. Allows you to obtain a deeper aging effect by artificially creating cracks on the surface.
Detailed description of the compositions
 Any thing can be given a noble surface, be it kitchen furniture or an antique cabinet. The main thing is that the wooden product has texture. To treat metal and wooden surfaces, compositions on various bases are used. The difference between them lies in the degree of stability and adhesion to the base.
Mordants. If you look around the situation in the house, you will probably find patinated wood products in it. If craftsmen use stain to paint wooden surfaces, then they most likely do not aim to give it special aesthetic properties.
But, despite this, this method of dyeing is one of the popular methods for refining products, which at the same time protects the surface from fungi, mold, moisture penetration and rotting.
If desired, the patina effect can be made more pronounced if perform brushing. It preserves the longitudinal hard fibers and at the same time removes the soft ones using a special hard brush.
This is the beautification of natural solid surfaces at home. Although this finishing option allows you to get only one patina color. After all, the stain has a dark shade, so you shouldn’t expect the appearance of a gilded surface.
Bitumen
 At first glance, it is difficult to imagine that using such an inexpressive building material as bitumen you can create a masterpiece. However, it clears all doubts after the first use.
Its special structure makes the wood very pliable and simplifies the process of applying patina. If desired, the owner can get the effect of rich gilding or a subtle coating.
Using bitumen varnish you can easily black out the recesses in the thread, highlighting the edges protruding on the surface. This material is made from concrete polymer and turpentine or white spirit. Therefore, after treating the surface, it requires applying a fixing layer with shellac varnish.
Acrylic
 It is no coincidence that this water-based material is popular for creating patinas. This is explained by its versatility, because with its help you can create an aging effect on any surface- metal, wood or plaster.
The coating is very durable, has excellent adhesion to the base, protects wood from rotting and the appearance of microorganisms. The technology for patination of wood with your own hands is also quite simple. With its help, you can process the entire surface or decorate only the protruding thread elements in the desired color.
To obtain a more expressive patina, you can use compositions of different shades. But you need to apply them in several layers. As a result, a complex color pattern is obtained.
Acrylic compositions allow you to create a patinated surface with different shades:
- gold;
- silver;
- blue, etc.
Patina technology
 Those who have ever worked with patina know how easy it is to do. There are no difficulties when processing wood. Moreover, this process is so exciting that it brings pleasure.
But every home craftsman needs to know that when working with various types of surfaces, your own special algorithm. This is the main condition that guarantees a decorative patina.
Surface preparation. Before you begin creating a patina on your woodwork with your own hands, you should examine the surface to make sure it is suitable for the job. Products made from untreated solid wood are ideal for these purposes, since they do not require additional processing.
It’s a different matter if you have to deal with smooth varnished surfaces, coatings created using acrylic film or PVC. The paint will not stick to them. The defect can be corrected by brushing. For this surface needs to be treated coarse sandpaper or wire brush.
So, we will remove the soft wood fibers located under the film, which is unstable to such influences. Once the structure is exposed, it is ready for further processing. Now you need to use a soft brush clean the surface from dust and degrease it.
Classic patination
Despite the fact that the technology for applying coloring compositions based on bitumen, wax or acrylic is quite simple, it must be carried out exactly according to the accepted algorithm:

Despite all the attractiveness of modern interior items and furniture, there are still people who will especially appreciate furniture with antique effect. But these don't have to be antiques.
A noble surface can be obtained using modern materials. But here you need to take into account that each of the painting materials has its own characteristics, so before work you need to study technology their application and adhere to it exactly.
Sometimes the influence of time can have a beneficial, rather than destructive, effect on objects. Things turn into antiques and become even more valuable and expensive. Patina, a fashionable and stylish decorative coating that occupies a place of honor in the world of design, can cope with such a task.
Thanks to patina, you can get an extraordinary antique effect, creating a charming atmosphere in any room, including the kitchen. Furniture pieces can become covered with natural patina only after many years of life; such a coating most often appears on copper products.
However, modern decorators have learned to create this amazing coating artificially, using special varnishes, paints and acids. With the help of such means, not only metal objects are aged, but also wooden furniture, as well as other materials.
The patina itself is a greenish tinge that appears on copper over time, under the influence of moisture and air. Patina gradually builds up in layers, making objects more mysterious and similar to museum exhibits.
The use of patina in kitchen interior design
Every housewife wants to have a special kitchen, with an interior that will amaze guests at first glance. Patination is one of the simplest and most accessible ways to achieve a similar effect. This technique, which makes it possible to artificially “age” objects, is most often used when decorating furniture.
It will be an excellent solution if you want to create a sophisticated and respectable interior with notes of true luxury. There are many patonation technologies, and each of them achieves different effects. For example, the design of a classic kitchen after such treatment will look elegant and solemn.
 You can make a patina on furniture with your own hands using special varnishes, primers, finishing paints, abrasive materials for polishing, brushes, and a spray bottle.
 When arranging a kitchen in a country or Provence style, it is necessary to achieve the completely opposite effect - the furniture should not look new, slightly shabby, with a touch of history. Such a room will immediately become more comfortable and warm, and it will be pleasant for both household members and guests to stay in it.
How the process of patoning facades in the kitchen is carried out
The advantages of a process such as patonation are that it can be applied to almost any surface, even to such a simple material as MDF. Before you start work, you need to prepare all the tools and materials. These include: spray bottle, brushes, colorless polyurethane primer, varnish.
To begin with, an insulator is applied to the surface to be treated, that is, to the façade. The soil should be applied evenly, in a very thin layer - a spray bottle can achieve this effect. After this, colorless polyurethane primer is applied to the surface of the facade in the same thin layer. After drying, it must be thoroughly sanded, then the patina itself must be applied. After this, the facades are wiped with a hard or soft sponge (depending on what effect should be achieved).
The more intensive such grinding is, the more aged and textured the facade will look. As soon as this stage of work is completed, glossy or matte varnish should be applied to the surface to be treated in several layers.
Advice: To protect kitchen furniture from moisture and steam, you should use polyurethane varnish.
Advantages and disadvantages of patina in the kitchen
Patoning kitchen facades has a lot of advantages, the main ones include the following:
- High wear resistance- a special composition that is applied to the entire surface, as well as several layers of varnish, help provide reliable additional protection to the facades. They become much less susceptible to steam and moisture.
- Durability- since patina is highly durable, it does not lose its external characteristics even after many years. Thus, the furniture facades are preserved in their original form for a long time.
- Practicality- despite the fact that the patinated surface has a very antique appearance, it does not require special care using special products. In addition, with the help of abrasions and other signs of antiquity characteristic of patina, you can reliably disguise small cracks, irregularities and dirt.
- Uniqueness- a kitchen design made in this way has an original look. To make the interior as interesting as possible, you should use silver, gold, white, green, black or yellow patina.
- Affordable price- Few people can afford real antique furniture. Inexpensive patina will help artificially age any furniture and turn it into a real work of art.
As for the disadvantages of patination, there is only one - this coating tends to ignite easily, so the furniture will have to be kept at a sufficient distance from fire sources. It is also necessary to carefully insulate all wiring in the kitchen.
What are the types of patina?
Patina varies in shades and in the decorative effect it can create. The choice of material should depend on what style of interior will be created in the kitchen, and what initial shade the set has. There are many types of patina. It is worth considering the most popular of them.
Silver or golden patina- This is a universal option, but it is recommended to use it in a white or black kitchen, as well as on light wood furniture. On dark facades, white trim will look more impressive, and on light facades, gray, black, yellow and brown. For a patina of golden and silver tones, it is worth choosing a matte, rather than glossy, varnish.
 For a patina of golden and silver tones, you should choose a matte varnish.
 Contrasting patina- it will help to favorably emphasize and highlight carved patterns on furniture facades. It is worth choosing shades of silver, gold, bronze, copper. First, such compounds are rubbed into the joints of the panel and frame, in the corners, or onto other milling elements. Then the main thin layer is applied on top.
 A light brown kitchen has a golden patina.
 Patina with craquelure or crackle effect- ideal for finishing kitchen furniture in country, shabby chic, and Provence styles. The facades are coated with a special craquelure varnish, which, after drying, is immediately covered with a network of cracks reminiscent of old paint. After this, a contrasting patina is very carefully rubbed into the cracks, and the final stage is the application of a layer of varnish.
 Kitchen with craquelure or crackle effect.
 What interior style should you choose for a kitchen with patina?
Patina is applied in order to artificially age the furniture, give it a more antique look, and create the illusion that it is many years old. This means that patina should not be used in any modern interior design.
Ideal design solutions that go well with a touch of antiquity on furniture - kitchen interiors in country style, Provence, shabby chic. Patina would look quite appropriate in a classic interior, but in this case it is necessary to use more expensive shades of coating - gold, bronze, copper.
 Facades with patina look chic and create a classic style.
 Thanks to patina, you can create a unique atmosphere in the room, giving the interior originality and uniqueness.
What color to choose for decorating the interior of a kitchen with patina
White kitchen with patina- an excellent solution for arranging an elegant and cozy kitchen. The white color harmonizes perfectly with the patina; this set looks very gentle and resembles real antique furniture.
Ideal shades for decorating white facades are blue, green, purple. Be sure to use details in cream, beige and brown tones with gold. Panels will help make facades more elegant.
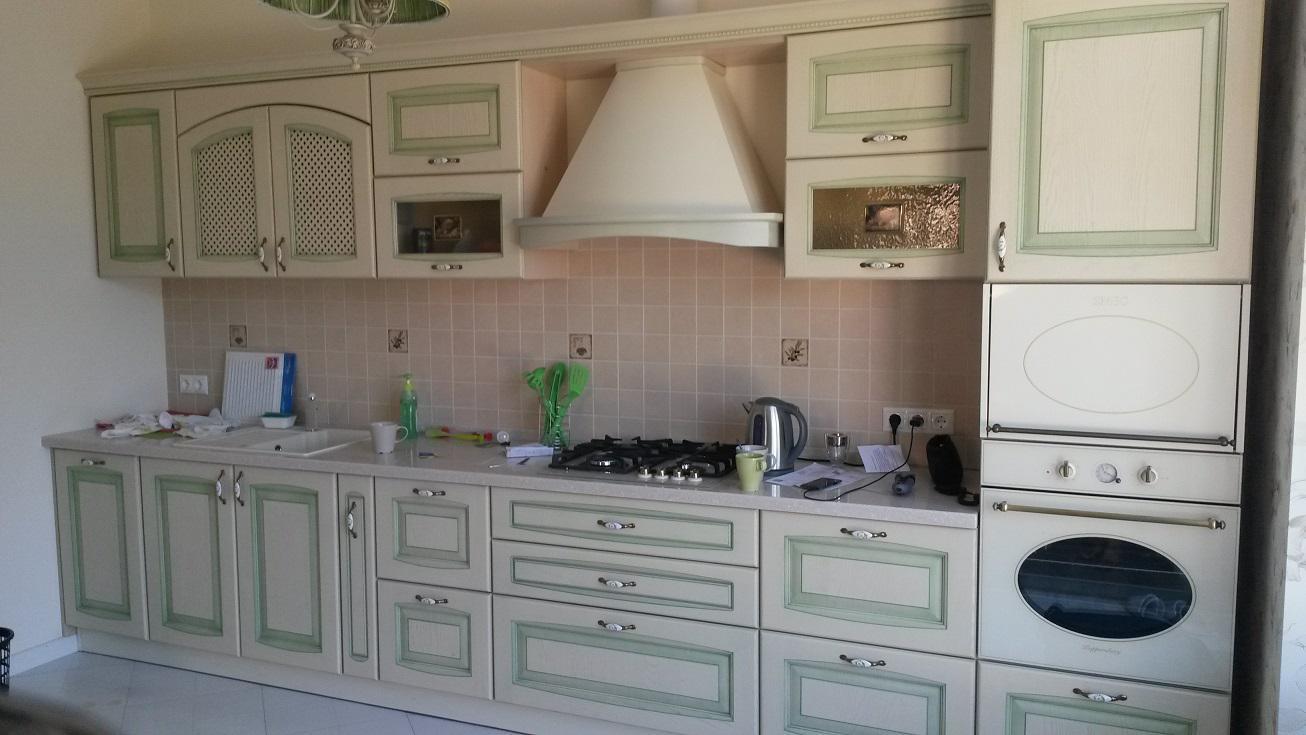 Light shades of green on a white background look very beautiful.
 Green kitchen with patina- most often this option is chosen when arranging an interior in a light and airy shabby chic style. This combination is also suitable for creating a country-style kitchen. To make the kitchen look truly unusual and attractive, it is recommended to use the lightest shades of green. They will harmonize perfectly with white, blue, gray, brown and beige patina.
 Kitchen set in Provence style.
 Black kitchen with patina- a very original solution, which cannot be applied in every interior. It is desirable that the kitchen with such furniture be quite spacious and bright. A matte black kitchen set will look great with a gold, silver or white patina. Silver or gold fittings would be a worthy decoration.
 Black kitchen with silver patina.
 Gray kitchen with patina- you shouldn’t treat this noble shade as something nondescript and boring. Gray can look luxurious and expensive, especially when combined with the patina of black, blue, white and green. Such a set will look very harmonious, sophisticated and elegant. Gray tones never tire, and they combine perfectly with any other colors. In addition, this interior design solution is suitable for both spacious and small kitchens.
 Small scratches and dirt are less visible on textured surfaces.
 Brown kitchen with patina- perhaps this is the best solution for creating a rustic interior, or a country-style interior in the kitchen. The patina in this case can have yellow, gray, blue, green, beige and purple tones. Brown color is also perfect for a classic interior, but the patina should be chosen in golden or bronze tones.
 Over the years, the patination effect does not disappear.
 Beige kitchen with patina- an ideal solution for a classic interior, as well as furnishing a kitchen in Provence and shabby chic style. Patina of any tones harmonizes perfectly with beige shades, but to make the kitchen look more delicate and elegant, you should opt for light colors. An excellent solution would be a patina of gray, pale blue, light green, soft lilac and light golden shades.
 Solid wood with patina looks incredibly impressive.
 Red kitchen with patina- a very bold option for the kitchen interior, but quite appropriate when it comes to country style. The main thing is that the red color is sufficiently muted; preference should be given to its burgundy tones. As for patina, it can be black, brown, gray, white, beige, terracotta.
 The patination effect not only looks impressive but also rich.
 - As a rule, patinated kitchens are made to order. If you need to save money, you can choose headsets made from materials such as MDF or chipboard. It’s worth taking a closer look at the lightly embossed textures that are most reminiscent of natural wood.
- The most inexpensive are the sets whose facades are solid and straight. Grilles, glass inserts, radius doors and appropriate fittings will help make the interior more “expensive”.
- An average price option is a kitchen made of veneered MDF. This material is practically no different in appearance from solid wood.
- The most expensive option for a patinated kitchen is furniture made from solid ash, oak, beech and other hard woods. The surface of such facades is tinted with matte enamel in pastel or neutral shades.
- To give patina-covered doors a more textured appearance, they can be brushed using a special brush, which leaves characteristic irregularities on the facade. They are perfectly filled with a patina coating.
 (1 ratings, on average: 5,00 out of 5)

