How to make a toilet stand with your own hands. Raise the toilet higher above the floor: types of options, description of the process. How to install a toilet with your own hands: work order and possible problems
If you plan to make drastic changes to the bathroom, it is better to do this while the general renovation is underway. Modernization is possible, but in practice it may raise questions.
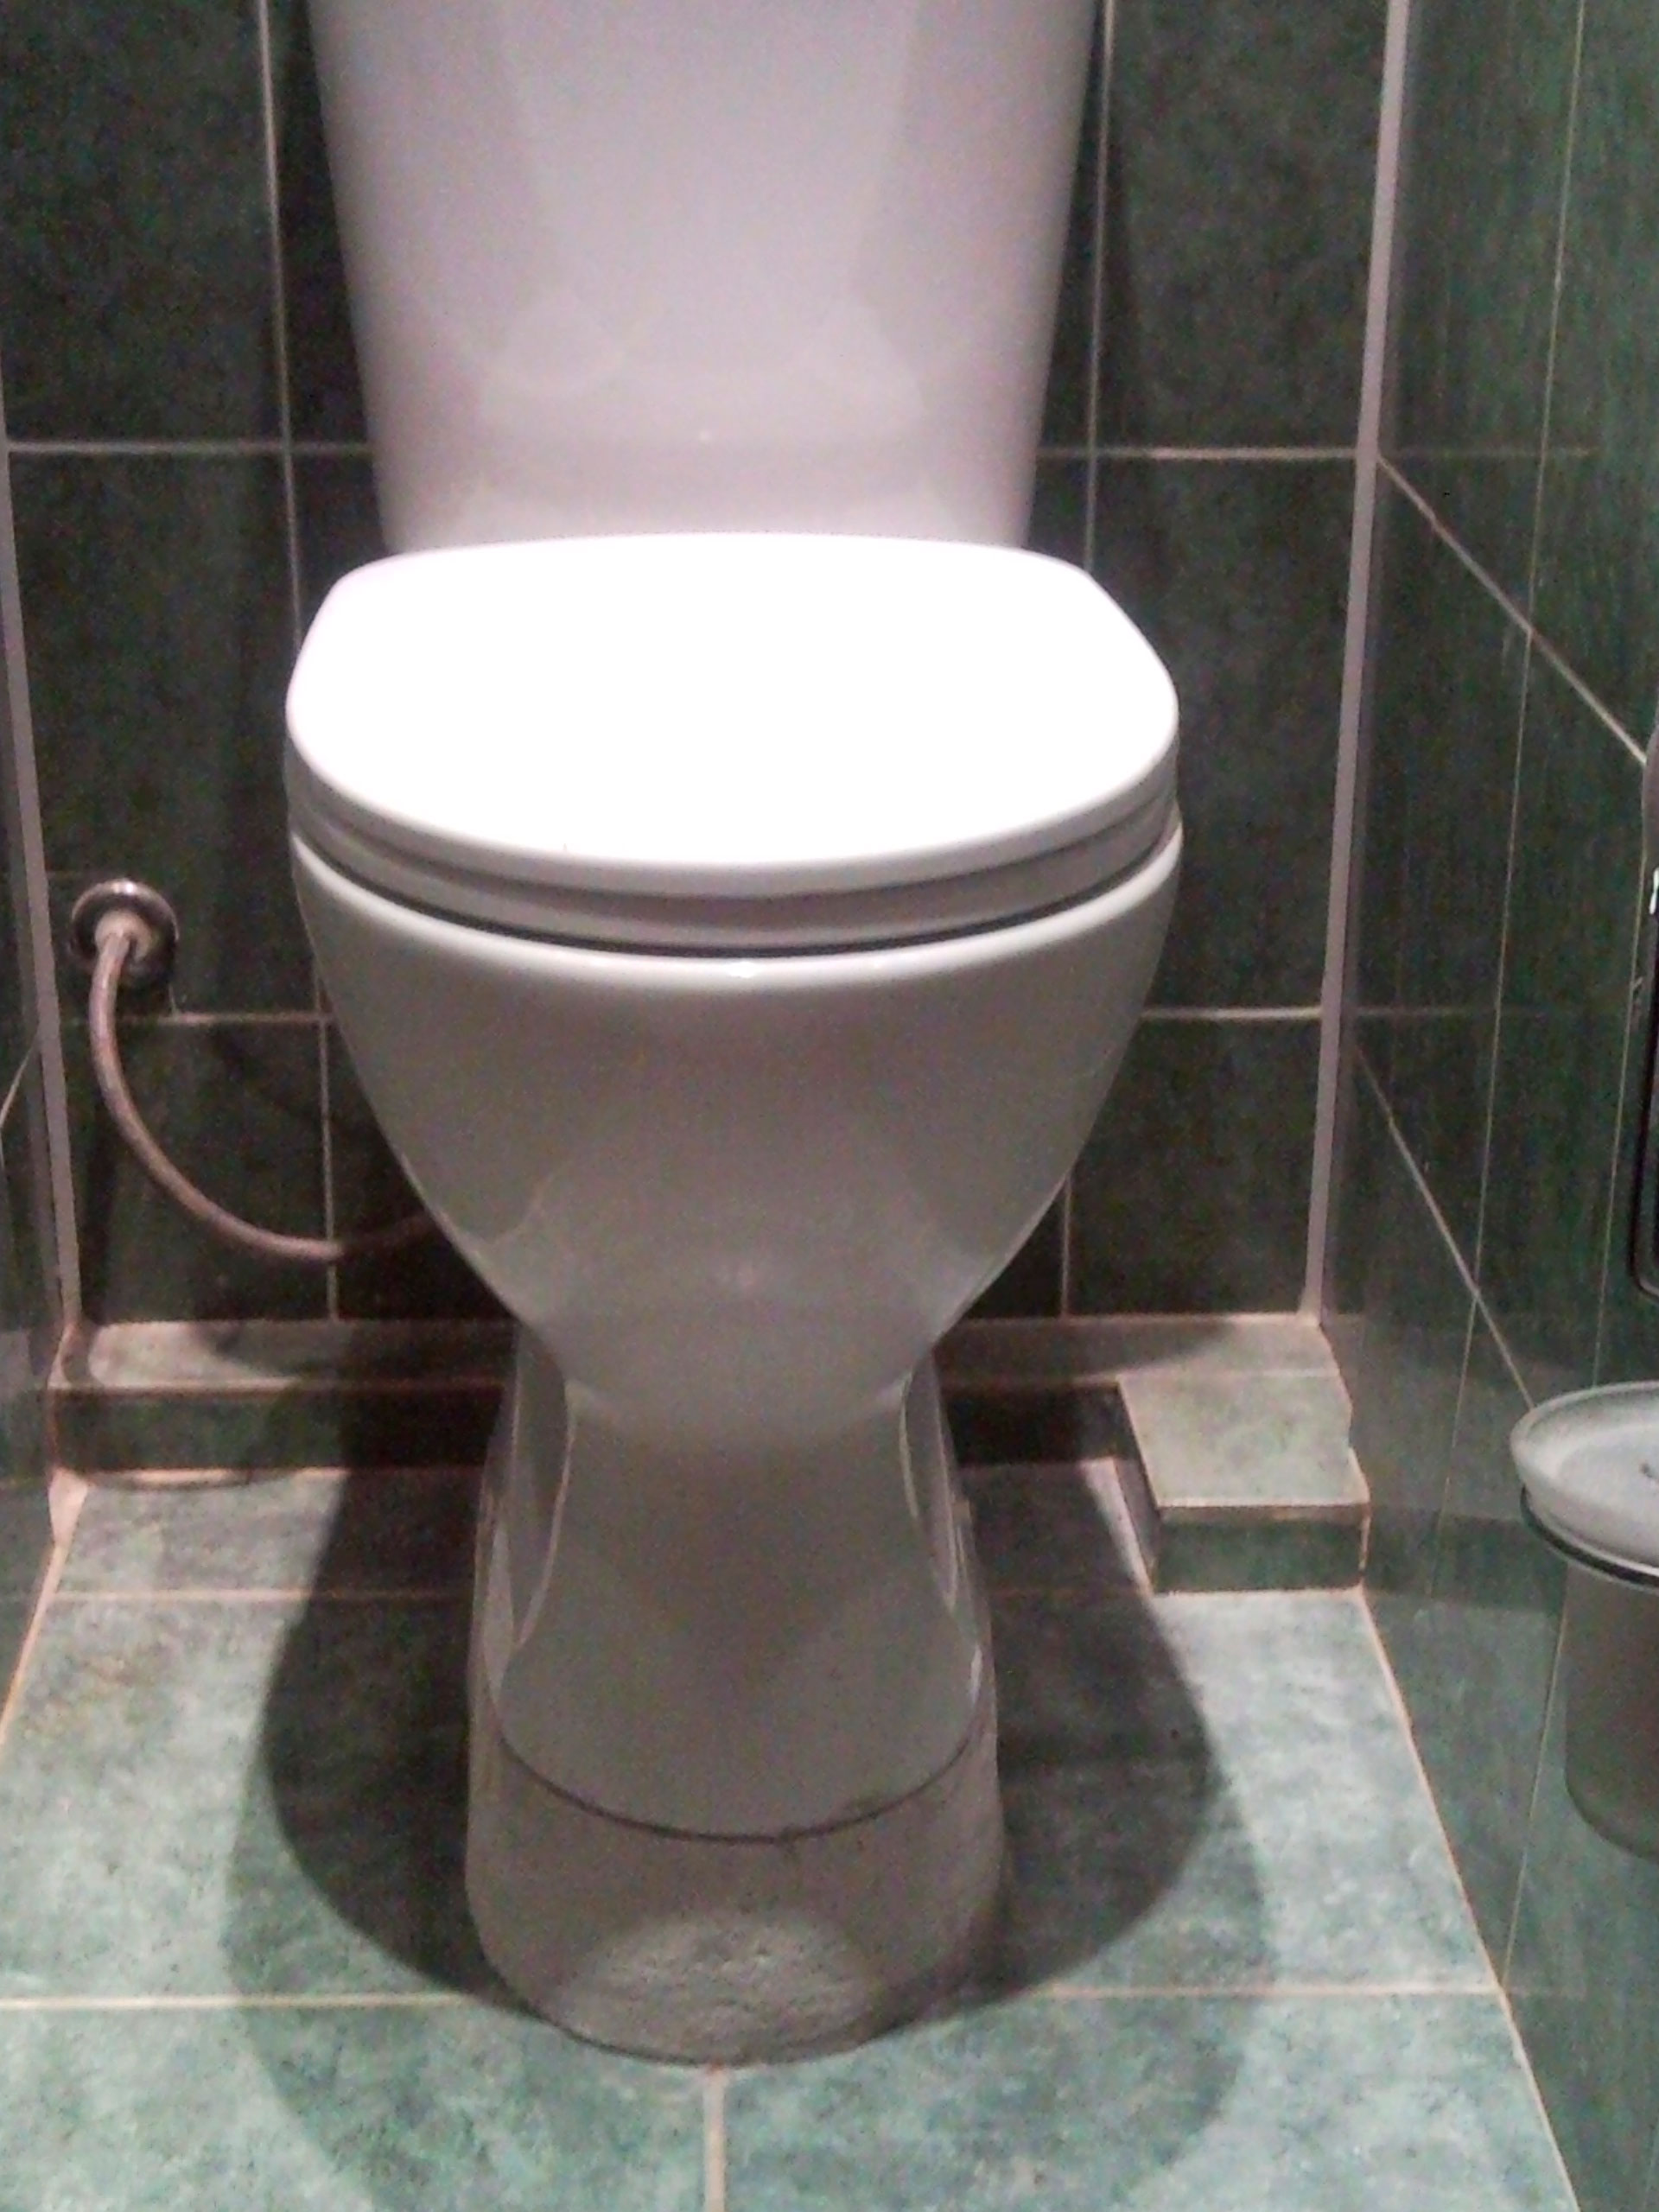
The outlet of the plumbing fixtures must coincide with the part where the outlet of the sewer pipes is located. This must be taken into account before lifting.
There are several options for solving the problem.
- When using an accordion made of plastic, flexible in shape. Then you can choose any height to install the toilet. But the quality of the accordion determines how high quality the entire structure will be. Some forward extension is important for the device; this option is not convenient for everyone. The boiler is not affected.
- The sewer axes and outlets from the device are easily combined, and if you choose the right angle of the pipes, use gaskets. This is not always possible in practice. After all, initially the angle of inclination is such that selecting something else causes problems.
- The sewer water outlet can be redesigned to suit your needs.
After choosing one of the options, all that remains is to take care of the selection of tools and materials. Then they move directly to the plan. It is not necessary to touch the water heater.
Workflow Description
The first step is to prepare a work area for faucets and other items. The main thing is to get rid of everything that will interfere with the installation of the device.
The technology is typically used as follows:
- The toilet and water supply system are disconnected from each other. The water supply to the device tank is shut off. Be sure to close the central valve and remove the hoses from the float on the tank.
- The remaining liquid is removed from the device. A rag with a rubber bulb will help you deal with this. This is also required for the bathroom faucet.
- The mount is removed from the sole of the device. Screeds made of concrete or wood are most often used. Use a chisel and hammer to remove the fasteners if this cannot be done by other means.
- You can disconnect the device and the sewer from each other. The outlet is disconnected from the pipe.
- The old cement covering is removed.
- The pipes require complete cleaning of contaminants.
- The next step is to raise the floor to the required level. In the location chosen by the owner, the toilet is mounted on top of wooden blocks. The building level helps to understand how horizontal the surfaces are. It also helps when the gasket is replaced with an analogue one.
The best choice if the axes do not align exactly is a flexible accordion with a plastic base. Sometimes rubber corrugation becomes a worthy replacement. Using two pipes, normal adapters are created. But then you will have to ensure normal sealing of the joints.
At the final stages, the toilet is fixed to the floor surface. The attachment points are outlined, as is the base itself. Marking increases the accuracy of work. Then all that remains is to drill the holes.

The system is fixed. Cement and sand will be suitable materials to solve the problem. Many people use silicone glue for fastening, but this option is not always convenient. The foam block is convenient only in the sense that it is easy to cut with a hacksaw.
When the work is completed, all that remains is to connect the tank to the water supply.
Suspended structures: installation procedure
This issue can be solved by two methods - using an installation or a concrete base.
In the first method, a special structure is created that changes the level of the device in height and secures it. Installations are easily secured with plasterboard. Everyone will figure out how to raise the toilet higher.

To construct a concrete base, you cannot do without additional materials.
You will need:
- Two steel pins, caliber M20, 0.8 meters long.
- Wood screws.
- Formwork.
- Washer.
- Screw.
- Concrete solution.
The transition coupling connects the toilet and the sewer - this is the action of the first stage. Afterwards, they decide on the place to which the studs will be attached on the wall. The best option is to drill through. If this option is unacceptable, proceed to the use of epoxy glue.
Two side and one front surface are required for formwork. The studs help pull it to the wall. Then these same parts become the support for the wall-hung toilet.
Concrete is poured gradually, then you don’t have to worry about displacement of the transition coupling. The formwork is left for seven days until the concrete is completely dry.
Sanitary standards
What does the law say? Construction, sanitary and hygienic norms and rules establish a number of restrictions related to the transfer of plumbing fixtures. Damage from leaks and noise should be kept to a minimum.
The following rules help you figure out how to lift the toilet under any circumstances.
Bathrooms should not be located directly above living rooms and kitchens. This is only permissible for apartments on two levels. Thanks to this standard, the lower rooms are protected from possible flooding.
When, as a result of a back problem, it is difficult to sit on the toilet due to the standard height, the question arises of how to raise the toilet higher. In this article we will give practical advice on how to raise a toilet with your own hands and available materials.
Before dismantling the toilet and preparing a place for a new installation, it is necessary to determine the lifting height. To do this, we place improvised objects on the toilet and determine the height of the rise. 
We disconnect the water supply and sewer lines from the toilet, turning off the water. Remove the remaining water in the toilet with a rag. The toilet is fixed to a wooden stand using self-tapping screws. The outlet from the toilet to the sewer is made of a corrugated adapter. To disconnect, tighten the corrugated pipe. Unscrew the bolts and remove the toilet.
Material for raising the toilet:
- To raise the toilet you will need
- Foam block of required thickness
- Adhesive for foam block
- Dowel nails
- Silicone
- Putty on drywall
Do-it-yourself toilet lifts
We carefully place the toilet on the foam block and trace the lower contour with a marker. Then, using a hacksaw, we cut out our stand in the foam block. We try on the resulting blank and sand the unevenness so that it looks like one with the toilet.

Now let’s prepare the base for installation by clearing the area of dust and leveling the surface for the toilet. Having tried on the workpiece, apply the adhesive to the floor and wait one minute to fasten the part to be glued.
 We remove the remaining glue and, using a level, level the surface of the podium. Let our structure dry according to the instructions for the adhesive composition. After complete hardening, we try on our toilet bowl and mark the hole, Drill a nail under the dowel for fastening. Apply sealant to the sole of the toilet bowl, install and fasten it using self-tapping screws. Then in the reverse order as we took it apart.
 We putty the podium using drywall putty, and we can paint it the color of the toilet. This design is reliable and does not spoil the appearance.
You are here now - home page - All about repairs:
How to install a toilet correctly?
- In fact, there is nothing simpler, once you install one toilet, the rest will be easier! You can already make money from this (just kidding).
- How to install a toilet on a wooden floor, see the very bottom.
To install a toilet on a tile (tile) floor, you need:
- Hammer.
- Victory drill 6mm or 8mm. (or another diameter, you need to check with the seller what diameter the dowels come with)
- Dowels. (If they are not included in the kit, check with the seller. Depending on the holes, there are either 2 or 4 holes in the base of the toilet.)
- Corrugation. (In case the floor level has changed significantly, or you want to move the toilet a little to one side or the other.)
- Level. (How to check if the level reading is correct?)
- Depending on the situation: PDS or silicone.
Corrugation for connecting the toilet flush.
- We have already laid tiles on the floor in the toilet.
- Now we need to install a toilet.
- If your tiles are laid level, then the toilet will be level, without the level itself. If not, then we have to level the toilet. We set the level along, then across.
- To raise the toilet from one side, use pieces of fiberboard.
- The thickness of the fiberboard is 5mm. Therefore, for leveling, fiberboard is an excellent material.
If, for some reason, it turns out that the gap between the tiles and the toilet is large and the toilet is in an incomprehensible suspended state, then you will need PCS (sand-cement mixture, it is sold at 5 kg, I think that this will be enough for you. )
- The thickness of the fiberboard is 5mm. Therefore, for leveling, fiberboard is an excellent material.
- We dilute the PCS until it becomes thick sour cream.
- How to understand that the divorce was correct? We make a slide from the solution. It should not spread within a minute. The solution should hold its shape, but after this the slide should slowly lose its shape. This consistency of the solution is needed so that when you put the solution under the toilet, it should fill the niche under the base of the toilet. After the solution sets, the toilet will stand rigidly.
- The first step is to assemble everything and connect the toilet flush. If everything is in place, then we start drilling.
- Sometimes it is very difficult to mark where to drill holes for dowels. Either the hole is small, or it is impossible to draw on the tile in any way. You need to take a couple of A4 sheets of paper and place them under the place where the holes will be. To prevent the paper from running away,... secure it with tape. You can draw anything on paper. If a pen or pencil does not fit into the dowel hole, take a cleaned pencil lead and mark it.
- Now let's drill.
- It can be very difficult to drill through tiles. The drill cannot engage. To do this, use a tile drill, it has a sharp end and drills easily. Just don't rush! To prevent the drill from grinding too quickly, pour water into a cup and periodically lower the drill there to cool it. Don't let it get to the point where the drill hisses. This will lead to rapid failure of the drill.
- Of course, you can drill with a regular hammer drill.
- This is what I do, but it will take more time and experience. In order for the drill to catch on the tile, you need to make a mark in the marked place, as is done with a core on metal. Just be careful. Tiles are not metal and may crack.
When the place is ready, we drill. We put the hammer drill in drill mode. (Without a bump stop.) Slowly, take your time, and everything will work out!
- This is what I do, but it will take more time and experience. In order for the drill to catch on the tile, you need to make a mark in the marked place, as is done with a core on metal. Just be careful. Tiles are not metal and may crack.
- Mark the outline of the base of the toilet.
- Now we remove the toilet. If the toilet does not fit very tightly to the base, use PDS (described above.) If the toilet fits tightly to the tile, then you need bactericidal silicone. We don’t regret it and apply it along the contour of the base of the toilet. Carefully place the toilet and connect the drain.
We remove either the silicone or the PCS solution that comes out from under the base of the toilet with a rag.
- Now we remove the toilet. If the toilet does not fit very tightly to the base, use PDS (described above.) If the toilet fits tightly to the tile, then you need bactericidal silicone. We don’t regret it and apply it along the contour of the base of the toilet. Carefully place the toilet and connect the drain.
- What other role does PDS and silicone play?
- If water gets under the toilet, the process of rotting may begin or mold may grow there. We don't need either one or the other! In addition to the smell, it is harmful to health!
- So as not to struggle with twisting the water supply hose.
- Do this when the toilet is not installed. Most often, on the toilet, the place for connecting the hose is plastic, so be careful, the thread can be easily torn off. For a tighter connection between the hose and the toilet, use a special tape (I forgot what it’s called). Wind it 5-6 turns onto the thread.
How to install a toilet on a wooden floor?
- We install the toilet on a wooden floor in the same way as on a tile floor.
- Just instead of dowels, use self-tapping screws of the same length. If the screws fall into the hole, use washers of the appropriate diameter.
- If it is necessary to use the PDS (see above, in which case).
- The PCB will not stick to a wooden floor. To do this, you need to mark the outline of the toilet on the floor, turn the toilet over and see where the void is at the base. You need to tighten the screws halfway into this place. For example, 60mm screws, then tighten them to 30mm.
- Then, measure to see if the screws interfere with the installation of the toilet.
- After this you need wire. Twist the wire between the screws... this will be the reinforcement. Decide for yourself how many screws and how to tighten them, but at least 4 screws!
- Here you go! That's probably all!
- And one more thing... In order not to worry so much... pay 1000 - 2000 rubles and a professional will install the toilet for you.
How to raise a toilet
Forum / Plumbing / How to raise a toilet
Ask your question on our forum without registering
and you will quickly receive an answer and advice from our specialists and forum visitors!
Why are we so sure of this? Because we pay them for it!
The apartment is inhabited by elderly people who, due to their physiological capabilities, find it difficult to sit on the toilet at a standard height, so the question is whether it is possible to somehow raise it by cm. 20.

alex78sol
Put together four boards of the required height as formwork and pour a concrete “podium”, cover it with tiles, and top it with a toilet. But in general, I was in Moscow, in one social center I saw a toilet in the toilet, and handrails were installed nearby so that older people could lean on their hands when sitting down or standing up.
The height of the toilet, or rather the problem of getting up and even sitting down from it, is very important.
For this purpose, manufacturers have created special high toilets for the disabled.
I need advice on installing a toilet (how to raise it higher when the floor is tile?)
I saw this one in the hospital. If funds allow, then you can buy it and the problem will be solved.

Seryozha
I would like to add to the above. Before constructing the “podium”, prepare the place where the “podium” will be installed; use a hammer drill or chisel to remove the tiles and the top layer of mortar. For reliability, attach the toilet to anchors buried in the main floor.
Dear guest, stay!
Many people are already making money just by communicating on our forum!
For example, like this. Or like this.
You can start communicating on the forum now. Just log in via VKontakte or register, it will take one minute.
But if you are passing through us, you can still:
How to connect a toilet to the sewer system?
To connect a toilet with your own hands, no special skills are required. The main rule for installation is a properly studied installation process, which does not depend on the location of the plumbing in the house. In addition, you need to prepare all the components in advance and choose a method for connecting the bathroom, which will be discussed further.
Method of connecting a bathroom to the sewer system
Connecting a toilet primarily depends on the model structure and implementation of the outlet. The modern type of models has a structural structure that has the following data:
horizontal plumbing with communications built into the bathroom wall;
with outlet at an angle of 45 degrees. The model is universal and allows communications to be routed both to the floor and to the wall;
vertical structure, where water is drained through a pipeline located under the tile at the location of the toilet.
Each bathroom fixture, regardless of the model, has its own disadvantages and advantages.
It is also worth paying attention to the fork in the hoses leading to the sewer drain in the toilet room:
perpendicular drain pipe;
drain pipe parallel to the floor;
the drain pipe is inclined towards the floor.
In the first case, the structure of the pipeline leading perpendicularly to the sewer is made according to the old model. The advantage of this construction is that the pipe fits tightly to the wall without spoiling the appearance of the bathroom and without cluttering up the free space. Models of this kind are not in demand today and are rarely produced.
The advantages of the second scheme include ease of installation and ease of connection. When doing installation work, you will need instructions on how to connect the toilet. After reading it, proceed to the first stage of work, placing the toilet bowl on the drain riser and sealing the joint.
How to install a toilet with your own hands: work order and possible problems
Then the base of the toilet needs to be screwed to the floor with dowels. The disadvantage of the scheme is that the installation of such a pipe is only possible if there is a vertical riser.
A drain pipe at an angle of 45 degrees is the best option if you choose from the two described above. The disadvantage of this structure is the large distance between the toilet bowl and the wall, which is important when connecting.
How to connect a corrugated pipe?
The best option for connecting communications is to connect the corrugation. The corrugated hose is able to bend and stretch, which makes it possible to smooth out errors in inaccurate sizing. To connect the corrugation you will need the following materials:
corrugated hose;
a pair of rubberized cuffs;
silicone glue.
One end of the corrugated tube is treated with silicone and built into the receiving hole of the sewer outlet with a tightly fitted cuff. If there is no leakage at the joints, the base of the toilet is fixed using dowels or cement mortar.
The difference between cast iron and plastic pipes
When connecting a toilet to a sewer, you need to have an idea of the difference between the two types of pipes. Cast iron pipelines corrode over time and require reliable sealing at the junctions of the pipes and cuffs. To seal joints, a solution of red lead or a resin-based mixture is used. Silicone is used to seal the cuffs.
Plastic pipes are more reliable and are manufactured with a ready-made sealing ring, which, in combination with the collar, ensures a reliable connection. Such pipes last a long time and are resistant to mechanical damage.
Connection to sewerage
After installing the bathroom and securing its base to the floor, you can connect the toilet to the sewer. The supply element from the sink to the drain pipe has a different structure, which can be straight or at an angle.
The outlet has holes that are lubricated with red lead, after which it is inserted into the socket where the toilet is connected to the sewer system of the drainage system. There are also corrugated pipes for toilets, which, when connected, are treated with silicone, one end is put on the outlet, and the second part is mounted in the socket.
Installing a cistern
The first step is to treat the drain outlet from the outside with silicone and hang the tank on the toilet. Secure the joints with plastic bolts. Then proceed to adjust the drain mechanism. To do this, the liquid level in the container must be maximum to ensure complete drainage. If the float is high, this may affect the overflow of water from the tank.
Before adjusting the drain, you need to fill the container with water to the middle level, and as it fills, set the float.
Thanks to the information provided, connecting the toilet yourself will not be difficult and will help you save money on calling a plumber.
In new open-plan buildings in Moscow, there are very often cases when the owners are not satisfied with the location of the toilet or bathtub and there is a desire to move the toilet to a new location and install a shower stall in place of the bathtub. But the toilet is tied to the riser and when moving it to a new place, problems arise with the slope of the drain. How to solve such a problem?
The way out of this situation is to install a podium for the toilet or shower. The advantages of this solution are as follows: by increasing the distance from the riser and moving the toilet to a new place, the drain pipe is hidden in the filling podium, and its exit from the new place is vertical (fortunately, there are plumbing models that have a vertical drain), and a drain also passes from this drain through a tee to the shower tray, which is also hidden in the filling structure. According to existing water drainage technologies, the slope should be at least 2 cm per linear meter.
To enhance all elements of the poured structure, you can use mosaics; the podium of the shower stall lined with mosaics looks especially aesthetically pleasing.
question: how to lift the toilet
You can also replace the toilet with an installation (these designs also have a vertical drain).
Another solution is a poured podium on two different levels. This option can be used if: according to the design, the shower stall is located quite close to the riser, and the toilet bowl is moved a considerable distance (then for a normal drain slope you have to make a two-level podium).
Construction of a podium for a toilet: a tray for a shower stall.
Considering that the floor level in the bathroom and toilet should be lower than the general level of the apartment, poured podiums help solve floor level problems.
When installing a podium under a toilet, an important feature is the location of the toilet itself. The point is that if the drain pipe is hidden, you can get into it when drilling a podium to mount the toilet, therefore, when laying the drain pipe, you need to take these points into account.
The same applies when connecting the drain to the shower tray and installing a drain.
 To install a toilet, you need to have available tools and basic knowledge regarding this process. Of course, it is better to use the services of specialists, but you can also try to install the toilet yourself.
This article discusses how to properly connect a toilet to a sewer system and what types of toilets exist.
What do you need to know when starting to install a toilet?
The toilet is connected to the sewer using corrugated cuffs, plastic bends and drain pipes.
For those who do not know what a sewer drain pipe is, I would immediately like to explain that this is a pipe that copes with the problem of unpleasant odors.
When considering how to connect a toilet to a sewer, you need to pay attention that the corrugated cuffs can be bent at any angle and stretched in length. And eccentric cuffs are allowed to be rotated around their axis.
In addition, when installing a toilet with a waste pipe, you must follow these rules:
- Don't trim them.
- Do not change their shape.
The tools should include:
- Hammer and drill.
- A set of wrenches and an adjustable wrench.
- Screwdrivers.
- Bulgarian.
If you have all of the above, then you can begin preparatory work for installing the toilet.
Types of toilets
Today, toilet manufacturers offer a wide range of their products. The buyer has the opportunity to choose exactly the option that he likes best.
There are these types of toilets:
All toilet models have their advantages.
Bathroom renovation: how to move a toilet to another
The choice remains with the buyer and his preferences.
Preparation for installation
If you plan to replace the old toilet with a new one, then you need to carefully dismantle the old product. When the fastenings are removed, you need to tilt the toilet back. This is necessary to drain out any remaining water. This applies to replacing an old plumbing product with a new one.
If this is a new building, there were no previously installed plumbing products, then it is enough to clean up the mess, buy a toilet, prepare all the necessary tools and begin installation work.
Installation of a toilet with an oblique outlet
All toilets have their own individual characteristics, which determine the installation and connection process.
A toilet with an oblique outlet is connected to the sewer as follows:
- First you need to lubricate the toilet outlet with red lead mixed with drying oil.
- Next, a resin strand is wound on top, but you need to leave its tip free.
- Then the wrapped strand should be lubricated with red lead.
- Next, you can install the toilet by securing the outlet in the opening of the sewer pipeline
This is how the toilet is connected to the sewer riser with an oblique outlet.
Installation of a toilet with vertical outlet
As mentioned earlier, a vertical outlet toilet has a siphon with an outlet pipe that points upward. The toilet is very easy to install. The installation process looks like this:
- You need to mark the location of the toilet, install a screw flange, which is equipped with a lock.
- A sewer pipe is installed in the center of this screw flange.
- Then the toilet is installed on the flange, it must be turned until it is completely fixed.
It is noteworthy that the pipe will be automatically fixed at the end of the sewer pipe. The toilet can be placed tightly against the wall, which will definitely be an advantage.
Installation of a toilet with horizontal outlet
Installation of a toilet with a horizontal outlet is carried out using a sealing collar. First you need to secure the toilet to the floor using dowels. Then a connection to the sewer is made. The connection must be carried out very carefully so as not to damage the surface of the toilet.
Installation of a toilet bowl to a sewer with corrugation
You can also connect the toilet to the corrugated sewer yourself. In general, this is a standard installation procedure, there is nothing overly complicated in it.
The connection is done like this:
There is nothing complicated in the process of installing a toilet bowl to a corrugated sewer.
Connection to cast iron sewer
Typically, connecting a toilet to a cast iron sewer is done in houses with an old sewer system, which was made from cast iron products.
In any case, the connection of the toilet with the cast iron sewer will be carried out using auxiliary elements such as cuffs, corrugation and sealant.
The easiest way to install a toilet is with an oblique outlet, since this is the type of toilet that was used in Soviet times. And the most difficult thing will be to install a toilet with a horizontal outlet, because the cast-iron sewer system is simply not adapted to such a connection.
In general, connecting the toilet to the sewer can be done independently. If you need to connect to a cast iron sewer, it is better to use the services of a specialist.
How to install a toilet correctly?
- In fact, there is nothing simpler, once you install one toilet, the rest will be easier! You can already make money from this (just kidding).
- How to install a toilet on a wooden floor, see the very bottom.
To install a toilet on a tile (tile) floor, you need:
- Hammer.
- Victory drill 6mm or 8mm. (or another diameter, you need to check with the seller what diameter the dowels come with)
- Dowels. (If they are not included in the kit, check with the seller. Depending on the holes, there are either 2 or 4 holes in the base of the toilet.)
- Corrugation. (In case the floor level has changed significantly, or you want to move the toilet a little to one side or the other.)
- Level. (How to check if the level reading is correct?)
- Depending on the situation: PDS or silicone.
Corrugation for connecting the toilet flush.
- We have already laid tiles on the floor in the toilet.
- Now we need to install a toilet.
- If your tiles are laid level, then the toilet will be level, without the level itself. If not, then we have to level the toilet. We set the level along, then across.


- To raise the toilet from one side, use pieces of fiberboard.
I need advice on installing a toilet (how to raise it higher when the floor is tile?)
- The thickness of the fiberboard is 5mm. Therefore, for leveling, fiberboard is an excellent material.
If, for some reason, it turns out that the gap between the tiles and the toilet is large and the toilet is in an incomprehensible suspended state, then you will need PCS (sand-cement mixture, it is sold at 5 kg, I think that this will be enough for you. )
- We dilute the PCS until it becomes thick sour cream.
- How to understand that the divorce was correct? We make a slide from the solution. It should not spread within a minute. The solution should hold its shape, but after this the slide should slowly lose its shape. This consistency of the solution is needed so that when you put the solution under the toilet, it should fill the niche under the base of the toilet. After the solution sets, the toilet will stand rigidly.
- The first step is to assemble everything and connect the toilet flush. If everything is in place, then we start drilling.
- Sometimes it is very difficult to mark where to drill holes for dowels. Either the hole is small, or it is impossible to draw on the tile in any way. You need to take a couple of A4 sheets of paper and place them under the place where the holes will be. To prevent the paper from running away,... secure it with tape. You can draw anything on paper. If a pen or pencil does not fit into the dowel hole, take a cleaned pencil lead and mark it.
- Now let's drill.
- It can be very difficult to drill through tiles. The drill cannot engage. To do this, use a tile drill, it has a sharp end and drills easily. Just don't rush! To prevent the drill from grinding too quickly, pour water into a cup and periodically lower the drill there to cool it. Don't let it get to the point where the drill hisses. This will lead to rapid failure of the drill.
- Of course, you can drill with a regular hammer drill.
- This is what I do, but it will take more time and experience. In order for the drill to catch on the tile, you need to make a mark in the marked place, as is done with a core on metal. Just be careful. Tiles are not metal and may crack.
When the place is ready, we drill. We put the hammer drill in drill mode. (Without a bump stop.) Slowly, take your time, and everything will work out!
- Mark the outline of the base of the toilet.
- Now we remove the toilet. If the toilet does not fit very tightly to the base, use PDS (described above.) If the toilet fits tightly to the tile, then you need bactericidal silicone. We don’t regret it and apply it along the contour of the base of the toilet. Carefully place the toilet and connect the drain.
We remove either the silicone or the PCS solution that comes out from under the base of the toilet with a rag.
- What other role does PDS and silicone play?
- If water gets under the toilet, the process of rotting may begin or mold may grow there. We don't need either one or the other! In addition to the smell, it is harmful to health!
- So as not to struggle with twisting the water supply hose.
- Do this when the toilet is not installed. Most often, on the toilet, the place for connecting the hose is plastic, so be careful, the thread can be easily torn off. For a tighter connection between the hose and the toilet, use a special tape (I forgot what it’s called). Wind it 5-6 turns onto the thread.
How to install a toilet on a wooden floor?
- We install the toilet on a wooden floor in the same way as on a tile floor.
- Just instead of dowels, use self-tapping screws of the same length. If the screws fall into the hole, use washers of the appropriate diameter.
- If it is necessary to use the PDS (see above, in which case).
- The PCB will not stick to a wooden floor. To do this, you need to mark the outline of the toilet on the floor, turn the toilet over and see where the void is at the base. You need to tighten the screws halfway into this place. For example, 60mm screws, then tighten them to 30mm.
- Here you go! That's probably all!
- And one more thing... In order not to worry so much... pay 1000 - 2000 rubles and a professional will install the toilet for you.
It's OK!
You can still help the project!
May the hand of the giver never fail!
 To install a toilet, you need to have available tools and basic knowledge regarding this process. Of course, it is better to use the services of specialists, but you can also try to install the toilet yourself.
This article discusses how to properly connect a toilet to a sewer system and what types of toilets exist.
What do you need to know when starting to install a toilet?
The toilet is connected to the sewer using corrugated cuffs, plastic bends and drain pipes.
 For those who do not know what a sewer drain pipe is, I would immediately like to explain that this is a pipe that copes with the problem of unpleasant odors.
When considering how to connect a toilet to a sewer, you need to pay attention that the corrugated cuffs can be bent at any angle and stretched in length. And eccentric cuffs are allowed to be rotated around their axis.
In addition, when installing a toilet with a waste pipe, you must follow these rules: 
- Don't trim them.
- Do not change their shape.
The tools should include:
- Hammer and drill.
- A set of wrenches and an adjustable wrench.
- Screwdrivers.
- Bulgarian.
If you have all of the above, then you can begin preparatory work for installing the toilet.
Types of toilets
Today, toilet manufacturers offer a wide range of their products. The buyer has the opportunity to choose exactly the option that he likes best.
There are these types of toilets:

All toilet models have their advantages. The choice remains with the buyer and his preferences.
Preparation for installation
 If you plan to replace the old toilet with a new one, then you need to carefully dismantle the old product.
The toilet is at a height of 47 cm.
When the fastenings are removed, you need to tilt the toilet back. This is necessary to drain out any remaining water. This applies to replacing an old plumbing product with a new one.
If this is a new building, there were no previously installed plumbing products, then it is enough to clean up the mess, buy a toilet, prepare all the necessary tools and begin installation work.
Installation of a toilet with an oblique outlet
All toilets have their own individual characteristics, which determine the installation and connection process.
A toilet with an oblique outlet is connected to the sewer as follows: 
- First you need to lubricate the toilet outlet with red lead mixed with drying oil.
- Next, a resin strand is wound on top, but you need to leave its tip free.
- Then the wrapped strand should be lubricated with red lead.
- Next, you can install the toilet by securing the outlet in the opening of the sewer pipeline
This is how the toilet is connected to the sewer riser with an oblique outlet.
Installation of a toilet with vertical outlet
As mentioned earlier, a vertical outlet toilet has a siphon with an outlet pipe that points upward. The toilet is very easy to install. The installation process looks like this: 
- You need to mark the location of the toilet, install a screw flange, which is equipped with a lock.
- A sewer pipe is installed in the center of this screw flange.
- Then the toilet is installed on the flange, it must be turned until it is completely fixed.
It is noteworthy that the pipe will be automatically fixed at the end of the sewer pipe. The toilet can be placed tightly against the wall, which will definitely be an advantage.
Installation of a toilet with horizontal outlet
 Installation of a toilet with a horizontal outlet is carried out using a sealing collar. First you need to secure the toilet to the floor using dowels. Then a connection to the sewer is made. The connection must be carried out very carefully so as not to damage the surface of the toilet.
Installation of a toilet bowl to a sewer with corrugation
You can also connect the toilet to the corrugated sewer yourself. In general, this is a standard installation procedure, there is nothing overly complicated in it.
The connection is done like this:

There is nothing complicated in the process of installing a toilet bowl to a corrugated sewer.
Connection to cast iron sewer
 Typically, connecting a toilet to a cast iron sewer is done in houses with an old sewer system, which was made from cast iron products.
In any case, the connection of the toilet with the cast iron sewer will be carried out using auxiliary elements such as cuffs, corrugation and sealant.
The easiest way to install a toilet is with an oblique outlet, since this is the type of toilet that was used in Soviet times. And the most difficult thing will be to install a toilet with a horizontal outlet, because the cast-iron sewer system is simply not adapted to such a connection.
In general, connecting the toilet to the sewer can be done independently. If you need to connect to a cast iron sewer, it is better to use the services of a specialist.

Hello! From time to time, plumbing fixtures in apartments and houses have to be replaced - they can break down or become aesthetically and functionally outdated. If it makes sense to call a specialist to install complex systems, then you can install a toilet with an oblique outlet on your own, and we’ll talk about how to do it correctly in this article.
Tools and materials
During the work of dismantling the old toilet and installing a new one, you will need:
- tape measure, set of wrenches/adjustable wrench and metal saw;
- hammer drill + drills for concrete, set of screwdrivers + dowel-nails;
- knife, hammer, plumber's heel (strand of resin) + red lead;
- cement, fum tape, white silicone sealant;
- fan pipe or corrugated cuff or eccentric cuff.

Choosing a method for connecting the toilet to the sewer
To quickly install a new toilet instead of an old one, it is recommended to select a suitable connecting cuff in advance. To do this, take comparative measurements of the existing and new toilet - if the parameters are the same, you can choose a cuff of the same type that is already installed.

Rigid fan pipes with a hermetically sealed fastening system at one end are used if the toilet outlet and the entrance to the sewer pipe are strictly on the same axis. The dimensions of such a pipe are regulated by trimming. A pipe with cuffs at both ends cannot be cut.

Eccentric cuff, suitable for use if the axes of the toilet outlet and the entrance to the sewer are slightly misaligned. By turning such a cuff, you can achieve the correct connection of the elements.

Corrugated pipe– universal fastening.
How to make a toilet a little taller
It has a certain drawback - if installed incorrectly, waste can accumulate in the sagging folds of the corrugation, which threatens to clog the system. But the corrugation allows you to connect the toilet to the sewer system, regardless of the location of the entrance to the sewer pipe.

Preparatory work
At the preparatory stage, the old toilet is dismantled. First of all, turn off the water supply to the tank and disconnect the flexible line from it, drain the water, remove the toilet seat. To dismantle the tank of the standard compact model, you need to saw through the fastening screws with a hacksaw - access to them is open in the space between the toilet shelf and the tank, or if possible, unscrew the fastening bolts.

After the tank is dismantled, it is necessary to disconnect the toilet from the floor and the entrance to the sewer. To do this, you may need to break the toilet outlet with a hammer, as well as the attachment points to the floor, in order to then unscrew the metal fasteners. The cuff with which the old toilet was attached must be dismantled, and the place where it enters the pipe must be cleaned of any remaining sealing material and dirt. To prevent unpleasant odors from penetrating into the room, temporarily plug the pipe with a gag made from a plastic bag stuffed with rags.

The floor must be cleaned of dirt, traces of cement or sealant. Make sure that the surface on which the toilet will be installed must be level - otherwise, under uneven load, the earthenware or porcelain product may crack. If necessary, lay tiles or make a cement screed. Please note that changing the height of the floor will affect the alignment of the toilet outlet and the entrance to the sewer pipe!
Toilet installation
If the oblique outlet of the toilet strictly fits into the cast-iron entrance of the sewer pipe, an additional cuff is not required. In other cases, place a cuff, corrugated or rigid pipe on the outlet (they are put on tightly), and then connect the free edge to the sewer hole. Check the position of the toilet and, if necessary, trim the end of the rigid drain pipe.

After estimation, making sure that the toilet sits correctly, circle the “leg” of the toilet with a pencil and mark the places where it is attached to the floor. Then remove the plumbing fixture and drill holes in the floor for the dowels. If you don’t want to drill into the floor, cement mortar or silicone sealant will help fix the toilet in place - apply the compound inside the contour marked on the floor and install the toilet on it. But it’s still safer to screw the toilet to the floor.

Attaching the outlet directly to the sewer pipe. The annular recess of the outlet is lubricated with a thick layer of red lead, then a strand of plumbing cable is wound there (leave the end 5-10 cm free and make sure that it comes out and does not get into the pipe, creating the cause of the blockage). The resin strand is also coated with red lead, after which the toilet outlet is inserted into the cast iron socket. Cover the gap between the edge of the socket and the outlet walls with cement mortar or fill it with sealant to completely prevent the penetration of unpleasant odors.

Securing the release with a cuff. The free end of the drain pipe, tightly fitted onto the outlet, is inserted into the entrance to the sewer pipe. The joint is filled with sealant. The joints of the cuff or corrugated pipe with the sewer pipe are mounted in the same way.

Make sure the connection is tight, after the sealant has dried, pour a couple of buckets of water into the toilet - there should not be the slightest leak. If everything is in order, you can screw the bolts into the pre-installed dowels, securely securing the toilet. It is recommended to carefully fill the gap between the floor and the “leg” with sealant.

Next, a tank is mounted with pre-installed fittings (drawings and explanations are supplied by the manufacturer) and fastening bolts with sealed gaskets. A rubber cuff is placed on the shelf, which seals the joint between the tank and the hole for supplying water to the toilet. Having carefully installed the tank, place washers on the threaded part of the bolts from the back side of the shelf and screw the nuts.
When securing the tank, it is important to tighten the nuts on both sides evenly - one at a time, no more than one turn at each time. This will avoid distortion and ensure tightness of the fastening. The tank must be installed firmly, tightly, and not wobble. After pouring water into the tank, check the tightness of the connections.

At the final stage, a flexible line is installed to supply water to the tank. All fasteners are included in the toilet fitting kit. To seal threaded connections, use fum tape.
Video on the topic “installing a toilet with an oblique outlet with your own hands”:
Or toilet, most people face such a problem that the level of the outlet of the plumbing fixtures pipes changes. This occurs as a result of changing the floor level and rearranging equipment. One way or another, in this case the question arises of how to raise the toilet higher. In this article we will give you practical advice on how to deal with this problem yourself at minimal cost.
How to lift a toilet? There are several approaches to solving this issueTo eliminate the problem of incompatible fittings, you just need to use modern adapters. If you are faced with the fact that the axes of the pipeline do not coincide, you should use a flexible hose system or create a new pipe gasket. The level of future placement of your plumbing depends on how well these holes coincide.
To achieve the required matching of pipes, you can use one of three options:
- create a new installation location at which the appropriate level will be maintained;
- install a wall-hung toilet;
- use a system of adapters and pipes.
Beginning of work
Before any work, it is necessary to properly prepare the workplace. In our case, everything that is not related to the installation must be removed from the room. It is best to work in a completely empty room. To change the product level you will need:
- chisel;
- hammer;
- wrench;
- level;
- felt-tip pen;
- screwdriver;
- Bulgarian;
- sandpaper;
- device for pumping water (rubber bulb);
- sealant;
- cement and sand;
- washers, bolts and so on.
Sequencing
Before looking for the answer to the question of how to lift a toilet, you must disconnect it from the sewer and water supply. To do this, you need to turn off the water supply and disconnect the main pipe on one side from the tank, and on the other from the water supply. Next, take care to remove all remaining water from the product. For this you will need a rubber bulb and a regular rag. If you leave even a little water inside, it will definitely spill out during transportation.

As it becomes clear, you can find the answer to the question of how to lift the toilet yourself. If you have ever encountered a similar problem, share your comments with the readers under this article.
 (1 ratings, on average: 5,00 out of 5)

