Decorative bottle with salt. The best master classes on decorating bottles with your own hands. Decorating bottles with your own hands using salt.
In order to decorate the interior, create a warm, cozy atmosphere in the house or please loved one an original gift, it is not at all necessary to buy expensive souvenirs. It is quite possible to create them yourself.
Lately Various decorative bottles and jars have become very popular. They are brought from travel or purchased in souvenir shops for a lot of money. However, creating such beauty yourself is quite possible. You just need to show your imagination and spend a little time.
Any glass container can be turned into exclusive item, decorating it with fabric, beads, shells, paints, appliqué, etc. A beautiful and original trinket can be made by filling it with tinted salt.
Transparent jar;
salt;
colored crayons;
funnel;
sieve;
several small containers.
To work, take any salt (fine, coarse, sea salt) and small glasses (according to the number of crayons). Pour 3-4 tablespoons of salt into a flat plate and rub it with chalk until you get the mixture of the desired shade.

Salt can be colored using a few drops of any dye, dried in the oven or microwave, and then crushed. Crayons can also be turned into powder in various ways: grated on a fine grater or crushed in a mortar. The main thing is to get a homogeneous mass without lumps. To do this, sift the crushed chalk into a prepared container.

Fill one of the cups with uncolored salt: white can also be useful. After all the shades are obtained, you can move on to the creative part of the work.

Choose a jar or bottle made of clear glass or plastic. It can be of any shape and have a neck of any diameter. Wash it and wipe dry. Using a funnel, start pouring salt into the jar so that you get beautiful waves or even stripes.

You can pour regular uncolored salt in the center, and to get an interesting pattern, slightly tilt the jar in the right side, correct the drawing with a sharp stick or move the funnel spout to the desired point. The sequence of arrangement of color layers can be arbitrary - it all depends on your imagination and taste.
Periodically, you need to lightly tap the bottle on the table so that the salt lies more densely. So fill the container to the very top, compact its contents again, add more salt and close the lid tightly.
All that remains is to decorate the jar. Beads, ribbons, ropes, bright scraps of fabric or flower paper are suitable for this. Cut a circle of the required diameter from suitable material. Wrap it around the lid and secure with an elastic band or thread. Decorate the top to your liking with the decorations you have on hand.

This original jar can be placed on a shelf next to spices or on a windowsill with flowers. If desired, it is possible to make real paintings in a jar from colored salt. To do this, use sharp sticks to mix the already poured layers and give them the required shape.

Did you know that an ordinary glass bottle can be turned into exclusive decoration interior? This does not require significant financial outlays or innate talents - do it original accessory Anyone can do it using available means. Let's see how you can decorate a bottle with your own hands.
For stylish decoupage Anything can be suitable for bottles: twines, ribbons, shells, leather, beads, salt, napkins, cereals and even egg shells - it all depends on your imagination and desire to create. You can decorate bottles in Provence, Terra, rustic, country or vintage style.


Using a large transparent glass bottle of sufficient volume, you can arrange even a small florarium in it

Don’t rush to throw away glass bottles - they can become an excellent exclusive decorative element.

Bottle decor options
- Decorating the inside of bottles. For this you will need transparent bottles, preferably unusual shape, with various depressions, notches and tubercles. You can decorate bottles with flowers, wax or cold porcelain.
- Decorating the outside of bottles. Many methods of external decoration are suitable for decorating gift drinks - the bottle can be opened and its contents removed after the decoration is completed.


DIY bottle decor: painting from the inside
An easy way to add some flair to a bottle's ribbed body. Pour paint of the desired shade into the vessel, shake the bottle, twist it under different angles, and then fix it with the bottom up. Excess paint will flow out and the first layer will dry. Repeat the procedure so that there are no unpainted fragments left.
A small master class on coloring glass bottles from the inside

Decor of bottles with salt
Decorating bottles with salt is a fairly popular option, since it does not require much money or time, but allows you to show your imagination to the maximum.

Decorating with salt - option No. 1
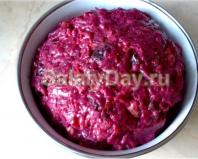
Pour salt into a heat-resistant bowl and add acrylic paint and mix, kneading the resulting mush with a fork. Place the mixture in the oven (100 degrees), take it out after an hour, knead it again with a fork and sift through a sieve. It turns out something similar to colored sand. We make several types of such “sands” - different colors.

Advice! To get interesting shades, mix several colors of paint before adding it to the salt, mashing the resulting paste with a fork.
Take a funnel and pour salt into the bottle, alternating colors. It is important that the bottle inside is completely dry. When the vessel is filled to the top, close the bottle with a cork and decorate it as desired.

Fall asleep colored salt You can put it into a bottle using a paper or plastic funnel, or you can also use a container with a dispenser.

Bottles can be filled with sand and decorated with elements using the macrame technique
Decorating with salt - option No. 2
Now we will decorate the outside of the bottle. We remove the labels and wrap an elastic band at least 5 mm wide around the body of the bottle - in the form of a spiral or in a random order.

Randomly wind rubber bands around the bottles
We evenly cover the bottle with white paint, and after it dries, apply glue. Place a bottle coated with glue on the salt scattered on the paper and gently roll it. When the glue dries, remove the elastic band and get a bottle with patterns. You can dilute this bottle decor with sparkles and rhinestones. In this way you can decorate bottles with semolina or other, more original things.


Bottle decorated using decoupage technique in vintage style


Unusually shaped bottles can be used as lampshades for light bulbs
Decor of cereals and pasta
Decor of bottles with cereals - another one interesting option vessel decoration. Main stages of work: remove all labels and degrease the glass with alcohol. We apply glue to the bottle and create several layers with a border in the form of a wavy line - glue peas below, use rice, lentils, buckwheat and any other cereals above. From curly pasta(bows, shells, leaves, etc.) create an ornament or thematic design. We fix the pasta with glue on top of the layers of cereal, and also decorate the lid with pasta. We paint the resulting creation - it’s better to use it here spray paint with metallic effect.
The simplest and economical way make a craft for today's master class - using salt and coffee. The main thing is that you don’t have to paint anything and you don’t have to wait for anything either. I just wanted to, took it and did it. Decorated bottle with your own salt it will take you about 20 - 30 minutes. As always, photo instructions with an explanation are attached below.
Decorative bottles with salt
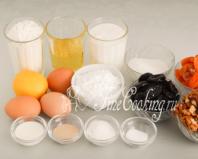
We will need: fine salt, ground coffee (I used it from a capsule coffee machine), empty bottles(not colored), watering can, long knitting needle (for compacting).

If you have coffee in capsules, then simply remove it from there by cutting off the top cap.

Let's get ready for work. The coffee must be dry. Sift it through a sieve to get rid of large impurities.

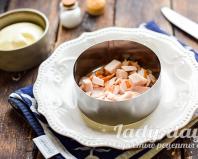
We insert the watering can into the bottle (it should be free of stickers), and move the containers with salt and coffee closer. For convenience, so as not to stretch.

We tilt the bottle and begin to fill in the first, bottom layer of salt. Our salt should be poured on one side in a mound.

Changing the order of salt - coffee, we continue to pour row after row, not forgetting to alternately tilt it in one direction or the other. The main thing is to act slowly and not make sudden movements, otherwise the drawing may be damaged.


Having filled the bottle halfway, it is necessary to compact our mixture to strengthen the pattern. Wherein upper layer should be salt (salt is simply heavier than coffee and will be easier to compact).

We take the knitting needle and lower it strictly into the center of our loose mixture (it is better not to remove the watering can from the bottle during this action).

Holding the needle by the very tip, we begin to compact our salt. At first, the knitting needle will easily fit into the mixture, but after a few minutes you will feel the filling begin to resist you. This means we are doing everything right.

Make sure that there are no grains left on the sides of the watering can after pouring coffee.

After pouring a few more rows of salt and coffee, we compact it again using a knitting needle. The main thing is that the knitting needle goes down only to the center. Do not bring the knitting needle close to the walls of the bottle, this may lead to distortion of the pattern.

Having reached the neck, we repeat compaction again. You will see how the salt settles, forming a funnel in the middle.


When compacting, removing the knitting needle may even show the bottom coffee layer through the salt. No problem, just add a little more salt.

We tamp the neck itself very carefully and carefully. Periodically add a little salt through a watering can and tamp again.

It must be compacted very well, otherwise over time the salt will settle and you will end up with a hole between the layers.

Fill the bottle with salt with a small pile.


Take water and a teaspoon, and wet the surface of the salt one drop at a time. gets wet and settles. Sprinkle more salt and wet again. Not yet formed Smooth surface like a traffic jam. The salt will dry out and harden. Now our bottle is not afraid of anything. Even when turned over, the design will remain in place.

This is how beautiful it turned out.

Different sizes and shapes of bottles look more impressive.


Did you know that an ordinary glass bottle can be turned into an exclusive interior decoration? This does not require significant financial expenditure or innate talents - anyone can make an original accessory from scrap materials. Let's see how you can decorate a bottle with your own hands.
Anything can be suitable for stylish decoupage of bottles: twines, ribbons, shells, leather, beads, salt, napkins, cereals and even egg shells - it all depends on your imagination and desire to create. You can decorate bottles in Provence, Terra, rustic, country or vintage style.
Accent decor of bottles with gold and silver plating

Using a large transparent glass bottle of sufficient volume, you can arrange even a small florarium in it

Don’t rush to throw away glass bottles - they can become an excellent exclusive decorative element.

Delicate vintage finish of a glass bottle with decoupage elements
Bottle decor options
Decorating the inside of bottles. To do this, you will need transparent bottles, preferably of an unusual shape, with various recesses, notches and tubercles. You can decorate bottles with flowers, wax or cold porcelain.

Decorating the outside of bottles. Many methods of external decoration are suitable for decorating gift drinks - the bottle can be opened and its contents removed after the decoration is completed.


DIY bottle decor: painting from the inside
An easy way to add some flair to a bottle's ribbed body. Pour paint of the desired shade into the vessel, shake the bottle, twist it at different angles, and then fix it with the bottom up. Excess paint will flow out and the first layer will dry. Repeat the procedure so that there are no unpainted fragments left.
A small master class on painting glass bottles from the inside

Original design of bottles using soot
Decor of bottles with salt
Decorating bottles with salt is a fairly popular option, since it does not require much money or time, but allows you to show your imagination to the maximum.

Decorating with salt - option No. 1
Pour salt into a heat-resistant bowl, add acrylic paint and mix, kneading the resulting paste with a fork. Place the mixture in the oven (100 degrees), take it out after an hour, knead it again with a fork and sift through a sieve. It turns out something similar to colored sand. We make several types of such “sands” - different colors.

This technique is perfect for working with children.
Advice! To get interesting shades, mix several colors of paint before adding it to the salt, mashing the resulting paste with a fork.
Take a funnel and pour salt into the bottle, alternating colors. It is important that the bottle inside is completely dry. When the vessel is filled to the top, close the bottle with a cork and decorate it as desired.

You can pour colored salt into a bottle using a paper or plastic funnel, or use a container with a dispenser

Bottles can be filled with sand and decorated with elements using the macrame technique
Decorating with salt - option No. 2
Now we will decorate the outside of the bottle. We remove the labels and wrap an elastic band at least 5 mm wide around the body of the bottle - in the form of a spiral or in a random order.

Randomly wind rubber bands around the bottles
We evenly cover the bottle with white paint, and after it dries, apply glue. Place a bottle coated with glue on the salt scattered on the paper and gently roll it. When the glue dries, remove the elastic band and get a bottle with patterns. You can dilute this bottle decor with sparkles and rhinestones. In this way you can decorate bottles with semolina or other, more original things.


Decor of cereals and pasta
Decorating bottles with cereals is another interesting option for decorating a vessel. Main stages of work: remove all labels and degrease the glass with alcohol. We apply glue to the bottle and create several layers with a border in the form of a wavy line - glue peas below, use rice, lentils, buckwheat and any other cereals above. From shaped pasta (bows, shells, leaves, etc.) we create an ornament or a thematic design. We fix the pasta with glue on top of the layers of cereal, and also decorate the lid with pasta. We paint the resulting creation - here it is better to use aerosol paint with a metallic effect.


 (1 ratings, on average: 5,00 out of 5)