How to strip thin wires from headphones. Possible causes of failure. Required materials and tools
The fact that the wires on the headphones sometimes break, as if this is normal. After all, the wires are from copper wire, and if they are frequently bent in one place, they simply break inside. The electrical contact is lost and the headphones stop working. I think it’s clear that depending on the cost and manufacturer, the quality of the wires, plugs, and headphones themselves will be different. But even the highest quality headphones, from a good company, made of normal material, can easily be damaged if they are not used very carefully. It is enough to bend and twist the wire many times at the entry point of the wire and the plug, and a break in the contact will form inside.
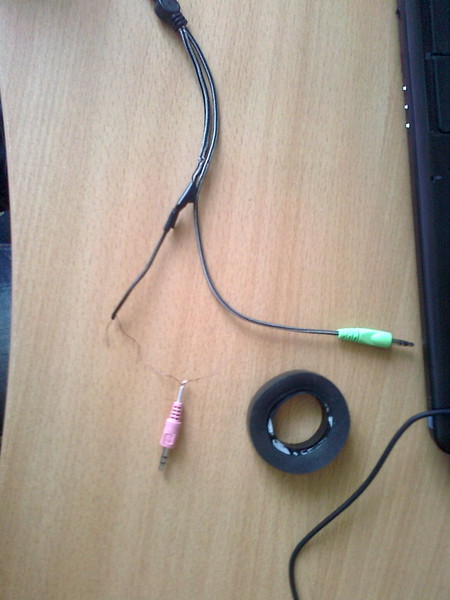
So, the wire was broken and the headphones became non-functional. What to do? If you have a lot of money and are too lazy to do anything with the old ones yourself, then you can buy new ones. But even the old ones can be easily repaired with your own hands. To repair headphones in which the wire has been torn off from the plug (this is where wire breaks most often occur), you will need regular soldering iron, solder and rosin. First, the end of the wire will need to be carefully stripped (remove the insulation). First of all, he removes sharp knife rubberized, plastic insulation, which is located outside the copper wires.
Inside you will see several colorful stranded wires(near the 3 plug, if these are only headphones without a microphone and a button). Each of them has a varnish coating. It needs to be carefully burned with a lighter at a distance of about half a centimeter. After this, use a sharp knife to clean off the deposits that have formed on the ends of the wire. Strip carefully so as not to scratch the wires themselves too much. When this is done, you can start soldering.
Here's what to do next when the headphones (wires from the plug) break. Before connecting the headphone wires with a 3.5 plug with a soldering iron with your own hands, you first need to tin the ends of the wires. That is, the place where we burned the varnish and carefully cleaned it with a knife, now we touch it with a soldering iron and pass it several times (not forgetting about the rosin). As a result, we will get the ends of the headphone wires with solder applied to them. In this state, they are easily soldered to the plug.
Of the three wires, one is common. It is soldered to the contact that is located closer to the middle of the plug. And the other two wires go to each of the headphones. They can be soldered to the ends of the plug in any order. To find out where the common one is you need to use a tester. You need to measure the resistance. There will be maximum resistance between two wires from different headphones. Well, between the common and any of the two wires going to different headphones, the resistance will be half as much as in the first case. Or check at random, by simple selection. The plug is plugged into the phone, turn on the music, and poke the wires into the contacts of the plug. Once you find the desired combination of wire locations, you begin to solder them.

P.S. After soldering the headphone wires to the plug, this place will need to be insulated. Simple and in a good way is to use heat shrink tubing. Well, if this is not available, then carefully wrapping regular electrical tape will do. You can also use a plastic tip from a regular medical needle. We carefully remove it from the metal needle itself, and put the plastic part on the wire before soldering. After soldering, we put this tip on the plug, after dropping a little glue (hot glue) there.
Headphones are used by almost everyone and everywhere these days. They can be seen not only in MP3 players, but also in cell phones. They often break, most often due to the fact that wires come out of them. Of course, they are inexpensive and you can always buy new ones, but it is much easier and faster to repair them yourself. If the latter method is chosen, you will need a soldering iron. But first you need to determine the cause of the failure, and only then solder the device.
Possible causes of failure
Most often, headphones stop working due to the fact that the wires located inside them fray or break due to frequent kinks. This mainly occurs in the places where they come out of the earphone, or at the beginning of the plug connected to the playback device. But it is possible that the conductors inside the cable can be damaged in absolutely any place. This happens due to a fall, a sharp jerk, or the cable being pinched.
First, you need to determine which cable is damaged, that is, which speaker is not producing sound. Then you need to bend this wire into different places at an angle of 90 degrees. If a sound or even a cracking sound begins to appear when the wire is bent in some place, it means that the damage is located in this area. But you can find damage using a tester, if you have one. After this, you can start soldering the device to listen to audio information.
To solder damaged or flying contacts, you will need:
stationery knife.
soldering iron on a stand;
rosin;
The first stage is removal of insulation
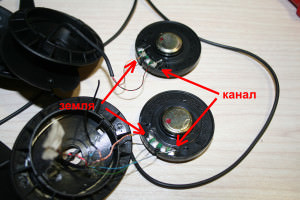
At the very beginning, before you start soldering the headphones, you need to cut off a piece of cable about 2 cm long from the damaged wire. It is thrown away. Then the insulation is removed from the cable using a knife or wire cutters. After this, you can see 2 different-colored veins - they also need to be cleaned. The left channel is marked in red, and the right channel in green. The common channel has yellow or Blue colour, or it is without insulation and does not have its own color.
The main thing when removing the insulation is not to damage the contacts themselves. If there is varnish or paint on wires without insulation, they must also be removed before soldering. It is best to simply burn them out with a soldering iron, after which the contacts are tinned using solder.
Second stage - soldering
The end that has been tinned is placed on rosin. Solder is distributed over its entire surface using a heated soldering iron. The wire is then connected to the area where it is to be soldered or to another wire. The solder melts with the tip and connects both pieces to each other. After this, the soldering iron can be turned off. Once the wire has cooled down, you can check the operation. The main thing in this process is not to confuse the cables: they must be connected in accordance with the colors.
The entire repair process looks like this:
Cutting the end of the cable.
Stripping the insulation.
Maintenance of ends.
Resoldering the plug
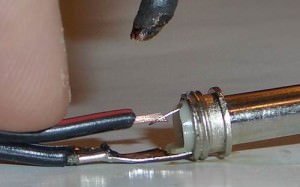
Often the plug falls off the headphones, but this problem can be easily fixed with a soldering iron. In this case, everything is carried out in approximately the same way as with wiring, step by step. The soldering iron heats up, and at this time the old plug is cut off along with a small piece of cable in order to completely get rid of problem area. The remaining wire is stripped of insulation, as are both wires located underneath it. In each core you can see 2 copper wires - they also need to be stripped a few millimeters. One of them is blue, another is red, maybe the third is copper, without painting. Pay attention to this. They are cleared of paint so that the copper tips can be seen, which must be soldered.
 Wires without insulating paint must be connected to the same in another core. The result is 3 contacts - copper, blue and red. Then a new plug is disassembled, which can be purchased at any radio parts store. The prepared cable from the headphones is inserted through its hole, and their connection begins.
The copper contact is soldered to the middle contact of the plug; it must first be threaded through a special hole. Its tip is lubricated with rosin, and soldered with a heated soldering iron tip with one drop of solder.
The same procedure is done with colored wires. Each of them is soldered to the side contacts of the plug. After this, you need to wait a little for the solder to cool. The plug is assembled, the headphones are connected to the audio playback device for testing. If both speakers produce sound, then everything is done correctly.
The wires in the headphones are very thin and fragile, like human hair. Therefore, it is necessary to remove the insulation from them carefully. Some wires, especially in small headphones, are very thin; it is unlikely that you will be able to solder them properly at home, so it would be wiser to purchase new ones.
If during soldering the solder does not hold and immediately falls off, it means that the wires need to be further processed thin layer rosin.
If during the test you find that there is no sound from the headphones, the problem is probably in another wire. But it is possible that the soldering was carried out incorrectly, so you can try to repeat the entire procedure again. This often happens if the ends of the wires are poorly stripped.
The success of the soldering operation depends on the cleanliness of the tip. Before the first use, the tip must be sharpened, giving it the required form depending on the character future work. This operation can be performed various instruments, but most often a file is used.
Second necessary operation– the soldering iron tip needs to be fornicated, that is, remove the oxide film and cover the surface of the working part with a stable layer of solder. This is done by immersing the tip in rosin during the first heating, after which, immediately wipe the tip on wooden surface or a special sponge. Then, the tip needs to be coated with solder by immersing it in melted (with a soldering iron) solder.
To connect wires in this way, you need to perform the following operations:
- Remove the insulation from the ends of the wires, if available. This operation is best done special tool, which is called a crimper, when stripping with a knife there is a danger of damaging the wire, which will negatively affect the connection - its durability and the characteristics of the network with such a connection.
- Tin the bare ends, while:
- Strip the wire from the varnish coating (if any).
- Place the bare end of the wire on a piece of rosin and heat it with a soldering iron until the flux melts, carefully remove the tip out and let it cool.
- Place a drop of solder on the tip of the soldering iron and apply it to the wire, ensuring an even coating of the wire with solder.
- Repeat the operation with the other end of the wire.
- Place the soldered ends together, take a drop of solder onto the tip of the soldering iron and apply it to the joint, achieving a uniform monolithic layer.
- In some cases, it is better and more reliable to twist the wires to be connected, which will increase the strength of the soldered joint.
How to solder wires
To earphone and plug

Remove the outer braid from the cable and strip the ends of the wires. Remove varnish coating mechanically with a knife. Tin the ends and solder them to the channels respectively. The left channel is marked with a red stick, the right – with a green one. If there is a common channel, its wire is usually used without insulation.
To the board
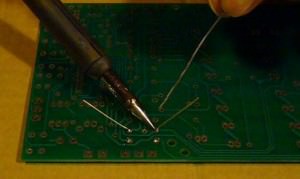
When performing this operation, preparing the end of the wire for soldering is the same as in the examples described above. The peculiarity of this operation is that the conductor on the board must not be overheated; it may burn out.
Therefore, a heat sink must be installed near the soldering area. As such, you can use tweezers, which can be used to hold the soldered end with emphasis on the conductor on the board. The soldering point must be immobilized until the solder solidifies completely.
To LED strip
Very important operation- cleaning contacts on . They are coated with silicone, and the slightest residue of it on the tape can lead to irreparable consequences. Strip the contacts on the wires shortly and irradiate.
Separate the wires from each other, cutting the insulation by about 1.5-2 cm. Place on the cable heat shrink tube corresponding to the size of the LED strip. Put smaller diameter tubes on the cut ends.
Soldering should be done very quickly, within about 1 second, so as not to melt the silicone body of the LED strip. Use a lighter to shrink the smaller tubes, push the larger tube onto the LED strip and heat it to shrink it. Upper heat shrink tube must be transparent.
To the speaker
The peculiarity of this operation is that the speaker lead wires are very thin and operate under constant vibration conditions. In addition, they are glued to the membrane. Before soldering, you need to carefully separate the wire, strip the end, and tin it. Pick up a similar wire and solder it to the broken end. Solder the other end to the speaker contact, leaving a small loop. Glue the finished conductor to the membrane with Super Moment glue.
Required materials and tools
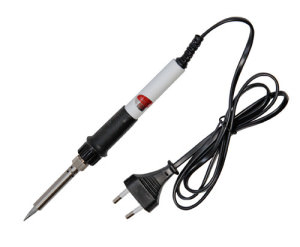
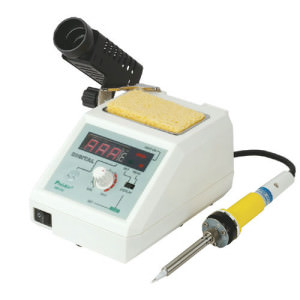
The main tool for soldering is a soldering iron.
There are many varieties of them and they are used depending on the nature of the connection being made by soldering:

The most common type of this tool, in which the heating of the rod is carried out by a heating element made of nichrome. As a rule, these devices are equipped with thermostats that prevent the soldering iron from overheating and the heating coil from burning out.
A time-tested thermocouple is usually used as a thermostat. Structurally, these soldering irons are made in various options. The simplest ones have a nichrome spiral, which is wound on dielectric material and when heated, transfers heat to the core. These products usually use a copper rod as the core, since copper has high thermal conductivity.
Ceramic
A tip made of this material, to which contacts are connected, is used as a working body. When current is passed, the tip heats up to desired temperature. Ceramic heating elements are considered the most advanced and durable, provided correct operation. In such devices, a wide range of temperature and power adjustment of the working body is possible.
Induction
The tip is heated through an induction coil. When current passes through it, eddy currents are induced on the surface of the tip, quickly heating the working element.
When the core is heated to a certain temperature, its ferromagnetic coating stops inducing eddy currents and it cools until it reaches the induction temperature of stray currents. Thus, thermoregulation occurs smoothly and the instrument maintains an almost constant temperature.
Pulse soldering irons
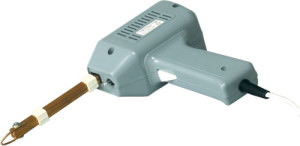
They constitute a separate category of similar instruments. They are characterized by a heating element they are included in the electrical circuit and when current passes through it, it instantly heats up. The power supply circuit provides a high-frequency transformer designed to reduce the voltage, and a frequency converter, increasing the frequency to 20-40 kHz.
Thus, the working tip is heated for several seconds while the start button is held down. When it is released, the soldering iron turns off. Modern products This type allows you to solder fairly large parts, and not just work with electronic circuits.
Gas

They are used as stand-alone devices. The work is carried out in a stream of flame from gas burner. Refueling is done from an ordinary can of lighter gas.
Rechargeable

They also belong to the class of stand-alone devices. Their power is usually about 15 watts, used for minor repairs electronic devices.
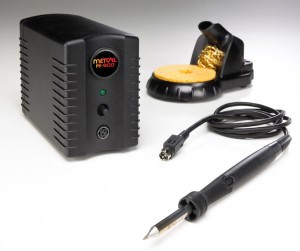
Soldering stations
There are two types of these devices on the market:
- Thermal air– heating of the soldering zone is carried out by a flow of hot air with a temperature of up to 300 o C, focused by the soldering iron nozzle. The pressure is created either by an impeller in the soldering iron body (turbine) or by a compressor (compressor).
- infrared- in them, heating is carried out by a stream of infrared radiation.
Soldering stations are used in cases where soldering irons with their copper or ceramic tips are inconvenient or generally unsuitable for work. This occurs when working with modern miniature boards that use SMD mounting.
Solders
This is a material that connects two parts during the soldering process.
Depending on the chemical composition There are two types:
- fusible with a melting point up to 400 o C.
- Refractory, in which this indicator is above 400 o C.
The choice of the required solder depends on the characteristics of the materials being soldered, the conditions and purpose of soldering, and many other parameters. Available in the form of wire, tubes, plates, pastes and other forms.
Low-melting metals and their alloys are used as solders:
- tin;
- lead;
- cadmium;
- antimony;
- bismuth;
- zinc;
- copper;
Alloys of these metals with fluxes are actively used, which make it possible to combine two main operations: tinning and soldering itself.
When heated during soldering, oxidation of the surface of the parts being connected is inevitable, which prevents the solder from spreading over the surface of the conductors and reduces the adhesion of solders to the metal. Fluxes are used to protect the surface. The flux melt destroys the oxide film, improving solderability.
Conventional division of fluxes - active and passive. Active fluxes can destroy the soldering area during operation. Therefore, the adhesion sites must be thoroughly washed with water. They are not used for working with electronic installations.
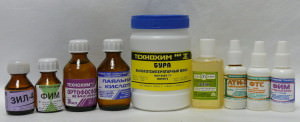
The following are used as fluxes:
- Rosin– recycled resin coniferous trees, quality indicator – light tone.
- Alcohol rosin flux– a mixture of rosin (10-60%) with alcohol, actively used in radio installation.
- Fluxes LTI– a mixture of rosin and alcohol with the addition of triethanolamine, used for soldering iron, copper, brass and other metals.
- Soldering paste made from a flux mixture, tin and lead with the addition of up to 2% silver, used in radio installation.
- Soldering fat and soldering acid– used for soldering iron parts, actively removing the oxide layer from the surface.
- Borax– high-temperature flux (melting point about 900 o C) for soldering parts made of iron, cast iron, copper, brass and other materials.
The list is far from complete; there are many types of fluxes.
Price
| Name | Image | Purpose | Price, rub) |
| Mounting binocular | 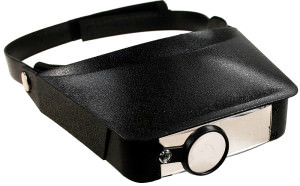 |
Eye protection when soldering, increasing visibility of the working field when installing small parts | 350 |
| Soldering kit (6 items) ZD-151 REXANT |  |
Installing parts, cleaning contacts and soldering areas and other auxiliary operations | 500 |
| Soldering iron stand “Cast iron square” ZD-10A REXANT | 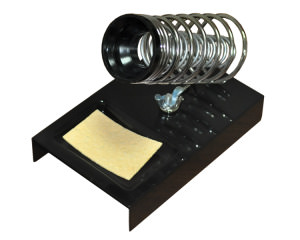 |
Storing the soldering iron when heating up and between operations | 550 |
| Antistatic bracelet ZD-152REXANT | 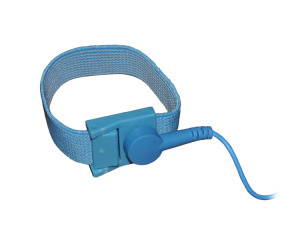 |
Grounding of static charges | 300 |
| Third hand holder with lens and stand for soldering iron ZD-10A REXANT |  |
Holding parts during operation, illumination. Used in electronic editing and watchmaking | 1200 |
| Solder desoldering pump ZD-108 REXANT | 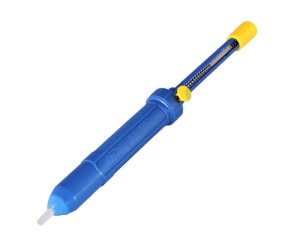 |
Removing excess solder or flux during assembly/disassembly in electronics | 350 |
| Soldering iron tip cleaning sponge 40x70 mm ZD-929 REXANT |  |
Cleaning the soldering iron tip from solder and flux residues | 80 |
The table shows examples of the design of devices; in fact, these products are produced in an innumerable number of varieties and by many manufacturers.
How to solder a wire without a soldering iron?
There are several ways to connect wires without soldering:
- Thoroughly clean and degrease ends connected wires, twist. Apply a few drops of Kontaktol glue on it, let it dry. Insulate the junction.
- Perform twist, having previously prepared the connection points, connect the wires to powerful block power supply (5-6 volts, 4-5 amperes). Connect a massive conductor, for example a nail, to the second contact. Touch the nail to the twist. An arc is formed that reliably welds the wires. Insulate the connection point.
 (1 ratings, on average: 5,00 out of 5)

