Homemade metal candlesticks. Candlesticks made from cans are an economical solution for any occasion. Other design options
One author shared a technique on how to make a forged candlestick yourself. Everything is made from sheet metal, as well as steel rod. The elements are connected by welding; here it is very important to be able to weld with spots. So, let's start making.
Materials and tools for homemade:
- metal rod (diameter 10 mm);
- sheet steel (thickness 1-1.5 mm);
- three carpentry nails;
- round nose pliers or pliers;
- construction corner (wall thickness 4 mm);
- a piece of pipe with a diameter of 2-3 cm with a wall thickness of at least 2 mm;
- slotted screwdriver;
- grinder (cutting and grinding discs are needed);
- welding machine inverter type(you will need to cook with a 2 mm electrode with a current of 60-80 A), a semi-automatic machine is also suitable for such purposes;
- paint and primer for metal;
- felt-tip pen.
The process of making a forged candlestick:
Step one. Device for bending rods
First of all, you need to start by making a small template, with which you can conveniently bend a metal rod for a candlestick. The template is made very simply, for this you need to take a piece of a corner 10 cm long and then weld two rods 5 cm long to it, the distance between them should be 3-4 cm. That's all, this device can now be clamped in a vice. If there is no vice, then another rod can be welded to the corner on the other side so that the device can be fixed to the table using a hole.

Step two. Making blanks
To make the first blanks for a candlestick, you will need to work with a grinder. You need to cut two pieces 15 and 35 cm long from the rod. The ends of the rods need to be rounded using a grinding machine.

Next, our previously made machine comes into play; with its help, the rods need to be bent in the shape of the letter S. The rod is inserted into the template and slowly bent to the desired shape. To obtain the desired bend, the fulcrum of the rod must be shifted slightly during bending. To bend the rod easily, you will need a lever; a steel tube is suitable for such purposes. The longer the pipe, the easier it will be to bend the rod.

Step three. Making and installing legs for a candlestick
To make the legs, the rod needs to be cut into 4 pieces 8 cm long. The made sections will need to be bent a little, this can be conveniently done using the same template and lever made earlier. The segments need to be mentally divided into three parts, and then folded, stepping back 1/3 from the edge.


Next, the legs of the candlestick need to be rounded at the ends, again the Sander. So that the legs can be securely and beautifully fixed on the candlestick, special recesses must be made at the opposite ends. A “stone” type disk is well suited for such purposes.

Once the legs are made, they can be attached to the candle holder, this is where welding comes into play. The legs need to be welded to a rod 15 cm long, 1 cm must be retreated from the edge of the rod. The deflection of the legs should point down. There is no need to immediately weld the legs tightly to the rod. First you just need to grab them, and then see if everything is done smoothly. If you place a rod on a table with its legs down, all four legs should touch the table, and the rod should be positioned strictly vertically. If this is not the case, the legs need to be adjusted or broken off and then welded again. After the required accuracy is achieved, the legs are welded along the entire diameter of the rod. Next, the welding areas need to be sanded.
Step four. Decorate vertical axis
In order to decorate the vertical axis, two strips need to be cut from a sheet of steel. Their length should be 40 cm and width 1 cm. The strips are welded to the candlestick by welding in several places. As for the angle of installation of the strips, here you can choose to your taste, the most important thing is that the angle of the two strips is the same.

Now the strips can be bent around the rod, the strip goes one after another, alternating by half a turn. The easiest way is to bend them by hand, but you can use pliers. Closer to the top, the strips no longer need to be wrapped tightly around the rod. When winding metal strips, you need to maintain a small distance between them. If this did not work out right away, then you can get it later by moving the plates apart using a slotted screwdriver.

At the final stage, the strips need to be broken off from the rod using a slotted screwdriver and then bent around the legs. In this position, the strips are finally welded. To bend the strips well, you can use a hammer.

Step five. Further assembly
Next, the author attaches the S-shaped part of the candlestick to the second element, that is, a vertical rod with legs, made earlier. This is done using spot welding, you need to weld it well. Subsequently, the welding areas must be sanded.
After this, the other edges of the metal strips wrapped around the rod are welded in the same place. Before welding, you need to make sure that they are symmetrical.


Step six. Making leaves for the legs
To cover the legs of the candlestick, the author makes leaves from metal. You will need four of these leaves in total; they should be even, the same size and beautiful. To make sheets, you will need to make a template; for such purposes you will need a sheet of cardboard 9 cm long and 5 cm wide. Then the template is traced on a sheet of metal and cut out using a grinder. The edges are processed using a sanding disc.

The author also makes veins on the leaves; for this, the leaf is first marked with a felt-tip pen. Along these lines, you then need to make notches of shallow depth with a grinder. Next, the leaves are processed on top with a petal sample sanding wheel.
To give the leaves a relief, their tips need to be bent using pliers. This can be done by hand if the metal is soft. One end of the leaf should point up and the other down. In this case, the bends should be smooth, without creases.

That's all, now the leaves can be welded to the legs. Welding is carried out on the other side. You need to work carefully so as not to burn the leaves. The easiest way is to solder them. Leaves may change color when welded; this is absolutely normal. That's it, at this stage the base of the candlestick is finished.


Step six. Making bowls for candles
First, the author makes a crescent-shaped template from paper, it is 11 cm long, 6.5 cm wide, and the bending depth is 2.5 cm. Well, then the template is traced on a sheet of metal and cut out using a grinder.

The two crescents need to be adjusted to each other so that they are tightly connected. Then they bend from the inside, and a bowl is formed. There can be a gap of no more than 1 mm between the halves of the bowl. To bend the bowls you will need a flat object round shape. A pipe or a round mallet is suitable for such purposes. The halves are welded from the inside.


When the structure is assembled, it can now be well welded at the junction between the outside and the inside. You need to weld at points, with each new point should slightly cover the previous one. As a result, a complete weld seam is formed. The outside then needs to be treated with a petal-type disc.
Candles have accompanied people for many centuries. It is known that the very first of them, which are mentioned in historical documents, were used in China around 200 BC.
And in Europe they appeared after 400 AD. The first, so to speak, models were made from natural fats and wax, and later they began to use oil for the production of candles.
Paraffin was a real revolution in their production, but they began to use it only in 1830.
Initially, candles were needed only for lighting. However, now that we have electricity, we still keep them in the house: basically as decorative element, and sometimes for light, depending on the circumstances and mood.
Today we will tell readers of the Design Museum how to make original candlesticks with your own hands.
Candles in a jar with a wide neck

Preserving jars are a delicious option for this project. You can make many interesting candle holders out of them.
For example, these floating candles have a wonderful rustic theme. They will look great on any table. You can also use them as central element for wedding serving.

You can do more interesting design, adding color to such a product using paint, as well as personalizing it, as shown in this example.
Cut out a heart from ribbon or something else, attach it to the jar and paint it without touching this shape. Then remove your “stencil” and you will have a beautiful candle holder. (Check out Heartloveweddings.)

This project is similar to the very first one shown here, but used regular small candles instead of floating ones. The jars are placed upside down, and the candles are attached to the lid. (Look at Simplykierste.)

Reusing old cans and fabric will allow you to create something elegant and beautiful. First, measure the container and decide how much lace you will need for the wrapper. Then apply glue to the edges of the material and wrap the jar. Place the candles inside. (Look on Flickr.)

You can also make lanterns using oil. Drill a hole in the center of the lid for the wick, pour some oil into the jar, and you have the perfect lantern for your yard. Just place it on your terrace and you will get a truly wonderful view!

This material may seem difficult to work with, but you should still try using it if you want to carry out your own design project.
For example, try making stylish candle holders. It's much simpler than it might seem at first glance. You will need: cement powder, paper cups, coins, Vaseline, adhesive tape and disposable containers. (Look at Sayyes.)

There is an even easier way to create a unique candlestick made of concrete. For example, such a product can be intended for four candles at once. This is a simple block with holes.
To make it you need a form, concrete mixture and candles. Pour concrete into the mold and place candles on the right places. Wait for the solution to harden. And when the spark plugs burn out, you can remove them and replace them with new ones. (Look at Signepling).

There are many other interesting designs you can try to make. In principle, the shape depends only on your desire. Just figure out how to make it, or find ready-made molds (for example, for baking) with the right size for you. (Look at Nimidesign.)

The fact that concrete is not a very delicate material gives you the opportunity to make candle holders with a rougher design if necessary. At the same time, they can look very organic.
The lines don't have to be perfect! On the contrary: any irregularities and imperfections will make your product unique. (See this site for details.)

You can use a soda bottle as a casting mold. Start by cutting off the top. Add a small amount of water to the bottom, then a glass of concrete and mix.
Continue adding both the first and the second. Gently shake the pan to ensure it is level. Place the candle on top of the mixture and press it down.
Spread the concrete evenly around the candle. Allow it to dry overnight and then remove from the mold. (Look at Oncewed.)

This project will require milk cartons, duct tape, and concrete. Remove top part cardboard base, and then cut it around one of the sides to form a lid.
Make four holes for the candles. Fill the mold with concrete and use masking tape to secure the cut part. Insert candles into the holes and let the concrete dry. (Look at Chezlarsson.)

You might like the look of the bottom plastic bottle, which can also be used for a form. First, cut it off. The cut doesn't have to be perfect. Then fill in concrete mortar, shake a little and insert the candle on top. Let it dry and you can use it.

By painting the lamp, you will give it interesting view. The products shown in the photo were made using the technique we described above. Wherein Bottom part painted in various metallic colors. You can simply dip the bottom into a container of paint, then wait for it to dry. (Check out Monsterscircus.)

These unusual looking candle holders have lids. That is, you will need two molds for one product. One will hold a candle, and the other can be used to cover it after use.
The form can be chosen the way you like: just find it and do it as we previously described. Do not deny yourself the pleasure of having a concrete candlestick! (See this site for details.)
Wooden lamps
If you prefer warm material with a variety of textures, try wood. And although wood can easily burn and from a safety point of view it is not entirely correct to place it next to an open fire, it will look elegant and become a favorite decoration in your home. The main thing is not to leave such a product unattended during use.
This option shows us a compact and sleek design. This is a large block of wood with three holes. And since the candles are placed inside a glass candle holder, there is no danger of the product catching fire. (See this site for details.)

This candle holder is essentially a simple piece of wood with five small holes for thin candles. (Check it out on Houzz.)

If you like natural look logs, why not use large stumps to create unusual, rustic candle holders? These mini sculptures will make a great impression on your guests.

Do you recognize those tiny candles that grace our birthday cakes? But they can also look great on a table, on a fireplace, and in other places. Make cute little cubes, drill holes in them and you're done! (Look at Handkandhunt.)

Take advantage of what nature gives us and find a piece of wood that has an interesting shape. Clean it and make recesses in it for attaching candles. You will get a stunning decorative element that will give your home an unusual atmosphere. (Look on Etsy.)

Everything here is similar to the previous description, the only difference is that this piece of wood is thinner. This candlestick is also very simple to make. Take a piece of wood and make a hole in it for the candle so that it fits a wide shape. This product can also serve as a table for romantic dinners. (Look at Brit.)

When it comes to wood, the finish doesn't have to be flawless. Each piece of wood is unique in itself, so no matter what you do to it, it will remain that way. To give your home a rustic look, try using scrap wood. (Check out Aamodestuffblog.)

We have shown you many options on how to make candlesticks from wood. They are similar to each other, but at the same time completely different. In this case, the log was cut in half vertically. This way it rests confidently on the table, while maintaining its natural appearance. (See this site for details.)

Candlesticks made from pipes

Try an industrial style design if you think it would suit your home well. For example, use such a pleasant accent - a candlestick made of copper pipes. Try combining pieces to create a strong structure with a good base and an interesting shape. (Look at Anmagritt.)

You can combine various materials and finishing. This candlestick, for example, is made from copper tubes, but has a base made from a piece of wood. Reliable bases with an ideal diameter hold the candles tightly. (Look at Adailysomething.)

This candle stand is made of black metal parts. It showcases a symmetrical design with a solid base and simple shape. This product will look amazing in the fireplace area or in the center dining table. (Look on Etsy.)

If you need something simpler, try this project - it will take you a minimum of time. This is a minimalist copper candle holder. All you need is a thin copper wire, which you can bend the way you want. Experiment with a few samples until you find something you really like. (Look at Amerrymishapblog.)
Glasses and bottles

Glass - provided that it has suitable size- can be a wonderful lamp. But you might want to personalize it a little. You can, for example, use twisted sisal and wrap it around the base of a candle holder for a classy, rustic look. (See this site for details.)

Here's something you've probably never thought about. You can make a candle holder out of a beer bottle! Cut off the top part and carefully attach it to the bottom. This way you will have a wonderful base for a candle that you just need to put inside. (Look on Etsy.)

If you want to try something more flashy, you can use glitter. Take an empty glass that you like, apply a little glue to inner surface and sprinkle it with glitter. Wait until everything dries - and you're done! (Look at Houseofearnest.)

This wine bottle turned into a lamp-candlestick. To do something like this you will need to cut the bottom off. Then find a suitable stand, such as a wooden disk. Do not cover the neck so that there is a vent. (Look on Etsy.)

Use the power of reflection to obtain an intriguing item. Apply silver paint for this. Plus, if the glass has a certain design, it will be even more beautiful. Choose a glass decorated with monograms or other designs. (Check out Ruffledblog.)

Look what interesting idea for the center of the table. Take empty ones glass bottles(They may be different sizes and shapes), as well as some paint and a brush to write the numbers. Then insert the candles into the neck. Choose them with a suitable diameter. You can also tie this candlestick with twine or cord.
Wrapper design

Do you want to do something wonderful for Christmas that will create a magical atmosphere around you when you watch TV in the evening? Why not make a “sweater” for the candle holder? You need yarn and crochet hooks. Choose a template you like and get started. (See this site for details.)

Bring a touch of rustic chic to your home with these unique handmade lamps. You will need twigs, a can of spray paint and a glue gun. First, paint the sticks, and then glue them to the cup one at a time. (Look at Freutcake.)

As you probably know, rice paper ribbons are an incredibly versatile item that is a lot of fun to work with. You can decorate a lot of things with them, including candlesticks.
Choose prints you like and start creating. Be creative and come up with your own design. (See this site for details.)

The author of this project used a very simple yet chic way of decorating. This is a simple rope wrapped around the base of the candle. If you decide to take the same step, take twine, paper tape and a glue gun. (Look at Mintedstrawberry.)

A candle holder in the form of a glass cylinder wrapped in bark will look truly charming. The idea is not only interesting, but also simple. Only necessary glass vase, threads, glue and birch bark. (Look on Etsy.)

If you want, you can try to make something fresher. For example, like this wonderful thing in the photo above. A candle in a glass holder with small fresh flowers tied with twine.
This original product captivates the eye and gives modern room a touch of tenderness. And besides, the flowers will smell nice!

And the last project in this chapter, which incorporates all your wishes. Glass jars and paper snowflakes around them. You can choose a theme directly for yourself and replace the snowflakes with what you like best. (Look at Michelemademe.)
Other design options

There are many more great ideas you can use, but they don't fit into any of the above categories. How do you like the deer antler candlestick?
Very unusual option. Do something similar yourself. For this you need: copper bushings and caps, horns and candles. (Look at Adailysomething.)

This candle stand has a sculptural design and is different from others not only in shape but also in color. The piece has bright violet accents and looks very elegant.
To create such an item, take tape and demarcate the areas that need to be painted, and then simply dip the candlestick in the paint. (Look at Kristimurphy.)

Try modeling your own candlestick using clay. To make this you will need a rolling pin, a candle cone, a pizza cutter, wine stopper or something similar and modeling clay. A very tempting project to tackle over the weekend. (Look at Oncewed.)

Screen-printed burlap reveals its true beauty when it gets dark. If you want to do the same interesting subject decor, prepare Consumables: cardboard or stencils, burlap, glass candlesticks, ribbons, acrylic paints, glitter and threads to match the burlap. (Look at Justcraftyenough.)

We need to come up with something fun for children's party? Here's an example: candle holders in the shape of dinosaurs. You can use other toys that your child likes for these purposes.
Just take something that can hold candles and glue it to the toy. (Look on Etsy.)

Basically, you can reuse any item that can hold a candle. Even fuses or something similar, like in this photo. Check out this unique and inspiring project! (Look at Pikkuvarpunen.)

And such candlesticks are even more unusual. These are old ladles, so they would look best in the kitchen, adding a bit of country charm to it.

If Halloween is approaching, pay attention to this decorative option. Take a small pumpkin, make a hole in it and remove everything inside.
Grease the surface with glue and sprinkle with glitter. Wait until everything is dry and place candles inside. To make your job easier, take a drill. The hole should be slightly larger than the candle. (Look at Twigandthistle.)

Pepper and salt containers make great candle holders because they have little holes in the top. All you have to do is place the candle inside and make a handle out of wire. Then you can decorate the product and hang it on a branch in the garden, for example. (Look at Thehomelessfinch.)

It is also very easy to build an original candlestick from a tin can. In addition, prepare a can of spray paint, a nail and a hammer. First, fill the container with water and place it in the freezer.
Then use a template to punch holes in the base of the jar. Remove the ice and spray paint the product. (Look at Celebrations.)
The ancient art of blacksmithing amazes modern descendants with its elegance. Among the variety of products that came out of the hands of craftsmen, special attention deserve forged candlesticks. Exquisite decor will become a worthy design element in different styles interior
We will tell you in detail what shapes of forged candlesticks will harmoniously complement the interior, where to find the optimal place for them, and how rich the imagination of blacksmith masters is.
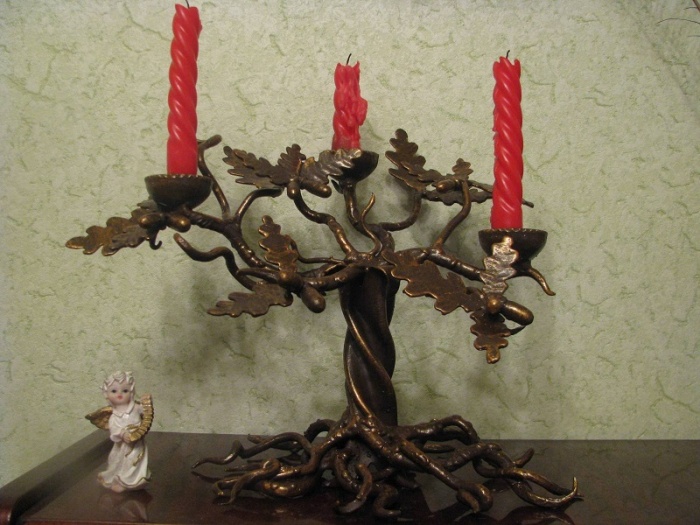
Types of forged candlesticks
Regardless of the size and the image presented, all forged candlesticks are divided into three large groups:
- desktop;
- wall;
- floor
Forged wall candlesticks are the most popular among all other models; they have the shape of a sconce, a flat panel, or take on even more intricate configurations.

Tabletop specimens are also popular in interior design. Floor products are much less common, as they require large space, so that there is an opportunity to appreciate in the presented perspective all the presentability of the forged masterpiece.
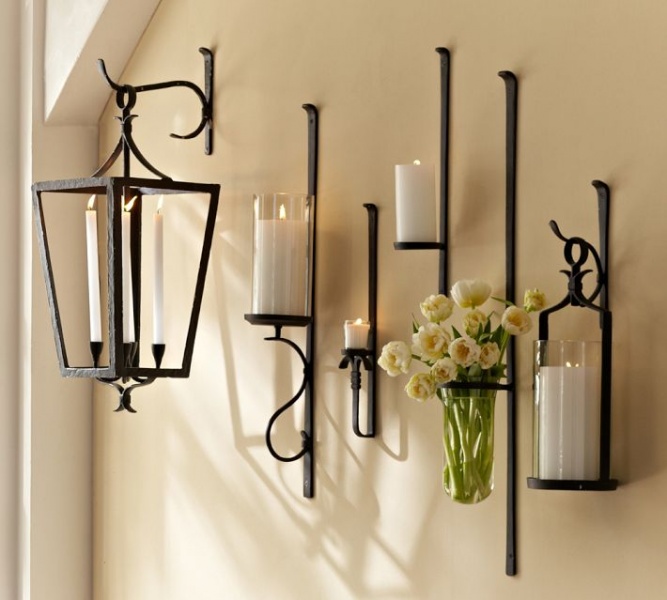
The element for securing the candle can be made in the form of a plate, ring or hemispherical recess of a certain diameter.

The sizes of forged candlesticks vary from the smallest to the largest. Small specimens are usually intended for one candle; more massive ones can be installed from three candles or more. Although this is not a rule, you can choose a large one for interior decoration. original model candlestick, created for one candle.


The role of candlesticks in the interior
When choosing the shape of a candlestick, they are guided by the functionality of the room where they plan to install it. The following recommendations will help you avoid mistakes when decorating a stylish interior:

Comment! The complexity of the form is determined based on the interior style of any room.
In some cases they stop at simple models with strict lines, creative personalities appreciate eccentric images, keepers of traditions often choose complex and intricate specimens.
The gallery of forged candlesticks in the photo will give an idea of the variety of design solutions:


Areas for placing candlesticks
A forged candlestick is not the only decorative metal element that can become worthy decoration design. For interior decoration specialized companies they offer a wide range of elegant chandeliers, original furniture, staircase and window grilles. The atmosphere will be organically complemented Decoration Materials in the form of marble, natural and artificial stone, tree.

Flower stands look extremely impressive in the interior, decorative design which are made in the same manner as candlesticks. The recommendations below will help you navigate the placement of forged products on various areas living space:
- Art lovers will be interested in watching how the palette of the canvas changes, on which the shadows from the candles located on the sides play.
- Metal decor placed along the flight of stairs will help bring the atmosphere of the hallway closer to the atmosphere of an ancient castle.
- The interior will be filled with mystery if you hang it wall models on the sides of the mirror or mounted on the mantelpiece.
- Candlesticks on the kitchen wall will create a relaxing atmosphere, so necessary for a late dinner.
- The purpose of the bedroom itself demonstrates the need for the presence of forged masterpieces. They can be located above the head of the bed, on the nightstand or cosmetic table. An intimate atmosphere will be ensured.
The play of light and darkness is mesmerizing in any room. Perhaps the only place where candles are not needed is a children's room. Photos will help you enjoy the sophistication of forged wall candlesticks:


Design options tailored to style
The functionality of the room is not the only factor that determines the form forged product. Interior style has a significant impact on the choice of model.
Classic shapes
Classic interior style, modern and baroque gravitate towards traditional forms of forged candlesticks. Regarding the location, all options are acceptable here - on the wall, table or floor. Characteristic forged products - smooth lines, rich decor.

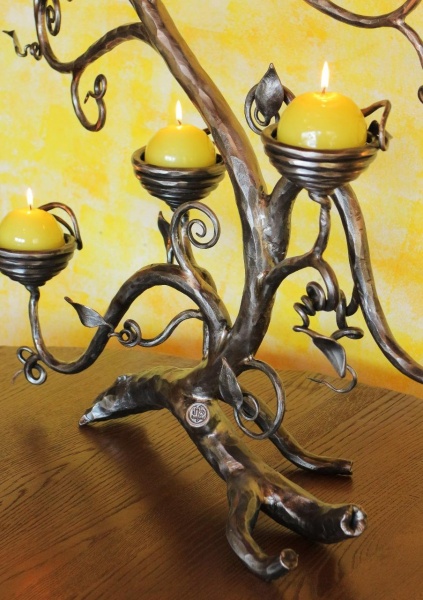
The next pair of candlesticks radiates incredible beauty, the flickering of the candles on which is reflected in thousands of reflections in the gilded plating.
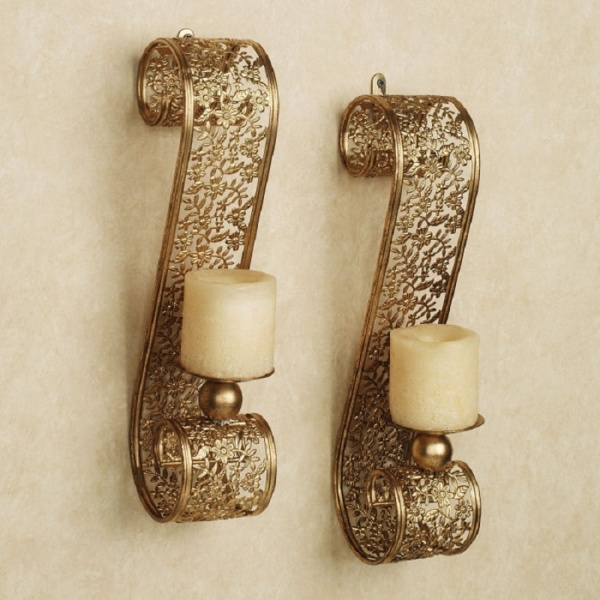
The Baroque interior will be decorated with complex forged candelabra, which amaze with their sophistication:


Comment! Art Nouveau is invisibly associated with natural motifs, so for the interior they choose specimens that contain leaves, flowers, bunches of grapes and other vegetation.
There are a lot of design solutions for decorating forged candlesticks. When creating a suitable image, not only the shape is played out, but also the color scheme. Look at the photo to see how differently a rose is perceived, silently testifying to romantic feelings, and a wall tree, evoking peace and tranquility:
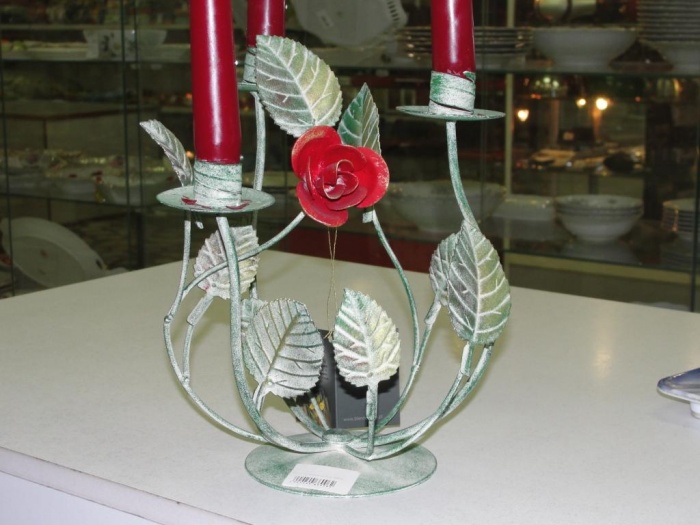

A logical continuation of the natural theme will be forged candlesticks in the form of a pair of branches, which are also ideal for an Art Nouveau style interior.

For a spacious hallway, the following idea will be a godsend, where candlesticks are framed by a whole picture of birds with cages.

The model looks simple and tasteful, relevant for an interior where vintage reigns supreme:

National character
There are many interiors with national flavor. This includes:
- Strict Scandinavian style.
- Motley country.
- Romantic Provence.
- Laconic Japanese.
- Multifaceted oriental style.
Therefore, decisions when choosing forged candlesticks for the interior vary. The presented photos with comments will help you when decorating your own interior.
Provence, like Art Nouveau, is characterized by the presence of natural motifs. Therefore, forged candlesticks, where leaves or flowers are used as decoration, are the optimal solution.

Provence is associated with romanticism French province, the original lantern is designed to achieve the desired atmosphere, as in the photo below:

A forged candlestick of a simple shape, placed on the wall with non-standard finishing, will be a worthy decoration for a country style interior.


Scandinavian style does not tolerate unnecessary complications, so the next product will harmoniously blend into the practical northern atmosphere and fill the home with a cozy flickering fire.

The discreet Japanese are consistent in everything, including the interior. The laconicism of the model of the forged candlestick shown in the photo can hardly be accused of excessive decoration.

Another example of functionality, suitable for an interior in an eastern direction, is shown in the photo below:
Extraordinary modernity
Modern interiors are interesting in their own way. The main emphasis here is on concise and functional design. But simplicity of solutions is not at all necessary. It is not forbidden to introduce a touch of extravagance and eccentricity into the atmosphere. And forged candlesticks of original shapes will help in solving this problem.

A reflection of the character of an avid bachelor or a mild cynic can be a forged candlestick in the shape of a scorpion, which evokes associations with a poisonous nature.

A woman can be pleased with the following forged candlesticks:
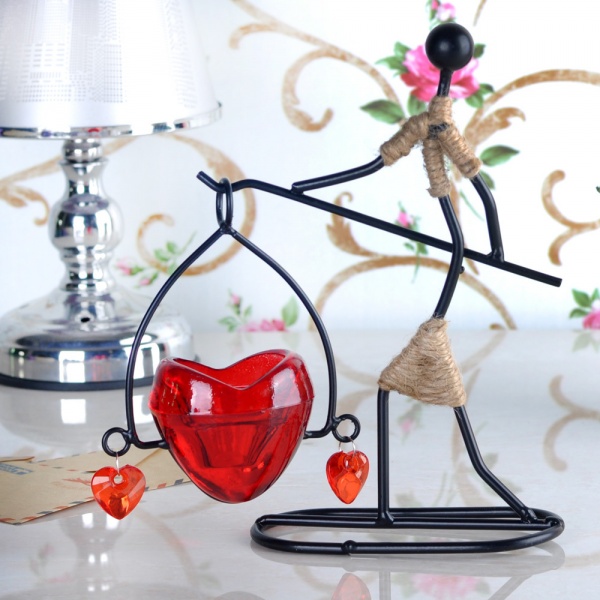

Clearly expressed minimalism can be seen in the following model:

Adherents creative interior You will like another original design of forged candlesticks.
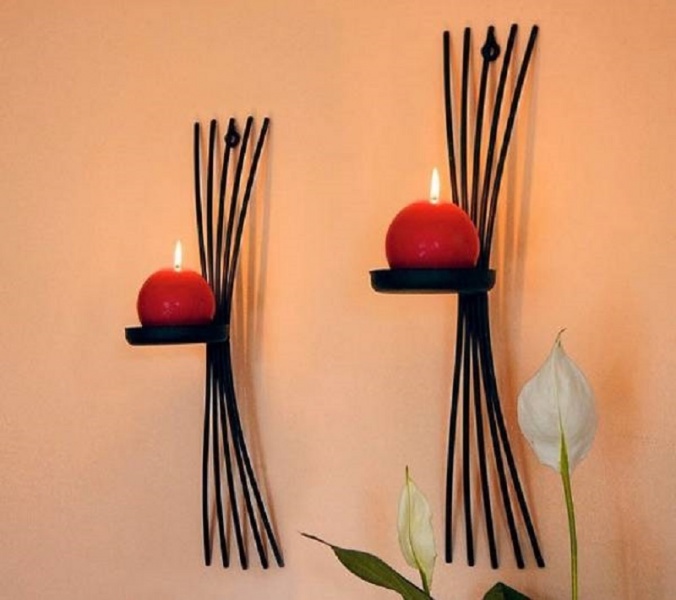
A simple shelf for a large number of decorative candles looks simple and at the same time elegant.
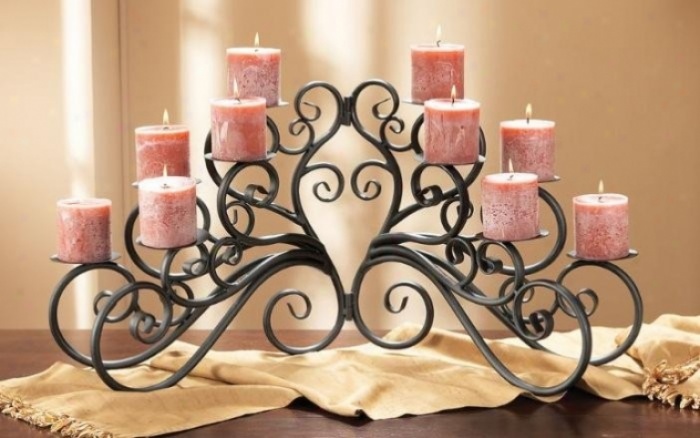
Another example of brevity that skillfully contains romantic overtones.


It is difficult to choose a specific interior style that includes forged candlesticks with non-trivial images. But lovers of everything extraordinary have always existed, so there will be those who want to become the owner of an octopus, a dragon, a harp and some kind of fairy-tale tree.


Creative people will be able to organically fit the presented models into own interior or place an order for an even more unconventional look.
Each forged candlestick is interesting in its own way, even if it is presented in a simple form. Specialized companies offer a wide range of finished products and can produce an individual forged piece in accordance with the customer’s wishes. If you wish, you can become the owner of a rough candlestick for a Gothic interior or an exquisite and sophisticated masterpiece that will decorate the aristocratic setting of classicism.

In order not to make a mistake with your choice, when buying a forged candlestick, pay attention to the following points:
- Stability of table and floor structures. The selected model should not wobble or tip over.
- Strong fixation of candles that should not fall out.
- Quality of paints and varnishes. When the forged product is heated, no unpleasant odors should be released.


Interior of a room with decor self made made of metal, always interesting and original in its own way. There are practically no limits to blacksmithing, so the models presented are only a small part possible solutions design.
Materials and tools for homemade work:
- metal rod (diameter 10 mm);
- sheet steel (thickness 1-1.5 mm);
- three carpentry nails;
- round nose pliers or pliers;
- construction corner (wall thickness 4 mm);
- a piece of pipe with a diameter of 2-3 cm with a wall thickness of at least 2 mm;
- slotted screwdriver;
- grinder (cutting and grinding discs are needed);
- an inverter-type welding machine (you will need to weld with a 2 mm electrode with a current strength of 60-80 A), a semi-automatic machine is also suitable for such purposes;
- paint and primer for metal;
- felt-tip pen.
The process of making a forged candlestick:
Step one. Device for bending rods
First of all, you need to start by making a small template, with which you can conveniently bend a metal rod for a candlestick. The template is made very simply, for this you need to take a piece of a corner 10 cm long and then weld two rods 5 cm long to it, the distance between them should be 3-4 cm. That's all, this device can now be clamped in a vice. If there is no vice, then another rod can be welded to the corner on the other side so that the device can be fixed to the table using a hole.

Step six. Making leaves for the legs
To cover the legs of the candlestick, the author makes leaves from metal. You will need four of these leaves in total; they should be even, the same size and beautiful. To make sheets, you will need to make a template; for such purposes you will need a sheet of cardboard 9 cm long and 5 cm wide. Then the template is traced on a sheet of metal and cut out using a grinder. The edges are processed using a sanding disc.

Make veins on the leaves; for this, the leaf is first marked with a felt-tip pen. Along these lines, you then need to make notches of shallow depth with a grinder. Next, the leaves are processed on top with a petal sample sanding wheel.
To give the leaves a relief, their tips need to be bent using pliers. This can be done by hand if the metal is soft. One end of the leaf should point up and the other down. In this case, the bends should be smooth, without creases.

That's all, now the leaves can be welded to the legs. Welding is carried out on the other side. You need to work carefully so as not to burn the leaves. The easiest way is to solder them. Leaves may change color when welded; this is absolutely normal. That's it, at this stage the base of the candlestick is finished.


Step six. Making bowls for candles
First, the author makes a crescent-shaped template from paper, it is 11 cm long, 6.5 cm wide, and the bending depth is 2.5 cm. Well, then the template is traced on a sheet of metal and cut out using a grinder.

The two crescents need to be adjusted to each other so that they are tightly connected. Then they bend from the inside, and a bowl is formed. There can be a gap of no more than 1 mm between the halves of the bowl. To bend the bowls, you will need a flat, round object. A pipe or a round mallet is suitable for such purposes. The halves are welded from the inside.
So autumn has come. As always, unexpected and unexpected. It's time for a cup of hot coffee, in terry socks, under a wool blanket by the fireplace. Or by candlelight in beautiful candlesticks. The flickering of a candle that shines with real fire will create an atmosphere of comfort and a romantic atmosphere in your home.
Today, a candlestick is not so much a functional as an aesthetic item in the design of space. Candle fire can make the atmosphere of any room more mysterious and exciting, but at the same time more calm and cozy. Even if the candle is not lit, an elegant candle holder will act as an excellent decor in your home.

Homemade candles and candlesticks not only please the eye, but also add coziness and warmth to the interior of the room. Making them is not at all difficult, and the result of the work can either be kept at home or given to someone close. We offer you several simple master classes on how to make candlesticks from jars with your own hands.
Such candlesticks would be appropriate:
- Inexpensive
The warm flickering of many candles in the garden will turn any ordinary evening at the dacha into a fabulous, cozy and romantic one. A minimum of materials, a little time and effort - and you can easily make garden lanterns - candlesticks with your own hands!

Beautiful, very cozy candlesticks for your home and garden can be made from small glass jars. You can put a finished candle in a jar candle holder, or you can pour wax into it. Everyone decides for themselves what type they need. How to do it?
Master class on a glass jar candle holder

You'll need:
- Pieces of wax.
- Saucepan.
- Wooden stick.
- Aroma oils.
- Dyes.
- Wick.
- Glass jar.
Step 1
To pour wax into a glass container, you must first prepare it. To do this, take a piece of material and cut it into small cubes. Place the crushed wax in a saucepan.

Melt the wax in a water bath
Step 2
Turn on kitchen stove and place a saucepan with water on the burner, and place a container of wax on top. Make a water bath. Stir the wax with a wooden stick. Until it completely melts.
- Then turn off the stove and, without removing the saucepan with wax, add the necessary additives: aromatic oils, dyes, etc.
- Mix everything thoroughly with a wooden stick. The wax is ready.
Remember that it can harden very quickly. Therefore, immediately make a candle out of it.

Pour the wax into the jar, carefully holding the wick
Step 3
- Take a jar and attach the wick inside it. To do this, drop wax on one end of the cord or use a special tablet clamp and lower it to the bottom of the container using a straw (see photo).
- Secure the other end of the wick so that it does not fall inward. To do this, wrap it around a wooden skewer or make a special clamp.
Slowly, so that the wick does not move or fall, pour the liquid wax into the glass container.
Step 4
When the wax on top has hardened, you can remove the wick mount. If there is a hole in the candle, pour the remaining wax into it.
If you want a striped candle, pour in the wax, alternating colors and letting each row dry.

Striped or gradient candle in a jar

This candle also looks original in small flat jars

Candle with lavender
There are also many options for other handmade candlesticks made from glass jars.
Flashlights - Candlesticks can be hung on hooks, nailed to a fence, hung on a veranda, terrace or directly on tree branches. If there wooden frame or a pallet, make an entire garden chandelier out of candlesticks!
It is advisable to pour sand, grains or fine gravel into jars for candles to stabilize the candle inside

Hanging candlesticks for the garden
Detailed master class on how to do it - follow the link.

Harness pendants

Wicker pendants
Very simple, but quite elegant and interesting candlestickcan be made from a half-liter jar.
- Any glass jar, such as a mayonnaise jar, will do.
- Remove the label and place inside the jar fir branches and sprinkle generously with coarse salt.
This winter option candlestick, and our tree seems to be covered with snow. We place a candle in the initiated snowdrift.

Winter candlestick
Glass decor cans painted in dotted or stained glass technology will turn the simplest bottle into an elegant vase or candlestick. In the photo below, homemade candlesticks are painted with contour paints. Also try painting jars with stained glass paints, it will be very beautiful!

Dot painting of a candlestick

Made using a gold outline on glass

Moroccan candlestick from a jar - glitter painted
It is very easy to make a stained glass candlestick from cans:
- Using a glass contour, you need to apply a design to the jar. Instead of contour, you can use glitter. Then paint the jar with stained glass paints.
- Allow the drawing to dry for 1-2 hours. Then insert a candle into the jar and you can admire the result.
Such a special glass contour can be found in any “decor” store.

Contour painting technique
You can also use the tote technique to paint plates -
Candlestick decorated with semolina from glass jar looks very impressive.
- You need to start working from the bottom of the jar. It must be thoroughly greased with glue and rolled in semolina.
- Then use glue to draw arbitrary patterns on the walls of the jar and also sprinkle them with semolina.
- When the glue has dried, the pattern must be covered with paint and allowed to dry again.
- You can fix the result using hairspray.

There can never be too many candlesticks - every romantically inclined person knows this, as well as everyone who loves evening gatherings with friends by candlelight. Using a glass jar is an original and affordable way to decorate your home and give it a cozy atmosphere.

The jars are decorated with glitter
If you decorate a jar with glitter, then such candlesticks are an excellent decoration for a wedding or New Year's table.
How to do it? See the article ““ - the execution technique is the same!
A structural candlestick will turn out, if you wrap a rope around a jar. Its size does not matter; here you can focus on your own imagination and preferences.

- We cover future candlesticks with paint. To do this, you can use a brush or washcloth. While the paint layer dries, prepare the candles.
- We attach the twine and color it. At the final stage, remove the rope. We place candles in the finished product and install it in the chosen location.
How correctly and evenly? See article.
In fact, making a candle holder from a glass jar is not at all difficult. Your imagination is important here. An ordinary jar can be decorated in different ways, and you will get an original candlestick.

Canvas hearts are attached to the jar using silicone glue

Decor with linen and lace

floating candle

Decor with an old fishing net
For example, you can cover a jar with stars cut out of foil. You can crochet it and use an unusual pattern to give it a unique and inimitable look. Or you can cover the jar with colored pebbles.
You can also paint the jar with paints and draw a picture on it. Some even decorate with lace and it also turns out very beautiful and looks unusual. In the photographs you can see some options for homemade candlesticks.
Master class on a candlestick made from a jar and decorative stones

To do this you will need:
- glass jars;
- silicone glue for glass;
- decorative glass pebbles of different sizes.
- Candle.

- Take a glass jar and peel off the label.
- Apply glue to the decorative glass stones one by one and glue them to the jar. So carry on glue each pebble in a checkerboard pattern, starting from the top of the can.

- Insert a candle inside the jar. Your magnificent candlestick is ready.

Pebbles are also attached with silicone or “Moment” type glue.
Instead of glass pebbles, you can use sea or decorative ones for flowers! It will turn out very impressive
Master class on a candle holder made from a glass jar with a window
To do this you will need:
- glass jars;
- painting livestock;
- acrylic paint or spray paint
- twine, ribbon.
- candle.
Step 1
Take a glass jar and stick a piece of masking tape on its wall. If the stripes are thin, then make several rows overlapping each other.
Step 2

Glue adhesive tape or masking tape in the shape of a heart
Cut out a silhouette from the pasted tape. In our example, this is a heart. Remove excess tape from the jar, leaving only the silhouette of the figure on the wall.
Step 3

Paint with acrylic paint using an aerosol can
Cover the jar with paint. It is most convenient to use a spray can. To do this, roll several newspapers into a tube and put a jar on them. Cover the entire surface evenly with paint. glass containers. If necessary, make another layer. Instead of a spray can, you can use acrylic paint. But it takes longer to dry.
Step 4
When the paint is dry, use something to hook the masking tape and remove it. Decorate the neck of the jar with twine or ribbon. Place a tablet candle inside. The original glass jar candlestick is ready.
Small candlesticks glass jars. Many people think that the best candlesticks are made from tall or wide jars. After all, they can accommodate a lot of decor and, thanks to their size, there is a large field for creativity. But in fact, you can make a very beautiful candlestick from a jar from baby food. Sometimes just a couple of touches are enough and a wonderful decor is ready.

Stencil for an openwork candlestick
How to make a candlestick from a tin can?
Small tin cans can be an excellent material for a beautiful New Year's candlestick.
This beauty is made from an ordinary tin can and paper lace, which can be made independently from regular wallpaper and a hole punch.

Country style candlestick
- First, the jar is painted with acrylic paint.
- Then you can attach a thin strip of fabric lace to the paper lace. The resulting tape is glued to the painted, dried surface of the jar.
- When the lace is dry, all that remains is to decorate the jar according to your discretion. Additional elements decoration can include buttons, old keys, small souvenirs.
The resulting candlestick will decorate any table and will look impressive on a snow-white festive tablecloth.
Also similar candlesticks from tin can Can be hung on the wall as wall decor.
You can make tablets from tin cans, hangers and candles. original decor for an empty wall


