Fallout 4 boss power armor. That's how it went for a ride. Melee Weapons
There are a lot of different items scattered throughout the park, collecting which you can get certain bonuses. Such items include caps, magazines, and star cores.
In addition, during the passage of Nuka World Fallout 4, players are given the opportunity to obtain new, improved protection kits, various costumes, as well as weapons that were not available in other versions of the application. Today we will talk about how you can get your hands on weapons and protective equipment that give undoubted advantage without spending a lot of time on it. You will find out where to find all this on the territory of the Yader-Mira amusement park.
The search and collection of combat kits begins with the very first mission of Nuka-World, which is called “In places!”. One of the tasks is to destroy the boss of the invaders named Kolter. It will be possible to remove the unique protective suit from him after the victory.

You won’t be able to get this kit without effort. You can find it in the vastness of “Yader-World” in the “Galaxy” location. Based on the information obtained from the Star Dispatcher computer, you can find out that to obtain the kit you need to find thirty-five star cores. But we talked about how to collect them in another guide. The set looks quite impressive and is painted blue.

The set can be found in the “World of Freshness” location on the factory premises, where the amazing Yader-Cola is produced and bottled. The protective suit is kept in a special closed cage. To get inside, you need to turn off the terminal located in the corner of the room. It is located on the top floor.
A complete set will give the character a bonus in the form of three units of agility. In fact, it is the most common T-51 armor. But unlike it, it is painted red and white, and also has a “Yader-Kola” sticker. There are no further differences between them.
Read also: Fallout 4 Far Harbor Walkthrough [part 1]

In the vast space of Yader-Mir you can find two such sets. One can be found on the west side of the park at the power plant. You can pick it up on the lower level basement. But in order to penetrate it, it will be necessary to destroy big number evil ghouls. Before picking up the kit, you need to open the door at the very bottom using a special terminal.
Another protective kit can be found on the southeast side of the park. You can find it in the bunker. To take possession of it, as in the case of the T-51 protection, you need to use the terminal.
"Rocket" women's suit
The armor is intended for a female character. You can find it in the Galaxy location. But just like all other costumes, getting them may not be easy at all. To do this, you need to get into the room where the astronaut girl is, but before that, destroy several robots.
The set does not have any special protection, but it will give its owner a sexy look, thanks to appearance. In addition, the kit will increase charisma by one unit.
Melee Weapons
All types of weapons that were added to latest update the application can make many players smile. Among the new types you can see the Shiny Club, Ball on a String, Sword of Miracles and other, more witty types. All this can be found in the vastness of Yader-Mir, an amusement park affected by a merciless war. They are special, unique weapons.

It is a weapon for close combat. You can get it at Yader-Arcade by exchanging it for fifty tickets. It is a table tennis racket and at first glance does not pose any danger.

Can be used with one hand. The hammer is intended for close combat. Doesn't have much attack speed. You can also find the hammer in Yader-Arcade near the machines.

This weapon is a very sharp blade with serrations. The Throat Cutter is capable of inflicting up to twenty-five points of damage on an enemy during combat due to severe bleeding. Get it this type weapons on the market in Yader Town, purchasing them from Alden Catelyn.
Read also: What are the best flash racing games?

It is far from a light, two-handed weapon for close combat. You can take possession of it only after successfully completing the Safari mission. It is a baseball bat, but reinforced with various elements that can hit an opponent during a fight. During critical hits on an opponent, the hero's action points are restored.
In the vast expanses of the amazing “Yader-Mir” you can also find several types of blades. They differ in appearance and technical characteristics.

This is a two-handed weapon with a low attack speed. Is legendary. You can get it in two ways. First: find the body of the invader in the “Children’s Kingdom” location, near which the sword lies. Second: after successfully completing the Magic Kingdom mission. Among the various unique abilities of the weapon, one can highlight the reduction of opponents' resistance by one third to energy types attacks.

The blade is also a two-handed weapon. Finding it is quite easy. Each invader of the Adept gang carries this weapon with him as additional protection.
But not only cold weapons can be found in the vastness of Yader-Mir.

In order to get this weapon, you must successfully complete an additional mission called “Journey to the Stars.” The task for her must be received from Dara Hubbell. During a critical attack on an enemy, it deals double damage, and also restores the attack indicator and increases speed.

This is a children's water weapon with the Yader-Cola symbol on it. In Yader-Mir it will be found at two points. The first one lies in the locker room closet, which is located in front of the entrance to the arena. It will be needed in order to win the battle with the boss of the invaders named Colter. It is protected by energy armor, which means that it is susceptible to short-circuiting when exposed to water.
The second one can be found in the "World of Freshness" and is given after successfully completing the mission "Show of Force". The Cobalt diagram can be found in the same place.
), but a surprise awaits you here. Back at Yader Express, Porter Gage spoke to you over the loudspeaker and said that you were heading into a trap. If you survive, then he has an interesting business for you, but that’s still a long way off.
Pass the Test
Let's start the test, since we still have no other choice. At the Yader-Mir station, under the counter with a terminal, you will find purified water, which you will certainly need, and in general, I hope you arrived in full combat readiness, with supplies of medicines and provisions, as well as with a companion who will come in handy more than once.
Go through the passage marked Enter, go down the stairs and welcome to the first stage of the challenge - a room filled with different types turrets. To get through it with minimal losses, here are a couple of tips:
- Try to destroy several turrets before entering the room. They will begin firing only after the door slams behind you, so stand in the doorway and, using the V.A.T.S. system, destroy those turrets that you can reach.
- Then quickly run to the cover on the left (Yader-Cola machine gun, wall) - this way only half of the remaining turrets will be aimed at you. Destroy them, and then run to the other side and deal with the rest.
- Some turrets are hidden behind a wall, so you won't notice them right away, but be prepared for them.

Having dealt with the turrets, inspect the room. Under the cafeteria counter on the right you will find a cache of caps, on the left wall at the end of the room there is a first aid kit, and in a fallen file cabinet there is a box of ammunition.
Go ahead. White arrows painted on walls or other objects show us the way everywhere. In the next room, a line of obstacles consisting of many traps awaits you - look under your feet, at the walls and generally be careful. Disarm one trap after another until you reach the end of the room.

However, traps can be bypassed if you have a high level of lockpicking. On the left after the first trap you will see a small space (there is also a trap at the entrance), there is a red door (the castle level is very difficult). Once you open it, you can bypass it most traps.

After going through the traps or opening the door, go up the wooden stairs up. The next stage of the test is to have time to walk on a collapsing floor made of wooden planks. You can get around this place along a small piece of the floor, which you will see if you turn around as soon as you climb the stairs. This same piece of floor will save you if you decide to walk on the boards and fall.


Next, our path lies along the windows, but first look into the nook. There you will find a safe (the lock level is easy), but before breaking into it, disarm the trap on the ceiling. Walk along the windows, looking at your feet and at the ceiling in search of traps, you will find yourself in a corridor with three red doors.

Our door is on the left, since the other two are dead ends with a trap. Behind the middle door is an annoying monkey hitting plates, and behind right door— a trap with grenades. Walk until you go down into a room with radioactive barrels. You can’t do this without good protection from radiation and antiradin. But we will do everything quickly, which you won’t have time to notice. Your task is to open the red door (the lock level is difficult) to exit this room. Hack it or open it with keys. A bunch of keys lies on a rack in a small nook located behind the cash register counter in the corner, and under the cash register counter you will find a cache of lids.


We go down to the door leading to the technical tunnels of Yader-Mir. Enter the tunnels. On the left side there is ammunition on the cabinets, and on the table there is a turret control terminal (level - easy), which you may not notice at first. You can hack it in advance, since it will be useful to you a little later.

In the meantime, go to next room, where turrets will be placed on shelves on both sides. They will only start shooting when the monkey on the opposite side starts hitting the plates. If you destroy it earlier, the turrets will not be activated, otherwise the turret control terminal will help you. Return to him and deactivate the turrets.
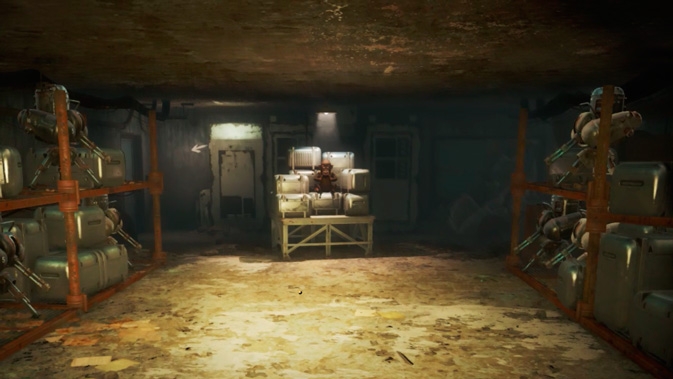
To leave the room with the monkey and the turrets, you need to open the storage room door in Yader-Mir. The key to it lies on the equipment behind the monkey.

Now it's time to go through a small maze with traps in the form of bathroom scales, mines and animatronic aliens that act as turrets. You need to make your way to the door on the other side of the room. After passing through the alien, climb up the wooden ladder and walk along the top of the equipment that makes up the maze. Then jump down to the exit on the other side.

Destroy the turret on the way out. Behind the locked door (lock level - medium), near which there was a turret, you will find a box with explosives. Go through the tunnel with the old equipment, but beware of the mines scattered around. They can be detected in V.A.T.S mode. and neutralize them by shooting at them and being on safe distance. The service tunnel will lead you to a flimsy bridge made of wooden planks, which will begin to fall apart as soon as you stand on it. On the other side of the bridge is a door that needs to be hacked (the lock level is difficult).

So, if your hacking level is low or the bridge has collapsed, then you will have to fight the swamp creatures that live in the water below. One of them is the Legendary Glowing Swamp, which will be quite difficult to kill. Try to take a higher position and hope that your armor is strong and your companion is reliable. After you deal with the swamp creatures, immediately destroy the swamp eggs on both sides of the pit with explosives, otherwise they will begin to hatch and attack you en masse.

Go through the cave, it will lead you to where the locked door on the other side of the bridge would lead. Before you open next door, first disarm the trap on it. It leads into a narrow service corridor, which, by the way, is also full of floor traps. At the end of the corridor you will be taken to the next stage of the test. Perhaps this test is the most interesting.
As soon as you enter the room the corridor leads to, the door will close and the room will be filled with gas, which will slowly kill you. To get out of here and not die, you need to turn off the gas or get out of here as soon as possible. The gas is shut off by gas supply valves, one of which you can see in the screenshot below. Walk up to it and turn around. There are four of them: the first - immediately to the left of the entrance (in the screenshot), the second - behind the bars on the left, almost near the floor, the third - on the other side of the room, near the door, the fourth - behind the locked door next to the first valve.

The situation is aggravated by the attack of radroaches. They will have to be killed with a melee weapon, since when fired, the gas ignites, which simultaneously kills both the enemy and you. On desk in the room to the left of the entrance you will find the password for the electrical substation, and when you enter the room on the right, located in the far part of the service room, you will find the key to the Yader-Mira electrical substation in the door.

Open the locked door, which is visible in the screenshot with the valve. Behind it you will find the last valve, an electrical substation terminal and another batch of radroaches. Kill the radroaches, gain access to the terminal using the password and open the door that will let you out of here. The next stop is the Yader-Mir office premises.

In the service room, new enemies await you - ants, flying and crawling. Next to the equipment there is a locked door (the lock level is easy), behind it on the file cabinet you will find a cache with lids. Then exit through the exit on the other side office space. You will come out into an impromptu corridor with a mesh instead of a roof, making it terribly difficult to shoot at the raiders who will fire at you from above.

Along the way, you will also come across an area with grenades suspended on strings, which you should not touch, and of course, where would you be without turrets. Just quickly go through the corridor and enter the door of the Yader-Mobilchikov arena. Go up the stairs to the second floor. The final stage of the challenge is an arena fight with the raider boss Kolter. He is convinced that in his armor no one has a chance to cope with him. Let's see.

Enter the locker room
You have been given the opportunity to prepare, go to the locker room. A door that opens after talking with Colter leads into it. When you enter the locker room, Gage will address you. He says he has a minute and asks you to come to the intercom on the wall.

Talk on intercom
Gage is on the line, you can ask him what the hell is coming here, but you won’t necessarily get an answer.
Charisma
You can try to convince Gage to tell you what it all means (medium level).
Gage wants to help you. You have no chance to defeat the boss, since Colter’s power armor is powered by the arena’s electrical network, so he is invulnerable in it. Gage hid weapons in one of the lockers in the locker room. You need to find it.
Find weapons
You were sent to the locker room to prepare for battle, so there is plenty of ammunition for every taste, some medicine and even a minigun. The weapon that Gage hid is on the bottom shelf in the locker, which is located next to the bench in the corner. And this is the Thirst Quencher, simply a spray gun, the ammunition for which is water. Funny.

Talk to Gage on the intercom
Gage claims that this is the perfect weapon that will short out Colter's electrical power armor. This will disable its protection for short term, which will allow you to deal damage.
Enter the Yader-Mobilchikov arena
It's time to enter the arena and fight the Raider boss, but first there's one more thing you can do to improve your chances. Look into the locker room toilet, go through the hole in the wall and remove the nuclear unit from the working generator. This will reduce the arena's power supply by 30%, which means Colter's power too. The battle will take place like a show, probably all the Yader-Mir raiders will watch it.
Defeat Boss Colter
So, your battle will take place in this order: you take the Thirst Quencher, spray water on Colter, his armor shorts out, then you change to the most powerful weapon and inflict as much damage as possible on him until the power supply is restored. Then repeat the procedure until you completely defeat him. It will be nice if you have a companion with you - this is not prohibited, and you are wearing power armor, and a stealth battle to become invisible will also not hurt. Forward to victory!

When you defeat Colter, don't forget to dig through his things - you'll find the boss key and password, which will probably come in handy later. And the boss's power armor is now yours too.
Reference: Colter's Boss Power Armor
Torso power armor Colter's boss is legendary, so he has peculiarity: Deals energy damage to nearby enemies.

Talk to Gage
Gage proclaiming you the new boss of the Raiders is news. Now you will finally meet him face to face.

From him you will learn that the raiders have long planned the murder of Colter. Yader-Mir was divided among three gangs of raiders - Adepts, Operators and Pack. Colter has turned this place into a powder keg, gangs are ready to start a war among themselves because of the slightest discontent. And you, as the new boss, can change everything and stop them from being at each other's throats. Porter Gage will tell you more about everything later, when you come to the boss’s lair - in the restaurant at the top of Fizztop Mountain. However, more on this in the next quest “An Ambitious Plan”.
Explore the Yader-Mobilchikov Arena to the end and go to explore the amusement park. For example, in a trash can located immediately at the exit from the battlefield, you will find the new kind drink - Yader-Cola Pobeda. In some ways it’s even cooler than Quantum.
As with other add-ons for Fallout 4, Nuka-World New types of power armor will be waiting for you. There are 4 of them in total, and this guide will help you determine their exact location.
Boss Power Armor
This armor can be found at the beginning of the Nuka-World DLC. All you have to do is kill Boss Colter in the amusement park car arena. To find him, start the "Taken for a Ride" quest and defeat him.Core T-51F power armor
The return of the classic T-51 armor with a new color scheme. This power armor can be found in the World of Freshness park, down the river. Move until you see a cage with armor on the right, and a little further - a hole in the wall. Climb into it, go up the stairs, turn off the terminal in the far left corner and the armor is yours. Let's add that if you wear the entire set, you will get +3 to agility.X-01 MK.3 Power Armor
This power armor can be found inside the Yader-Mir power plant (far to the west on the map). Once you get there, find your way to lower floor, where you will encounter a locked door. Hack the terminal and take the armor.Power armor Quantum X-01
The latest and greatest armor so far is the Quantum X-01 MK.5. In order to receive this set, you must complete the quest "Star Control", where you need to collect 35 star cores.


 (1 ratings, on average: 5,00 out of 5)