Lr Vetonit putty goes on concrete. We level the ceiling with a vetonite solution using a wide spatula. The undoubted advantages of Weber Vetonit putty
Vetonit is trademark, which produces powdered building mixtures used for a wide range of finishing and construction works. Among the most popular products are finishing putty for walls and ceilings, floor leveling screeds, and tile adhesive. The products have become widespread due to their excellent qualities and affordable price. The production of dry mixes in Russia is carried out by the company Weber-Vetonit, which is an industry division of the international industrial and construction group Saint-Gobain. The article will discuss the main features of Vetonite dry mixtures.
Briefly about the manufacturer
- The Saint-Gobain company is one of the largest corporations in the world for the production of construction products. It was founded in France in the mid-17th century, and today it has 1.5 thousand companies in more than 60 countries around the world. The head office is located in Paris. Construction mixtures are just one of four areas of activity in which the corporation consistently occupies a leading position.

- In 1992, the Weber company, specializing in the production of building materials, joined the Saint-Gobain industrial group. “Weber” dates back to the beginning of the 20th century, when J. Weber and J-B. Bruten began to produce facade plasters. Today, Saint-Gobain Weber has more than 200 branches in 42 countries, and after the acquisition of the industrial group Maxit (MaxitGroup), its factories also appeared in the Russian Federation.
- All manufactured products meet the highest European requirements, which is confirmed by international quality certificates. Vetonit is a universal and highly specialized material for finishing almost any surface.
Consumers who choose Vetonite are guaranteed to get excellent results, but how can this be achieved?
Vetonit characteristics
Vetonit putty
- Putty mixtures are used for final leveling of surfaces; the quality of their application directly affects the overall impression and appearance of the finished renovated room. Vetonit putties create a perfectly flat surface, and their main purpose is to seal cracks, layers and cracks after rough basic construction work.

- Like all types of putty, Vetonit mixtures are divided into three subtypes: cement, polymer and gypsum. These are mainly finishing putties intended for cladding ceilings and walls. The basis for their application can be a variety of materials - concrete, plasterboard, brick, plaster and others; putty has even been developed that is applied to painted surfaces.
- The mixtures are universal and can be used both indoors and outdoors. Although putties create a perfectly flat and smooth surface, they still do not have any special decorative qualities, so it is possible to apply almost any decorative materials on top of the layer - wallpaper, relief plasters, tiles, acrylic or water-based paints and so on. The putties themselves are not adhesives.
- These are environmentally friendly products that are created only from ingredients that are safe for humans and nature.
- Due to their excellent water resistance, the mixtures are versatile and can be used even in areas such as swimming pools (the packaging should be marked “waterproof mixture”).
- Powder mixtures have such a fine fraction that the applied layer acquires an ideal, almost mirror-like smoothness.
- The applied layers of putty are not afraid of adverse weather conditions, including frost, rain or hail, which means they can serve reliably even in facade finishing long years. In addition, products have been developed that can be applied even when negative temperature(snowflake marking on the package).
- The putty layer enhances the heat-insulating and noise-absorbing properties of the walls and ceiling.
Technical specifications
- Release form. All Weber putty products are produced in three-layer paper bags, the middle layer of which is made of polyethylene (dry powder) of 5, 20 and 25 kg or plastic containers(paste-like substance) 10-12 l.
- Astringent. Cement, polymer glue, limestone, and gypsum can be used as a binder.
- Main purpose. There are several types of putty, distinguished by their main purpose:
- for leveling a plastered surface or concrete base before subsequent finishing (painting, wallpapering, cladding ceramic tiles);
- for sealing seams formed between sheets of drywall;
- applying a putty layer to a previously painted surface.

- Color of the finished composition. The main shades of the applied layer are white, gray or yellow, which corresponds to the color of the purchased dry mixture.
- Granule size. Fine-grained powder mixture, the size of which is 0.3-0.5 mm, the fraction of a paste-like substance is no more than 0.06 mm.
- Temperature. The surface during processing and the ambient temperature should be in the range from +5 to +25 degrees (for frost-resistant species from -10 degrees).
- Vetonit product consumption. On a surface of 1 m2, when applying a layer of 1 mm, 1.2-1.4 kg of dry substance will be required, consumption when filling joints is 100-200 g/m2.
- To prepare putty, you need to add 290-350 ml of water per 1 kg of powdered substance.
- Viability. The prepared cement mixture must be used within 2 hours, after which it loses its quality; diluting it again is not recommended; if the composition includes polymer binders, the viability of the finished solution can be 12-24 hours, and if stored in a closed container, up to 2 -x days.
- Complete drying time. The applied layer hardens within 3 hours, for complete drying you should wait at least a day; the greater the thickness of the layer and the number of layers, the longer it takes to dry.
- Thickness of the applied layer. It is recommended to apply 1-3 mm at a time (depending on the brand of product, a layer of up to 5 mm can be applied in one pass).
- Frost resistance. At least 75 freeze/thaw cycles for powdered products and 10 cycles for ready-made solutions.
- Strength factor. After one month, the layer is able to withstand mechanical loads of up to 10 MPa.
- Adhesion coefficient. The adhesion strength to the surface is approximately 0.9-1 MPa.
- Shelf life. The product can retain its quality for 12-18 months, provided the original packaging is kept intact, as well as under proper storage conditions - dry room, where air humidity is no more than 60%.
Stages of work
- Putty mixtures can be applied to the surface to be treated either manually or mechanized way using automatic settings.
- The base is properly prepared - cleaned of dust and dirt, it must be strong, dry, hard and free of substances that reduce adhesion (oil or grease stains). In the room where finishing is taking place, windows and doors must be closed to prevent the possibility of drafts.

- To prepare the solution, pour the required amount of water into a large container, preferably made of plastic, the temperature of which is approximately 20-25 degrees (no more than 40 °C). Then dry powder is poured into the container (it is not recommended to change the sequence) and thoroughly mixed using a construction mixer or a drill with a special attachment for 5 minutes. After which the prepared mixture is kept for at least 10 minutes to better dissolve the binder, stir again and you can start using it.
- When applying several layers of Vetonit putty, it is necessary to dry each previous one. Before further finishing, it is recommended to sand the dried surface with fine sandpaper and clean it from dust.
Vetonit plaster
To Russian construction market Several types of dry are supplied plaster mixtures from the Weber-Vetonit company, which are produced both directly at factories in Russia and in other countries, for example, in Finland.

- Vetonit plasters are, as a rule, cement mixtures, in which sand and limestone can be used as filler, and additional components such as microfiber are added. The most popular product is considered to be the product "Weber.Vetonit TT" - a universal plaster for most substrates.
- Decorative plasters, capable of creating a unique relief, have become widespread. They can be applied to surfaces pre-treated with any type of plaster (cement, gypsum, lime-cement), as well as to plasterboard and gypsum fiber substrates.
Main competitive advantages
- The product can be used on most known materials - concrete, aerated concrete, ceramic or sand-lime brick, foam concrete, and so on, preparing the base for subsequent finishing using tiles, glass or plastic slabs, as well as for applying putty.

- Vetonit plaster is particularly frost-resistant and water-resistant, making it suitable for use in facade work, as well as for plastering bathrooms, warehouses and other premises with high humidity or low temperature.
- Non-shrinkage hardening and excellent adhesion to the surface.
Technical specifications
- Release form. The manufacturer supplies its products in paper bags, packaged in 5, 20 and 25 kg. Decorative plasters can be produced in the form of a ready-made solution, in plastic container 15 kg each.
- Astringent. The binder is cement.
- Main purpose. Depending on the type of product, it can be used in the following cases:
- creation of a decorative layer for subsequent painting with water-dispersion paints both inside and outside residential and public buildings;
- preliminary leveling of ceilings or walls in rooms with any level of humidity;
- local application when leveling surfaces for subsequent construction and repair work.
- Color of the finished layer and mixture. The shade of the resulting layer is gray for simple plasters and light gray for products intended for subsequent dyeing.

- Granule size. The powdery substance has maximum size fractions no more than 1 mm. Decorative plasters, depending on the texture, contain fractions from 1.5 to 4 mm.
- Temperature. The solution can be applied at temperatures from +5 to +30 degrees; if the package is marked with an asterisk or has the inscription “winter”, then the plaster is used in the cold season, at temperatures from -10 degrees.
- Vetonit product consumption. To apply a layer of 1 mm to an area of 1 m2, from 1.2 kg to 2.4 kg of dry matter is consumed.
- Volume of water for mixing the mixture. Water consumption per 1 kg of dry matter is from 160 ml to 300 ml (the exact amount is always indicated on the packaging and you must follow the recommendations to get the finished layer as durable and high quality as possible).
- Viability. Cement mortars very quickly lose their viability; as a rule, it fluctuates within 2-3 hours.
- Complete drying time. Each applied layer must be kept for up to 2 days, and only after this period of time has passed, you can proceed to subsequent repair work. Within a week after finishing, the plaster gains 50% strength.
- Thickness of the applied layer. Vetonit plaster can be applied in one pass in a layer of 2 to 10 mm, maximum thickness 3 cm.
- Frost resistance. The dry powder can withstand 75-100 full freeze/thaw cycles.
- Strength factor. After 28-31 days, the applied plaster is able to withstand a load of 6-8 MPa.
- Adhesion coefficient. On a concrete base, the adhesion strength will be within 0.5 MPa.
- Shelf life. The product must be stored in its original packaging, without damaging its integrity. In a dry room, the product can retain its properties and qualities for 1 year.
Stages of work
- The surface for applying the solution must be properly prepared. To do this, it is cleaned of dust and dirt, and if necessary, the base is strengthened with reinforcing mesh. If there are oil or grease stains, they should be removed as they will reduce adhesion. All large irregularities are repaired. Before applying the diluted mixture to the concrete base, it must be treated with a primer so that the concrete does not absorb moisture from the solution.

- Mix the solution in clean water, room temperature (20-25 degrees). Be sure to follow the sequence in which the dry powder is added to the liquid, and not vice versa. To improve adhesion, 10% of water can be replaced with a dispersion primer. Stir the solution using a construction mixer or drill until all lumps have dissolved. During the application process, the finished mixture is stirred without additional addition of water or other liquid.

- When finishing facades, it is important to protect the applied layer from rain, snow and direct sun rays in 24 hours. The resulting decorative surfaces can be painted after 72 hours; to reduce paint consumption, it is recommended to treat the relief layer with a silicone or silicate primer.
Self-leveling floors/floor leveler
Self-leveling floors are self-leveling mixtures used for floor screed. Weber.vetonit products allow you to create a perfectly flat surface, with a layer thickness from 1 mm to 25 cm in one pass. The solution can be used for installing floors in residential and office premises, both in new buildings and in structures with a long service life.

Main competitive advantages
- The resulting surface has an almost mirror-like appearance and does not require additional grinding or leveling.
- Can be used as a base for any floor coverings, even for subsequent finishing with very thin materials.
- Due to its high compressive strength, the finished coating can withstand heavy loads; in addition, internal reinforcement allows the mixture to be used even on deformable surfaces.

- The mixture has the fastest possible strength development, which allows you to walk on the poured layer within an hour, and lay floor coverings after 2 hours.
- It can be used even on difficult substrates, for example, on top of an old wooden floor, ceramic tiles and other materials, thanks to the addition of special polymer components.
- Forms a sound-proof, heat-resistant and moisture-resistant layer.
Technical specifications
- Release form. Available in the form of dry powder, packaged in three-layer paper bags of 5 and 25 kg, for reliable protection from exposure environment The middle layer of the packaging is made of polyethylene.
- Astringent. Special cements are used as a binder.
- Main purpose. The mixtures are intended:
- for leveling concrete and cement-sand bases;
- to create screeds for subsequent installation of floor coverings;
- to create the main floor layer on balconies and terraces;
- for installing a “warm floor” system.
- Color of the finished composition. The shade of the mixture is determined by the presence of cement in the composition, which gives the finished layer a gray tint.
- Granule size. The maximum size of the powdery substance is from 0.6 mm to 3 mm.
- Temperature. The solution is poured in rooms with air temperatures from +10 to +25 degrees; it is considered optimal to maintain the temperature within +15-+20 degrees.
- Vetonit product consumption. When applying a layer of 1 mm to an area of 1 m2, 1.4-1.8 kg of dry matter is consumed.
- Volume of water for mixing the mixture. To prepare a working solution, add 200-300 ml of liquid per 1 kg of dry matter.
- Viability. The prepared mixture requires immediate use, as after 15 minutes it begins to harden.
- Complete drying time. After 1 hour, you are allowed to walk on the poured layer; after 2-3 hours, you can lay the floor covering.
- Thickness of the applied layer. It is allowed to make a layer whose thickness varies from 1 mm to 25 cm.
- Shrinkage. A month after application, the layer may shrink by up to 0.5 mm/m.
- Strength factor. After 28 days, the self-leveling floor can withstand loads of up to 30 MPa.
- Adhesion coefficient. Grip with concrete base 1 MPa.
- Shelf life. Bags of mixture are stored unpacked in a dry place for 6-12 months from the date of production.
Stages of work
- The mixture is used indoors. When pouring the floor, it is necessary to close windows and doors tightly and maintain a constant temperature within +10-+25 degrees for at least 7 days.
- The base under the self-leveling floor must be cleaned of dust, and also make sure that it is dry and durable (if it is concrete, it must stand for at least 2-3 months). If upper layer If the surface being treated has flaking materials, they should be removed. The place of possible leakage of the mixture must be sealed.

- It is best to prime the surface with a special compound, for example, Weber Vetonit MD 16 dispersion. If more than 1 layer is intended to be applied, then each of them must be processed accordingly. Dispersions and primers prevent the formation air bubbles and provide better adhesion to the base.

- To prepare the working solution, pour clean water into a plastic or silicone container, then pour in the dry ingredients and mix everything thoroughly with a construction mixer.
- It is best to use the mixture immediately. It can be applied either manually or mechanically. It is optimal to fill in strips, the width of which varies between 30-50 cm. You should start from the corner, spread the poured solution with a steel spatula and roll it with a needle roller (to release the existing air).

- It is not allowed to take breaks during pouring; if too large an area is being processed, then it should be divided into small sections by installing limiters.
Range of products and approximate prices per package
The industrial group "Weber.Vetonit" produces, in addition to plaster and putty products and self-leveling floors, many more dry building mixtures that have proven themselves in domestic market. These materials include adhesive compositions used for installation thermal insulation boards (mineral wool, expanded polystyrene) and for laying porcelain stoneware, tiles, stone slabs, including at sub-zero temperatures. Almost any surface can be used as a base - concrete, plasterboard, brick, wood, and so on. The table shows the average prices for dry Vetonite mixtures.
| Product type | Brand / purpose | Price/packaging |
|---|---|---|
| putty |
Finish-LR+
Used in dry rooms for walls and ceilings, made in Finland. |
670-680 rub. / 25 kg. |
|
LR paste
Ready putty solution in the form of a paste. |
690-700 rub. / 12 l. | |
|
LR Fine
Superfinish mixture, which contains a polymer binder, is intended for finishing ceilings and walls in dry rooms. |
650-670 rub. / 25 kg. | |
|
Finish-KR
For finishing ceilings and walls in dry rooms, made in Finland. |
610-620 rub. / 25 kg. | |
|
Finish VH(gray) For finishing surfaces in wet rooms, made in Russia. |
590-600 rub. / 25 kg. | |
|
Finish VH(white) For finishing surfaces in wet rooms, made in Finland. |
920-940 rub. / 25 kg. | |
|
Siloite gyprocJS
For sealing seams formed during installation plasterboard sheets, as well as for finishing walls and ceilings in dry rooms, made in Finland. |
780-850 RUR/20 kg. | |
| Rend facade(white) | 540-570 rub. / 20 kg. | |
|
Rend facade(gray) Cement-based putty, the main purpose is finishing facades, and is also used to apply the finishing leveling layer. |
400-450 rub. / 20 kg. | |
| Plaster |
TT
Plaster mixture for cement based, has increased moisture resistance and frost resistance, used for pre-leveling walls inside and outside public and residential buildings. |
350-370 rub. / 25 kg. |
|
TTT
A cement-based plaster mixture, lightweight, used for preliminary leveling of surfaces, and is moisture and frost resistant. |
360-380 rub. / 20 kg. | |
|
414
Plaster mixture on a lime-cement basis, with the addition of microfiber, intended for external and interior work. |
630-650 rub. / 25 kg. | |
|
stuk cement ( gray )
Cement based plaster, can be used as facade mixture, thickness of the applied layer is up to 5 cm. |
390-450 rub. / 25 kg. | |
|
min 1.5 Z
Decorative plaster creating a “fur coat” texture, filler fraction 1.5 mm, subsequent painting with water-dispersion paints is allowed. |
1600-1700 rub. / 25 kg. | |
|
min 2.0 Z
Decorative plaster creating a “fur coat” texture, filler fraction 2 mm, subsequent painting with water-dispersion paints is allowed. |
1600-1700 rub. / 25 kg. | |
|
min 2.0 R
Decorative plaster creating a “bark beetle” texture, filler fraction 2 mm, subsequent painting with water-dispersion paints is allowed. |
1600-1700 rub. / 25 kg. | |
|
min 1.5winter
Textured plaster (“fur coat”) with a grain size of 1.5 mm, can be used at temperatures from -10 degrees. |
1600-1700 rub. / 25 kg. | |
| Screeds/leveling mixtures |
3000
Self-leveling floor mixture, made in Finland. |
700-725 rub. / 25 kg. |
|
4100
Quick-hardening floor leveler, with a layer thickness from 2 mm to 3 cm, made in Finland. |
542-620 rub. / 25 kg. | |
|
4150
Self-leveling floor. |
540-630 rub. / 25 kg. | |
|
4310 Renovation
Self-leveling mixture, can be used on difficult substrates. |
885-920 rub. / 25 kg. | |
|
4350
Self-leveling floor. |
880-920 rub. / 25 kg. | |
|
4400
A quick-hardening floor mixture used on concrete and cement-sand bases. |
990-1000 rub. / 25 kg. | |
|
4601
Self-leveling floor (industrial). |
1230-1250 rub. / 25 kg. | |
|
4630
Self-leveling floor. |
1230-1250 rub. / 25 kg. | |
|
4650
Self-leveling floor. |
1350-1370 rub. / 25 kg. | |
|
4655
Self-leveling floor. |
1350-1370 rub. / 25 kg. | |
|
5000
Quick-hardening self-leveling floor, the solution is intended for manual application. |
570-580 rub. / 25 kg. | |
|
5700
Basic leveling mixture, made in Russia. |
280-300 rub. / 25 kg. | |
|
6000
Self-leveling floor, applied layer from 1-25 cm, hardening time 3 hours. |
375-385 rub. / 25 kg. | |
| Adhesive mixtures |
Easy fix
For tiles and porcelain tiles for interior and exterior use |
230-300 rub. / 25 kg. |
|
Granit fix
For porcelain tiles and plasterboard. |
280-300 rub. / 25 kg. | |
|
Ultra fix
Elastic composition for outdoor use. |
570-585 rub. / 25 kg. | |
|
Ultra fix winter
Cement mixture for tiles, drywall and blocks, used for facade works in winter. |
420-450 rub. / 25 kg. | |
|
Profi Plus
For gluing porcelain stoneware. |
345-440 rub. / 25 kg. | |
|
Optima
Tile adhesive for dry and wet areas. |
195-250 rub. / 25 kg. | |
|
marble
White adhesive composition used for light-colored tiles. |
990-1000 rub. / 25 kg. | |
|
therm S100
Universal adhesive mixture. |
440-450 rub. / 25 kg | |
|
therm S100
winter
Composition for gluing mineral wool and expanded polystyrene at low temperatures |
490-500 rub. / 25 kg. | |
|
therm EPS
Adhesive mixture for installation of polystyrene foam. |
330-350 rub. / 25 kg. | |
|
KF
Elastic adhesive composition for floor tiles. |
680-700 rub. / 25 kg. | |
|
RF
For gluing tiles and plasterboard sheets to complex substrates. |
700-750 rub. / 25 kg. | |
|
M.W.
For gluing mineral wool boards. |
450-470 rub. / 25 kg. | |
| Masonry mixtures |
ML 5
Colored mixture for laying silicate and ceramic bricks. |
15150-16000 rub. / 1 t. |
|
PSL Concrete
Quick-hardening mixture for sealing vertical joints in concrete structures. |
14000-14500 rub. / 1 t. | |
|
Jay SL N169
Used for sealing brick joints. |
400-420 rub. / 25 kg. | |
|
JB 600/3
Non-shrink mixture. |
1000-1100 rub. / 25 kg. | |
|
JB 1000/3
Non-shrink mixture. |
1200-1250 rub. / 25 kg. | |
|
C06
Cement mixture, produced in Russia. |
220-250 rub. / 25 kg. | |
|
Block
Masonry mixture for bricks and blocks |
240-250 rub. / 25 kg. | |
|
Block winter
Masonry mixture for blocks and bricks, can be used at low temperatures. |
290-300 rub. / 25 kg. | |
| Kiln mixtures |
ML Savi
Clay-based oven mortar. |
400-420 rub. / 25 kg. |
|
ML Tuli
Fireproof masonry mortar. |
1200-1300 rub. / 25 kg. | |
| Grout for joints |
DECO
Grout for joints between stone, glass and ceramic tiles, with fine grain and a wide range of shades. |
150-200 rub. / 2 kg. |
|
Prof
Grout for joints, with rapid strength development, 8 color shades. |
350-400 rub. / 5 kg. |
In addition to dry building mixtures, Weber factories produce acrylic, silicate and bitumen paints, primers and dispersions for pre-preparing bases and subsequent application of self-leveling floors, putty or plaster, as well as all kinds of impregnations, antiseptics, substrates and injection materials (bitumen pastes, suspensions, improving the properties of screeds, mastics for insulation, and so on).

When entering a store, it is very easy to get confused among the huge selection of goods and products, but Vetonit products can be found immediately. These are yellow paper bags(less often white), on the left side of which there is a strip with the name of the product - 2/3 black (the name of the manufacturer is indicated), and 1/3 red, orange, green and other shades (the brand of the product is indicated). By purchasing powdered building mixtures or ready-made Vetonite solutions, you can always be sure that the repairs performed will be of high quality and durable.
Today, putty is the most popular method of finishing walls and load-bearing structures. Before the main decoration, the surface is carefully processed; one of these stages is the application of putty. In essence, this is a standard leveling of the base using special building mixtures. As experts note, Vetonit putty rightfully bears the title of the best mortar for wall finishing. Compared to other analogues, it has a lot of advantages, distinctive technical characteristics and operational properties.
Applying putty is a very labor-intensive process, but using high-quality products makes it easier to putty walls and also helps the coating dry faster (regardless of the number of layers).
Vetonit Weber is a famous collection consisting of individual modifications of the putty. The most popular is Vetonit lr putty. Due to his unique composition it is used for finishing plastered, concrete walls and ceilings, as well as plasterboard partitions.
In most cases, putties Weber Vetonit used for external decoration of walls, as well as as a base for painting or wallpapering (for example, Vetonit kr putty). There is also façade putty designed for leveling walls outside buildings (facades).
As noted above, this series presents different types of putty, differing from each other in their composition and direct purpose. However, filler and binders (oil or other) are an integral part of all putties in this series. That is, there are two complementary components, due to which the structure of the material is unpretentious in use.
Most of the composition of the putty is taken up by filler (limestone), while polymer glue acts as a binding element.

Preparation of the solution
To prepare putty with optimal structure and consistency, dilute the dry mixture with water in accordance with the proportions indicated on the package. The result should be a homogeneous mass of medium density.
Before diluting the putty mixture, you should know that water must be added to the solution in portions, and its temperature should be approximately 20 degrees.

There are a few professional advice that you should adhere to:
- After the finished putty has infused a little (for 10-15 minutes) and acquires a more uniform texture, it should be thoroughly mixed again using a construction mixer.
- After mixing the solution, no more than 24 hours should pass until the putty is applied, otherwise the mixture will lose its properties and harden.
- If there is still dry mixture left in the package, it is recommended to store it in a cool (but dry) and dark room.
Methods for applying putty
Leveling walls with putty is done in two ways:
- mechanical spraying (using special equipment);
- applying the putty mixture manually (using spatulas of different sizes).

The latter option is more often applicable for putty polymer materials. It all depends only on the personal preferences and tasks of the person performing construction works. The putty layer should not exceed 5 mm, otherwise the coating will dry out for a long time and unevenly.
When applying several layers of putty, each subsequent layer is applied only after the previous one has completely hardened.

On video: tips on puttying walls from experts.
Types of putties and their descriptions
Vetonit putty is available in several types. Each product has its own unique composition and purpose. Thus, the following groups of materials can be distinguished:
- VH, V, TT - with these marks, mixtures that are made on the basis of cement are released for sale. Materials of this group are excellent for any type of premises; they can be used in the bathroom, kitchen and toilet (where there is high humidity).
- LR and KR - these markings indicate that the putty mixtures are intended for final leveling of walls and ceilings, resulting in a coating suitable for subsequent painting or wallpapering. Materials of this group cannot be used in rooms with high levels of humidity.
Vetonit VH
This type of product is best suited for use in conditions of high humidity. Vetonit vh putty, in addition to its main task of preparing the surface for subsequent painting, performs protective function– it prevents the appearance of condensation on ceilings and supporting structures in rooms with high air humidity.
The product is presented in two versions: white and gray color. White model Vetonit putty vh is simply irreplaceable if the surface is planned to be painted. The second option is used as a primary layer before laying tiles.

The main feature of this putty mixture is the ability to be used on surfaces made of the most different materials. As the instructions say, the finishing putty can be used on plastered, concrete, stone (brick) walls and bases made of expanded clay, foam aerated concrete, and gas silicate blocks.
Vetonit LR and LR+
Vetonit finishing putty is in high demand on the building materials market; it has a unique composition, low cost and is easy to use. Model Weber putties Vetonit lr is intended for finishing dry rooms, therefore, compared to other brand products, it has a more viscous and dense structure. After applying the Vetonit finishing putty, proceed to wallpapering the walls or painting work using specialized highly pigmented paints.

It is worth noting that this product not suitable for leveling non-standard, volumetric planes, as well as large objects. This is how most finishing compositions work, whose main task is to reduce the sharpness of the transitions between layers of plaster and paint and minimize surface unevenness. White base putty is best suited for plaster and chipboard surfaces.
The putty is available in different configurations, most often it can be found in a powder version in 25 kg bags. You can also see a ready-made putty mixture that does not need to be diluted with water.

There is also a product Vetonit LR+. This is a polymer putty from this collection. Due to its unique composition, it is ideal for finishing ceilings and walls in dry rooms. This is the starting and most popular model. Its distinctive characteristics are low consumption, quick drying, ease of use and very affordable price. The diluted composition can be applied over smooth or rough surfaces (plasterboard and mineral materials).
You can find many on the Internet positive feedback about the use of this product, with most buyers appreciating the low consumption of material and its versatility. Plastering walls and ceilings with Vetonit allows you to prepare the surface for subsequent paint application.
Important! Vetonit lr plus putty is usually applied by spraying onto walls and ceilings made of plasterboard or particleboard. This starting mixture can also be used as an adhesive layer for installing gypsum boards.

KR and TT products
Marking KR means that the putty is finishing. Before using it, the VH starting solution is first used. Vetonit TT putty is a universal composition that can be used both as a starter and as a finishing coating. In addition, this material is also suitable for finishing facades.

How much material is needed for finishing?
The main criterion when choosing a product for puttying surfaces in living conditions is the product consumption. As for Weber putty, all models in this series have different viscosities. Thus, the version of Weber Vetonit lr putty, as well as individual modifications of Vetonit kr putty, have different consumption.
Before purchasing a putty mixture, you need to calculate required amount material. To make it clearer, let’s look at the consumption of Vetonit kr putty as an example. When finishing walls, about 1.2 kg of ready-made mortar is consumed per 1 m2 of surface, while seven liters of water are enough to dilute the mixture (this figure may vary depending on the structure of the material).
Repair and construction work and putty are interconnected concepts, since finishing work is unthinkable without leveling the walls with a paste mixture - putty. It is thanks to this composition that the walls have a perfect, ideal appearance, on which you can subsequently glue wallpaper or apply decorative plaster. Today, manufacturers offer a huge amount of putty on the construction market, and to figure out which one is most suitable for repairs, you should listen to the advice of experts.

Peculiarities
Very often, when choosing a product for treating and leveling walls in stores, a person is perplexed - on the packaging mineral mixtures on a connecting basis two meet different names: putty and putty.
A powdery (or paste) mixture containing gypsum, mineral fillers, chalk and wood glue is called putty. Manufacturers offer types of this building material with different composition:
- based on latex components;
- oil;
 Oily
Oily
 Latex based
- oil-glue;
- acrylic.
 Acrylic
 Oil-adhesive
Depending on the composition, the putty is used only for internal or external works. The principle of using putty is similar, and it should be noted that there is no fundamental difference between these names.
One of the best putties experts in the construction field consider Weber Vetonit. The manufacturer of this building material is rightfully considered world famous - it is a subsidiary of the Saint-Gobain industrial group, founded back in 1900.
Today, Weber is a leader in the production of dry construction mixtures. The company's enterprises are present in all parts of the world, producing a range of products for construction and repair work.

The undoubted advantages of Weber Vetonit putty:
- the mixture is made from environmentally friendly raw materials - it does not emit toxic substances;
- moisture resistance - it is used even in the construction of swimming pools;
- the composition is powdery, so the surface of the wall being treated becomes perfectly smooth;
- the snowflake drawn on the packaging of the mixture indicates that it can be used for low temperatures for facade finishing;
- the composition in diluted form can be stored for 24 hours.


Types and composition
Vetonit putty is used at the final stage of finishing work before directly gluing wallpaper or decoration decorative plaster. The basis for putty is the ceiling and a smooth surface, not necessarily concrete, but also plasterboard. The main factor for this process is the presence of a dry surface, since otherwise yellow spots will appear through the putty.
The main composition of the Vetonit dry mixture is aggregate (limestone) and a binder. However, some types of putty are slightly different from each other. First of all, it is worth paying attention to the designations that manufacturers use: mixtures marked LR are used only for dry rooms, VH - in rooms with high humidity.


In the list of building mixtures there are two types with similar names: Weber. Vetonit LR and Weber. Vetonit LR+silk.
- putty Weber. Vetonit LR- This is a paste that is the most popular mixture for treating surfaces on which wallpaper or paint is going to be applied. It perfectly levels the walls, but is used only in dry, heated rooms. Vetonit LR is not a moisture-resistant material and is not suitable for laying tiles. Polymer glue is used as a binder here. The putty is ideally applied to the surface without special effort. Retains its properties after dilution with water for more than a day.

- Weber. Vetonit LR+silk– an excellent solution for finishing the walls and ceiling of a room. The mixture is very quickly diluted and applied thin layer. It is distinguished by its increased whiteness, for which it is nicknamed “white silk”. Experts believe that it is the most convenient to use.
- Vetonit TT– a universal composition used at the starting and finishing. The basis of the mixture is cement. It can be used both indoors and outdoors. It is frost-resistant and not afraid of water. Putty is also applied as a base layer and before laying tiles. Dilute with water and mix using a drill. The resulting solution must be used within three hours. Sold in a three-layer paper bag weighing 25 kg.
After applying the first layer, you must wait for it to completely dry and harden - this usually happens after 1-2 days.


- Packaging marked KR used for final (finishing) work before wallpapering or painting walls. Packaged in bags of 5 and 20 kg. Used only in dry rooms, ideally applied in thin layers up to 3 mm. The binding element in this composition is glue based on organic substances, which explains the specific smell when applied. After drying, the smell disappears. When diluted, Vetonit KR can be stored for 30 hours in an open container and twice as long in a closed container.


- Weber moisture-resistant putty. Vetonit VH Perfectly suitable for both external and internal work. Easily applied to concrete and foam concrete. The paste prevents condensation from appearing on the ceiling, so it is widely used in rooms where there is humidity. Plus, the manufacturer Weber offers for full complex finishing works, cement-based grout between tiles of various colors.
The grout is used to work with any tiles and mosaics: floor and wall. This material is frost-resistant and does not pollute the tile surface.
Specifications
High-quality mixtures from Vetonit have many advantages compared to analogues from other manufacturers. First of all, these are their technical characteristics, or more precisely, methods of diluting putties.
First of all, you need to dilute the powder with water in the required proportions. This depends on the thickness of the paste applied to the surface of the walls. In some cases it is from 0.5mm to 3mm, in others the putty should be thicker.
 Dilution of putty
It is necessary to correctly calculate the number of packages of the mixture for the room. For example, when using a white polymer mixture - Vetonit LR Fine superfinish putty for the ceiling and walls of dry rooms - the consumption per 1 m2 will be 1.2 kilograms of the mixture.
The mixture itself should be dissolved in water not entirely, but in portions. The water should not be very cold - about 20 degrees is enough. Then you need to wait until the mixture is infused. After this, it needs to be thoroughly mixed again using a special mixer or an ordinary drill.


The mixture is applied in two ways:
- using special equipment by mechanical spraying;
- manually, applying the finished mixture to a spatula and rubbing it over the surface of the walls.
In any case, the finished layer of plaster should not exceed 5mm, otherwise it will take a long time to dry, and the next stage of work will have to be delayed.
In order not to make a mistake in your choice, you should pay attention to the appearance of the mixture. According to GOST, Vetonit can be gray or white. The differences are explained by the composition of the mixture - if it contains gypsum, limestone or finely ground marble, the mixture will be lighter. You also need to pay attention to the expiration date, which the manufacturer indicates on the packaging itself - it should not exceed 18 months.
 Manual application
 Mechanical application
Scope of application
The manufacturing company offers modern customers complete complex solutions in the field of construction: from the starting and finishing coating of walls to the insulation of facades.
All types of putties produced at the company's factories are ideal for finishing work indoors and on its façade.
Most of the mixtures are made on the basis of polymer components, which are binders in finished form. After the putty is applied to the wall or ceiling, it hardens, after which you can glue wallpaper or simply paint the surface.

Depending on which putty is chosen: for dry rooms or rooms with high humidity, Vetonit will ensure the ideal appearance of the treated surfaces. After the walls have dried, they can be finished with tiles, glass or plastic.
Putty is also used for high-quality sealing of plasterboard slabs, on the surface of which cracks are subsequently excluded.
After the wall puttying process is completed, the room may appear bad smell. However, it will disappear immediately after the mixture dries. This feature is inherent in many materials for construction work.


Applying the finishing layer of putty is an indispensable stage of repair, ensuring smooth and durable coating ceiling and walls. In addition, the surface will acquire uniform hygroscopicity and white color. Of course, the surfaces being processed must be leveled and dried well in advance.
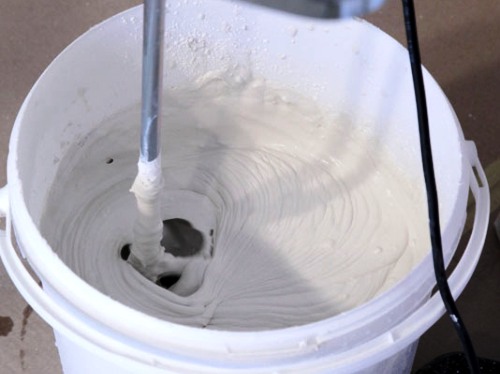
We spread the putty.
This putty may seem expensive - about $20 for 25 kg, however, if applied correctly and with quality training, it is quite possible to achieve economical consumption - 1 kg per 1.5 m2. Based on this, the required amount of mixture is taken into account, although sealed Vetonit LR can last a couple of days. But then the process of rotting begins. By the way, all other finishing putties, in this sense, are stored much less and emit more hydrogen sulfide.
It is advisable to stir using a drill and a mixer, since mixing with your hands is almost impossible, and the consistency finishing putty should look like thick yogurt. By the way, when applying the finishing layer itself, the presence of any grains or lumps in the mixture is unacceptable. In general, the ideal mixture will not be obtained immediately, but only after some training.
We apply.
After letting the mixture sit for 5 minutes, stir it again, and you can start applying. The surface to be treated must first be scraped with a spatula, which will help avoid the appearance of any debris in the mixture.
The mixture should be applied in opposite directions, which will ensure perfect adhesion and filling of all pores. However, the last movements of the spatula on the intended area should be directed in one direction: thus, the emerging irregularities become guides for the next layer. It is very important, in this case, to smooth out the smeared mixture, returning, periodically, to where it was putty a few minutes ago.
As for the number of layers and their thickness, this depends, not least of all, on the quality preliminary preparation surfaces. Provided that the wall is professionally plastered, two layers of Vetonit are sufficient for subsequent wallpapering. But three or more layers can be applied under painting, depending on the required quality. An experienced painter, with the proper attitude and conditions, is able to prepare about 30 m2 for wallpaper in one day, because next layer can be applied almost immediately.
The thickness of the layer is adjusted with a spatula: if you place it perpendicular to the wall, the layer will be practically zero. This is called "na sdir". This method is used quite rarely. Typically, the applied layer is about half a millimeter.
Trying to avoid show-through areas can lead to applying too much layer thickness, so you need to remember that when dry, the putty becomes much whiter and less transparent.
The best results are usually achieved using light directed along the surface being treated. It could just be a light bulb with a long wire. This light can show such irregularities that you can simply get scared. But these are usually just visual effects. When part of the wall has already been smeared, smoothing is done using light.
We polish.
Painters usually take sanding seriously, using a directional light and a sanding pad, as well as a respirator. In fact, an experienced craftsman tries to avoid sanding altogether, since the layer applied is small. However, a fine sanding mesh is an indispensable attribute of painting and preparatory work. Here it is important not to overdo it, because Vetonit is sanded very easily, to the point that it can crumble, and this is a rework. Moreover, sometimes, due to seemingly small shortcomings, the ceilings have to be prepared completely, in a new way.


Vetonit is a facing putty for interior work. Ideal for finishing puttying of ceilings and walls in dry rooms with air and base temperatures from +10. It is not used in rooms with high humidity; any penetration of excess moisture (even through insufficiently protected windows) leads to yellowing of the putty applied to the surface. Also not intended for processing seams, leveling floors or as an adhesive for tiling.
The interior decoration of a residential building is a very important and final stage of work on the construction of your home. Prices for interior finishing wooden house sometimes they bite, so on our website we will tell you about the stages of work that you can do yourself. Let's start with building materials.
Vetonit is a facing putty for interior work. Ideal for finishing puttying of ceilings and walls in dry rooms with air and base temperatures from +10. It is not used in rooms with high humidity; any penetration of excess moisture (even through insufficiently protected windows) leads to yellowing of the putty applied to the surface. Also not intended for processing seams, leveling floors or as an adhesive for tiling.
Specifications:
White color
water resistance - not water resistant
aggregate - limestone,< 0,3 мм
binder - organic glue
operating temperature - during leveling work, the temperature of the base, mortar mixture and room must be above +10°C.
water temperature - no higher than +40°С
time of use - within approximately 24 hours from the moment of mixing with water
Drying time - at +10°C approx. 2 days; at +20°C approx. 1 day, with good ventilation. Drying time depends on layer thickness, ventilation and temperature. It is necessary to create such conditions at the site so that the leveling layer can dry in about one day from the moment of application.
layer thickness
- with partial leveling: max. 5 mm
- with full leveling: 1-3 mm per application Vetonit putty consumption- approximately 1.2 kg/sq.m with a layer thickness of 1 mm
required amount of water - 10 liters / 25 kg of dry mixture
adhesion strength - with concrete > 0.5 MPa
packaging - 25 kg bag
Vetonit is well applied to gypsum and cement surfaces, plasterboard, porous surfaces of particleboard and fiber panels. This putty is perfect if you plan to interior decorate a house made of rounded logs.
Before puttying with Vetonit, the surface to be treated must be cleaned of all substances that reduce the adhesive ability of the base (dust, dirt, grease) and thoroughly dried (i.e. if you are planning to renovate a house in a cottage village, then start with a thorough cleaning).
Vetonit is produced in bags weighing 25 kg (consumption for a layer thickness of 1 mm is 1.2 kg/sq.m)). When preparing the solution (about 2 liters of clean water at room temperature are consumed for 5 kg of dry putty), the dry putty and water are mixed using a construction mixer. To obtain a homogeneous solution with a dissolved binder, mix the dry putty and part of the required water for several minutes, then let it stand for 15 minutes and mix again, adding the remaining water. Now the mixture can be used within 24 hours, making sure that its temperature does not fall below +10.
To coat the surface with Vetonit, use a spatula with two handles 70 cm wide or the spraying method (for treating wood surfaces). If puttying is carried out for the purpose of partial leveling (as is the case when finishing and repairing a country house), then a 30cm wide spatula is suitable. In case of a very dry surface, immediately before applying Vetonit it can be moistened with water. Vetonit can be puttied in one or several passes (each new layer is applied to the completely dried previous layer of Vetonite).
Depending on the temperature of the room, ventilation and thickness of the putty, Vetonit dries completely within 1-2 days, after which it can be sanded, painted, or wallpapered. When Vetonit is applied to the ceiling surface, you no longer need to perform any work.
Spots on Vetonite that appear during use of the surface should disappear after treatment with a damp sponge.
To avoid clogging the drains, do not throw the remaining Vetonit solution into the sewer. You can see photos of the interior decoration of a country house on our page.
How to properly dilute putty so that you can work with it easily and simply
In order to know how to properly dilute the putty, just read the instructions on the package. But to prepare a solution suitable for use, you can neglect some instructions. In construction stores you can buy both ready-to-use types of putties and dry mixtures that need to be pre-diluted with water - the latter type will be discussed in this article.
Simple instructions on how to properly dilute putty
Among putty mixtures, there are two main types: starting and finishing. The start is intended for rough initial leveling of surfaces, while the finish is the final stage before decorative finishing. How to dilute the putty depends on the type of mixture. For example, the starting one dissolves very easily and is easier to mix, while the finishing one will take a little longer. To work with it you will need the following tools:
An ideally clean container with a volume of no more than 10 liters.
Electric drill with whisk attachment.
In principle, all manufacturers' instructions are identical. Only parameters such as the amount of dry mixture and water can change. Pour clean water into a container (bucket), measure required weight putty and mix the contents for the time indicated on the package. As a rule, after this the mixture should be left alone for a while, and then thoroughly mixed again. This is done to make the mass more homogeneous.
However, experienced painters almost never follow instructions, and here's why. The fact is that the manufacturer indicates the ratio of water and putty, which, according to certain criteria, is considered the most optimal. But not always and not everywhere the consistency of the material may be suitable for certain jobs. For example, a thicker application of putty requires a thicker solution. In this case, it will not float off the wall. Or vice versa, if you need to quickly correct something before the base layer has dried, make a more liquid batch. Builders certainly know how to make putty.
If you decide to conduct experiments of this kind, you should remember that a more viscous mass hardens faster than a liquid one. Moreover, the setting time is divided unevenly. At first you will notice a slight compaction of the putty, which is still workable. And this will continue for some time, after which the solution will rapidly begin to harden. That’s why you don’t need to take any “smoke breaks” while the diluted putty remains in the bucket: upon returning, you may find that it is only possible to clean it off with a spatula, and washing out the container will turn into a rather long and tedious task. There is a loss of both time and money.
How to work with putty - it's not so scary
If this is your first time putting putty on your own, you probably won’t succeed right away. The material will either treacherously fall from the spatula onto the floor, or you will leave such “artwork” on the wall (or God forbid on the ceiling) that it will take several hours to correct them.
To work, you need spatulas with a blade width of about 300 and a length of about 150 mm. These are the perfect sizes for beginners.
However, do not rush to putty immediately. To begin, knead a little putty, use a small spatula to scoop out a mass about the size of your fist, and try transferring it from one spatula to another. This must be done so that the material does not fall on the floor, and when removing it from the blade, the tool remains practically clean.
If everything works out, you can try it on the wall. The putty must be applied at a certain angle. The larger it is, the thinner the applied layer will be. Do not forget to transfer the putty from trowel to trowel each time. This is done not only for ease of work, but in this way additional mixing of the mass occurs, and it becomes more plastic and homogeneous.
A few “putty secrets”
You already know how to make putty, and even how to work with it. And now it's time to reveal the couple useful secrets. Beginning craftsmen are often faced with the problem of not producing the mixed mass. Don’t be lazy and mix a large bucket at once. Do a third, and then the putty will not harden at the wrong time, and it will be easier to wash the tools. Speaking of tools. The key to comfortable work and good results is a perfectly clean bucket, spatula and construction mixer. If particles of the old get into the new batch, scratches on the walls cannot be avoided.
If the putty still begins to harden and you feel that you won’t have time to work it out, you can try to “save” it. Add some cold water to the bucket and quickly stir the mixture. For some time everything will be quite wonderful, but after such manipulations, if seizure occurs, it occurs almost instantly. At room temperature you will have about 10 minutes to process the material. By the way, putty hardens faster at elevated temperatures than at lower temperatures (within reasonable limits, of course).
Adviсe
Starting putty on this moment is an indispensable material for cosmetic and major renovation and is the penultimate authority in the interior decoration of the premises. It's no secret that starting putty is made from several components. The two most important components that make up the starting putty are gypsum and lime, the remaining components of the starting putty are binders chemical substances, without harm to human health, and of course to other inhabitants. It is the starting putty that differs from other types of putty in its grinding of the main components of the starting putty. The grinding of the gypsum and lime fraction in the starting putty is 80 MPa, such grinding is considered coarse compared to finishing putty and medium grinding compared to the grinding of the plaster mixture. The maximum layer of application of the starting putty is one and a half centimeters, this is quite enough to cover visible defects on the plaster, such as shallow depressions, cracks and thoroughly level the surface.
Preparing the base for applying the starting putty.
As with any other work with mixtures, first of all you need to clean the base from poorly adhering parts of the wall, for example, such as: falling part of the plaster, knocked out pieces of concrete, crumbling parts of the wall, fungal base, unstable or bouncing parts of the base should be dismantled before applying the starting material putties. The BASIC rule that every builder should know is that the base must be primed before applying the starting putty!!! The base is primed thoroughly before the starting putty is applied, and it is advisable that the primer be from the same company as the putty; the adhesion of the putty to the wall depends on this. There were simply such cases when work was done with the starting putty of one company, and the primer of another, and after that, places in which a primer from another company was used resulted in the starting putty peeling off the walls from the walls, but when we worked with one type of raw material, such cases never occurred problems.
Mix and apply starting putty.
Before applying the starting putty, of course, you need to mix it. The proportions for mixing the starting putty according to the technology are as follows: for 12 liters of water, thirty kilograms of putty, or for one kilogram of putty, two, two and a half liters of water, which is not always suitable for working with volume, because you need to work quickly and there is not enough time for proportions when mixing, and I don’t want to spend it. So pour water and boldly add putty until a small mound of starting putty appears on top of the water. I would like to note that it is better to mix the starting putty using a wide whisk and knead until there are no lumps in the putty and it turns into a homogeneous mass reminiscent of sour cream. Now the solution is ready to be applied to the wall or ceiling.
The starting putty is applied to the wall using a wide and narrow spatula. Using a narrow spatula, apply the starting putty to the wide one and apply the putty with a wide spatula tightly pressed to the wall. The technique for applying starting putty is individual for everyone, and it can be applied in different ways, it all depends on the base and the volume. With an even base and large volumes, the starting putty is applied to the spatula in large portions and sweeping strokes. Apply to the wall from bottom to top and press the spatula as tightly as possible to the wall. Leave the stains that appear on the wall as they are, simply correct the solution and at the very bottom, where the stain appears, make a smear and so on throughout the entire wall. If you need to go higher at the joints of dried putty with a new layer, you don’t have to worry, old layer The joint is grouted using a grout mesh. Read more about using the grout mesh here. If you need to apply the starting putty on a small amount of surface, then you will have to tinker a little and your hand should at least feel the application layer a little, or you will have to apply the putty in several approaches and in several directions.
Polymer putty WEBER-VETONIT LR plus / WEBER-VETONIT LR+ (25 kg)
Finishing putty on a polymer binder for walls and ceilings in dry rooms. Designed for manual and machine application.
Scope of application: all smooth surfaces made of mineral materials, leveled with WEBER.VETONIT L, V putty (Vetonit L, V) or WEBER.VETONIT TT, TTT plaster (Vetonit TT, TTT); gypsum surfaces; walls and ceilings made of plasterboard, cement-bonded particleboard, particleboard or fiberboard;
leveling the surfaces of walls and ceilings for final finishing during repairs and new construction up to 3 mm in one application.
Advantages:
ease of use;
high adhesion to surfaces;
possibility of mechanical spraying;
the ability to obtain even and smooth surfaces for painting and pasting with thin wallpaper.
Weber.vetonit LR Plus putty (vetonit LR Plus) is not suitable for use on surfaces of structures that have not dried; in rooms with a humid and wet microclimate; for leveling floors and sealing seams of plasterboard boards.
Specifications
White color
Layer thickness 1-3 mm/one application
Maximum fraction 0.3 mm
Consumption at a thickness of 1 mm 1.2 kg/m2/m
Quantity of water for mixing 8-9 l/25 kg
With your own hands
Wall putty.
Puttying walls without involving specialists is not as difficult as it might seem. First you need to decide whether the surface of the walls is ready for putty, or needs pre-plaster. The fact is that the putty is finishing layer before the final decoration of the room, be it (painting the walls in the apartment) or gluing wallpaper.
The finishing putty is applied in a very thin layer, 1-2 mm, and is therefore used to hide minor defects, such as small cracks or the porous surface of concrete in panel houses. If there are holes in the wall, for example, from a pulled out plastic or wooden dowel, then the putty will not stick in such a hole. The same applies to fallen pieces of plaster and seams in brickwork or (plasterboard seams). In this case, you will need to plaster the walls yourself. Ideally, the surface to be puttyed should be absolutely flat. So, you can putty connecting seams and holes with screws in drywall or plastered and leveled walls.
Before you start puttingtying the walls with your own hands, the surface must be prepared. Old wallpaper is removed from the wall and cleaned old paint, stains from grease and rust, dust and dirt. Then, using a regular roller, the surface is primed with an antibacterial primer. deep penetration, this is done to subsequently improve the adhesion of the putty to the wall and the shrinkage of construction dust. The primer dries very quickly, within 3-4 hours, so all work can be planned for one day.
In order to putty the walls with your own hands and strength, you will need two spatulas, the main one, with which the putty will be applied, and an auxiliary one, with which the putty is laid out from the container on the main one and its excess is cleaned off. It is advisable to take spatulas that are not very large, since it is easier to work with such spatulas in the absence of experience. The narrower the spatula, the more accurate the layer is; the width of the main layer should be within 20 cm. The putty can be selectively applied to places that require leveling or along the entire plane of the wall. To do this, place the spatula against the wall at an angle of 45 degrees and evenly stretch the putty over the entire surface with a smooth movement. Particular attention is paid to the corners, since cracks and irregularities occur there most often. You don’t have to worry about the fact that at the boundary between the wall and the putty layer, the latter turns out to be a little higher. All defects can then be easily eliminated using sandpaper.
The putty dries within 24 hours, then take a special sanding float; if you don’t have one, you can simply take a block, wrap it in sandpaper, which is secured to the block with buttons or nails. The sandpaper should not be very coarse, otherwise it will leave deep scratches on the wall. Using this bar in a circular motion, the entire putty surface is cleaned. Thus, it is leveled, and the transitions between the putty and the wall are erased. Perhaps this part of the work is more important than how to putty the walls. If you do not level out all the defects and transitions of the putty, then when (painting the walls) these places will be noticeable. The same applies to light wallpaper(under denser and darker ones the defects in the putty are not noticeable)
Putty "Vetonit LR+" and its area of application
Vetonit LR+ putty is based on a perfectly white polymer adhesive binder.
It is used for finishing ceilings and walls inside dry rooms. The basis for finishing can be smooth surfaces made of minerals, gypsum surfaces, ceilings and walls made of plasterboard slabs, leveled surfaces with Vetonit putty or Vetonit TT brand. Walls and ceilings made from other boards, such as porous fiber boards or particle boards, can also be sprayed.
Please note that this mixture cannot be used for leveling floors, nor can it be used as an adhesive solution or base for tiles. The putty is not suitable for wet and damp rooms, namely bathrooms and saunas, for use in sealing joints of plasterboard boards and for use on various surfaces wet structures, since this material is not sufficiently waterproof. Putty Vetonit LR+ (Vetonit LR) is resistant only to short-term exposure to moisture.
To achieve maximum effect when using putty, the base for work must be dust-free, hard and clean, and substances that weaken adhesion, such as dust, oil, etc., must be removed. Surfaces that are not being treated must be carefully protected. The mixture must be applied to a dry surface, as excessive moisture can cause yellowing of the leveled surface.
When Vetonit LR+ putty is mixed with water, a homogeneous plastic mass is obtained, which is well applied to the main part of the building base and has a long service life. The latter circumstance is very important, since the result is a surface of excellent quality even when applying the mixture without certain professional skills. The prepared portion of putty retains its qualities for 24 hours and the mixture becomes white after drying.
The layer thickness on large surfaces can be up to 1 mm, and on a small area up to 3 mm. With a layer thickness of 1 mm, the mixture consumption is 1.2 kg per square meter. m. The maximum permissible layer thickness per application is 5 mm.
To prepare the putty, combine 8 liters of water with a bag (25 kg) of this dry mixture, mix for 1-2 minutes using a powerful drill with a special attachment. To achieve better dissolution, Vetonit lr should be allowed to stand for about 20 minutes, then stir again and the putty is ready for use. The dissolved unused mixture must not be poured down the drain to avoid pipe blockages, nor should it be left in hoses, mixing containers and other equipment for more than a day; it is better to use it all and not leave it for subsequent days.
Vetonit LR putty can be applied manually using a two-handed spatula or using mechanical method spraying. When leveling a small area, use a slightly smaller steel spatula 25–30 cm wide. Remove excess mixture and then use it again. When leveling the mixture manually, it is better to use a tool 80 cm wide.
The putty is applied to a spatula and applied to the surface using upward movements. When performing work, the temperature of the air, mixture and base should not be higher than 10 degrees, and the water temperature should not be more than 40 degrees. To achieve an increase in adhesion, when mixing the mixture, Vetonit dispersion (Vetonit LR+) is added to the water at a rate of 1:10, thereby increasing wear resistance.
If leveling is carried out in several layers, then each layer should be allowed to dry for 24 hours, and only then apply the next layer. Drying time depends on temperature, ventilation and layer thickness. After drying, each layer must be sanded with sanding paper.
Characteristics
Vetonit putty: description and characteristics
The Parutonn kit company sells wholesale and retail Vetonit putty, which is used when leveling wall and ceiling coverings. With the help of Vetonit putty, you can quickly and efficiently complete the finishing. The composition of this material includes environmentally friendly components: limestone, organic or polymer glue, as well as a series of mineral additives.
| Color | grey |
| Water resistance | waterproof |
| Aggregate | natural sand and limestone< 1,0 мм |
| Binder | cement |
| Working temperature | during leveling work, the temperature of the base, mortar mixture and room must be above +10C |
| Usage time | Within approx. 3 hours from the moment of mixing with water |
| Compressive strength (28 days, relative humidity 65%, +23C) | 6-8 MPa |
| Hardening | reaches 50% of final strength within 7 days. In cold conditions, the process of gaining strength slows down. |
| Recommended layer thickness |
|
| Consumption | approx. 1.2 kg/m2 with a layer thickness of 1 mm |
| Required amount of water | approximately 6 liters/25 kg of dry mixture |
| Adhesion strength (28 days, relative humidity 65%, +23C) | with concrete >0.5 MPa |
Prices / Order
Putties Vetonit (VETONIT)
Vetonit LR putty is intended for leveling walls and ceilings of dry rooms. Suitable substrates: all smooth mineral surfaces; surfaces leveled with Vetonit L, V putty or Vetonit TT primer; gypsum surfaces; walls and ceilings made of plasterboard slabs. Mortar mixture applied mechanically by spraying or manually using a two-handed spatula.
Vetonit cement-based finishing putties are used for leveling walls and ceilings in dry, damp and wet rooms, as well as for fine leveling plastered surfaces of facades.
Firms
Putty of walls and ceilings
150 rub./sq.m
Contact Information
Title: Apartment renovation in Moscow. Plumber and electrician services. Wallpapering. Prices.
Contact person: Daniil
Address: metro station Dynamo, Leningradsky prospect, building 36, Moscow, Russia
Phone, email:
Website: http://remonter-msk.ru
Opening hours: daily, from 9-00 to 23-00, excluding holidays.
Puttying walls and ceilings is very often done during cosmetic renovations in an apartment. Putty is necessary to smooth out small unevenness in the walls and ceiling. For example, if you are going to glue wallpaper, then for the best result it is advisable to treat all uneven spots, cracks and holes with putty. Plastered walls also need to be puttied. If the plastering was done with ordinary cement mortar, then you cannot glue wallpaper onto such a surface; you must first apply putty.
Wall putty should only be carried out by specialists in this field, otherwise you may not expect a good result. Of course, you can try your hand at it yourself, but if you have no experience, you will simply waste material and personal time. A service such as putty, the price of which is quite reasonable, is offered today by numerous craftsmen. Therefore, there is no point in saving money and mastering this business on your own.
Wall putty
If you decide to glue wallpaper, then puttying the walls is necessary before doing this. Prices for putty depend on the volume and complexity of the work, but in any case, today prices in Moscow are more than acceptable. Before the walls are puttyed, the surfaces must be primed. You don't have to do this, but the primer will promote better adhesion. Moreover, the primer is quite cheap, and applying it is not difficult.
When applying putty, you must remember that depressions, pits and cracks more than 3 mm deep must be sealed with plaster. Wall putty is aimed at correcting minor defects up to 3mm deep. Remember that the quality of the putty will depend final result, so it is necessary to use high-quality mixtures. Putty, the price of which is not so high, will help you achieve the best result. Therefore, you should not save when choosing putty. You can also order putty for slopes, both door and window, the price of which is slightly different from the same work with a horizontal surface.
Also keep in mind that there are several varieties of putty on sale. For example, different mixtures are used for concrete, wood and drywall. Plasterboard putty is done with special plastic compounds that do not tend to crack when the dried layer oscillates.
Ceiling putty
Plastering the ceiling is actually no different from the procedure for treating walls. The only difference is the inconvenience of performing the work, so the cost of ceiling putty is slightly higher. It is necessary to putty the ceiling very carefully and efficiently. It is necessary to avoid applying thick layers of putty, as later it can all simply fall off.
In order to perform high-quality putty, you need to have considerable experience, so it is best to order putty for walls and ceilings. Just invite specialists who will do all the work efficiently and for a reasonable fee. This way you will save your time and get excellent results.
What keys do we use?: interior decoration of a country house photo interior decoration of a wooden house price interior decoration of a residential building
 (1 ratings, on average: 5,00 out of 5)

