DIY wine bottle stoppers. Craft product modeling design thermos stopper waste material. Click the button to subscribe to "How it's done"
Glass containers, unlike plastic bottles, is suitable for reuse. For example, a beautiful wine bottle in which you can store home-made wine will not only preserve the taste of your drink, but also festive table would be more appropriate. Very often, factory bottles are closed with a cork stopper, which cannot be used to close the neck again - it, as a rule, becomes several times larger than the neck of the bottle. Even if you cut the cork with a knife, the initial tight closure of the bottle will not be achieved, and besides, the cork cork is not very durable. And if we are talking about a 10-liter bottle, then no old stopper will do at all. In the not-too-distant past, our grandmothers used to cap bottles with corn on the cob. Agree, during technological progress, closing the bottle in this way is out-of-date and inconvenient. In our article we will tell you how to make a stopper for a 20 liter bottle with your own hands so that it is beautiful, convenient and reliable.
DIY silicone bottle stopper
So unique and useful craft can be done in several ways. Next we will look at the most interesting of them.
Method No. 1
How is a cork made? To make a stopper for a ten-liter bottle, you need to prepare the following components in advance:
- 100 gram plastic cup for the mold;
- Starch;
- Silicone sealant.
Important! One package of silicone sealant comes out with 3 plugs.
- Place ¾ of a package of starch on the table and make a hole.
Important! To prevent the silicone from sticking to the table, you can place glass on the surface.
- Using a professional silicone gun, squeeze the silicone into the starch funnel.
Important! The amount of silicone matches the size of our workpiece, namely a plastic cup.
- Then mix silicone and starch until smooth. To prevent the silicone from sticking to your hands, dip them in starch and begin kneading the ingredients, similar to kneading dough.
Important! When kneading silicone, it is important to achieve such a consistency that the dough is not too hard and does not have loose formations. Otherwise, the finished cork will allow air to pass through. The ideal mixture for cork production should resemble plasticine and not stick to your hands.
- The dough for the preparation must be thoroughly mixed so that the silicone is completely saturated with starch, roll it well on the table and give it a cone shape.
Important! The more starch the mixture contains, the tougher the cork will be.
- Then sprinkle the prepared cork a little with starch so that it does not stick to the plastic cup and easily comes out of it when completed.
Important! To get rid of excess air, make small punctures on the bottom of the glass with a needle or awl.
- Next, we place the raw materials in plastic cup chick, using screwing movements, distribute the mass tightly and evenly throughout the entire container.
Important! It is not at all necessary to use a blank in the form of a cup. If it is difficult to choose a blank for your bottle, roll the cork tightly by hand, measure its diameter with a caliper, and leave it to dry on a flat surface.
- In this form, leave the workpiece to dry for 3-4 hours. After the time has passed, we remove our cork from the workpiece.
Important! To speed up the drying process, after 30 minutes, place the container next to hot surface or place it near the battery.
- You can use a kitchen knife to smooth out any unevenness or reduce the diameter of the finished cork.
Important! Silicone sealant has specific smell. To get rid of it, you need to place the finished cork first in hot water, then in cold water with the addition of soda for a while, or simply take the product out into the fresh air.
The cork is elastic and tightly closes the neck of the bottle. It is perfect for a 10 liter threaded bottle and bottles with tapered thread, they are also called “Cossack” bottles.
Important! For wine enthusiasts, you should drill a hole in the cork to allow air to escape from the bottle. To do this, the diameter of the hole should be slightly smaller than the drainage that you will use.

Method number 2
The next method is quite labor-intensive and requires much more time to manufacture than the previous one. But for those craftsmen who like to tinker with the tool, you can use this option.
To make a bottle stopper using the method we will discuss next, you will need to prepare some auxiliary tool, namely:
- A pea or corn tin;
- Soldering iron;
- Gun for liquid silicone;
- Sandpaper;
- Construction hair dryer;
- Liquid silicone.
Sequencing:
- At the first stage of making a cork, you should make a mold into which liquid silicone is poured. For this purpose in tin can we cut off the top and bottom, and in the end we get a cylindrical workpiece.
- Then cut the blank vertically to make a rectangular tin.
- Using a compass, measure the diameter of the bottle neck, twist the tin until the right size from below, gradually expanding it upward.
- When one edge meets the other, put notches on top and bottom, connect the notches with an oblique line and cut with scissors.
- Carefully shape the workpiece into a cone shape with your hands, maintaining the size along the entire length of the workpiece.
- Unfold your workpiece and sand the beveled and smooth edge of the tin with sandpaper.
- Connect the two slices end to end and use a soldering iron to fix the workpiece in this position along its entire length. You end up with a cone-shaped glass without a bottom.
- Next you need to solder the bottom. First, sand the bottom cut of the workpiece with sandpaper.
- Take one of the cut parts and solder the bottom with a soldering iron, trim the edges with scissors.
- Next you need to solder the handle. To make it, you can use rigid wire or a metal tube.
- Sand the handle location and the edge of the wire to better adhesion material. The mold for casting a silicone cork is ready, now you can start making the cork itself.
- Take a hair dryer and set the temperature to 120 degrees.
Important! A construction hair dryer will serve to heat the mold so that the silicone does not harden during filling and even distribution inside the mold.
- After the mold has warmed up, use a glue gun to fill it with liquid silicone.
Important! The tin mold should be constantly held over a stream of hot air.
- Once the silicone is completely poured into the container, leave it to harden.
- Finally, use pliers to bend the soldered edge and pull out the plug.
DIY bottle caps
You can quickly and without tools make an alternative to bottle caps.
Method No. 1
For implementation this option For corks, you will need a plastic bottle with a cap that matches the diameter of the bottle neck.
Manufacturing sequence:
- Fill a plastic bottle with up to half of the water and close the lid tightly.
- Turn the bottle over and lower it into the neck of the bottle.
- The device tightly and securely closes the glass container.
Important! For winemakers it is necessary to drill through hole in the lid and bottom of the plastic “stopper”, pass the hose through and close the neck of the wine bottle.
Method No. 2
From the old ones cortical plugs For wines that do not fit the diameter of the neck, you can make new creative stoppers. For this you will need:
- Kitchen knife;
- Cork plug;
- PVA glue;
- Wooden spools of thread of different colors.
Preparation method.
It is very difficult to organize a stable fermentation process without a water seal. Experienced home winemakers and moonshiners know this. Although nowadays you can buy a factory-made water seal, it is easier to make this device yourself from scrap materials, spending just a few minutes. The most successful designs we'll look further.
Why do you need a water seal? During fermentation, carbon dioxide is actively released (about 4 cubic meters per 1 liter of alcohol produced). The accumulation of carbon dioxide can lead to high pressure in the fermentation tank, which can lead to an explosion. The gas must be removed, but this must be done so that oxygen does not enter the container. The fact is that oxygen activates the vital activity of bacteria, which convert alcohol into acetic acid, and without air access these bacteria are inactive.
A fermentation air seal is a valve that removes carbon dioxide while preventing air from entering. Without this device, winemaking is impossible, otherwise young wine immediately turns into vinegar. Moonshiners are still arguing about its necessity, but it is better for beginners to install it.
There is an opinion that mash should “breathe”, so a water seal is not needed. In fact, mash oxidizes no worse than wine. It’s just that during the period of active fermentation, the carbon dioxide released prevents oxygen from reaching the surface. But as soon as the alcohol bacteria do their job, their vinegar “colleagues” immediately get to work, turning the alcohol into acid. If such mash is not distilled in time, it will simply turn sour or an unpleasant sourish taste will appear in the moonshine. The exit rate also drops.
The mash under a water seal can stand without distillation much longer and not oxidize. All the alcohol produced by our friendly bacteria is stored.
1. Classic water seal(lid, tube, jar). The simplest and most reliable kit. It is enough to make a hole in the lid of the fermentation tank, insert the tube and seal the joint with glue. Place the other end in a jar of water.
 1 - mash (wort); 2 - plug; 3 - tube; 4 - water
 Disadvantage: with a small tube diameter, the water seal can become clogged with foam, so I recommend using large-diameter tubes rather than thin capillaries.
 assembled kit
 This water seal allows you to accurately determine the readiness of wine or mash. If there are no bubbles in a jar of water for 1-2 days, then the unsweetened mash is ready for distillation, and the wine is ready for draining from the sediment.
One of the variations of this design is a water seal made from a dropper. More details in the video.
Appears during fermentation bad smell. This is very important for apartment residents who do not have the opportunity to take the container with mash outside. non-residential premises. You can get rid of the smell by releasing carbon dioxide into the sewer. You just need to improve the jar into which the fermentation products fall.
 gas drainage diagram
 Gas enters the jar through a tube from the fermentation tank, overcomes the pressure of the liquid column (h) and goes into the sewer. The water column serves as a kind of barrier that prevents gases from the sewer from entering the fermentation tank.
This design resembles a steam chamber for a moonshine still. Two holes are made in a jar with a tight lid, then they are connected to the tubes and sealed. A modernized half-liter jar is filled to 1/3 of its volume with water, the inlet tube is lowered into the liquid by 1-2 cm, and the outlet tube is lowered into the washbasin.
 operating device
 2. Medical glove. Simple design, suitable for wide-necked fermentation containers (jars and bottles). In essence, this is not a water seal, but it works no worse. The glove shutter is often used by women, since its construction does not require drilling, soldering or gluing anything.
 1 - bottle; 2 - glove
 A small hole is made in any of the fingers of the rubber glove with a needle. Next, the glove is put on the neck of the container. To prevent gas pressure from tearing off the glove, the attachment point with the neck is covered with an elastic band or tied with thread.
 fermentation glove
 Disadvantage: due to the neck diameter being too large and high pressure gas on containers with a volume of more than 20 liters, it is very difficult or even impossible to securely fasten the glove. The smell of fermentation will be present in the room.
During active fermentation, the glove inflates; when the process ends, it deflates again.
 extravagant option
 3. Cotton plug. The neck of the container is plugged with a stopper made of cotton wool or other porous material, through the structure of which carbon dioxide can escape. But the cork does not provide complete tightness, especially at the very end of fermentation. The pressure in the bottle drops, as a result of which air begins to enter the container. Another drawback is that it is very difficult to understand when fermentation has ended.
 1 - bottle; 2 - plug
 A cotton plug is used if for some reason it is not possible to install a more reliable structure.
4. “Quiet” water seal. Selection carbon dioxide accompanied by characteristic gurgling sounds. There are people who are annoyed by this. The author of the following video solved the problem by creating a water seal from a syringe and plastic bottle. This water seal will take a little more time to make than in previous cases, but you will have a device that resembles store-bought options.
Apart from silent fermentation, this design has no other advantages.
Plastic bottles are versatile containers that can be reused. To provide such functionality, it should be supplemented with a stopper that limits the flow of liquid.
Simple options
You can make a stopper for a bottle different ways. Let's consider the algorithm for obtaining a silicone plug:
- Initially we purchase starch, silicone sealant. You will also need a plastic glass, which should be the same size as the diameter of the hole in the bottle.
- Initially, ¾ of a package of starch and silicone is mixed (the volume of a full glass). It is important to knead the “dough” thoroughly to give it a uniform consistency.
- When the mixture is ready, a plug is formed from it. It is placed in a glass. To prevent the silicone from sticking, the container is also covered with starch. It is also important to make several holes in the bottom of the glass. This will allow excess air to escape.
- After this, the cork should dry for about 4 hours. When it is ready, it is taken out of the glass and leveled with a knife. To get rid of the smell, the workpiece should initially be kept in hot water, and then in solution cold water and soda. Then you need to dry it thoroughly in the fresh air.

If you need a drain hole, then you can make one in the plug using a small drill. If desired, you can form a small spout that will be used for pouring water.
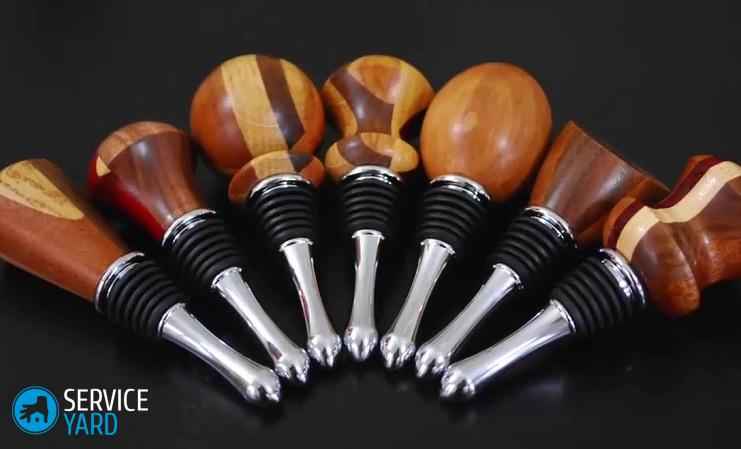
We use wood
Wood is unique material, which perfectly retains moisture. Therefore, plugs were previously made only from it. This process is quite simple and consists of several steps:
- Select timber with a thickness slightly larger than the diameter of the neck.
- Then a small cone is formed from it. The easiest way to do this is to lathe. But if it’s not there, you can grind it out and sharp knife. During manufacturing, it is important to constantly monitor its shape and fit it to the hole. The plug should fit perfectly into the gap, sealing it.
- For versatility, a small hole can also be made in the stopper to allow liquid to be poured.
If you don’t want to waste time, it’s better to purchase a special plastic design that can be matched to different neck diameters.
How to make a cork aslan wrote in April 10th, 2013
Cork appeared in the form in which we know it relatively recently, only in the 17th century, along with the appearance in mass use glass bottle. Before this, cork was also used, but not in such quantities. They preferred to seal the vessels with rags and pieces of wood, which over time gave the contents an unusual taste, or even spoiled it. Cork does not swell as much as wood, and when properly processed it does not spoil the taste of wine or cognac, which is important.

Cork is made from the bark of the cork oak tree, which grows only in a few countries in Europe and on the Mediterranean coast of Portugal, Spain, France, Italy, Morocco, Tunisia and Algeria. In other countries, cork oak practically does not grow. The largest harvest of cork bark can be obtained on Portuguese plantations.

The first time the bark is removed from an oak tree is after it is 20-25 years old. Over the next ten years it should be restored. In addition, the bark can be removed only in a certain season, when it practically peels off on its own. The rest of the time the tree can be damaged. The bark is not removed all at once, but in certain sections, so from the outside the trees appear half naked. From the bark taken from one oak tree you can get a thousand corks. The highest quality bark is considered to be taken from a 150-year-old tree. An oak tree that is more than 200 years old begins to get sick and no longer produces high-quality bark. It is uprooted and a new tree is planted in the vacant space.

This is the only tree in the world whose bark is capable of completely regenerating. Cork oaks are marked so that they know when the next harvest can be harvested from them. For example, the number 7 means that the last time the bark was removed from this tree was in 2007.

The cut bark is sorted. The first grade is sent to a factory where they make corks for fine wines and cognacs, and the worse ones end up at a plant for the production of building insulation and noise absorbers.

Cork oak bark is dumped into huge piles right on the factory grounds. Before putting the cork into use, it is kept in the open air for several months.

First of all, the raw materials are subjected to heat treatment. The cork is boiled in a huge cauldron, and at the same time all sorts of spider bugs that managed to live in it are destroyed.

Then the bark is cut into strips, after which it is again sorted, washed, disinfected and again soaked in water.


Corks are cut out of these blanks, and the cork chips, to which a binder is added, go under the press.

Rejected corks are covered with cork dust and used for mid-priced wines. And the simplest and most popular corks, including those for champagnes, are made from cork chips, the pieces of which are glued together special glue. Such glued corks are also found in bottles of wine of the middle and low price category, designed for quick sale and short-term storage.

The rest of the waste is used to make various Decoration Materials. You cannot enter the workshop from which the cork comes out already packaged without headphones and a respirator - it is very noisy and dusty here. The cork sheets come out from under the press very hot. After they have cooled, they are sent for further processing - cut into standard plates.
If you cover a room with this material, you can even walk on your head - the neighbors still won’t hear anything. Builders also love cork because, unlike plastic panels in case of fire does not emit toxic gases.
As for bottle caps, their quality used to be checked manually. Since the cork oak bark plates have different sizes and thickness, not all operations were trusted by automatic machines. A worker directly involved in cutting out corks pressed his foot on the machine pedal about ten thousand times a day. Now, in modern factories, electronics completely control the entire process.


The finished corks are carefully sorted. This is done by a special machine. It “scans” the surface of the cork, and depending on how many cracks and defects it detects, it directs it to one or another basket. After which it is again checked for quality. The corks are then washed and bleached to remove harmful substances, and placed in a 12% alcohol solution for 24 hours.

Solid stoppers are ideal for long-term storage only if you comply necessary conditions(humidity, contact of wine with cork). Coated corks (coated) are also suitable for storage, but not for too long. Glued and pressed corks allow wine to be stored for only a few years, after which there is a risk of spoiling the contents of the bottle.

The cork dries out, which can cause the wine to spoil due to air access. Vertical storage is wrong wine bottles on shelves in supermarkets. Just a few months of vertical standing under powerful lamps in a store - and such a wine can deteriorate or greatly lose its taste.

Only natural cork allows the wine to “breathe” and, in contact with the wine, complements the bouquet in a certain way. Bottles sealed with natural cork can be stored for decades and even centuries (if special conditions). For such a long “collaboration” with cork oak, winemakers have studied all the properties of cork, and most eminent wine critics believe that natural corks not only preserve, but also improve the aroma of wine. However, there is a small percentage of defects - a natural price for “naturalness”.

Not only construction materials are made from production waste, but also bags, aprons, shoes and even umbrellas! Cork production is virtually waste-free. Among other things, cork is an indispensable material in the manufacture of life-saving equipment. On water, it can withstand much more weight than its own, and practically does not absorb moisture.


Click the button to subscribe to "How it's Made"!
 (1 ratings, on average: 5,00 out of 5)