How to properly make sheathing for flexible tiles. Lathing for soft roofing: single-layer and two-layer solid structures. We lay the lining under the tiles, valley, eaves and end elements
With all the variety of materials for soft or other roofing, the structure of the roof is almost the same. Valid general rules roof devices. The slopes should have the shape of an isosceles triangle. Identical slope angles make such a roof beautiful, reduce its construction time, and save building materials.
The construction of the roof begins with the installation of rafters. Next, a continuous sheathing will be needed. After this, galvanized steel is used to cover the grooves, valleys, pipe junctions, dormer windows to the roof. The bottom bar of the sheathing should be higher than the other bars by the thickness of the roofing material being laid. The roofing begins from the bottom up towards the flow of rain or downpour. If it is made with a wavy covering (metal, ceramic or bitumen tiles), then it is laid towards the prevailing winds in a particular area from left to right or vice versa.
Under the roof mansard roof lay a layer of waterproofing (polyethylene film, roofing felt or roofing felt). The installation of a so-called “cold” roof does not require this. The installation of a “warm” roof requires ventilation between the sheathing and the insulation from 2 to 5 cm.
Construction of the rafter system

In low-rise construction for installing roofs under soft roof mainly used wooden structures. They are divided into three types: wooden trusses. A system of rafters or rafter legs that directly bear the roof load and transfer it to the mauerlat (mat). This beam, located along load-bearing wall, transfers forces to the racks (vertical beams) and ties, which take the tensile loads on the roof.
They do it in increments of 0.6 to 2 m, depending on the load, type and type of wood. The racks are arranged in increments of 2 - 3 m. After this, this entire system is attached to the walls of the building so that it does not get blown away by the wind. This is done using wire (twisting), which is attached to the walls using anchors. This kind rafter system It is also widespread because it has a very convenient design that can be easily changed depending on the intended roof configuration.
Soft roofing in Lately has gained wide popularity when installing roofs of one- and two-story buildings. This is private and cottage construction, construction of various buildings household use. Soft roofing is suitable for both rural and urban architecture. And first of all because it gives residential buildings, cottages, trade and exhibition pavilions a unique look, providing reliable protection from precipitation for 25 years or more.
Laying roofing materials

When covering the roof roll materials If the slope does not exceed 15%, the panels are rolled out in the direction of the water flow. Roll coverings for residential premises are arranged in several layers. For the inner layers, glassine, only leather, and lining roofing felt are used; for the outer layers, rolled materials with coarse-grained topping are used. With a slope of less than 5%, the overlap width in all layers is less than 100 mm.
Modern ones form a continuous sealed carpet on the roof, ensuring water resistance even at zero slopes. Therefore, a flat roof very often has soft tile coverings. It is based on fiberglass impregnated with asphalt. On top, such a coating consists of stone or mineral chips of various colors, and on the bottom it is covered with a special bitumen layer and plastic film. When laying flat roof the film is removed and bitumen shingles under the influence of the sun it is glued to the base of the roof. There is an option when the tiles are completely impregnated with bitumen and are fastened with ordinary nails directly into the soft roof. In both cases it looks aesthetically pleasing.
Sometimes a flat roof can be made without any coating of roll materials at all, but only with the use of mastic.
It is applied using a special sprayer. Each subsequent layer is applied after the previous one has dried. For reinforcement, a flat mastic roof is reinforced with fiberglass or fiberglass mesh. The flat mastic roof has iron at its base concrete plates or a screed made of cement-sand mortar.
This coating method is convenient when constructing, first of all, a flat roof. A flat roof with a soft roof is used in both civil and industrial construction. In addition to protection from precipitation, a flat soft roof can serve as a garden, terrace, swimming pool, or parking lot.
During construction, a soft flat roof allows a slope of no more than 3%. Therefore, the covering materials for a flat roof must be such that it is possible to install a continuous carpet: bitumen, bitumen-polymer and polymer. The basis for a flat roof is concrete slabs, insulation slabs (stone chips), asphalt concrete, wood, metal, slate, old roll covering. A flat roof can be enlivened by a lawn, greenhouse or winter garden.
A soft roof is also well suited for roofs with a large angle of inclination. The main advantage is resistance to large temperature changes. It is economical and absolutely silent. In addition, it is an excellent heat insulator, does not rust, does not rot, and is resistant to fungi and lichens. Being a good dielectric, it is not afraid of lightning.
The number of roll layers and reinforcing gaskets is selected depending on the slope of the roof slopes. With a slope of 2.5 to 10%, three layers of mastic carpet and two layers of reinforcing pads are needed. With a slope of 15-25% - three layers of mastic, two - reinforcement and upper layer paints
The main task of any roof is to counteract daily and seasonal temperature fluctuations, rain, hail, snow, solar radiation and harmful emissions industrial enterprises. Moreover, a soft roof does this for 25-50 years.
Today, soft roofing is becoming more and more popular. The quality of its operation largely depends on its arrangement, during which a rather important role is given to the base of the roof - the lathing. When designing it, all nuances must be taken into account, including the presence of chimneys, ventilation passages and built-in skylights.
To prevent the roofing material from leaking, it must be laid tightly to the formwork, therefore the sheathing for a soft roof should not have any unevenness, all its joints must be perfectly adjusted to each other. Not only the roofing covering, but also the material for the roof sheathing is responsible for the quality of the roof.
Wooden roof sheathing under a soft roof, usually a flat surface assembled from edged boards with a very tight installation pitch.
Calibrated boards are most suitable for making “soft” formwork. It is clear that using lumber different thicknesses It is difficult to count on the ideal evenness of the base; most likely, the result will be a stepped surface. Even if you manage to lay bitumen shingles on it, it will obviously not last long.
For the formwork of the upper enclosing structure, multilayer moisture-resistant plywood, fiberboard or OSB can also be used - these are materials that will also retain moisture.
Requirements for the installation of lathing under a soft roof
Installation of sheathing for soft roofing must be done in such a way as to allow it to withstand loads roofing without causing surface deformation. In this regard, taking into account such loads on the roof as the mass of the snow cover, the effective thickness for lumber formwork or for plywood is calculated using the pitch of the rafters as a basis. For example, in a structure with a rafter pitch of 500 mm, a 20 mm thick edged board or 10 mm thick OSB boards are used for the base, and with a rafter pitch of 1200 mm, the thickness of the material will be 30 and 20 mm, respectively.
The sheathing for a soft roof must be firmly fixed, strong and smooth, and free from decay. Its humidity before installation, according to SNiP, should not exceed 20%, that is, 1/5 of the dry weight.
Features of the base for bitumen shingles

To get a complete coverage, wooden base mounted in two layers. As a result, a continuous flooring is obtained on top of the rafter structure, which is smooth and even. To prevent kinks or excessive friction from appearing in such a roof covering, the base structure must be free of sharp corners and all sorts of kinks.
That is why it is so important that in the process of preparing and adjusting the base materials, all its lines are smoothed out, without corners. To build such a structure, the width of the edged board should be about 140 mm. Thus,
- the base is made in two layers, and the coating should be continuous;
- the base flooring should be even and perfectly smooth;
- the structure should not have bends or sharp corners that could cause friction of the roofing material;
- It should be taken into account that during storage the board may begin to warp, and this, in turn, will cause the formation of trays and humps on its surface, in other words, grooves and bulges. For correct device It is recommended to lay lumber on the formwork with the tray facing up. Then the moisture seeping through the roof will have the opportunity to flow down the tray. Otherwise, the only way for water to drain will be the joints, and thus it will seep into the under-roof space.
- sheathing pitch for soft roofing depends on the slope of the roof and the strength of the winds in the area where the house is located, and on the degree of windage of the construction of the bitumen shingles themselves. The strength of the wind and the pitch of the base are related by an inversely proportional relationship: the stronger the wind, the smaller the pitch of the base for flexible tiles should be, and, conversely, the smaller it is, the larger the step of the base. Typically, the pitch of the base for bitumen shingles can fluctuate around 50-100 cm.
Stages of lathing installation for a soft roof

The following materials are used for the manufacture of lathing flooring:
- special roofing plywood,
- edged board, preferably from coniferous trees,
- nails for fastening.
Installation work begins with the installation of the first, working layer of the base, wooden blocks of which are attached to load-bearing structure, rafters, from bottom to top. The condition of the most flexible tiles in the future depends on how even and smooth this layer turns out. It should not undergo friction or kinks.
At the ends of the base front boards rounded as much as possible to ensure a smooth transition of the roofing material, without any bends or fractures. That is, practically the installation of the base begins with the construction of a frame, which must have increased strength and reliability.
Then they begin to install the next continuous layer, the finishing one - laying roofing plywood. It must first be impregnated with a special waterproofing compound.
This may not be enough to provide good waterproofing, so it is recommended to lay an additional layer of waterproofing on top of the waterproofed plywood.
For an additional waterproofing layer, bitumen mastic is usually used. Next, to enhance the thermal insulation of the roof, a vapor-proof film can be laid on the base.
It is important that all sheathing bars are installed in a strictly horizontal position.
There are countless roofing materials available today. For every taste and budget. Among them, a special place is given to soft tiles. If you prefer this coating and decide to install a soft roof on your roof, then be sure to familiarize yourself with the basic rules for its installation. But before that, think about installing a roof under a soft roof. After all, this process is very important and requires a special attitude towards yourself.
Features of a soft roof
Bituminous (soft) shingles appeared about 30 years ago. Subsequently, this roofing material gained wide popularity. Produce soft tiles for the roof and lining for it from raw materials such as non-woven polyester or fiberglass. The latter is impregnated using a bitumen-based composition. Polyester, unlike fiberglass, has greater tensile strength. It should be used in areas where there is a large load on the roof. These are ridges, valleys and various junction points.
On top of the flexible tiles there is a topping, which consists of basalt granules or mineral chips. At the bottom of the material there is a self-adhesive layer made on the basis of bitumen. It also features polyethylene film, which must be removed during work. To prevent individual sheets from sticking together while the tiles are stored in your home, manufacturers refuse to attach a protective film and sprinkle its lower surface with sand.

Soft tiles are produced in plates. They have a length of up to 1 meter, a width of 0.3-0.45 meters, and a thickness of 3-5 millimeters. U different manufacturers the material differs in color and shades. The price of the material, which is produced on the basis of fiberglass, will be much lower than that of tiles reinforced with polyester. Thus, last option It is more advisable to buy to form the main coating if the level of strength does not matter.
It will be possible to install a soft roof if the slope of the roof under the soft roof is at least 11-12 degrees. If the slope is greater, rainwater will stagnate on the surface. And this will cause the destruction of the structure. When laying bitumen shingles, the roof shape can be any, even the most complex design. The finished roof takes the shape of a rectangle or oval. The form of a hexagon or any other geometric figure is possible.
Conditions for working with soft tiles
When working with soft tiles, adhere to certain working conditions:
- You can install a soft roof if the temperature environment reaches at least 10 degrees above zero. The bottom layer of material, which is capable of adhesiveness, will spontaneously adhere to the base when heated by the warmth of the sun. After gluing, a completely monolithic carpet will be created that is not able to get wet.
- If the temperature outside is lower, the layer of glue will not melt. Bottom part In this case, the material will have to be heated forcibly. For this purpose, buy yourself a hot air gun.
- For industrial facilities, it is possible to install a special shelter called a greenhouse. This is a wooden or metal structure that is placed on top of the roof in case of roof installation in frosty conditions and is heated until the temperature reaches the desired value. However, in special cases this option will not be profitable, as it is expensive.
- Remember: if the weather is damp, it is better to avoid laying soft tiles. Of course, it will be possible to lay the material on a wet base. But it will quickly rot under the covering. Thus, the most best time for work of this type - summer. And in winter you can do preparatory work. For example, make a rafter system, as shown in the photo of a roof under a soft roof.
- All this time you will store soft tiles. Create a material suitable conditions content. The selected location should not have direct access to the sun, since the adhesive layer should not melt under any circumstances. Under no circumstances should the temperature drop below zero.

Preparing the roof for soft roofing
Laying bitumen shingles, like installing other roofing materials, begins with preparatory work.
1. Arrangement of the base for a soft roof
The base for soft tiles must be solid and even, since the material is not only glued to it, but also nailed:
- It’s good if you take an OSB board or edged board for the base. Plywood will also work. Use moisture-resistant or tongue-and-groove.
- Remember not to use wet material. Its moisture level should be minimal - no more than 20% of the total mass.
- When creating a base for a soft roof, the joints of the boards are located at the support sites. In this case, take boards with a length of at least 2 spans between such supports.
- At similar work It is worth considering the expansion capabilities of the boards. This is a common phenomenon in wood and is caused by changes temperature regime and humidity levels. Leave enough space between the boards.
2. Creating ventilation gaps
When preparing a roof for soft roofing, always leave an air gap. Remember that it should be made large enough. Its dimensions must be at least 50 millimeters. Position the exhaust vent higher. And at the bottom of the roof make a hole for air flow.

Ventilation gaps will ensure a long service life of soft tiles. They are required because they perform many functions:
- They take away from thermal insulation material humidity. The sheathing structure and roofing pie are also eliminated from it.
- By arranging ventilation, the number of icicles and ice that form on the roof in winter is reduced.
- In summer, optimal temperature conditions will be maintained in the middle of the roof.
3. Installation of underlay carpet
Definitely under flexible tiles arrange backing layer:
- To do this, prepare insulating material in rolls. It is better to give preference to materials recommended by soft tile manufacturers. They contribute to better “sintering” of the roofing cake into one whole.
- Roofing material should not be used, as it is inherent short term operation. Its use with this durable material, like soft tiles, is impractical.
- Lay lining material parallel to the cornice. In this case, choose the direction from bottom to top.
- Make an overlap that should reach at least 10 centimeters.
- Secure the edges with nails, maintaining an interval of 20 centimeters. Seal the seams with glue.
- Sometimes when attaching drainage system you have to install special brackets that are needed to install the lining layer.
- If the roof slope is more than 18 degrees, the underlayment layer can only be installed in places where leaks are most likely to occur. This includes skates and cornices.
- Also waterproof the roof valleys and ends.
- Be sure to install underlayment in areas where the roofing material meets the walls through the roof.
- Don't forget about chimneys and skylights.

Creating lathing for a soft roof
After preparing the base for the soft roof and installing the underlayment, start making a special sheathing. It consists of beams and boards, which should be located perpendicular to the rafter joists. The sheathing will act as a base on which workers attach flexible tiles.
1. Material and requirements for it
When laying the sheathing, adhere to the following requirements:
- The material used for the sheathing must be strong enough to withstand the weight of the roofing, people and snow in winter.
- Make durable sheathing that is highly reliable.
- Design a design that is unable to respond to factors external environment and mechanical impacts.
- There should be no bumps or sags on the sheathing. Cracks are allowed no wider than 6 millimeters. And there should be no protruding nails at all.

To make a lathing for laying a soft roof, prepare a material that necessarily meets the established quality standards:
- Edged board. Its width should be 140 millimeters. Choose only durable material High Quality.
- Wooden bars. It’s good if their humidity is no more than 20% of the total weight. dimensions the bars will change as the sheathing step progresses.
- Diffuse film. You can also use roofing film. It is needed to improve thermal insulation and increase the waterproofing properties of soft roofing.
- Roof purlins. They will strengthen your roof, make it more stable, and give it reliability.
- Plywood. You will place the board according to this material. This way you will achieve a perfectly even sheathing.
Not only the roofing material is responsible for the quality of the roof. This function lies entirely on the sheathing. Therefore, when making sheathing for soft tiles, follow these recommendations:
- Before arranging the sheathing, lay the bars parallel to the ridge on the rafters. Maintain an interval of 5-10 centimeters. On top of the bars, place the plank from the ridge along the slope to the overhang.
- Despite the fact that there are several types of sheathing, use only continuous sheathing under a soft roof. Make the sheathing in 2 layers.
- Be sure to ensure the evenness of the structure. Remember to exclude corners and kinks. Excessive bending of soft tiles is fraught with consequences. Therefore, adjust the material very well so that there are only smooth, even lines.
- When making lathing for a soft roof deck, you need to consider one thing: important point. Always take into account the condition of the boards used. Wood can warp during storage. As a result, depressions and bulges appear on its surface. If you want to properly lay a roof that will last a long time, place the boards in this position - with the tray facing outward. So the moisture that has leaked onto the roof through the roofing will flow down. If you do not take this into account, then after a while you will find consequences on your roof. Water will flow through the roof joints into the under-roof space. After this, the materials used will completely deteriorate.
- There is one more nuance that should not be forgotten when creating sheathing for a soft roof. This correct production finishing layer. It should be solid. To form it, prepare frontal boards. Round them at the ends. This way, the bitumen shingles will only have smooth bends, and you can forget about kinks.

3. Instructions for creating the sheathing
Carry out the work in the following sequence:
- Attach the sheathing bars to the roof support structure. The direction of work is from bottom to top.
- Nail the bottom sheathing. It is attached directly to cornice board. It is required to fix the first row of soft tiles.
- Lay down the roofing tape. It is positioned horizontally in relation to the roof ridge. Place the first strip at the eaves. The following are placed with an overlap. This is how the work is done up to the ridge of the roof.
- The roofing tape is fixed between the rafters and counter battens. This must be done to form normal ventilation gaps.
- Fix the first block to the edge of the rafters. First of all - in the area of the cornice.
- Install the second block behind bottom edge first. Maintain a distance of 300-350 millimeters between them.
- Attach the following bars. The pitch in this case is 370 millimeters.
- The last block is attached to the ridge board. For this, ordinary nails are used. The distance should be about 200 millimeters.
- Remember that all bars must be positioned strictly horizontally. To create a reliable sheathing, achieve strong fastenings of soft roofing sheets and not worry about the accuracy of the connections, strictly observe the distances between the bars.

Thus, soft roofing has many fans today. The quality of its flooring and use will directly depend on the quality of roof preparation, the correct creation of ventilation gaps and the laying of the underlayment. But the most great importance has sheathing arrangement. Pay due attention to its design, selection quality material and studying all the nuances of the work.
Until recently, only galvanized steel, tiles and slate were used as roofing materials. Several people were involved in the installation work, who spent a lot of time and effort on the work. But today the range of materials has expanded and now, after the roof is built, it can cope with roofing work is possible for one person, a lot of new things have appeared - for example, soft roofing.

According to its technical and operational characteristics soft roofing is in many ways superior to other materials. Its advantages include:
- ease of installation (can be done alone);
- strength;
- durability;
- flexibility;
- resistance to moisture and corrosion;
- tightness;
- attractive appearance.
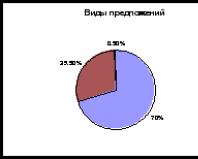
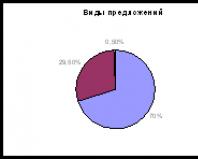
Often used as roofing the following types roofs:

Attention! If the top layer of the roof will not be removed, then when purchasing a soft roof you should check whether it is compatible with the material from which the structure is made.
Preliminary work
Installation begins with preparation.
Stage 1. Preparing everything you need
As already noted, one person can do the laying of a soft roof. To work, he will need a completely standard list of materials:

Stage 2. Preparatory work
The base must be as strong as possible; its sagging is unacceptable. There are several materials that can be used for strengthening:
- plywood;
- OSB boards;
- tongue and groove boards 10 cm wide.
It is typical that in winter small gaps (about 3 mm) should be left between the seams of the sheathing. If the structure is sheathed with boards, then 5 mm.

Attention! It is advisable to treat the rafter system to protect it from rot and insects, as well as with fire retardants to increase its fire-resistant properties.
Stage 3. Ventilation gap

Allows you to solve the problem high humidity and reduces the amount of ice that forms in winter time. Moreover, in summer, thanks to ventilation, the temperature inside roofing sandwich decreases.

Ventilation consists of three main elements:
- ventilation outlet;
- inlet valves fresh air(installed from below);
- an air gap 50 mm wide between the base and the waterproofing layer.
Attention! If the slope of the slope exceeds 25ᵒ, then the area of the ventilation hole should be 8 cm². If the slope is less than 25ᵒ, then 16 cm².
Stage 4. Spacer layer

In this case, the gasket means a special one laid along the entire perimeter of the roof. Installation is carried out from the bottom up, starting from the eaves. An overlap of 10 cm is maintained. The material is fixed with nails every 20 cm.
If the roof slope is less than 18ᵒ, the lining can not be laid over the entire area, but only in certain areas, such as:
- skate;
- eaves overhangs;
- junction with a vertical wall;
- location of the chimney pipe.
Attention! If the slope is less than 12ᵒ, then using a soft roof is not recommended.


Stage 5. Installation of planks
Step 1. To protect the material from precipitation, curtain rods are installed on the eaves, or directly on top of the cushioning material. The strips (another name is droppers) are arranged with an overlap of 2 cm and are attached roofing nails(zigzag, along the entire length of the bar).
Step 2. Pediment strips are installed at the ends of the structure. This must be done with the same 2-centimeter overlap. Nails are driven in increments of 10 cm.
Step 3. Mark the exit location (if the house has a heating stove).
Step 4. Upon completion of installation of the planks, the valley carpet is laid, which will significantly increase the moisture resistance. The color of the carpet must match the color of the roof, the edges are fixed with nails in 10 cm increments.
After this, you can begin laying the roofing material.
Below is the technology for laying bitumen shingles, since this is the most common type of soft roofing.
Stage 1. Cornice tiles

Eaves tiles are laid on slats fixed to the eaves. Galvanized nails are used for fixation - they are driven in two rows 2.5 cm from the top and bottom edges of the material.
Instead of cornice tiles you can use an ordinary one, which will save a little. To do this, the tiles are cut out - shingles are taken and the petals are cut off from them. In this case, installation is carried out “end-to-end” at a distance of 2 cm from eaves overhang.
Stage 2. Ordinary tiles

Attention! Don't forget about color deviations. Even if all the shingles are from the same batch, the tone in different packages may vary. For this reason, it is recommended to mix six to seven packages in advance.
Step 1. Installation begins from the center of the roof overhang and is carried out in both directions.
Attention! The protective film from the shingles is removed immediately before installation, since without it the material cannot be stacked.
Nails are used for fastening. Usually four pieces per shingle are enough, but if the roof slope exceeds 45ᵒ, then it is better to use six.
Step 2. The first row is laid in such a way that its edges deviate from the edges of the eaves overhang by 1-1.5 cm. In this case, the petals cover the joints between the eaves tiles.
Step 3. The second row is laid in the same way, but the petals should overlap the cutouts of the previous one.
Step 4. At the edges, the material is cut along the edge and glued. There should be a layer 10 cm wide.

The same is done in end-tiles - the tiles are cut to obtain a 15-centimeter strip, after which the edges are coated with glue to about 7-8 cm.
Attention! When cutting tiles, it is advisable to underlay a piece of plywood so as not to damage the layer below.
Stage 3. Ridge tiles

Step 1. First, the scaffolding is prepared. They will greatly simplify the work with the roof ridge, but after completing the work, do not forget to glue the shingle tabs at the fastening points.
Step 2. The tiles are laid overlapping (about 5 cm), each shingle is fixed with four nails.
Attention! The ridge tiles are laid only after the laying of the row tiles has been completed.
Step 3. To receive ridge tiles the cornice is cut at the perforation points. Next, each element is bent and laid with a short part along the roof ridge.
Stage 4. Passages and junctions in the roof

There are several ways to organize passages through the roof. So, if the passage diameter is small, then it is better to use special rubber seals. This applies to inputs for antennas and other communications, but the pipes are finished somewhat differently - here it is necessary to take into account possible heating and, as a result, expansion, which is why the technology used is different.
Step 1. First, a lath is nailed along the perimeter of the junction of the pipe and the roof triangular shape(in most cases – 5x5 cm).
Step 3. The pipe is glued insulating material in such a way that 25 cm of the slope and 35 cm of the pipe itself are covered.
On this installation work almost finished, all that remains is to secure the adjacent strip along the entire perimeter of the pipe. Next, the iron apron is fixed, and the seams are carefully sealed with silicone-based sealant.
The connection to vertical walls is carried out in the same way. The only difference can be considered that the triangular strip does not form a perimeter, but is fixed along the wall.
Video - Installation of soft roofing
Roll roofing installation
Roll material, which is also called euroroofing material, is laid mainly on flat roofs, although it can sometimes be found on slopes with a slight slope.
The technology looks like this.

Step 1. After rolling out the roll, all folds are aligned and the material is stretched.
Step 2. One side of the roofing material is heated with a special burner until the special indicator melts.
Step 3. After this, the side is glued to the base. When the material has cooled, the roll is rolled back to the place of fixation.
Step 4. The roofing material is fused and gradually rolled out. In this case, you need to adhere to certain rules.
- The roofing material is fused with an overlap of 5 cm. To do this, a special orientation strip is applied along the entire length.
- The material must not be overheated, otherwise it will deteriorate and lose its ability to adhere.
- A high-quality deposited material must be homogeneous - without voids, dark spots, etc.
Joints with other surfaces are processed bitumen mastic, which after drying will have the same properties as euroroofing felt.

Video - Installation of euroroofing felt
As a conclusion
The main points of installation discussed above will help even a non-specialist understand the essence of the issue. The main thing to remember is that adherence to installation technology and strict adherence to all instructions will extend the service life of the soft roof.
Soft roofing in last years has gained popularity among developers. But not everyone knows in advance that the base on which bitumen shingles are usually laid is very different from the sheathing on which slate, ondulin or metal tiles are mounted. Let's try to figure out how the sheathing for a soft roof should be arranged and how its installation differs from the installation of a regular sheathing.
The mauerlat on which the entire rafter system rests serves as a kind of foundation for the roof. Flexible tiles do not tolerate unevenness, unnecessary bends, height differences and protruding nails in the base on which it will be laid, so it is necessary to take very seriously geometric parameters roof structures from the very beginning. All mauerlat bars must lie strictly horizontally for any structure configuration. And the lines connecting the ends of the mauerlats at the ends of the buildings should make an angle of 90° with them. If a device is also provided at the ends pitched roof, then the end Mauerlat should lie perpendicular to the longitudinal ones in one horizontal plane with them.
Rafters - the frame of the future roof
If the Mauerlat is laid and secured correctly, then installation of rafters prepared according to one template, even for figured roofs, will be simple. As a matter of fact, this is the similarity with the frame for other roofing materials ends. For rigid roofing sheets, the sheathing can be made from unedged boards in one layer with an interval between boards of 150–400 mm. Under flexible tiles it is necessary to prepare a continuous, even and smooth base in two layers:- The actual sheathing is made of calibrated (one thickness) edged boards with a width of 100 mm, which can be mounted at intervals from 100 to 400 mm.

- A solid base on which soft tiles are glued, made of plywood or OSB-3 board (osb, OSB-3)

Plywood and/or OSB-3 board must be moisture resistant! All wooden roof structures: mauerlat, rafters, ridge girder, racks, struts, boards and timber for sheathing must have a humidity of no more than 20%.When calculating the distance between the rafter legs, it is necessary to take into account the thickness of the board, plywood sheets or OSB boards. If the pitch is 500 mm, then the thickness of the board can be 20 mm, and plywood or OSB boards can be 10 mm. With a step of 1000 mm, the thickness of the board should be 25 mm, and plywood or OSB board should be 20 mm thick. The distance may be different, and accordingly, the thickness of the boards and sheets of plywood, or OSB-3 boards should also be different. Here you need to understand that the board serves as a sheathing to support the slab or plywood. If the distance between the boards is too large, sheet material may over time bend, sag between the supports, which will lead to deformation of the soft roof. The figures for the width of the board and the thickness of the materials used are minimal. Therefore, if you have the funds, you can purchase plywood or a board of a thickness greater than that required by calculations. In this case, the pitch of the board can be slightly increased. If the thickness is less than required, it would be better to make the sheathing of boards continuous. What is the reason for this? The thing is mechanical characteristics materials:
- The board can maintain its rigidity for decades when the right conditions operation and will lie flat even with a rafter pitch of 1200 mm or more. Of course, the board must have a thickness corresponding to this step.
- Over the years, plywood and OSB-3 boards can sag under the influence of temperature changes and variable humidity if they rest on points or support lines with a distance of even 500 mm between them.
- Despite all its rigidity, a board can “lead” over time, become warped, and the edges of individual boards can move out of the general plane of the surface. But flexible tiles don’t like this. It will break, be pressed, or rub through, which will necessitate roof repairs.
- Obviously, using only boards or only plywood or OSB boards will lead to the fact that very soon the bitumen shingles will begin to tear at the seams of the boards or sag along with the boards or plywood. This may mean that the roof installation will have to be done again.
- Only the combination of board rigidity and flat surface OSB boards or plywood will provide a reliable base for soft tiles, and roof repairs will not be necessary for a long time.
 To find the best option, you need to find out the cost of all materials and calculate the consumption when different options step. For example, the cost of an OSB-3 board with a thickness of 20 mm is almost twice as high as the cost of this board with a thickness of 10 mm. Preparation truss structures roofs for installation must take into account the fact that wood is a flammable material and susceptible to rotting. Therefore, it is recommended to carry out appropriate treatment with fire retardant impregnations and antiseptics, and in places where the rafter legs come into contact with the wall, it is better to lay waterproofing material. For example - roofing felt. A layer of waterproofing must be placed under the Mauerlat.
Sheathing device
The sheathing for a soft roof must meet the following requirements:- Solid flat smooth surface bases without deflections, potholes, chips, cracks and protruding chips or nails.
- Technical gaps between OSB slabs or sheets of plywood necessary to compensate for their possible expansion should not exceed 6 mm.
- During installation, the edges of sheets and slabs must be cleaned so that they are not sharp, even if they lie close to each other.
 They will serve as protection against water entering the wooden structures of the rafter system. If you plan to install gutters, then they need to be installed before the drip line.
 (1 ratings, on average: 5,00 out of 5)