Interesting ideas on how to decorate a room. How to make a beautiful room. The principle of creating fabric panels
Today in interior salons you can find almost any material in order to create a completely unique atmosphere at home. Usually we remember this before a significant event, be it a birthday, anniversary or wedding. Although in Everyday life bright interior details add color and create a special mood. And of course, calling a professional decorator every time is quite expensive, so today we’ll talk about how to make room decorations with your own hands.
Let's start with the windows
In fact, these light sources greatly influence the perception of the interior as a whole. Therefore, we will begin our story about how to make a decoration for a room with your own hands, with window decoration. There are many options for this, but the easiest way is to hang new ones original curtains. It's not difficult at all.
You will need to take a piece of linen or cotton of the required length and width. And besides this, you need acrylic paints for fabric, cardboard and a stationery knife, as well as braid and fringe. First you need to prepare a stencil, and then apply a design on it to the fabric. After waiting for the artwork to dry, you can begin sewing on the decorative elements. All that remains is to hang the curtains and enjoy the new view.
Vertical garlands
And we continue to discuss what other decorations we can come up with for the room. With your own hands it is quite possible to build a lot of not tricky, but bright and very interesting details. For example, a garland is not only a New Year's attribute. Such products can create a mood all the time. Let's look at a few options.
1. Flower meadow on the window. If you have sheer curtains, you can add interesting decor to them. To do this you will need felt and satin ribbons. The decoration is simple: flowers of different colors are cut out of fabric and then sewn onto ribbons. They can be different lengths, this will only be a plus. Each tape is equipped with a hook and attached to the cornice.
2. If you have a sewing machine, you can prepare an even more interesting garland. Cut a large number of multi-colored felt circles and stitch them together. These long threads are hung along the curtain and have a very cheerful look. In addition, such a unique curtain can completely replace the usual tulle.
3. Show your imagination and create a fluffy garland from small pompoms strung on a string. Or you can cut out butterflies from felt - and the decoration for the room (you can create real miracles with your own hands!) is ready.

Unusual flowers
Since we started with the design of windows, we must not forget about the window sills. This is the space that most often remains empty or is filled with pots of flowers. But if this is a children's room, then living plants sometimes suffer from excessive curiosity, so it is best to postpone planting them. In the meantime, take any smooth flowerpots and soak them with primer. Now cover the surface with lace or knitted appliqués. When the structure has dried, it is covered with paint or glaze. Now you can fill the flowerpots with any artificial flowers or other crafts.
Night light for kids
A children's room is a special place where a child not only plays during the day, but also falls asleep in the evening. To help him sleep peacefully, try making a beautiful night light for him. To do this you will need to take balloons and inflate them. Take the ball wool thread, thread the needle and thread it through a plastic bottle of glue. It turns out that a thread soaked in glue stretches behind the needle. Now start wrapping it around the ball so that a mesh is formed. After this, the product is hung to dry. Now the ball inside can be pierced, and a small light bulb can be placed inside. If you wind the thread tightly enough, then such a “lamp” will not shine too brightly, but it will create a feeling of celebration.

Decorating the room
Most often, this need is remembered when there is a need to children's party. It is with age that we stop believing in miracles, and we no longer expect anything special from the new year of life. And decorating a room for a child’s birthday is a sacred thing. And of course, multi-colored balls are best for this. There is one condition - there must be a lot of them. Part can be filled with helium and launched under the ceiling, decorated with serpentine and multi-colored ribbons. Decorating a room with balloons can be made even more interesting if you use them to create certain compositions, for example, flowers or cartoon characters.
One hundred ideas for children's rooms
Indeed, this is such a fertile time when all that is required from parents is a little imagination - and the child’s happiness is guaranteed. It is best to start a process such as decorating a room for a child’s birthday in the evening, after you have put the baby to bed. Simple garlands and fluffy pom-poms will instantly give the room a completely different look. On your birthday, you can’t do without numbers that show the number of years you have lived. They can be large or small, but always bright.
Speaking about ideas for decorating a room, we cannot ignore all kinds of banners and wall newspapers, as well as funny collages. To do this, arm yourself with colored paper or felt-tip pens, draw and cut out capital letters the name of the child, which will then be distributed along the wall using fishing line.
For collages you can choose the most good photos child. from birth to today, and complement them with funny inscriptions and rhymes.

Girl's room
When a little princess appears in your family, you want to surround her with lace and flowers like an airy cake. This means that you will have such a test as decorating a girl’s room! Why the test? Yes, because coming up with something original is not so easy. For example, there is a stereotype that since the room is a girl’s room, it means it will be pink. Let me! Is it necessary to turn the room into a “Barbie house”? Believe me, it won’t be long before she gets tired of him. Therefore, choose any delicate shades and their combinations. It can be orange and green, white and blue. Airy tulle or organza looks very beautiful in a nursery. It is also worth considering not only hanging lush curtains, but also adding a hanging canopy with flowers and butterflies to the little beauty’s crib.
But it is best to leave one of the walls for the child’s own creativity. It can be covered with white wallpaper, which can be easily re-glued if necessary. Now do it various elements(flowers, birds and butterflies) from felt, and provide the wallpaper itself with small Velcro fasteners. Now crafts to decorate your room can be created and changed every day.

When the child grows up
Yesterday's baby becomes a teenager, and his tastes change dramatically. Now flowers and butterflies are unlikely to suit him. Now the room should become something between the bedroom of an adult and a child. Your favorite movie, character, or just a shared fantasy can become your fulcrum.
- If your child likes to draw, then allocate a part of the wall for creativity. Perhaps you will attach a tablet that will securely hold the Whatman paper, and cover the area nearby with slate paint for chalk notes.
- If your child loves to read, then develop sketches of bright shelves for books.
- And for lovers of a sports lifestyle it is ideal wall bars and a minimum of furniture.
Decorating a teenager’s room is a joint effort, because they will be hostile to any imposed decision.

Collages on the wall
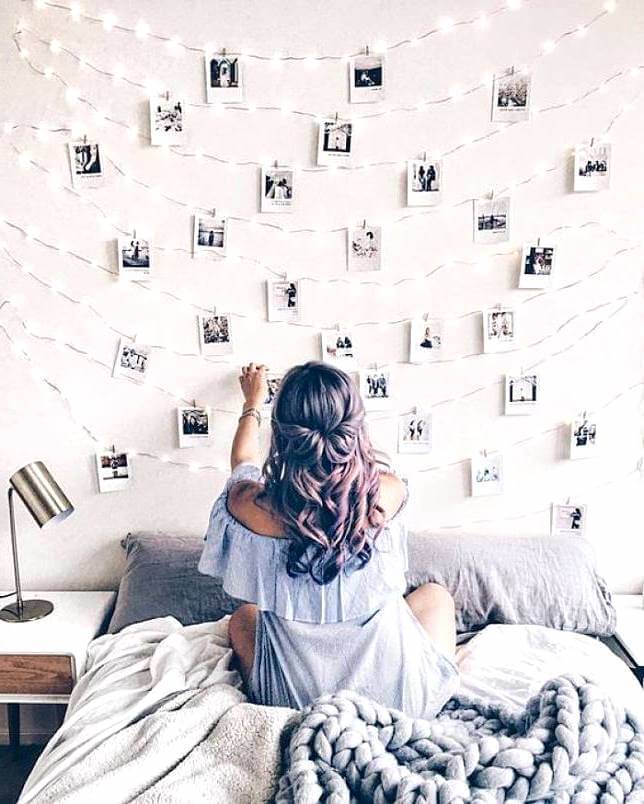
Right now, identifying oneself in this world is becoming especially relevant, so the more successful photographs on the walls, the more positive the image of Self will be formed. And your task is to find suitable frames or create them directly on the wallpaper, and also place the selection as grouped as possible. Be sure to make a selection of photos on your computer before printing; perhaps your tastes and the tastes of your children will not coincide.
Decorative elements in a girl's room
There shouldn’t be too many of them, as otherwise the overall picture is lost, but you can’t do without them either. It is by surrounding himself with beautiful things that a child acquires taste and begins to understand what he likes and what he doesn’t. The optimal solution would be pots with living plants; it is advisable to choose those that bloom readily. The flowerpot itself must be turned into a bright and interesting work of art. To do this, you can crochet a cape that will be worn in the shape of a sleeve, assemble a picket fence from ordinary twigs and tie them with bark, paste them with colored threads - in a word, anything to turn a boring pot into a bright element.
Remember about garlands. It will look very original window design their butterflies and fluffy pompoms. The color can be selected depending on the interior. And if you want the bed to evoke the most pleasant emotions in a girl, then work with her on making small pillows trimmed with silk stripes or fur and decorated with decorative elements. A pile of such pillows on a sofa or bed creates an atmosphere of comfort.
The mirror is another one important element, which is placed next to the window so that the lighting favorably emphasizes all the advantages of the occupant of the room. And around it you can attach small wicker baskets to the wall for all sorts of little things, decorating them with bows and flowers.

We create comfort in the room
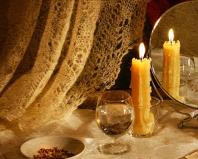
Candles, as a symbol of the hearth, are always an advantageous decoration element. You can use a glass vase filled with pebbles or dried flowers, with a candle placed in the center. People love to watch the fire burn, so it is very convenient to have such a decorative element in the room. And if there is a fluffy carpet on the floor, then imagine how many pleasant minutes you can spend watching the candle flame from it.
Instead of a conclusion
It’s impossible to list everything, because there are millions of ideas and options for decorating a room. However, the main thing here is to want to make your corner the most comfortable and decide on an idea. Then all that remains is to select materials, craft and place them in places, and then surprise your friends and acquaintances with the created beauty. But what matters most is your own comfort in the created interior.
Wall decoration is usually the final stage of construction work. In such a situation, even at the design stage, a color and stylistic solution is determined, materials are selected, and the necessary preparations are made. If we are talking about the need to change an old interior that has become boring over several years, or to transform the appearance of one or more walls without carrying out large-scale renovation measures, you can use creative ideas and independently add original notes to the decorative design of the room. Read on in our article to learn how to decorate walls with your own hands, based on fashion trends.
Wall decor using improvised materials
If you have the skills to work with scissors and paints, quickly make your own wall decor possible from ordinary items.
Decor made from toilet paper rolls
- Having collected the cardboard tubes remaining after using toilet paper, they are slightly flattened and cut into equal parts, each of which will subsequently become a flower petal.
- Now, from the cut pieces, you need to create a single composition. To do this, all the elements are glued together with their side planes, then they are given the required shape and painted in the desired color. Elegant paper wall decor ready.


It is important to know! Unusual design decorating a wall in a house with a classic design is always popular. Even with minimal financial investments You can recreate a noble atmosphere in the interior or hallway by making bricks from cardboard and painting them in the desired color.

Texture painting of walls
Texture painting of walls is used to give them relief and create a bright accent in the interior. When carrying out work, it is possible to use various technologies with which you can transform any room according to your taste.
When using texture painting technology, the surface does not need to be leveled, thus replacing a certain section of the wall is possible at any stage.
Below are practical tips that will help you quickly and efficiently decorate your walls, while getting an excellent result.
Preparatory work
To get the best result, before starting work, the walls are plastered in one layer, good are being cleared, then covered with paint on an emulsion basis. Texture paint is applied to the surface in three ways.
- The wet method is to use fabric.
- Dry method - using a brush.
- And the last method is the rolling technology of “rolling” textured fabric along the wall or ceiling in the same direction.

Texture painting technology:
- To begin with, the walls are cleaned of old paint, all cracks are sealed, the putty area is sanded, after which the surface is coated with a special primer.
- Next, to create a tint tone, apply base layer paints. Usually acrylic paint is used for this light colors(light grey, beige or white). The paint is applied with a regular roller, which can be purchased at any hardware store.
- After application, you need to wait for the paint to set and only then begin to create painterly textures.
- The glaze is applied to the wall using a brush, pressing the ends of the bristles into the fresh coating, so that a clear structural mark remains on the surface. To ensure that the deep pattern is not blurred, it is recommended to clean the bristles of the brush as often as possible.
- Depending on preferences, the brush can be replaced with fabric, the fibrous structure of which will change the texture of the wall, giving it an interesting and unpredictable pattern. Particular attention should be paid to the corners; they must be perfectly even. For joint finishing it is best to use small brushes.
- After the glaze has completely dried, it is necessary to apply several layers of varnish or cover the surface with a transparent glaze without texturing it. It is recommended that two people work together to process a strip from floor to ceiling in one step.


Even amateurs can do this type of work, but achieving an excellent result will require perseverance and patience.
Wall photo gallery
Decorating one of the walls with photographs brings a feeling of family unity into the interior, creates a special mood, awakening the kindest and brightest feelings.
These can be large portraits, genre scenes or ordinary shots captured from everyday life. A collage looks great, allowing you to fit many images into it. If desired, it can be made themed, dedicating it to a significant event, anniversary, or one of the family members.


Volumetric photographs are an elegant addition to a modern interior

Photos in frames different sizes and shapes give the interior a modern dynamism. For example, what makes a space more conservative and static is decorating the wall with rectangular frames, which are arranged strictly horizontally in one or several lines. What unites this composition into a single whole is the color shade of the frames.
You can move away from the usual way placing photographs, decorating the wall with a stylized image of a trunk, successfully placing portraits of household members on its branches, creating a whole family tree.


Photographs that are not framed, but pasted onto thick cardboard in rich colors that echo the color motifs of other items will help add sophistication and uniqueness to the interior. They are fixed on stretched cords, fishing line, chains.
Will appear emphasized and romantic wise quotes, important wishes, monograms, written on high-quality thick paper in an elegant font and framed with a gilded frame. They are placed next to photographs or on an adjacent wall, thus creating a space permeated with rhythm.


Important! If the wall area is small, it is not at all necessary to create a large composition. You can place one photo on a narrow glass shelf, highlighting it with beautiful lighting.
Volumetric elements
Architectural decor completely changes the surrounding space, becoming the center of the entire room. Having a free wall in a spacious room, with the help of volumetric elements you can turn it into a cozy relaxation corner, combining it with an exhibition of your favorite collectibles.
Having built a shallow false wall, they construct built-in decorative, small niches with glass and soft lighting. Objects placed in such niches attract attention in such lighting. A portal with antique half-columns and imitation stucco will help decorate the fireplace.
In order not to disturb the harmony, color scheme façade planes are selected to match the overall style of the interior. The color stylized as noble marble looks advantageous.


Frames as a decorative element
Frames from which glass is removed and cardboard is painted to create an amazing world of aesthetics bright colors or removed altogether. The material and color scheme of the frame are selected to match the specific style of the room.
- Strict in shape will easily fit into the classic surroundings rectangular products, made from noble wood.
- In Provence style it looks harmonious with smooth lines and rounded corners.
- For eclecticism, you can choose frames of the same shade, but of various shapes and configurations.
Another option for wall decor would be a single frame shape, but with different colors and the texture of the material.


Empty frames are arranged in various combinations and shapes. They can create strict horizontals, verticals, and move diagonally. Created from small frames geometric figures or dynamic curved lines.
An interesting stylish image arises if several frames are fixed on one image, breaking it into several fragments.


Use of paintings
It is possible to create a certain mood with the help of paintings, which have long been a win-win option wall decoration.
Wall decoration in style will be supported by images with clear, ordered lines on an achromatic background. They should have a simple frame without unnecessary decorative elements.
Important! If several small posters are selected, they are aligned along one line.


The noble, ancient Provence style assumes the presence of paintings depicting idyllic village landscapes or genre scenes, and stylized ones solid wood Frames with impeccable varnish and carving will add more attractiveness to the interior.
A touch of modernity is brought into the interior by modular paintings, which allow you to create compositions in accordance with own preferences. Red furniture and black and white paintings combine stylishly. For those who prefer calm, elegant solutions, floral motifs in beige tones will suit them.


Mirror fantasies
Mirrors are held in special esteem by designers, especially when decorating the interior, since with their participation the space visually expands. When fixed under the ceiling along the entire perimeter of the wall, a mirrored border creates the impression of a significant increase in the height of the room.
You can bring a feeling of celebration and freshness into the room if you place small mirrors on a free section of the wall, framed by frames stylized as aristocratic marble or mysterious malachite. They are placed randomly or in a clear order. The free layout brings speed and makes the interior more dynamic.


- A beautiful carved frame with gilding turns the mirror into bright accent classic interior.
- For rooms designed in high-tech style, mirrors are framed with a narrow chrome strip.
- The eco-style is supported by deliberately rough bamboo or wooden frames.


Soft decor
Soft panels allow you to create an expressive image of a room and bring coziness and comfort into it. Their surface is made of textile, leather or faux fur. Eco-friendly padding adds volume.
Such decorative elements are most often used to decorate the wall at the head of the bed.


Create thin and exquisite interior in the living room it is possible if you cover sheets of plywood of the required sizes with a noble fabric. Brocade or velvet with bright colorful patterns will add an unusual oriental accent.
Such panels placed on the wall visually highlight the guest area where chairs and a table are located. A decorative fireplace will fit perfectly there.


Having mastered sewing skills, you will be able to accomplish decorative wall element using timeless patchwork technique ( patchwork). Exclusive knitted products made with crochet or knitting. Openwork or multi-colored patterns, well-chosen to the main interior style, give the room a complete, original look.
They are stretched onto a round or rectangular base and create a planned compositional pattern. If necessary, use frames to enhance the overall perception.


Decorative paper elements
The walls can be skillfully decorated with butterflies, flowers, made from paper - corrugated, writing, papyrus. Lightweight parts are fixed on Double-sided tape and can be easily restored or replaced with other decor. On painted in neutral color on the wall, the thinnest paper parts form lines - horizontal, diagonal, broken, curved, concentric, vertical and others.
You can make them in collaboration with children. By fixing circles on the fishing line that change color saturation from yellow to orange or from blue to violet, it is possible to create a special dynamic atmosphere.


Using Cymbals
Special charm and sophistication for interior wall decoration have wall plates. Painted collectibles are quite expensive. However, it is possible to make the kitchen look festive by gluing fragments of the ornament onto ordinary porcelain or plastic plates. This could be the splendor of sophisticated Gzhel or the majestic Zhostovo painting. You can decorate your kitchen surroundings with bright Gorodets motifs.
After spending a little time, you will be able to decorate the plates with elegant pastel or contrasting patterns using the decoupage technique. Will add mood and emphasize special style premises, transferring the ornament present on the curtains to plates. For these purposes, you can cut out individual fragments from the remnants of the fabric and use transparent varnish to fix them on a plywood circle.
Important! Plastic products they can become deformed from the varnish, so PVA glue is used to work with them.


Vinyl stickers
It will be possible to quickly update the interior if decorate walls with ready-made vinyl stickers. Among the extensive assortment, you can select images with different color combinations, shape and size.
For example, a window design expands the room. The same purpose is served by the appearance on the wall of a road going into the distance, fields and meadows or boundless outer space. A nautical theme would be great in a bathroom. For home interior Dark subjects are not suitable.
It is important to know! Vinyl stickers are easy to replace if there is a need to refresh the interior or add a new touch to it.


Wall art
Since ancient times, painting has been the most popular method of wall decoration. To final result turned out to be exquisitely elegant, you need to have not artistic abilities, but also a rich imagination.
The drawing is done with tempera, acrylic, water-based, and oil paints. Having mastered certain skills, you can use an airbrush, cans of pearlescent, fluorescent paints (Fig. 1).
Creative wall decor ideas
- Gives amazing expressiveness and depth to the wall 3D drawings, for which, at the first stage, relief semi-volumetric images are made from gypsum mass. Then they are beautifully painted. (Fig.2)
- Most simple trick giving plain walls unusual color sound is striping. The edges are sealed masking tape, which allows you to get perfectly smooth edges of the image. You can vary the width, color, direction of the stripes. (Fig.3)
- For connoisseurs wall painting even without mastery of artistic techniques, you will be able to bring a special mood into the interior if you use stencils. You don’t need to make them yourself, since specialized stores and showrooms offer a wide range that allows you to choose the planned pattern. (Fig.4)
- It’s even easier to decorate wall planes using stamps. Previously sketch is being developed And markings are being made. This will avoid mistakes. The material for stamps is rubber. There are foam rubber and wooden products, as well as in the form of a roller. For home use, simple stamps are cut out of ordinary potatoes. (Fig.5)
Beautiful DIY wall decor is the end result of a lot of work, patience and perseverance.

(Fig. 1) Beautiful hand-made wall painting

(Fig. 2) Three-dimensional 3D image of a musical violin, which remains to be beautifully decorated with a drawing

(Fig. 3) Bright stripes on the wall

(Fig. 4) Using a stencil you can get an original drawing on your wall

Flowers in the interior
Fans of home gardening often place plants on the walls using flowerpots. If for these purposes, hanging varieties are selected, forming entire waterfalls of descending shoots covered with foliage and flowers, then it will be possible to create a magnificent vertical, enhancing the perception of homeliness and comfort.
The graceful shape of the pots serves as decorative additional element, allowing you to install flower arrangements on narrow, almost invisible glass shelves. In such situations, priority is given to compact flowers, selecting them according to the shades of the petals.

flower beds You can enhance the effect with the help of mirror elements placed on the wall behind the pots. This technique expands the space, makes it unusual and mysterious.


Video: how to decorate the walls in the house
There are many ways to decorate walls. Some of them are easy to do yourself, allowing you to quickly update them with available materials, and some will require certain skills. Good luck with your remodeling.
Quite often, many people are faced with the problem of lack of comfort in their apartment. Indeed, organizing a cozy living space is not so easy. In order to give your apartment comfort you need to choose perfect interior and fill it with various little things. We will look at how to make even a one-room living space cozy in more detail in this article.
Cozy Khrushchev
Often the owners studio apartment problems arise with the arrangement of the premises. Most often, this is due to the fact that the size of a one-room living space is small and in one room you have to combine a place for sleeping, receiving guests and working. However, even in a small one-room apartment you can create comfort using a basic division into zones. The intersection of different zones should be minimal.

In order for your apartment to become a studio, you should adhere to the following tips:
- It is necessary to avoid massive decorations around the entire perimeter. The best option is to group decorations in several zones;
- the window should be as open as possible;
- Original homemade little things made by yourself will help decorate the studio;
- zones dividing the studio should not intersect.
 In addition, for a small one-room apartment, the combination of colors plays an important role. The best option to make it beautiful is to use shades of light colors. They will help increase space.
The main emphasis should be on small elements. The best option is to make them yourself or select small details in the style of the interior.

The space in such apartments should be optimized as much as possible. A studio apartment is worth purchasing multifunctional furniture, which can free the apartment from unnecessary elements. If you wish, you can create the furniture yourself. Self-adhesive film can help make such furniture stylish without much expense.

How to organize a cozy nursery
First of all, when decorating a children's room, you should take into account such an important parameter as space. The children's room must be light and spacious, so the best option is to abandon large-sized furniture. To organize a cozy nursery, just a few pieces of furniture are enough.

Typically this is:
- bed;
- closet;
- dresser;
- desk;
- nightstand;
- shelf;
- place for toys.

These elements are quite enough to fill the space. Moreover, the furniture does not have to be new.
If there is no money, old room furniture can be used as a basis for creating new things. You can restore old things with your own hands in the style of a children's room.

Small details will help create coziness in this room. It’s enough to buy a cute rug or make curtain holders in the shape of toys. The walls can be further decorated with fabulous illustrations. Particular attention should be paid to the color scheme of this room. It must be light in color.
The best option is to use the following colors for decoration:
- green;
- blue;
- pink;
- yellow;
- peach.

Living room for everyone
One of the main aspects of comfort in the living room is space. All the most important items should be arranged and located nearby.

An element such as a long-pile carpet will add additional comfort. They will help give the sofa a homely atmosphere. Attention should also be paid various vases, paintings and other small interior elements.
An excellent element that will help create coziness is a decorative fireplace.

He will be associated with the hearth and home. It can be purchased at finished form, and if you don’t have extra funds, you can do it yourself.
A floor lamp on a high stand will help create a calm atmosphere.

The color scheme of this room should be kept in light colors. This will help give the interior lightness.
The best option is to use these colors:
- white;
- beige.

Comfort in the hallway? Easily!
The question of how to make a rental home comfortable is a very complex one. It is especially important in such apartments to pay attention to the hallway. To organize a room such as a corridor, it is important to choose the right furniture. As a rule, the corridor is always characterized by a fairly large number of things that have nowhere to hide.
This feature can be played out quite well if you install wall shelves, hangers and other accessories that, in addition to functionality, fill the room with decor.

Another way to free up the corridor and get rid of unnecessary things is the right furniture. As a rule, the corridor is quite long, but narrow. That is why the ideal set will have several niches. It is worth noting that upper items should be stored in a separate closed niche. In order to create an atmosphere of homely warmth, the corridor can be additionally equipped with shelves with various trinkets.

If your corridor is long and narrow, then it is worth increasing the space in it with the help of color. A combination of light and dark tones would be ideal. The long walls that form the corridor should be light.
It is best to use the following combinations for decoration:
- White black;
- beige – brown.

Bedroom for peace and relaxation
The bedroom is a real temple, which is created for relaxation. That is why it is especially important to create comfort in this room. First of all, you need to consider that the bedroom should be spacious enough. The best option for the bedroom is to purchase multifunctional furniture.

In addition, it is worth purchasing furniture made from natural materials. It is worth considering that the bedroom should have a minimum amount of various types of small parts. It is optimal to purchase several medium-sized jewelry. It is also worth leaving room in the bedroom for indoor flowers.
For placement in the bedroom, it is best to use unscented flowers.

A separate area in the bedroom should be allocated for the wardrobe. It should not come into contact with the seating area. They will help you create comfort in the bedroom correct lighting and color scheme. Lighting must be diffused. The best option there will be lighting from several sources. This will solve both problems at once: it will increase the amount of light in the room and add stylish decor. The color scheme of this room should be pastel colors.
It is optimal to use the following colors to decorate this room:
- brown;
- violet;
- blue;
- pink.

Balcony for beauty
If you have a spacious balcony, it’s quite easy to make it cozy. This area can be turned into a separate relaxation room. To do this, just a few elements are enough: a table, chairs, indoor plants.
Thanks to these elements, the balcony will turn into a real relaxation area.

If you need to store conservation or tools on the balcony, you just need to build a small shelf along one of the walls of the balcony with your own hands. You can decorate this element with bright self-adhesive films, or simply arrange jars of preserved food beautifully.
Indoor plants for the balcony should be bright. It is also worth covering the floor with a medium-pile carpet.

Suitable for decoration:
- blue;
- green;
- violet.

Home hearth in the kitchen
One of the most simple options make the kitchen cozy - use cute attributes. As a rule, such details will help give the interior lightness. It is definitely worth considering that a cluttered kitchen will not be cozy. Therefore, it is worth abandoning a large number of different household appliances.

Ideal for:
- yellow;
- light green;
- violet;
- pink;
- orange.

Every room in the house needs a caring hand and a show of love for its home. Therefore, carefully decorate, sew, create hand-made masterpieces or purchase ready-made little things. Your home is one of the manifestations of character, taste and attitude towards loved ones.
Video gallery
You can make many elements for your child’s bedroom with your own hands. The main thing is to correctly combine such elements with the overall design so that there is a certain balance and harmony. In this for everyone creative person The suggested ideas will help. Nursery decor for girls is exciting activity for both parents. They will be happy to create the most Better conditions living for your daughter, and for this you just need to show all your imagination and skill.
Many different decorative elements will fit perfectly into overall design rooms. It all depends on the age of the child. For example, there is a big difference whether a daughter is 7, 12 or 17 years old.
Interesting design ideas:
- a canopy over the bed with your own hands will decorate any sleeping place;
- decorating wallpaper, more suitable for a teenager, they really like it, especially if it is their photographs, names, their own drawings;
- design of curtains to match the overall theme of the room;
- design of a place for spending creative time;
- decorative stands for flowers, shelves and bedside tables;
- interesting options for potted flowers, decorating containers, and much more.
All the proposals presented are easy to do on your own if you have interesting ideas and the necessary materials. The right approach, love for the girl who will always be in the room, and you will be able to create a magnificent interior for your child, which he will be delighted with.
Making your own canopy over the bed
The most original solution A canopy (a type of dome) with a circular fastening is considered. The mount itself and the ring can be purchased at a specialty store; it must be securely held on the ceiling. This option is perfect for a girl who is one or two or three years old. Usually a design is arranged for them that gives additional comfort and tranquility.
The presented table indicates not only the materials for manufacturing, but also additional decorative elements to get a successful design.
| Material | Necessarily light, airy, only natural, not allergic. The footage depends on the height of the ceiling; the fabric can hang not only to the floor, but also be 12-20 centimeters below the mattress. |
| Decorative ruffles | Depending on the style of the room, the fabric is decorated with ruffles, which will add tenderness and sophistication to the design. |
| Butterflies, bows, little animals. | Decorating with butterflies is suitable not only for a teenager, cheerful and carefree, but also for a little daughter. A variety of fakes in the form of bows and animals look great. This is suitable for a daughter aged from 3 to 12. |
It is important that the design is strong and reliable in order to achieve a safe, comfortable sleep for the girl.


Walls as the basis of decor
You can decorate a room by decorating the wallpaper in the room. The main thing is to provide free space for the child. They make various panels, collages, and paintings with their own hands. You should leave room for the girl, who will be happy to give a successful design to the walls herself. To do this, you need to purchase a drawing board and place it in an unoccupied area.
- if the child is 12-17 years old, there is an option to organize wallpaper of a certain style. At this age, there are already favorite actors and cartoon characters that will deserve to be placed on the wall as posters and fakes. It is very important for a teenager to take into account his opinion and apply all his ideas;
- If the baby is one year old, then the parents themselves come up with various decorative elements for the wallpaper. These are various drawings, photographs of animals, nature, plants.
Ideas don't just come out of nowhere, so studying certain materials would be useful for every parent. And children are always the embodiment of hidden potential.


Making your own collage on the wall
For a teenager aged 12-17, an interesting proposal for decorating walls is a collage of photographs. It should be done by following certain steps:
- the selection of photographs and their quantity is an important detail. Only the most beautiful, beloved ones. You should first look at everything on the computer, make a choice, and discuss it with family members. You need to select a photo where the child is one year old, or three, or 12-16 years old;
- We research the Internet, find a suitable background that will fit well into the design of the room. You can decorate it with a combination of beautiful, bright colors;
- When the first two steps are completed, you should begin the main work. Using the Photoshop program, we structure and place photographs. When it’s ready, you can send it for printing, which is carried out with large color plotters in specialized photo centers;
- the finished collage is placed in a frame and takes place of honor girls on the wall.
Stores sell a variety of photo frames that can complement rooms for a variety of purposes. The main thing is to choose the right photos and place them in the finished product.


Decorating curtains
Ideas for decorating curtains with your own hands are the most popular. It depends on the type of room, so you can decorate them with the following elements:
- fake butterflies, bows, plants. For a teenager, the idea will not be very successful, because the child is already big. Babies grow up very early, tastes constantly change;
- decorating curtains is considered an excellent option, especially if it is modified. For a teenager of 15 years old it will be boring to have boring roller blinds or blinds in the bedroom. But a beautiful combination of tulle and night curtains will be an excellent solution that you can make yourself. There are many ribbons on sale that will perfectly complement the look by the window. They will beautifully tie up the night curtains and make the overall design as in the picture;
- It’s better to immediately write down ideas that come to mind on a piece of paper so as not to lose them. Then their use will be fully useful; you will be able to decorate the curtains as you imagined.


Creativity as an important detail of personality development
For a baby, it is important to realize her abilities, show creativity, and embody a certain idea. Therefore, parents are simply obliged to keep her busy with an interesting activity. For example:
- we make creative corners with our own hands. The decor is very varied. If the daughter is 6 years old, then the place for drawing is equipped with a small easel, a rack with magazines, and a stand for accessories. It is advisable to complement the corner with the beauty of decorative elements;
- playing musical instruments is more suitable for a teenager, so decorating such a place will be an interesting activity. Decorating it is not difficult, because specialized stores sell many interesting products for additional room decor. For example, photographs of famous musicians, vinyl records, vases of flowers. Elements are selected in the same style.
It is important not to overdo it with small things (figurines, candlesticks). Harmony and combination must be observed, since this is the basis of successful decor.


Original flower stands
You can make decorative flower stands with your own hands that will perfectly complement the design. Greening the walls is considered an excellent solution. This is a rather labor-intensive process, but the result will be excellent.
Plants such as azalea, gerbera, gardenia, various palm trees, and ficus are suitable for a girl. The following tips will help you add greenery to any wall.
- we buy small pots and rectangular containers in stores;
- We plant interesting plants in each pot;
- carefully and creatively put them into containers;
- we cover them with earth so that it is not visible that there are pots;
- do not forget about drainage, which is pebble stones or specialized drainage products;
- We arrange these containers beautifully one above the other.
Any girl will love this decor because they love plants. Alternatively, you can decorate the containers. This is done using special paints, stencils, decorative fakes, in the form of butterflies, letters or bows.
Some sites have many ready-made containers that can be hung on walls without any problems. All parents need to do is fill it with plants.


The importance of decor
The decor of the room is very important, because from childhood a child should grow up in a favorable environment, especially at the age of 6-12, to develop and improve calmly. To do this, it is necessary to create certain conditions. Therefore, to complement the overall look of the nursery, a huge number of interesting elements have been invented that are easy to make yourself.
The main thing is to show love and care for your child, then many ideas will not keep you waiting for their implementation.


For a truly festive spirit to be felt on a birthday, it is not enough delicious cake and gifts. The type of room where the celebration will take place also plays a very important role. Therefore, to make this day truly unforgettable, we offer you several ways to decorate the room for your birthday with your own hands.
It's pretty quick, easy and original way for your birthday. Materials you will need:
- rolls of colored paper,
- Whatman paper sheets (preferably thick),
- stationery knife, scissors and tape.


Now let's look at the manufacturing steps.
- You must decide on the color scheme. Sketch the design which you want to do.
- Of course, you can fix or change something later, but having a sketch will give you an idea of how it will ultimately look and will significantly speed up your work.

- Lay out whatman paper - this is the base on which you will work. Depending on the size of the embroidery you plan to make, you can take one sheet of whatman paper, or glue several together (with the edges to increase the area). It will be much easier to work with thick paper, as it will remain strong when you cut it and weave ribbons.
- Place the base from sheets of whatman paper so that it is convenient for you to work with both sides of the paper. You can place two chairs at a distance from each other so that you place the ends of the Whatman paper on the chairs, weighing them down with books or something heavy so that the Whatman paper does not fall.
- You can also hang whatman paper in the doorway. But do not lay it out on the floor or table, as in this case you will only be able to comfortably reach the front side.

- Using a utility knife make two cuts in the paper, thread a ribbon into each of them so that a strip of ribbon remains on the front side, and both ends are on the wrong side: leave one end small and attach it to the paper (with glue or double-sided tape), the other is longer if you want to continue this weaving, or attach it too if this drawing is finished.
- Repeat the previous steps until Do not fill the entire Whatman paper with paper embroidery patterns. In this case, the cuts do not have to be strictly opposite each other, and the lines do not have to be even. Take ribbons of different widths and make your own design.
- Hang your creation on the wall and enjoy the work done and the festive mood!

We decorate a large room for little money
If you need to quickly decorate a large, spacious room, using a minimum of money and effort, this method is just for you. All you need is colored corrugated paper in rolls.


Then everything depends on the room you will decorate. Strips of paper can be pulled from the cornice, pipes, chandeliers, cabinets or shelving, in general, anything that will be there. Moreover, you can stretch the paper with different strengths so that the sagging is greater in some places and less in others.


TIP: You can also twist the ribbons. Hang colors in a random order.
You will definitely be able to create a joyful and festive atmosphere! Don't forget - there are a lot of ideas in the link
Idea: walls with balls!
Both children and adults are all crazy about balloons. So, by choosing this method of decorating a room, you will definitely cheer up everyone present!

For this you will need the following materials:

Follow these steps and you'll soon be admiring the colored ball powder on your walls:
- Divide the ball by 6 equal parts, tying knots on it.
- Using a pump, inflate the first part of the balloon until you get an inflated sausage, tie a knot at the end. Then trim the inflated part of the balloon as close to the knot as possible. Then do the same with the next part of the ball, and so on until you get six small balls.
- Cover the knots with tape so that they don't stick out.
- Repeat the first three steps until you have hundreds of colorful balls.
- Attach the balls to the wall with small pieces of double-sided tape.

This decoration is perfect for an original party or photo shoot. And don’t forget to stock up on enough sweets, since the appearance of the room will definitely encourage you to eat something tasty.

Here's another great ideas for decorating with balls.


Decorating the walls with large homemade “lollipops”
Beautiful colored lollipops are not inferior to balls in their ability to create a great mood. With their help you can decorate a party or birthday and provide original photo– area for those present.


To create a festive atmosphere with your own hands you will need:
- wooden dowels measuring 12" x 1/2" (30 cm x 1.25 cm),
- acrylic paint (must be a wide range of colors: white, purple, dark blue, light blue, green, yellow, orange, red, pink, etc.),
- brush, stand for dowels (a glass or cup will do),
- palette, 4 sheets of A4 paper, scissors, pencil, foam disks measuring 10″ x 1″,
- glue gun, tape (regular or double-sided).
Assembly technique:
- Apply white acrylic paint on wooden dowels I. It's best to paint one half first and let it dry (in a container with the painted side facing up), then paint and dry the other side. While the dowels are drying, start making the candy itself.
- Cut out 8 identical curls from paper-stencils and place them on the foam disk as shown in the figure. Next, lightly trace the stencils with a pencil.
- Choose a paint color and use a brush to decorate with it. curls every other. First trace the outlines so as not to go beyond the edges. You can do several layers to make the color look more saturated.
- By this time your dowels should be dry. Use glue gun onto the end of the dowel and quickly press it onto the foam disk, holding it a little to fix it.
- Do the same with the other discs, using different colors for painting.
- Glue the finished candies to the wall. You can stick it with tape on the leg, or with double-sided tape on the lollipop itself.

That's all done, enjoy the beautiful background!
Make a volumetric figure
The big number will not only remain as a keepsake, but will also become the central photo area of the party. Detailed master classes


Fan garland for birthday
On hot days you crave coolness, and on cold days you crave reminders of warm days. This garland, which consists of many fans, will wonderfully help cope with both of these desires! Having made one, you will be transported to a fairy tale! And surprise everyone!


Materials:
- colored paper for scrapbooking,
- scissors, tape,
- colored cardboard, glue stick,
- ruler, stationery knife.
Steps for making a garland:
- If you immediately bought accordion folded decorative paper, you can skip this step. If not, fold the paper into even accordion shapes.
- Form semicircles from accordions.
- Cut out strips, circles, triangles or some other figures made of colored cardboard - you will need them to decorate fans.

- Cut out semicircles from cardboard(size should be smaller than fans). Attach them to some fans using a glue stick. They will perform two functions at once - decorative and strengthening, that is, they will not allow the fan to curl up.
- Stick on fans shaped cardboard molds by combining colors and creating your own pattern designs. You can take the drawing as an example.
- Connect the fans together to form a garland. To do this, stick them all on tape. You can first fasten the joints of the fans with a stapler to strengthen the structure.
- Hang a garland and cheer up!


Making large paper Martenitsas
These decorations are made very simply and quickly with your own hands. You will need two A4 sheets - red and white, scissors and glue stick. If you want to make a lot of decorations, then take more paper, the main thing is that both colors are in the same quantity.

Products have such color scheme, since Martenitsa comes from Bulgaria and there is a ritual there to welcome spring with similar products of exactly these colors, since it is a talisman for good health of the whole family. But if you don’t delve into this folklore, you can take paper in the colors you like.
Let's now look at the manufacturing steps:


- Fold each sheet of paper in half (lengthwise).
- On each sheet, draw 10-12 straight lines, as shown in the picture.
- Make cuts along the marked lines with scissors.
- Unfold the leaves and glue their ends together, there should be glue on both ends.
- Form circles, securing them with glue.
- In the middle of the circles you can also attach strips of paper that differ in color from the circles themselves.
- Hang items around the room.

Garlands without using glue
Even a child who knows how to use scissors can make such a decoration, since the pattern is very simple. You will need: A4 paper (calculating one sheet of paper for 4 elements of the garland), scissors, pencil.


The order of assembling the garland:
- Cut a sheet of paper into 4 even pieces.
- Take one part, fold it in half (across), and then in half again (also across).
- Draw with a pencil the shape you will use to cut out.
- Cut out the shape and carefully unfold it.
- Connect together individual elements garlands (as shown in the picture), alternating colors.
- Hang the garland.


We offer you several alternative options sketches for this garland.

A little holiday in a box
On cold autumn and winter days, such a box of positivity will be just a great gift and will definitely create a sunny mood! You will need: a box, small helium balloons, as well as paints (or ribbons, colored paper) to decorate the box.


How to make it yourself:
- Paint or paste over box with rainbow stripes, flowers or any other joyful patterns that come to your mind.
- Place small helium balloons in a box(the quantity depends on the size of the box. The ends of the ribbons tied to the balls can be attached to the bottom of the box if you want the balls to jump out to the length of the ribbon when opening the box, or not attached if you want them to effectively fly to the ceiling or into the sky.
- Close the box.
- Give a gift and watch carefully the surprise recipient's amazement!

IMPORTANT: It is important to remember that small helium balloons lose their ability to fly after about three hours. Keep this in mind when preparing a gift.


 (1 ratings, on average: 5,00 out of 5)