Sliding door repair specialist. Sliding – sliding interior doors. The flooring has sagged and scratched, what to do, how to repair it
Every day sliding doors become more and more popular interior doors, interior doors Profile doors and partitions. Many people prefer them because they do not take up as much space as regular doors, or rather, they do not take up any space at all. It will not be difficult to install such doors yourself, and it will also not be difficult to repair such doors.
If you have problems with the operation of sliding doors, you should first check the upper and lower guides, as a lot of dust may simply accumulate there, which is why there were problems with their operation. In this case, you just need to remove the dust from the guide rail with a vacuum cleaner. Among sliding doors, a quite common problem is the upper or lower rollers popping out of the guide rail. In this regard, there is also a need to periodically check whether they are in place.
If they do pop out and you are able to put them back in place, do so. In another case, this may lead to a change in the shape of the guides. The rollers must be placed in the grooves of the upper or lower guides. It is also worth paying attention to the stoppers: if they open, and this often happens, they should be closed. Since the rollers deteriorate over time, they need to be changed periodically. First of all, you need to remove the doors to do this. If there are stoppers in the guide rails, you should open them first, and then carefully remove the door. Next, using a screwdriver, you need to remove the old rollers and install new ones of the same type in their place.
In sliding doors, such a nuisance as the loosening of the upper bar on which the guide rail is fixed is also often encountered over time. If this happens, you should fix this bar again or replace it with a new one. To do this, you need to drive the dowels into the already prepared holes or move them slightly to the side from the latter. Next you need to attach the bar, after which you can start screwing in the screws. Please note that the guide rails need to be attached as straight as possible, even if they are distorted. Otherwise, such doors will not work for long and will soon break.
The door system has special carriages for correcting and installing fastening parts. This system can also break down over time. There is also a possibility that such a mechanism was initially poorly adjusted and eventually failed. In this case, you should first adjust the sliding doors, and then reinstall the locknuts from below under the adjustment bolts.
If your doors do not please you with their appearance: the door was cracked, sagged and dried out, and the lock began to jam heavily. Have you started thinking about replacing it more often? Do not hurry! Try to fix everything yourself. Most All these problems can be “cured” yourself, saving a lot of money.
- Review typical faults;
- How to strengthen door frame if it is loose;
- Sags and scratches flooring, what to do;
- How to correct geometry correctly;
- Large gaps, what to do;
- How you can strengthen the panels yourself;
- What to do with cracks;
- How to replace a broken lock with your own hands;
- The handle is broken, how to replace it with a new one;
- How to replace broken glass yourself;
- Do-it-yourself repair of sliding structures.
Overview of typical faults of interior doors
Often, when the door looks respectable, we forget to “take care” of it. And yet, no matter how expensive and high-quality it is, time takes its toll and it requires cleaning, lubrication or adjustment, in short - preventive measures. When they are not done on time, the door begins to create a lot of problems for household members:
- sag, scratching the floor covering;
- a nasty creak appears;
- door hinges become loose;
- fit tightly into the door frame;
- just dry out and so on.
One of the main reasons for all defects is considered to be improper operation or quality.
Strengthening a loose door frame, repair sequence
The step-by-step instructions for repairing the fastening are as follows:
The flooring has sagged and scratched, what to do, how to repair it
A simple solution is to re-hang the hinges or replace them:

Adjustment using a washer placed on the loop.
How to correctly adjust the geometry of an interior door
Sometimes it happens that not a single repair tip helps eliminate the problem of sagging doors. Most often this happens due to the fact that it dries out or, on the contrary, swells. The solution is to adjust the edges around the perimeter.
What needs to be done, what renovation work required.

Important! Before planing the door, make sure once again that the problem is not the deformation of the frame.
Large gaps, how to repair interior wooden doors
When door products are made from wet wood, the door will definitely dry out during use, which creates a lot of inconvenience and problems during use: the tongue cannot reach the latch, there are large hinges between the frame and the door, as a result, the door sags a lot.
What to do in this situation?

How to independently strengthen panels on interior wooden doors
When interior doors dry out, problems can arise not only in the form of gaps that appear, but also in the panels. They lose their tightness. What should be done in such cases?

Only the right decision The repair will involve plywood.
- You need to remove it from its hinges;
- Disassemble completely;
- Thoroughly remove old glue and dirt;
- Reassemble the bars and connect (glue);
- The panels are put in place, then the door is secured in the clamping device.

What to do with cracks on interior wooden doors
The repair process is labor-intensive and painstaking, however, the result is worth it. The restoration algorithm is as follows:

For clarity, watch the video:
Advice! You can, as an alternative to the entire restoration process, use special decorative overlays. Moreover, after this, it will be difficult to distinguish it from the new one.
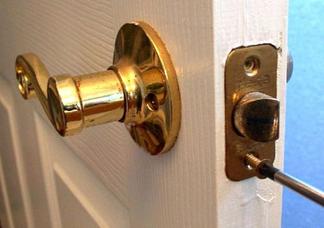
How to replace a broken door lock with your own hands if it cannot be repaired
This device bears the main load, so they very often fail. Signs that it’s time to repair or replace it: it closes very poorly, the handles turn. This indicates that the locking device cylinder is unusable and it is time to change it.

- The first thing that needs to be done is to remove the cylinder; to do this, screws are unscrewed on the end plate, after which it can be removed quite simply;
- decorative strips are dismantled along with handles;
- Carefully unscrew the remaining fasteners and remove the device body;
- after which a new locking device of suitable size (so as not to drill new holes) or a similar model is purchased and installed in the lock opening.
The repair process is shown in more detail in the video:
The handle on a wooden door is broken, how to replace it with a new one
In order to change the handle on the door panel, you need to carefully familiarize yourself with its design

follow further instructions:
- Unscrew the fasteners on both sides with a screwdriver;
- pull the handle out of the canvas;
- with help wrench unscrew it by hand swivel mechanism and remove it.
If the handle is equipped with mechanical locks (latches), then proceed as follows:
- the process of unscrewing fasteners is similar to the above;
- then carefully examine what is holding it in place. Typically, such models are equipped with mechanisms for moving a tongue and a rod, inside of which there is another rod. When removed, the handle comes out easily.
How to replace broken glass in interior doors yourself
Designs with glass inserts in apartments undoubtedly look beautiful and stylish, but unlike wood, glass tends to break. If such a nuisance happens, then you shouldn’t call a repairman, much less change the design of the interior wooden doors. We begin the repair ourselves.

Removing remaining glass:
- To do this, you need to loosen the glazing beads (wooden strips that hold the glass);
- carefully remove all remains and fragments;
- In some modern models there is a rubber gasket. It needs to be pulled out and carefully examined. If it is damaged, replace it too.
Preparatory work before repair:
- If broken glass has the correct rectangular shape, then repair is quite simple - the dimensions are taken and a new one is ordered from the workshop. If the door is figured glass, then you can draw the shape using a pencil and cardboard;
- if the broken insert was painted over or all kinds of putty or putty were used, they must be carefully removed;
- before inserting a new one, it is best to remove the door so that the glass does not break if it accidentally falls, and it is very difficult to work in weight;
- before laying on the bed, apply a layer of silicone;
- a rubber gasket is inserted and only then is it laid and secured with a bead.
Do-it-yourself repair of sliding structures
This type interior paintings V residential apartments not uncommon, especially nowadays. If earlier they were used for attractiveness and beauty, now it is caused by saving space. Such designs are equipped sliding mechanism, which tends to fail over time.
Main faults:
- difficult to open or vice versa;
- the upper rollers may jump out of the guides;
- loosening of the upper fastening bar.
Repair sequence:
In the first case (heaviness when closing), the repair consists of cleaning off accumulated dirt. In the second case, if you are sure that the rollers need to be replaced, then you just need to repair them:
- remove it from the guides;
- remove old and worn ones, insert new ones;
- the door panel is installed in its original place.
How to do this is described step by step in the instructions or watch the video lesson:
We really hope that the tips and instructions provided will help you repair interior doors yourself and postpone the purchase of new ones indefinitely.
In an effort to make your home more comfortable and cozy, you often come up with the idea of replacing conventional swing doors with sliding doors (they are also called sliding, sliding, hanging). The good news is that install sliding doors you can do it yourself without any problems. The bad thing is that a normal mechanism costs about the same as a high-quality blade. What is captivating about them is that when open they hardly “eat up” space. They either hide in the wall (a better, but more difficult to implement option), or move along it.
All this is true, but there is a significant drawback - a very low degree of sound insulation, especially in the sliding door version. When the canvas simply covers the opening. When installed in a pencil case (in the wall), the situation is a little better, but the degree of sound insulation swing door This cannot be achieved even with this installation method. If all this doesn’t scare you, you can start studying the systems, selecting them, and then installing them.
Sliding door systems
There are two types of mechanisms: suspended and rail. Neither is perfect. Briefly about their advantages and disadvantages below.
Top rail suspension system
The suspension mechanism is a supporting beam to which is attached a guide in the shape of the letter “P” with “legs” bent inward. The rollers to which the door leaf. In technical terms, it is a hanging door on a top rail.

When installing such a door, the floor under the door remains smooth, only on the right and/or left in doorway the lower roller is installed. It slides along a groove made in the lower end of the blade. It is necessary so that when moving it does not deviate vertically. This design is the easiest to install. Installation is very simple and consists of several steps:

That's all. Doors on rollers are installed. But this system, in the form as in the photo, has a very low performance on sound insulation. They are practically zero: the passage is simply blocked.
Rail sliding doors
This type of door has two rails: top and bottom. Rollers are also installed at the top and bottom. Thanks to this design, the system has a high degree of rigidity: it can be shaken without causing much damage.

The disadvantage of having rails in the floor is known: they are difficult to clean. Debris and dust constantly get into the grooves, so you have to keep them clean. This type of door is most often used in cabinets. They are used as interior doors if there are active children in the family. Then safety is more important than difficulties with cleaning.
Mounting options
Regardless of the sliding door system, installation methods can be:

The simplest installation option is sliding doors. They can be installed independently, not only at the repair stage, but also after it. It is only important that the opening is smooth and the wall has a normal bearing capacity. The disadvantage of such a system is that you cannot place anything close to the wall in the place where the door rolls back. There is one more thing: very low sound insulation. This is easy to explain: if you look from the end, there is a gap of several millimeters on the sides. It is necessary so that the canvas does not “shuffle” along the wall. And all sounds penetrate perfectly through it, becoming only a little quieter.
Cassette doors are good because when open, the door leaf is located in a niche in the wall and does not interfere. The second advantage is that seals can be installed around the perimeter of the opening, which provide much higher sound insulation performance. The disadvantage of installing a sliding door in a niche is that it can only be done at the renovation stage. The second drawback: to make a pencil case for sliding doors, they usually install a false wall, and this means stolen centimeters of space.
Cascade doors are one of the types of sliding doors. It just has large quantity guides: according to the number of movable door leaves. Installation is perhaps the most difficult: there are many parts and high installation accuracy is required. The systems belong to the elite category, and they rarely save on installation: repairs will cost more.
Features and installation procedure
You can install sliding doors yourself even without much experience. It is quite possible to do without installers. It will take a little time, and also installation instructions. We will try to give detailed description process with photo and video materials.
Self-installation of sliding interior sliding doors
Systems may vary slightly, but general rules remain the same. There are several requirements that must be met before installation:
- The opening must be level, otherwise you will have to take a canvas that covers all deviations with a margin.
- The load-bearing capacity of the sides of the doorway should be high, as should the wall above it.
- The opening must already be finished: plastered and painted, covered with wallpaper or decorated with decorative panels.
Next we proceed to assembly. First you can attach the rollers. U different manufacturers There are some recommendations. Some recommend retreating 1/6 of the width of the door leaf from the edge, in other systems they are attached immediately from the edge, and the indentation is provided mounting plates. This is the system we install: in it, roller platforms are installed immediately from the corner.

Marking the installation location of the rollers
We center them, measuring so that the distances are the same. Having positioned the plate, use a pencil or marker to mark the locations for the fasteners. Drill holes in the marked places. The diameter of the drill is 1 mm less than the diameter of the screw.

We set the plates and screw in the screws. The length of the fastener depends on the weight of the canvas, but not less than 70 mm. We twist them exactly perpendicularly, otherwise unnecessary stress will arise.

Installation of rollers
Supports for the rollers are inserted into the installed plates. They are fixed with a lid on the side surface. Next, roller platforms are screwed onto the threaded pins.

It is also convenient to install handles and locks before hanging. They need special, mortise ones. If you bought ready set, the required holes are available. If you have used a regular canvas, you will have to trace the outline with a pencil and remove the excess with a chisel. After the handle or lock fits into the recess, the attachment points are marked, holes are drilled for them and the fittings are installed.

Most convenient way- hang the sliding doors on a dry wooden beam. Its cross-section is less than 50*70 mm, its length is twice the width of the door leaf + 5 cm. We cut the guide to the same length.

Having aligned the guide along the beam, it is attached to the beam with self-tapping screws no less than 8 cm long. The number of fasteners is at least three, departing 10 cm from the edges and in the middle (more often is possible, less often - not).

Now you can measure at what height to mount the timber. A guide with a beam is “rolled” onto doors with installed rollers. This way you can accurately note how tall the doors are. We drill at least four holes in the side edge of the beam for mounting to the wall.

The guide with the beam “rolls” onto the rollers on the door
Add 7-10 mm to the resulting mark - the doors should hang and not shuffle along the floor. 7 mm is the minimum gap, which is sufficient if there are no floor coverings. If they are planned (later to lay laminate, carpet, linoleum, etc.), then the thickness of these coverings must also be taken into account.

To prevent the canvas from “walking” during installation, it is wedged with small wooden wedges. At least two stops are required - near both rollers.

Having placed the beam against the wall and adjusted its position using a level, we mark its position with a pencil. If the wall allows, you can fasten it to the wall through and through, but for this you need to use self-tapping screws at least 120 mm long, or better yet, place it on anchor bolts.
If the wall, for example, is concrete, the installation of dowels is required. To do this, you need to transfer the marks for the fasteners to the wall. This can be done using a thin and long drill, the diameter of which is smaller than the drilled hole.

An even simpler option: a long thin nail. It is inserted into the hole and a mark is made on the wall with a couple of blows. The following procedure is known: drill holes for the dowel plugs, insert the plugs, hammering them in if necessary. Then we install the doors.

Attaching sliding doors to the wall
Stoppers must be secured along the edges of the guide. They are brought in from the sides, empirically establish the required location (so that the canvas covers the opening completely in closed state, and rolled back enough when opening. They are fixed using clamping screws.

Having opened the doors, we install the flag roller on the floor. It fits into a groove cut into the bottom of the blade. It is necessary to ensure that the doors do not deviate vertically.

First, we insert it into the groove, mark holes for fasteners, drill, then secure with short self-tapping screws (length about 15-20 mm).

At this point we can assume that the sliding doors have been installed. They are already fully functional. Remained Finishing work. The mounting beam with the guide is covered with a decorative overlay, matched to the tone of the door leaf. It can be nailed finishing nails straight to the beam.

Only when you put it out, make sure that the wheels are closed. It’s much more beautiful this way)) Now that’s it, you’ve installed the sliding doors with your own hands.
A video tutorial on how to install such a door is shown below. There are several installation options.
We install cassette-type sliding doors (in a pencil case)
The process of installing the guide and hanging the door leaf is almost identical to those described above. There is no need only for finishing, but all other stages are necessary. Instead of installing a decorative strip, a false wall is mounted at a distance of at least 10 cm from the wall. It is usually made from plasterboard profiles, which are covered with wall plasterboard. But this is not important - you can use gypsum fiber board or plywood, or any other suitable material.
Where does the distance of 10 cm come from? The thickness of the door leaf and the gaps on both sides are 5 cm. At least another 5 cm is added to this for installation of the profile. So it turns out to be 10 cm.
Since the main load will fall on the wall, the frame made of profiles need not be reinforced. If such a wall does not seem very reliable to you, you can insert wooden blocks, which are screwed with self-tapping screws. This will make the structure very rigid.
The basic principles for calculating a pencil case for a sliding door, as well as marking features and principles for preparing a doorway for installation, see the video.
Homemade sliding doors
Any door leaf can be installed on rollers and will work as a sliding door. The guide and all other components - rollers (carrying and flag), stoppers, stops - can be purchased. Hang on them at least a piece of plywood or a door assembled from several boards. This will be the simplest and cheap option. But making the mechanism yourself is a more difficult task. One of the options for a sliding door mechanism made from scrap materials (from round pipes different diameters) in the video. The system was intended to be installed in closet, but judging by designs, easy can even withstand a solid oak door.
 (1 ratings, on average: 5,00 out of 5)

