Disconnecting the electrical box. What is a junction box for?
Today we will talk about how to install a junction box in concrete. The electrical junction box is small capacity made of plastic or metal, in which all groups of conductors in a certain room are connected.
The purposes of this product are as follows:
- Providing the opportunity to repair and maintain the home electrical network. For example, if the connection of the input wires to a room with an outlet group fails, you can easily repair the problem area.
- Possibility of connecting new lines to the room electrical wiring. If you decide, you will not need to pull another cable from the main panel, but just create a new route from the distribution box.
- Ensuring Even Distribution electrical energy throughout the room by creating several main power lines connecting into a single whole.
As you can see, this product plays an important role in any other room.
Design
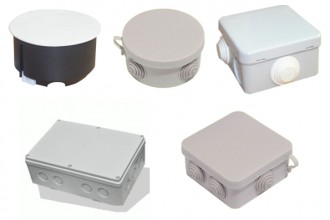
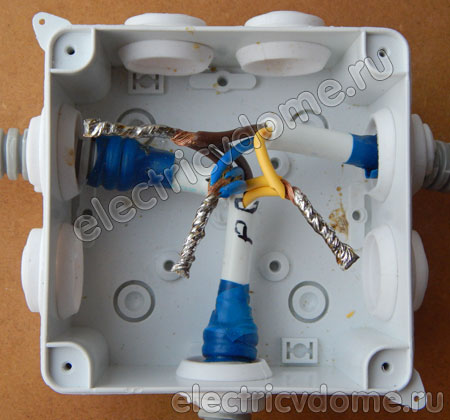
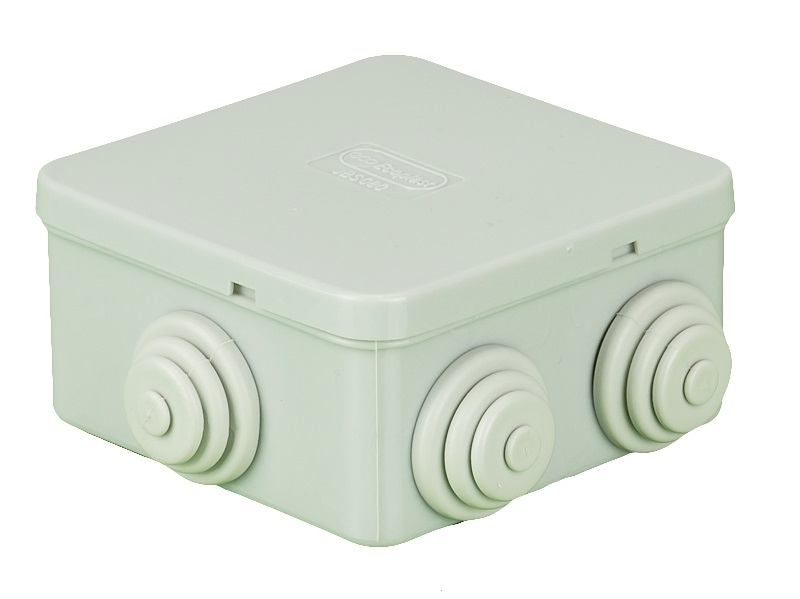
The design is quite simple and consists of a container with a lid, as well as inlet openings - seals (if the container is of an external installation type). The photo shows in detail the components of the electrical distribution box, hidden and external:
As you can see, the products are different from each other, but still perform the same function.
Please note that the junction box for hidden wiring Legs with springs can be installed on the sides. Their purpose is additional fixation if installation is carried out in a plasterboard wall.
Varieties
As you already understood, today there are several types of electrical distribution boxes. As a rule, the division occurs according to the following characteristics:
- material of manufacture (metal or plastic);
- installation method (open or hidden);
- product shape (rectangular, round, square);
- size.
Metal and plastic
Metal junction boxes have been used since the last century, when the plastic version had not yet been invented.
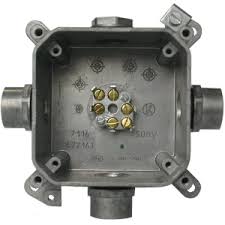
Not rare metal version products are still in use today. Most often, the installation of metal distribution boxes is carried out with either wooden house. This is because the metal, when the cable ignites spontaneously, will prevent the flame from spreading.
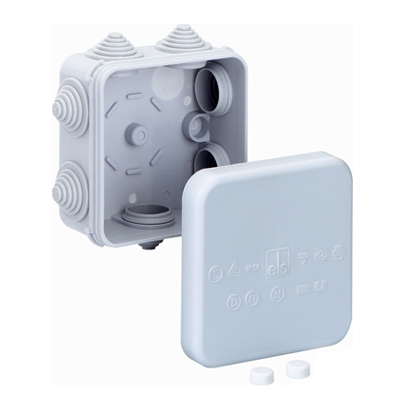
The plastic version is more modern. There are products of both external and hidden types. Their advantage is their low price, convenient design and attractive appearance. By the way, there are fireproof junction boxes made of self-extinguishing plastic.
External and hidden
If the wires in the room are connected open method, an external junction box is used. When installing under plaster, a hidden type product is used.
For hidden installation For outdoor installation
Both options do their job quite well, but it is still easier to repair and operate a wall-mounted object.
In addition, there are distribution boxes with terminals that allow you to efficiently connect the wires to each other. Such products are usually made for outdoor use.

Rectangular, square, round
Distribution boxes are also available in various geometric shapes. The reason for this is various purposes. If a little vein is supplied, round shape quite enough. At large quantities cores, it is necessary to use rectangular or even square containers, because they have a large capacity.
Please note that installing a round junction box in concrete takes less time, because... There is no need to level the product! At the same time for open wiring A square-shaped product will look more beautiful.
As for the sizes, they can be different, depending on what cable section you have chosen. We immediately recommend that you read the article: for electrical installation work.
Connection instructions
As we said earlier, the installation of the distribution box can be carried out open and in a hidden way. Let's consider the main stages of each method.
Outdoor installation
This type of installation is simpler and does not take much time.
 Everything for your attention step-by-step instruction, which will help you install the distribution box in the wall yourself:
- Turn off the power in the house and check its availability using indicator screwdriver. We talked about this in the corresponding article.
- Mark the attachment points with a simple pencil.
- Secure the box in concrete wall using dowels. The design of the product includes 2 holes for self-tapping screws.
- Cut off the ends of the seals to enter all groups of wires. The cuts should have a diameter slightly smaller than the cable cross-section to protect the wiring from dust and moisture.
- Connect the wires together. To do this, we recommend that you read. All you need is to correctly connect phase to phase, zero to zero and ground to ground (for the socket group). To connect the input group with a group of switches and lighting, read the article:.
- Insulate joints PVC insulated, if required.
- Close the lid.
That's the whole technology for installing a distribution box in concrete with your own hands. I would also like to immediately note that the most reliable is soldering and VAG terminals.
Hidden installation
Installation in a hidden way is more labor-intensive, but still possible for a novice electrician.
So:

Finally, I would like to give one helpful advice– when connecting wires, label each group (for example, sockets, switches, chandelier, etc.). This will allow you to quickly find the required core when repair work in the apartment.
There aren't many people who don't know what it is junction box. Nevertheless, it would not be amiss to recall that this is Plastic container round or rectangular shape with a lid and holes on the sides, designed for switching (connecting) electrical wires.
To provide all energy-consuming appliances of an apartment or house (light bulbs, lamps, washing machines, TVs, computers, etc.) with electricity, it is necessary to route the wires from the distribution panel to the points of consumption - sockets and switches.
This must be done in such a way as to ensure uniform distribution of electricity throughout all rooms.
To do this, the electrical wiring is divided into separate lines. Each room has its own supply wires, to which all energy consumers in the room are connected.
At certain nodal points the wires are connected to each other. At such points, distribution boxes are installed, inside which connections are located.
primary goal distribution boxes– provision fire safety. Wire connection points are the most dangerous from a fire point of view. Insufficiently tight contact creates high resistance in the connection and leads to its heating, sometimes leading to a fire.
![]()
Junction box isolates the connection point from flammable wall materials, eliminating the risk of fire. Except this main goal There is also a secondary one. Twisted wires that are not hidden in a box do not look very aesthetically pleasing.
By type of design, distribution boxes can be internal, designed for embedding into the wall (for connecting hidden wiring), and overhead, installed on the wall (for open wiring).
Is it possible to do without junction boxes at all?
Theoretically, yes. But for this you will need to connect the distribution panel and each place of electricity consumption in the apartment separate wire. This will lead to a large consumption of electrical wiring and the need to make wide and deep grooves in order to be able to lay several rows of wire in them.
Ultimately, the disadvantages of this method will outweigh the disadvantages many times over. use of junction boxes. Savings due to abandoning the latter will be many times depreciated by increased costs for electrical wiring.
One can sometimes hear this as an argument against the use of junction boxes; Although laying a separate line to each point of consumption is economically inferior to the option with junction boxes, it is safer, since it eliminates the connection of wires at nodal points.
There is only one answer to this. Correct and professionally performed, it is absolutely safe. While everyone has the right to their own point of view, the option of using junction boxes is still more preferable than without them.
Where and how to install distribution boxes?
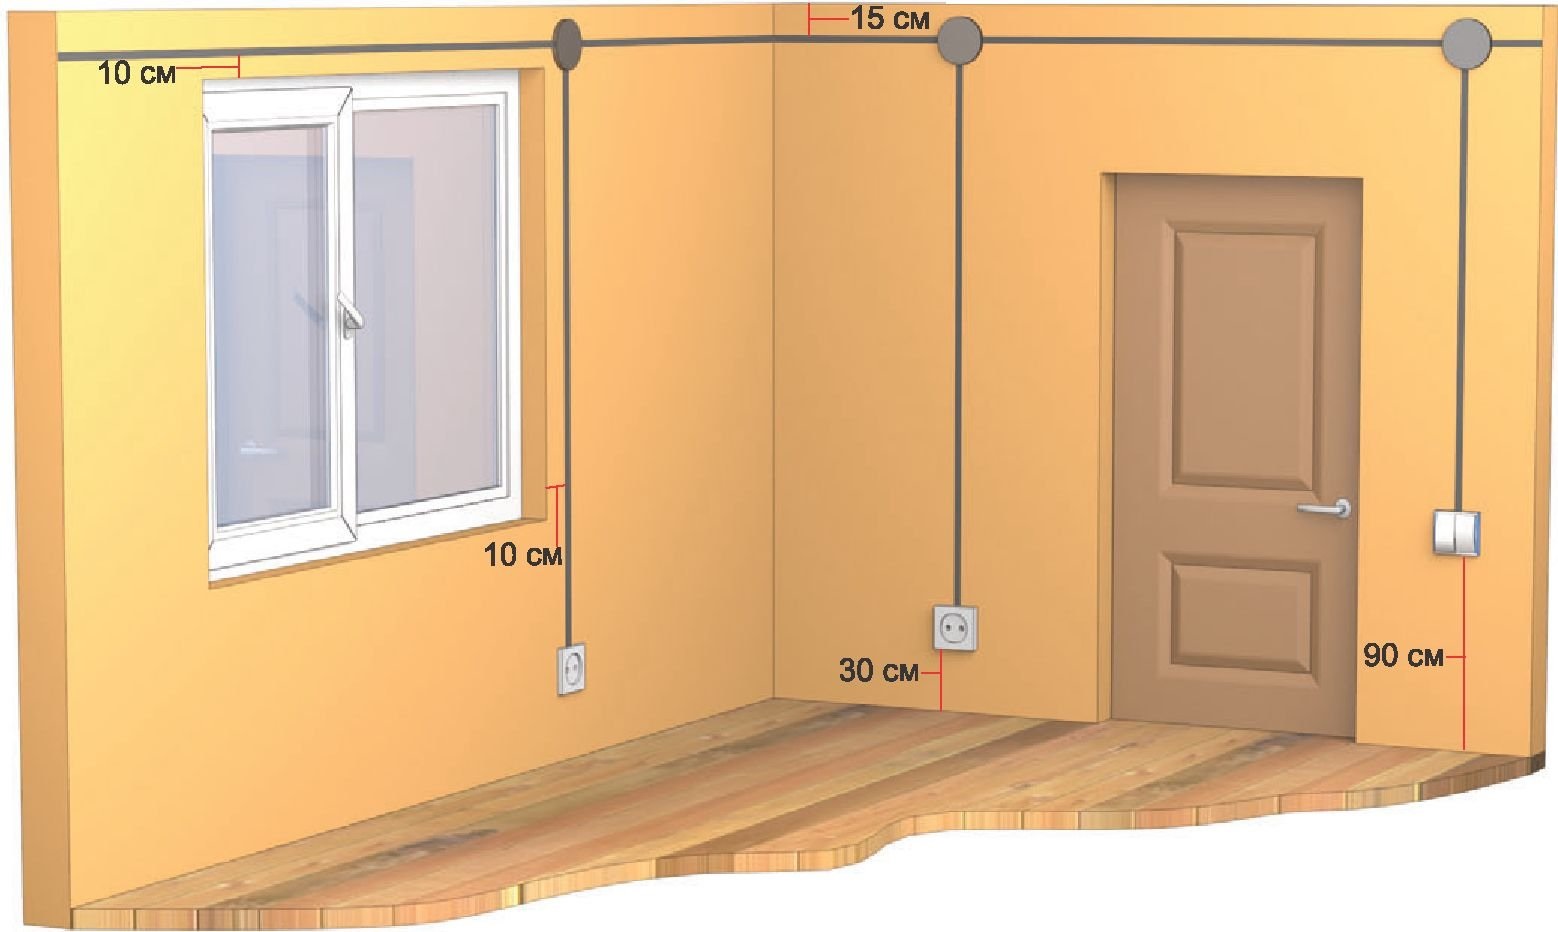
Distribution boxes are installed at a distance of 10-30 cm from the ceiling - depending on the height of the latter.
When wiring is hidden, the boxes are embedded in the wall, so that the top of their covers is flush with the surface of the wall. At open wiring boxes are installed without embedding into the wall on its surface.
PUE (electrical installation rules) require that access to the box cover be provided for inspection if necessary. With the overhead installation method, this requirement is met automatically.
When installing inside the wall, you need to take care of two things. Firstly, it is necessary that the location of the box is known and access to it is provided, and secondly, that the aesthetics of the room do not suffer. The first requirement is more important and must be met in any case.
The second is subjective, depending on the taste of the owner. Aesthetics can be ensured different ways. When applying wallpaper, carefully trim it around the lid, leaving it in place. This will make it possible to see the location of the box and at the same time make it practically no different from neighboring places.
If you use another method of decorating the walls, you need to make sure that the surface of the cover is the same color as the wall, and that you can remove the cover without destroying the wall in this place.
When installing suspended ceilings, to access the boxes (if they are hidden behind the ceiling surface), it is necessary to install small hatches.
How to connect wires in a junction box?
The PES states that the connection of wires should be made by welding, soldering, crimping or using screw and bolt clamps.
If out of all the methods you choose the one that is the best according to the criterion of manufacturability + reliability, then this can be considered twisting wires followed by soldering (welding). The use of clamps is also technologically advanced, but it does not provide the contact area that twisting and soldering provide.
Some are limited to just one twist. If it is done well, it provides a contact area no less than crimping or using clamps. However, twisting without soldering cannot be considered absolutely reliable.
After wire connections they must be well insulated with electrical tape, and the contact points must be placed in the junction box in such a way that they do not contact each other.

When the work is completed, you can check its quality by turning on some energy-intensive device for a while and checking all the junction boxes for heating at the connections.
If you find that a connection is heating up, it means that the contact area in it is insufficient, and it needs to be redone.

A distribution box is an electrical product within which cable strands are interconnected. Only with its help can you correctly connect a socket, switch or lamp to a power source. It also serves to protect connections from
ingress of dust, moisture, foreign objects and to prevent accidental touching of them.
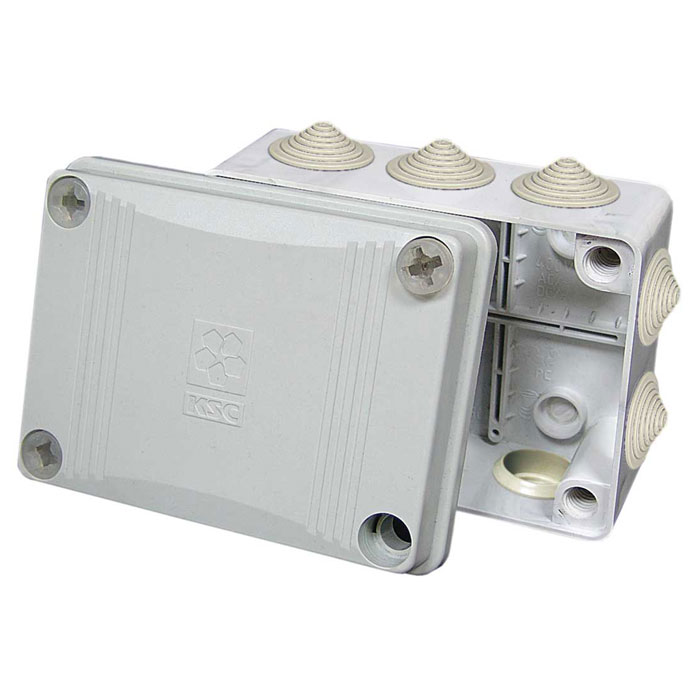
Boxes come in external (open) and internal (hidden) installation. External ones are designed for connecting cables laid openly: in corrugated cables, metal hoses or plastic cable ducts. To insert the corrugations inside, they are equipped with rubber seals to ensure the required tightness.
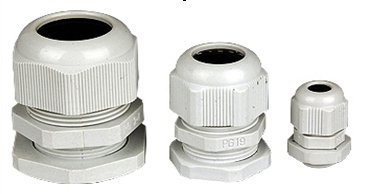
IP68 sealing glands for junction box
Boxes used in conjunction with cable ducts do not have clearly marked places for cable entry inside. They are sawed through during installation; in some models, to facilitate this procedure, the body is made thinner in several places.
Boxes for internal installation are walled into the walls. Hidden wiring cables are installed inside. To insert them inside, places with a thinner body wall are provided, usually round in shape. During installation, the housing is broken into in the right places, cables are inserted inside the box, and the resulting free spaces in the openings between them and the box body are covered with plaster.
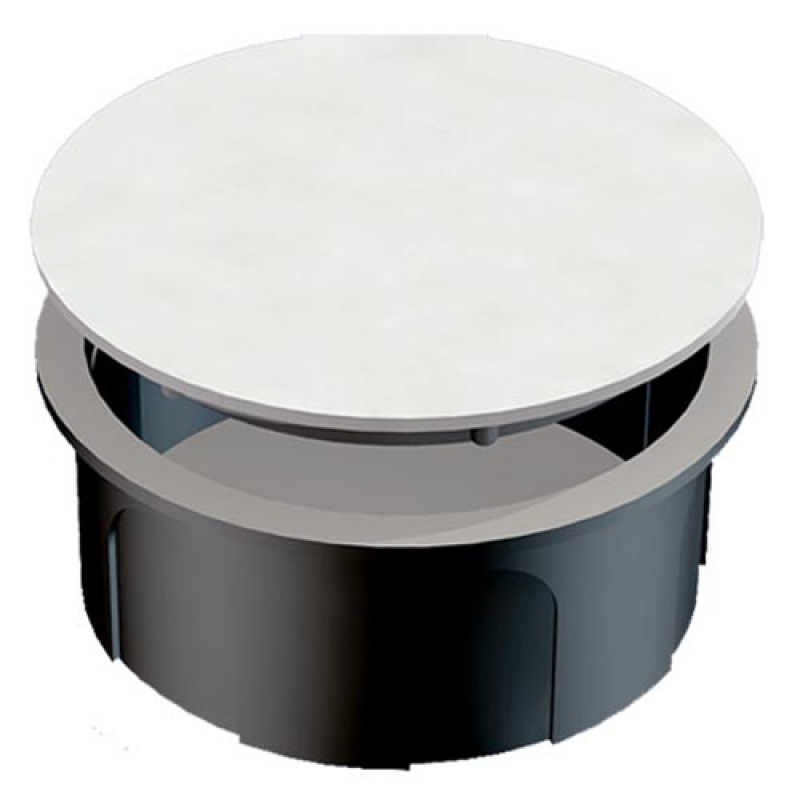
All boxes are equipped with removable covers, through which access to the connections is provided. Sometimes inside them there are permanently installed terminal blocks for connecting cable cores.
Choosing a location for installing the box
When installing electrical wiring yourself, you must lay it parallel or perpendicular to the surfaces of the floor and ceiling. The distance from the ceiling to the cables being laid should be 20-30 cm. It is advisable to place boxes feeding a switch or socket above them. This is done so that the box can be easily found. In order not to spoil the design of the premises, they are usually walled up flush with the surface of the walls and then covered with wallpaper. The box that powers the outlet and is located above it, if necessary, will be found faster than one located arbitrarily.
You can install boxes above hanging or stretch ceilings, but then it is necessary to provide access to them for possible subsequent repairs. After all, contact connections are the weak point of electrical wiring and over time can weaken or even burn out. For repairs, you will need to open the ceiling. This process will lead to unreasonable material costs, and if the installation location of the box is unknown, to very large ones. The same applies to the location of the box hidden in the wall. It should not be covered with a layer of plaster. To open the lid, the maximum that can be done is to cut off the wallpaper opposite it. They can then be glued in place or you can use a scrap of leftovers that inevitably appear after pasting.
To access the boxes located above suspended ceiling, ventilation hatches are built into its surface.
Box location outdoor installation determined mainly by design and cable length savings. To do this, they are also installed opposite switches, sockets and lamps. But even here you should not install them in hard-to-reach places, so as not to complicate your work.
When installing boxes outdoors with your own hands, you need to choose products with a degree of protection of at least IP44.
IP44 junction box
But to guarantee protection from the penetration of precipitation, it is better to install them under canopies, roofs, and awnings. But the degree of protection of boxes installed outdoors cannot be degraded, even if rain and snow never fall on them. Wet air, penetrating inside, leads to the formation of condensation, deteriorating the insulation between connections or leading to their corrosion. In the first case it is possible short circuit, in the second – oxidation and disruption of contacts.
Installation of distribution box
Installation of junction boxes in walls can be done in different ways, depending on the availability of tools. The optimal and least labor-intensive option is to use a hammer drill attachment called a crown.
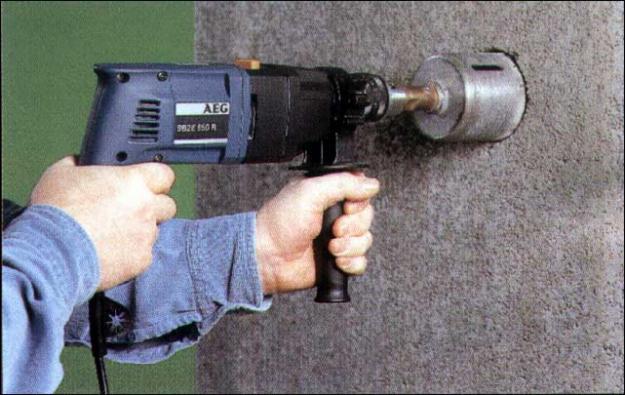
It is a ring with pobedite or diamond cutting edges, in the center of which there is a concrete drill. The drill performs the functions of centering the crown, and it itself cuts out a round segment from the wall.
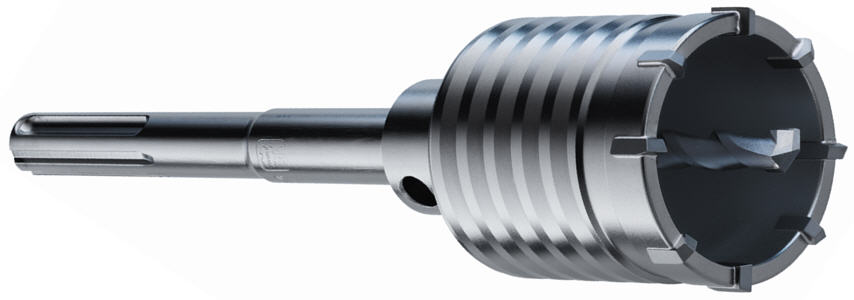
An example of a diamond-coated concrete bit that can be used to drill holes for distribution boxes
After drilling to the required depth, the segment is removed with a hammer and chisel or a mounting blade mounted on a hammer drill.
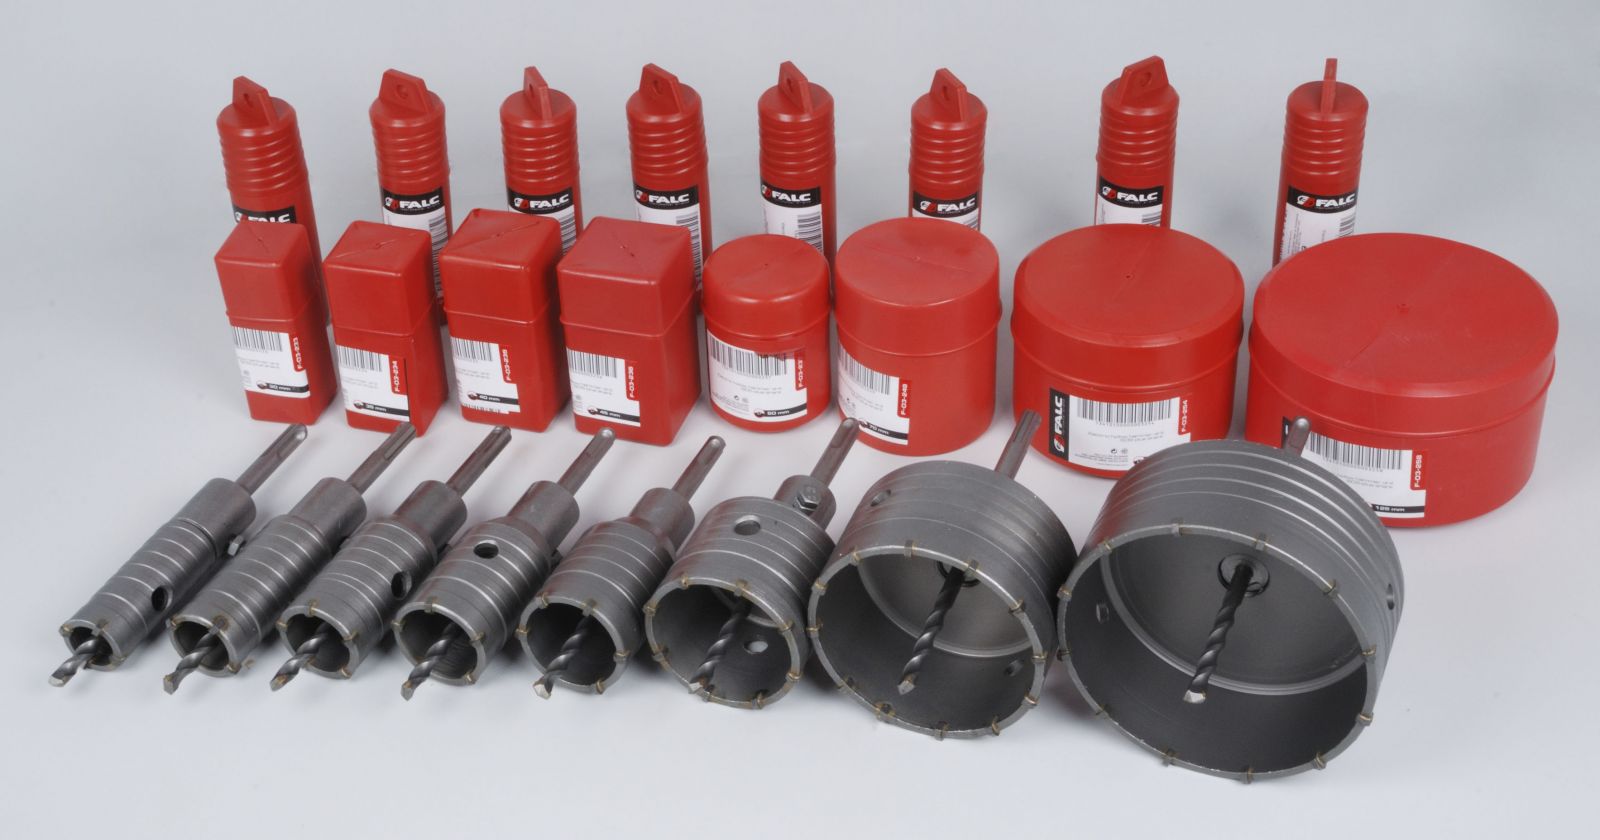
There are crowns of various diameters to suit any size of junction box
Holes can also be made with the mounting blade itself, especially for a rectangular box or large sizes. First, you need to drill holes along the edges of the required opening using a concrete drill. The section of wall between the holes is cut out using a spatula and a hammer drill set to the hammer mode, or with a hammer and chisel. Instead of a chisel, you can use a wide flat-head screwdriver with a strong handle. Installation of holes in walls panel house This can only be done with a hammer drill; other methods will not bring results. At the same time, holes for sockets and switches are installed.
Then grooves are laid, cables are laid in them, the ends of which are inserted into boxes so that the ends 10-15 cm long stick out from them. It is better to cut the cables in the boxes in advance. The cables must enter the box itself uncut, more than a centimeter long. At small sizes box, the length of the uncut cable in it must be minimized, otherwise the wires will not fit into it later. If, when sealing grooves, there is a possibility of cables shifting along the length, then it is better to cut them in connection boxes, as well as in installation boxes for a socket or switch, after finishing the plastering work.
Installation of cables in the junction box
After the plaster has hardened, you can electrical connections. To correctly connect sockets and switches in boxes with your own hands, you need to follow the action plan described below.
- Place the cut cable cores to the sides, grouping them according to their purpose. It's better to decide first protective conductors(RE). In cables they are yellow-green. Collect into one bundle the PE conductors going to the lamp housings, to the sockets, from the power source and to the next box. Be careful: the yellow-green wire going to the switch does not belong to this connection. It is important to remember: even if you do not plan to install an outlet with a grounding contact, a three-core cable must go to it, and its PE conductor in the box or panel must be connected. This is done so that in the future it will be possible in place of a regular outlet.
- To prevent the bun from falling apart, tie it together with a tie or tape. Connecting the wires can be done right away, but it is better to complete the planning process completely, since you will need to untangle the remaining wires.
- Collect all zero working conductors into a bundle. They - of blue color, and are assembled from supply and outgoing cables, as well as those supplying the outlet. An exception also applies to cables to switches.
- Then we put together the phase conductors of the incoming and outgoing cable lines, sockets and add to them one conductor from the cables going to the switches. The color of these conductors may be white, black or other, but not yellow-green or blue. From the switch cable we take a conductor of the same color as the phase conductors.
- We are putting together a diagram for connecting lamps. To do this, we take blue or yellow-green wires from the switches and connect them to the remaining unassigned phase conductors of the lamps. This case is an exception to the rule, when yellow-green or blue wires can be used to connect a phase, that is, not for their intended purpose.
- We connect grouped cores using one of the following methods: welding, soldering, installation of terminals.
- We isolate the connections.
- We put the wires in the box.
 (1 ratings, on average: 5,00 out of 5)

