DIY window air conditioner. Technical characteristics and types of window air conditioners. Window room air conditioner
A mobile air conditioner perfectly solves the problem of maintaining a comfortable microclimate in cases where it is not possible or necessary to use expensive split systems. Despite the convenience and versatility of this technology, there may be a problem with its use in apartments or rooms with modern plastic windows.
How to install a mobile air conditioner in a plastic window? — we will try to answer the question in several ways.
Installation methods can be different, and among them there are several deeply erroneous ones. First, we'll tell you which decisions you should abandon and why.
The easiest option is to open the window sash slightly and lead the hot air exhaust pipe from the air conditioner into it. The device standing in the room is equipped with a plastic corrugation for these purposes, and many owners of a mobile air conditioner simply attach the pipe to the frame or place it on the windowsill.
The solution is incorrect or only temporary; it is worth resorting to if the device is used infrequently or until you decide to use it more effectively. Disadvantages of the solution:
- a window slightly open to the width of the pipe is an opening sufficiently large area, and through it enters the room hot air, depriving you of a third of the effect of the air conditioner;
- dust and extraneous sounds actively penetrate into the opening;
- It is quite difficult to cover such a solid gap, and it is impossible to achieve tightness;
- you spend electricity cooling the mass of air that flows into the room from outside.
As a temporary option, resorting to this installation method is worth literally just a few days, until dust, noise and energy consumption become critical for the device owners.
The second wrong option is to try to cut through the window sash to remove the pipe from it. This will lead to complete depressurization of the glass unit, and in a window with a thermal break it will cause the loss of all its functional benefits. The heat transfer resistance coefficient of the structure will become almost equal to that for a conventional window with one glass and an unprotected frame. In addition, violation of the integrity of the profile will greatly reduce its strength. The window will warp, the sashes will stop closing, and the entire structure will become unusable. We will immediately reject this option as completely erroneous.
The right solution is to save the window and block the opening
Two correct decisions are related to the ability to keep the window intact and at the same time block the path of hot air, dust and noise from entering the room.
Changing the window design
First correct option requires contacting window repair and installation specialists. Major changes will have to be made to the window design.
- The blind sash will be disassembled or replaced with another one.
- The new sash will have a reduced-sized double-glazed window and another impost - a horizontal frame element.
- Instead of a piece of glass, a sandwich panel with a slot for the outlet of the air conditioner pipe will be installed between the impost and the lower edge of the sash.
- IN winter time this hole will have to be closed with a plug or completely replaced with a standard one, so as not to lose the effect of using a double-glazed window with its thermal insulation properties.
The solution allows you to create all the conditions for effective use air conditioning, block the path of dust, noise and warm air, but it requires considerable costs to re-equip the window. And it does not guarantee that in winter the sandwich panel will retain heat as reliably as a standard double-glazed window, since it has completely different properties.
Installation of plexiglass sheet
An option to avoid the problems listed above is to temporarily install a plexiglass shield over the entire opening area of one of the window sashes. In this case, you can not remove the sash, leaving it open, creating a barrier to noise and dust and preventing the flow of warm air from entering the window. The costs of implementing the project will be reduced to the purchase of a sheet of plexiglass and fastenings for mosquito net. In the most complete version, you can even seal the opening using a rubber seal. The main task is to measure the opening correctly, because the rather heavy plexiglass must fit exactly into place and not fall out in the wind.
Dimensions should be taken with the window sash open so as to accurately determine the distance from edge to edge of the main frame of the structure inside the opening. It is there that a precisely cut sheet with a hole prepared in advance to fit the size of the air conditioner pipe is installed. When using a rubber seal and standard mosquito net fastenings, the sheet will fit exactly into the free space and will block the opening. For the winter, you can remove it and simply close the window.
We have looked at several ways to install a mobile air conditioner in a plastic window, and you will have to choose the most suitable solution in terms of complexity and cost.
Window air conditioners - life in comfort
Windowed or vent air conditioner- a useful device for humans, making life easier in the summer heat and heating the room in winter.
The history of the invention of vent air conditioners
The history of its appearance dates back to 1902, when US engineer Willis Currier first presented a refrigeration generating unit to the public.
Initially, it was not widely used and until the late 20s it was used only in business, cooling rooms in shops and offices.
But in 1929, the American company General Electric began mass production of household appliances, and from this year ordinary citizens could buy window air conditioners inexpensively.
In 1958, Japanese developers took over the leadership from the Americans, who built a heat pump into the climate control equipment, which made it possible not only to lower, but also to increase the temperature in the premises.
And just two years later they mastered the production of a prototype of split systems in which the external and internal units were separated.
Features and principle of operation of window air conditioners
The operating principle of climate control equipment is quite simple and is based on the action of a refrigerant, which begins to boil at room temperature.
Window air conditioner installation
During this process, heat is absorbed, that is, warm air is cooled in the outer part of the unit and after that it flows back into the room.
If you are planning to buy a window air conditioner in Chelyabinsk, you should know that, unlike outdated models in which condensate was discharged outside, in modern devices moisture accumulates on the evaporators and, under the influence of a fan, is sprayed over the body of the unit.
Application of vent air conditioners
Purchasing a window air conditioner in Chelyabinsk in climate company, you should know that its installation is limited to a window or, which happens quite rarely, to special openings in the wall.
It is worth noting that the dimensions of window air conditioners for a home coincide with the standard sizes of window openings, so their installation will not cause additional difficulties.
You can also contact, for example, the April company and order small models, for which the price will not differ too much from the standard options.
Benefits of window air conditioners
If you decide to choose a window air conditioner, which you can buy for an office, an apartment, or for cooling other rooms, then you need to know about its main advantages:
- reasonable price.
A vent air cooler is cheap compared to other types of climate control equipment;
- long service life;
- simple design;
- possibility of working as a fan;
- easy installation.
It is also worth noting that due to the simple installation and the fact that window air conditioners, the sizes of which are suitable for all standard window openings, are removed by some users for use in the summer, for example, in the country.
And the resulting hole is temporarily covered with plywood.
Installation of a vent air conditioner
As we have already noted, installing a window air conditioner is not too difficult. And if you have already ordered climate control equipment and want to install it yourself, then read some recommendations.
- Installation in double-glazed windows is more difficult than in a regular window.
- The hole should be 5-10 mm larger than the size of the unit.
- In relation to the ceiling, the device should be located at a distance of no less than 20 cm.
- Install a plastic canopy on the street side.
- Install the equipment with a slight slope, no more than 1 cm, so that condensation can easily drain onto the street.
- Blow out all gaps with foam.
In addition to the above, if the unit’s power is up to 3 kW, then plug it into a regular outlet.
If more, then call an electrician who will carry out separate wiring.
Thus, window air conditioners still remain a popular type of climate control equipment due to their low cost and simplicity, despite the annually growing popularity of split systems.
Window air conditioners are “pioneers” in climate control equipment, allowing for comfortable living conditions.
Back in the thirties of the last century, the first window air conditioner was created in America.
Such devices immediately became widespread due to their simplicity of design, low price and sufficiently high power, making it possible to individually cool individual rooms.
The popularity of air conditioners has already brought this equipment into the category of household appliances. But still, there are a number of fundamental differences between the air conditioner and the vacuum cleaners and washing machines that are already familiar to us.
In order to make the right decision, we will offer information that may be useful:
installation of window air conditioners,
main purposes,
We will give recommendations on how to choose the right “window”,
Let's talk about the positive and negative sides of this equipment
and we’ll even tell you how to install an air conditioner,
Although the best option- entrust this work to the specialists of the Ruclimat company!
Device
The design of window air conditioners compared to split systems should be recognized
more compact and reliable.
A window air conditioner consists of one housing.
This is a so-called monoblock, which is mounted in a window opening or wall of a room. The case is a large box assembled from metal plastic panels white, gray, light brown or other pastel color.
The housing contains all the “stuffing” of the outdoor and indoor units of split systems (evaporator, condenser, compressor, fan, etc.). And all this without external connecting pipelines.
Such air conditioners are installed at the factory, so they have virtually no connections that could cause loss of refrigerant. Only improper operation, mechanical damage or complete wear and tear due to merciless use can force you to take the “window window” to a service center.
The main purpose of a window air conditioner
The window is designed to cool the air in a room of 60 sq.m.
In this mode, the “window” can operate at temperatures from 18 to 43 ° C (each manufacturer has its own opinion on this matter).
During the cooling process, such a device reduces the humidity in the room.
This has its advantages, for example, on a hot afternoon, after rain, when air humidity reaches a maximum value of 100% and drying the air to 30-60% facilitates the body's thermoregulation.
Some models are capable of heating indoor air.
This can be done by models with cycle reversal of the refrigeration machine (in a household refrigerator there is also a heating mode for defrosting). Heating is allowed until the air temperature outside drops below −3° C. For more than severe frost The air conditioner may malfunction.
For those who like year-round heating of premises, there are models equipped with an electric heater.
Such models are adapted to heat the air in the room in any frost; the refrigeration machine turns off at this time.
“Windows” are equipped with mesh air filters, sometimes with antibacterial impregnation, which retains coarse dust. This allows you to protect the room and the device itself from poplar fluff, lint, house dust and other contaminants.
If you do not turn on the air conditioner for cooling or heating, but select the ventilation mode, the “window” will perform the functions of a vacuum cleaner, cleaning the air and the room from dust.
How to properly install a window air conditioner in a plastic window with your own hands
Many modern air conditioners are capable of providing exhaust ventilation to the room.
What to look for when choosing a window air conditioner
To choose the right air conditioner, determine the most suitable type of device, manufacturer and take into account all the requirements for the equipment, and also that these requirements and functionality corresponded to the price, of course, specialist advice is necessary.
But you, by taking a quick look at your home, can determine which solution will be optimal.
The main aspect of choosing a window air conditioner is its cold performance. For household models this figure ranges from 1.5 - 2 to 6.5 - 8.5 kW.
Approximately determine required power possible at the rate of 1 kW per 1 sq.m. area with a ceiling height of 2.8 - 3 m. If the room has a large glazing area, the windows face the south side or there are other additional heat inflows, then it is better to purchase a model with a power reserve of 15-20%.
An important factor when choosing remains functional purpose of the room. For example, an air conditioner installed in a kitchen must have high performance for best fight with heat emissions.
An air conditioner for a bedroom should have low noise characteristics. When purchasing a window air conditioner, it makes sense to think about the factors responsible for minimizing its noise level, comfortable air distribution in the room, and ease of control. The main source of noise in an air conditioner is the compressor.
Models with piston compressors are especially noisy.
More modern devices are equipped with rotary compressors with a system inverter control and as a result they work quieter (by 3-5 dB). A noticeable reduction in noise levels is facilitated by installing the compressor on rubber vibration mounts, so that noise from the unit is not transmitted to the housing, as well as by covering the compressor with rubber.
The second source of noise is the fan (impeller + electric motor).
To reduce the noise of this unit, manufacturing companies use plastic impellers and low-noise electric motors.
Another device that creates noise is the sprinkler fan, which is equipped with some window models. It captures condensate from the drain pan (which is formed during the process of cooling the air in the room) and “splashes” it onto the condenser, where it evaporates, increasing the efficiency of heat discharge from the room to the environment.
For some models, the sound of the sprinkler blades hitting the water is often quite loud. But if you attach a drainage pipe to the air conditioner (the “nipple” is usually located on the back of the window unit housing) and equip the water outlet to the sewer or directly to the street, the splashing noise will stop.
It is better to assess the noise level before purchasing by turning on the window air conditioner at full power in the store's sales area.
Of course, you need to take into account that a store is not a living room and the noise of the device will be perceived differently than at home. Therefore, it is better to conduct the test in the evening, when there are few visitors and the amount of extraneous sounds (for example, car traffic) is reduced.
Air distribution comfort
The window air conditioner takes in room air through the input grille, which occupies most its surface facing the room.
Behind bars is air filter. After processing (cleaning, cooling or heating), the flow returns to the home through a small hole located on the right, left or above the air intake grille, that is, it is blown in by the “window” in the room.
The air outlets have their own movable grilles, allowing you to change the direction of flow.
Some inexpensive window air conditioners only provide manual adjustment of the air direction in the room. Moreover, the user can change the direction of the flow of cold (heated) air into the room using movable air distribution grilles (the heated flow is directed downwards, the cooled flow is directed upwards or horizontally).
Models with automatic blinds provide more comfortable air distribution throughout the room. Typically, automatic blinds change direction air flow in the horizontal plane, but there are models with four-way automatic jet deflection (both horizontal and vertical blinds work automatically).
Controllability
In most cases, window air conditioners are equipped with electromechanical control.
In this case, the power switch, temperature control knob (thermostat), and fan speed switch are placed on the front panel of the device. Electronically controlled “windows” use buttons to set the desired temperature, and the air temperature can also be displayed on the LCD display built into the control panel.
In terms of convenience, electronic and electromechanical controls differ insignificantly if the air conditioner is located close to the floor level.
If the device is mounted in a window frame, high above your head, it is logical to provide electronic control, the functions of which are duplicated by a remote control.
Sometimes “windows” are equipped with a convenient programmable timer for 12 hours.
Window air conditioning is not a technique of the last century, which has been replaced by modern multifunctional split systems. The window air conditioner certainly retains its right to exist. If only because it has a number of advantages over the split system.
“Ookonniki”, all other things being equal ( trademark, cooling capacity, functions performed) sometimes cost half as much as split systems.
In addition, for the installation of window devices there is no need to attract highly qualified specialists, and therefore, there is no need for large financial costs for installing equipment. Removing the “window” from the opening is as simple as installing it, after which it can be transported to another place (the opening can easily be sealed with a decorative partition).
For example, in summer the device will provide you with a comfortable stay in country house, and in winter it will be easy to transport it to city apartment. The “window” is also extremely good for air-conditioning the premises of a “rented” home.
Among the arguments traditionally used by opponents of window frames is the claim that they block the light from the window. However, as noted above, it is not at all necessary to tie the air conditioner to the window opening; you can install it in thin wall(about 15 cm).
By the way, the windows must be strong enough to support the weight of the device. If you plan to install an air conditioner in a plastic window with double-glazed windows, then at the window production stage it is necessary to provide an appropriately sized opening for installing the device.
A compelling argument against window air conditioners is the noise level generated by these devices during operation (it ranges from 39 dBA for the smallest to 59 or more for giants with a power of 6 kW and above).
It's not easy to fall asleep to their roar. Therefore, “windows” are contraindicated for the bedroom. However, if you cool the air before going to bed, and when using the bedroom for its intended purpose, simply turn off the equipment from the network, this disadvantage can be minimized. Of course, over time, the room temperature will rise, which is uncomfortable.
You should not sit very close to a window air conditioner working for cooling - this may result in a cold. However, the last observation is true for split systems and any other device that distributes cooled air. So, if you have already decided on purchasing a window air conditioner, here is the latest information for you.
Installation
When installing a purchased air conditioner, you must strictly follow the manufacturer's instructions.
As a rule, the first step is to make a rectangular opening in a window or wall (5-10 mm larger than the dimensions of the device casing). The main thing here is not to make a mistake with the location of the opening.
It is better to choose a place where dirt and precipitation will not get on the device, in the shade. You can hang the “window” higher, but not right under the ceiling: the gap between the ceiling and the top panel of the air conditioner should be at least 170-200 mm. Otherwise, there is a possibility that cooled air will be sucked back into the device, which will reduce its operating efficiency. From the street side, the nearest obstacle to the air entering the external heat exchanger (condenser) (for example, the wall of a neighboring house) must be at least 500 mm away from the external intake grille.
Attention!
When choosing a location for the opening for the air conditioner, you must remember that the external openings (blinds) on the top and sides of the device body must communicate with the external environment. They absolutely cannot be embedded in the thickness of the wall, thereby depriving the device of air access. In other words, part of the air conditioner must hang in the air outside. Obstacles to the flow leaving the condenser should be located at least 150 mm from the top and 400 mm from the side blinds.
Traditionally, to install a window air conditioner, a frame with a slope (jib) made of a steel angle profile with a shelf width of 30-40 mm is used.
This frame is fixed in the opening in the installation position. To improve condensate drainage, the air conditioner should be positioned so that bottom edge the outer part was 5-10 mm below the lower edge of the inner part.
Then the device slides into the frame. If necessary, a special canopy is mounted above it to protect from sunlight and precipitation. The gaps between the air conditioner housing and the walls of the opening are sealed using polyurethane foam.
Some window models have a lightweight removable casing. In this case, it is not necessary to make a frame from corners. During installation, it is the lightweight housing that is placed in the opening first, after which the entire “stuffing” of the air conditioner is pushed into it.
Low-power devices often have a plug for connecting to the power supply.
A powerful window air conditioner must be connected to the electrical network through separate wiring and an individual circuit breaker. It is better if the connection work is carried out by a qualified electrician.
Let's sum it up
Window air conditioners are the most common type of air conditioners. All elements are combined in one block: compressor, heat exchanger and fan.
Advantages:
cheap;
compact;
sometimes they solve issues of partial ventilation;
do not require installation;
easy to transport from place to place;
Flaws:
high noise level,
they take away part of the window, “stealing” daylight,
it is necessary to “reshape” the window frame,
the air conditioner must not be blocked, for example, by curtains, otherwise comfort will be created in the space between the window and curtains, and not in the room,
ineffective in a large room,
the price is sometimes comparable to split systems,
if the volume of the condensate collector is small, you will have to drain the water manually every two to three hours.
Suitable for apartments, cottages, offices.
How to properly install an air conditioner in an apartment
I would like to clarify right away that this means installing an air conditioner in an apartment with your own hands. That is, completely independently.
The reliability and durability of the air conditioner directly depends on how correctly the technology for installing it in the apartment was followed. Therefore, it is recommended to thoroughly study the attached documentation on the design of the air conditioner and all the details of its installation.
First of all, you need to choose the model that suits you.
In this case, it will be safer to listen to the advice of a specialist, rather than from friends - advisers. The specialist will give a recommendation, taking into account the nuances unique to your apartment.
After all, when choosing an air conditioner, everything is taken into account - the area of the room and its height, the thickness of the facade walls and the material from which they are built, the thermal insulation of PVC windows, etc.
So, let's start choosing the right model. Let's start the review with monoblocks. There are two types - window and mobile.
The window is installed either in the opening prepared under the window,
or in a window frame, on special mounts.
Mobile (portable) is convenient because it is not tied to one place. It can be moved throughout the apartment, depending on the circumstances.
They placed it in the right place, connected it to an outlet, and the hot air (exhaust) was vented out the window or ventilation system.
And now the most difficult option for us is the split system.
This is an air conditioner that consists of two units - external and internal.
And the difficulties relate specifically to installing an air conditioner in an apartment.
During the installation process, we will have to do the following:
choice of air conditioner;
study of technical documentation;
decide where to place both blocks;
punch in external wall hole for connecting route;
install drainage;
lay the power cable;
measure and assemble the pipeline for freon;
secure the system blocks;
connect them together;
launch a split system.
We chose air conditioning.
Now the whole installation process is step by step. The indoor unit must be positioned so that the free zone on all sides is at least 15 cm. The air flow should not encounter any obstacles on its way - partition furniture, etc.
Choosing a place for outdoor unit. It's best near the window. On the first floor - at least three meters to the ground.
Please note that the shorter the route between the blocks, the easier it will be to start the system - to remove moisture from the route.
Air conditioning systems and window air conditioners
We install the outdoor unit on special brackets at a distance of ten centimeters from the wall. In this case, an assistant will not be superfluous.
To attach the indoor unit, you need to mark the attachment points. We take the mounting plate from the kit, attach it to the wall (keeping it level!), and apply marks for the fasteners.
We attach the plate. Before this, for training, put on and remove the plate from the block a couple of times.
We drill a hole in the wall, about five centimeters in diameter with a slight tilt outward downwards. You can drill holes for each tube and cable separately.
We temporarily attach the internal block to measure the length of the route to the external one, add about thirty centimeters “in reserve”. The block can be removed. We are preparing everything for the track.
Align the tubes and cut them using a pipe cutter.
We put on the flex, a nut and make flaring at the ends of the tubes. It is advisable to use a special flaring kit.
We clamp the tube into the desired groove, leaving an external margin of 1.6 - 2.0 millimeters.
We apply the finished tubes for fitting, each to its own pipe, in indoor unit.
We add a drainage tube, a power cable, and connect the entire bundle with tape, forming the route itself.
We connect the tubes to the tubes of the indoor unit. The drainage is put on the fitting. Connect the power cable.
The contact markings in both blocks are the same. When connected copper tubes you need to act very carefully.
First, the nuts are tightened by hand, then tightened with a wrench, quite tightly. But try not to break the thread!
Then you need to push the route into the hole in the wall.
Work together! One person holds the block, the second directs the route. Before doing this, do not forget to cover the tube holes with something.
We attach the indoor unit to the mounting plate.
We connect the route to the outer side, just as we connected to the inner one. The drain hangs freely under the block.
Before starting the system, remove wet air from the track. This can be done in two ways - either by connecting a vacuum pump, or by the “spiking” method. “Zilch” is used if the length of the route does not exceed three meters!
Let's start with him. Let's look at what connection ports are.
1 – liquid tube; 2 – gas tube; 3,4 – valve covers; 5 – spool cover for freon.
Unscrew all three covers. Using a hex wrench, turn off tap No. 4 for a split second and close it again.
This is how we let freon into the tube. Then we press the spool (No. 5) and release the freon and the air in it from the tube.
It is advisable to do this quickly so as not to let air in again.
We repeat a couple or three times, we need to save freon.
If the route exceeds three meters in length, a vacuum pump is used.
We connect the hose from the pump with the fitting that has a special pin to the spool. We start the pump for 10 minutes. Then we open valve No. 4 and run a little freon into the route tube, close it.
Disconnect the vacuum pump hose as quickly as possible so as not to release the freon.
ATTENTION! Work only with protective gloves so that freon does not get on your hands.
We open the third and fourth valves and check the tightness of the entire route with soap foam.
We fill the hole in the wall with foam on both sides.
After the foam has dried, we cut off the excess, plaster, putty and paint the places where the route passes through the wall.
The installation of air conditioning in the apartment is completed.
During operation, you sometimes need to clean your air conditioner!
I would be grateful if you use the buttons:
Among budget options Household climate control equipment is characterized by distinctive advantages of a window monoblock: affordable cost, simple operation, rare maintenance, mobility if desired, etc. Installing a window air conditioner is also simpler compared to a split system; you can do it yourself if you follow certain rules.
Features monoblock A
This monoblock is inferior to split devices in the following parameters:
- noise level;
- productive capacity;
- functional;
- design;
- overall dimensions, etc.
Under certain conditions it may become alternative option split, floor-standing monoblock:
- it is impossible to install an external split block on the facade of a building that is of historical and cultural value;
- the decorative covering of the facade is dilapidated and crumbling;
- limited budget;
- impossibility of carrying out installation work inside the walls;
- relative mobility when moving or installing in another room.
Inside the common housing there are the necessary elements: heat exchangers, fans for them, a compressor, a thermostatic valve, a freon circuit, a drain tank, an automatic control unit, and air distributors.
The noise level of 50 dB is due to the placement of a compressor and heat exchange fans in a single housing, creating a noise flow. At correct installation This effect can be reduced by high-quality noise insulation and reliable fastening.
Mounting options
The placement of the window block is possible in three options:
- The lower part of the window, on the windowsill. The simplest, most affordable installation option chosen by all-in-one monoblock owners. A special opening is prepared inside the window into which the block will be inserted. It is best to do this when the windows are changed and the air conditioner parameters are known in advance.
- The upper part of the window, the window. Placement will require additional fastening to firmly fix the device. A less popular option, used when there are small children and animals in the house. Suitable for compact devices.
- Inside the wall. The main condition is an outer wall, no more than 250 mm wide, so that the ventilation holes of the housing remain accessible to the air flow. Before installation, the opening is strengthened metal body for strength.

Do-it-yourself installation of a window air conditioner is carried out in accordance with the following recommendations:
- it is necessary to provide a separate electric cable, installation of a “machine” in the distribution panel;
- the use of household extension cords is prohibited;
- the location of the outer part of the monoblock from the window opening is at a distance of 25-30 cm;
- when installed at the bottom of the window, the distance from the floor is at least 75 cm;
- a minimum of 10 cm must be left on the sides of the unit for access during maintenance and for ventilation of the mechanism;
- from the outside to the nearest wall, structure, etc. not less than 50 cm;
- the ventilation holes of the case must not be closed, this will lead to rapid equipment failure;
- it is necessary to maintain a slope towards the outer part (0.5-1 cm) for natural drainage of condensate. The location of the right and left sides is at the same level;
- structural elements must be securely fastened to avoid excessive vibration during operation, which can loosen the mounting base and damage the window.
Mounting kit
Some all-in-one models are equipped with installation structure. The kit includes fastenings, metal corners, using which you can install the block yourself. If the kit is not supplied with the air conditioner, it must be purchased separately or made manually.

List of tools that may be needed when installing the unit:
- hammer drill, chucks, drills;
- hacksaw for wood, metal;
- jigsaw;
- chisel for woodworking;
- construction level;
- glass cutter;
- Bulgarian;
- silicone sealant, polyurethane foam;
- paint, brush.
Installation in a wooden window
Least costly and easy to install the unit in wooden window. Installing a window air conditioner in a wooden window opening, sequence of actions:
- Prepare a place for placement in advance before installation. Take the external dimensions of the device, make the necessary marks on the window frame;
- carefully remove the glass from the sash;
- mount a wooden lintel at the marked level so that the outer body of the monoblock can be placed inside the resulting opening without excessively wide gaps;
- the remaining space on the sides of the air conditioner housing must be closed suitable material(plastic, wood, etc.), or purchase a special insert for window blocks and install it inside the opening;
- the frame from the installation kit is securely fixed at a pre-marked distance, taking into account the downward slope of the outer part;
- install the block body inside the opening;
- insert the air conditioner inside the frame, fix the front panel;
- cut the removed glass using a glass cutter taken sizes, install inside the reduced opening;
- joints must be sealed;
- if a drainage hose is needed, install it;
- connect to the electrical network;
- test the device by doing a trial run.
Installation in a plastic window
Installing a window air conditioner in a plastic window is a labor-intensive process related to the design of the opening. It is best to mount the block inside a pre-prepared opening, which is made before installing the window. If there is no such opening, installation of a window air conditioner in a plastic window is carried out as follows:
- the reliability of the window opening is checked and strengthened if necessary;
- the chosen location should be such that after placing the air conditioner there are as few gaps as possible;
- carefully remove the double-glazed window from the window using the necessary tool (first remove the glazing beads, starting with the longest one);
- insert the jumper at the required height;
- secure the mounting kit at the required distance;
- Close the remaining gaps tightly with plastic, or install a purchased plastic opening for window blocks;
- install the monoblock housing inside the frame;
- insert into housing inner part, reinstall the front panel;
- carefully cut the glass unit to length, side metal frames inside the chambers;
- insert the frames at the bottom at the cut site, treat the remaining gaps with sealant (you must ensure that dust does not get inside the chambers, if necessary, clean it before installing the metal frames;
- install a double-glazed window into the sash;
- cut long glazing beads to length and install in place;
- connect the device to the electrical network;
- carry out a test check of operating modes.
Installation of a window air conditioner in a plastic window must be done very carefully, observing the accuracy of the technical aspects of cutting the glass unit.

Temporary installation
Monoblock installation can be done temporarily. When the cold season sets in, the device can be removed by tightly closing the opening with a material that matches the composition of the window frame, or you can install a prepared double-glazed window. In addition, the unit can be taken to the dacha and installed there for the duration of your stay.
Recently, compact monoblock devices have been produced that are easy to install, transport and store, without causing any inconvenience to the owner.
The noisiness of the working process is compensated by simple installation, the ability to move, and the absence of complex construction manipulations with the freon route.
It is quite possible to install a monoblock window yourself, avoiding financial expenses (as in the case of purchasing a split system). At the same time, the price for installation by a professional installer will be significantly lower than similar work with a split. And the performance capacity and refrigeration function of some models exceeds these indicators of split and floor-standing options.
Friends! More interesting materials:
 Aluminum pipe for air conditioning - an alternative to copper
Window air conditioner models are monoblock air cooling devices that are mounted in the window frame. As a rule, they are used in the summer and turned off or dismantled for the winter.
With the advent plastic double glazed windows and split systems, monoblocks have lost their popularity. The fact is that installing a window air conditioner in a plastic window is more difficult than in wooden frame. At the same time, it is very important not to damage the glass unit or reduce its tightness.
In this material we will try to rehabilitate monoblock climate systems and tell you how to install them in modern frames with your own hands.
Monoblock air conditioners
To begin with, you should understand the design and operating principle of window air conditioners. For the most part, such coolers are monoblock devices. This means that all the main structural parts are located in a single block. This is exactly what it consists of main feature window coolers and their main difference from split systems.

Window air conditioner models are installed in a special hole in the window frame made of wood or PVC. They bring in air from the street, purify and cool it, and supply it into the room. Such models are quite effective for small apartments, have low noise levels and an aesthetic appearance.
Small mobile air conditioners
Monoblock devices also include mobile mini-coolers, which can be installed in rooms where there is access to a window. The air flow into the device is carried out through a special hose, which is discharged into the open sash of the window. As a rule, small window air conditioners for home are installed for the summer season in an apartment or country house. The disadvantages of such models include their bulky appearance and high noise levels.

Installation of a window monoblock
Proper installation of a window air conditioner with your own hands is quite difficult, but possible. It is best to install a monoblock during repair of an opening or when replacing a double-glazed window. In this section we have listed the basic rules for installing such climate control equipment.
Installation tool kit
Installing a monoblock in a plastic window is a rather labor-intensive process that will require an impressive set of tools. Many of them can be found in every home, but some parts will have to be purchased specially. We list the minimum set of tools for installing a cooler:
- Hammer or impact drill.
- A set of drills and chucks for various materials.
- Jigsaw.
- Metal file.
- Set of chisels.
- Level.
- A grinder or a special attachment for a drill with a cutting wheel.
- Internal and flat corners for furniture.
- Silicone based sealant.
- Paint and brush.

The location of the device is an important factor that directly affects the efficiency of the window air conditioner. Therefore, before installing the monoblock, you must carefully select a place to place it. In this case, you should be guided by the following rules:
- To begin with, it is worth visually inspecting the frames of the window opening, since they will become the basis for mounting the device. Bolts, mounting brackets and angles of sufficient strength are used as fasteners. If you are not sure of the strength of the frames, you need to strengthen them in possible ways.
- When choosing a location for an air conditioner, you need to think about the condensate drainage mechanism. To ensure that condensation does not linger inside the housing, it must be placed with a slight slope towards the street - 1–2.5 cm.
- The inside of the monoblock should not be blocked by furniture - this will interfere with proper air circulation and may affect the performance of the device. And also you should not place the cooler close to people’s resting places - above the sofa, bed or table.
- It is necessary to leave free space on the sides of the monoblock for unobstructed access when servicing the device.
Installation algorithm
The process of installing a window air conditioner with your own hands consists of several important stages. They must be followed both for self-installation and for professional installation.
First stage: preparing the window opening and frame
If the air conditioner is installed directly into a double-glazed window, you should choose such an arrangement of the device to avoid gaps between the housing and the frame. Modern monoblocks are manufactured according to standard door sizes plastic window, so this requirement is easy to fulfill if the frame has standard dimensions.

Stage two: Housing fastening
To install a monoblock window, due to its significant weight, a bracket is required. The bracket is attached to the wall and takes the entire load from the weight of the device.

The monoblock should be positioned in such a way that the “street part” protrudes outward at a distance of at least 25–30 cm. Care should be taken to securely fasten the device and ensure its precise alignment with the frame. Otherwise, the cooler will make noise during operation and may break.

When installing the housing, do not forget about the slight angle of inclination towards the street. It is also necessary to ensure the serviceability of the drainage pipe through which the condensate will be discharged outside. If there is a kink or bend in the tube, you need to straighten it to avoid air pockets.
It is important to provide protection from sunlight and rain to the outside of the cooler. This can be done using special visors that will cover the device body at an angle.

So, to install the monoblock, you need to take the following steps:
- Remove the glass from the frame or the entire frame.
- Install the bracket.
- Install a monoblock.
- Seal the gaps between the frame and the device.
Stage three: Connecting to power supply
The window air conditioner can be connected to the power supply using separate wire and a switch. The power of the device should be selected depending on the capabilities of a particular room. And it is also necessary to ensure that the wiring meets the operating requirements specified in the instructions for the device.
The window type air conditioner is a monoblock. In this case, its installation is much easier, unlike other split systems, which require checking the tightness of the pipeline, laying a freon route, etc. In addition, installing a window eliminates the need for high-altitude work. However for quality work When installing the air conditioner, you should carefully follow the sequence of actions.
- the installation process of this type of equipment will be difficult if the room has double-glazed windows or stained glass windows in aluminum and PVC frames;
- no gaps should be left between the opening and the air conditioner;
- installation of window air conditioners must be carried out perfectly level so that condensation does not flow onto the floor;
- in the process of purchasing and selecting an air conditioner, you need to make sure that its width is less than the width of the window;
- if you use equipment that is not even very powerful, make a separate electrical wiring and create a separate machine in the distribution panel.
Rules to follow when installing this equipment:

- the bottom of a window-type air conditioner must be placed at a height of 750-1500 mm from the floor;
- Place the outer edge 10-20 mm lower than the inner edge;
- When installing the air conditioner, it should be positioned with a slight downward slope outward;
- the side ventilation holes should be left open;
- the gap from the external panel to the nearest obstacle should be 500 mm, otherwise air circulation and equipment performance will be hampered;
- the outer side of the equipment must be mounted so that it protrudes onto the street from 250-300 mm;
- Avoid exposing the air conditioner to direct sunlight;
- The equipment must be firmly fixed so that noise does not increase during its operation.
Tools you may need:
- paint brush;
- water-based paint;
- furniture corners (flat and internal);
- building level;
- opaque white silicone sealant;
- perforator;
- hacksaw for metal;
- Bulgarian;
- chisel;
- roller glass cutter;
- replaceable drill chucks;
- jigsaw;
- hacksaw for wood.
Window air conditioner installation

When choosing a location for a window air conditioner, be sure to consider the location of the furniture, the shape of the room and other factors, and also adhere to the following principles:
1. First, you need to thoroughly inspect the wall and window frame to make sure they are strong. Modern building materials, the type of wall finishing and frames may require the use of various methods of fastening equipment: corners, mounting brackets, anchor bolts etc.
If the wall of the room is not strong enough and crumbles, and the window opening is fragile, then they should be strengthened:
- You can strengthen the lower edge of the window opening with a metal corner;
- To strengthen the wall, widen the metal support to reduce the load on it.
2. Create a condensate drain:
- Tilt the back of the equipment down slightly (5-10 mm);
- The right and left sides of the device should be at the same level.

- mount equipment in the center to allow cooled air to circulate normally;
- the air coming out into the street is quite hot, so it should not blow on people, plants or animals;
- There should be no obstacles around the air conditioner for the exit and entry of air, otherwise its performance will be significantly reduced;
- For maintenance, leave approximately 100 mm of free space on the left, right and top of the equipment;
- If direct sunlight falls on the equipment, protect it with a canopy that will not impede air circulation.
How to install a window air conditioner

DIY window air conditioner installation:
1. Preparing the window opening
In the opening of any type of window you can always find best site to install the air conditioner:
- remove the glass;
- insert the jumper
- cut the glass to the required size.
If the equipment is wall mounted:
- drill holes in the wall;
- make markings on it to secure the equipment;
- draw lines corresponding to the air conditioner;
- using a drill, drill inside the contour of the hole at a distance of 500 mm from the lines;
- install the bracket and air conditioner housing.
- if the equipment is installed in a window opening with a distance between frames of more than 25 cm, then operation of the air conditioner is possible only if there is a window in the outer frame;
- if the equipment is mounted in a wall, then its thickness should not be more than 0.25 m.
2. Today, the air conditioner models on the market make it possible to install them even in the absence of access to the outside and the windows cannot be opened. This is done by removing the entire mechanism from the housing and fixing it to a wall or bracket. To ensure normal water drainage, the rear casing should be slightly inclined downward, and the right and left should be at the same level. The connection areas must be sealed. If the walls in the room are not very strong, then the air conditioner bracket can be supported on the floor.
3. Assemble the air conditioner into the housing. If shock absorbing gaskets were used during transportation to protect the fan and compressor, they must be removed. After installing the equipment into the housing, make sure that its back is slightly tilted down. For models 12, 9 and 7, the slope should be 0.65 cm, and for models 24 and 18 - 1 cm.
The resulting gaps between the air conditioner, the wall and the housing must be sealed with sealant and foam rubber. Then you can paint over the damaged areas.
4. Installation of the drainage hose

As the air conditioner cools the air in the room, moisture begins to condense. Therefore, if you do not connect this equipment, water will begin to drip out of the drain hole. If the drain hose becomes bent, check for an air lock. Do not allow the tube to come into contact with the ground surface or the water level in the container.
5. Power supply for window type air conditioner:
- This equipment must be grounded, and the terminals and wires must be firmly fixed;
- all electrical wiring equipment must comply with GOST standards, installation instructions and safety standards;
- to power the air conditioner, you should create a separate line with a circuit breaker independent of the base fuse;
- The supply voltage of this equipment should be from 90% -110%;
- The capacitive current of the switch should be 1.5 times greater than the maximum consumed current of the equipment itself.
Upon completion of installation work, carefully check your work and only then turn on the air conditioner. If you are unable to solve any problem, then seek help from specialists.
Installing a window air conditioner with your own hands video:
Not so long ago, some 20 years ago, air conditioners were considered the lot of either big bosses or very rich citizens. In fact, these air conditioning units were installed in “high” offices, luxury hotel rooms or, much less commonly, in the own homes of wealthy people. However, nowadays the convenience of such household appliances is appreciated by the widest segments of the population, it is no longer unaffordable, and now no one is surprised by air conditioners, which are available almost everywhere.

As a rule, companies involved in the sale of climate control equipment, in most cases, take care of its installation, debugging and commissioning. Of course, this service is not free, and its cost can be quite significant even compared to the price of the air conditioner itself. Therefore, probably potential buyers I often wonder: is it necessary to resort to the help of experts? Is it possible to install an air conditioner?
There is no clear answer to this question. And the air conditioners themselves are different, and the levels of technical preparedness of homeowners can vary significantly. Besides, great importance has a specific location of the living space in which it is planned to install such a device - very often without specialized equipment, equipment or construction equipment produce self-installation It's simply impossible.
And in order to immediately be able to assess the complexity of the task at hand, you need to at least understand a little about the principle of operation of the air conditioning unit - what causes the sharp cooling of the air passing through it?
Basic principles operation of a household air conditioner
If we reason from the standpoint of physical laws, then in order for cooling to occur in one place of a certain balanced system, then in another area this must be compensated for by corresponding heating. How to achieve this?
Everyone knows that the evaporation of liquid from the surface of an object is always accompanied by the absorption of heat and, accordingly, rapid cooling of this surface. It is enough to remember that, for example, a wet palm feels much cooler than a dry one. Wet compresses on the forehead of a sick person when the temperature rises is also one of practical techniques use of this principle. Conversely, condensation of steam into a liquid state occurs with the release of heat. This means that it is necessary to create conditions so that in one single system the liquid in one area actively evaporates, and in another, under the influence of some external influence, condenses, giving off heat. This is exactly how almost all refrigerators, freezers and air conditioners are designed.
The principle diagram of the operation of any air conditioner is shown in the following figure:

This unit can be divided into two halves - external and internal. In split systems, this division occurs “literally” - with division into appropriate blocks. In monoblock models this is not so noticeable visually, since the entire structure is arranged in a single housing, but the operating principle does not change.
So, both the external and internal parts of the air conditioning unit have their own tubular radiator However, they perform exactly the opposite functions. In the outdoor unit it plays the role of a condenser, and in the indoor unit it plays the role of an evaporator. They are connected to each other by sealed pipelines. A special substance, the so-called refrigerant, is constantly pumped through this closed circuit using a compressor.
The main requirement for such a refrigerant is a fairly high boiling point compared to atmospheric gases, no likelihood of freezing (transition to a solid state of aggregation), and high volatility. At the dawn of the production of refrigeration units and air conditioners, ammonia was most often used in this capacity. However, the vapors of this chemical compound are very dangerous for human body, and therefore, over time, it was widely replaced by freons - special synthetic gases (or mixtures of gases) developed specifically for such purposes. Until recently, R-22 freon was most often used in most air conditioners, but in a number of countries its use is already banned as a substance leading to the destruction of the Earth's ozone layer. R-410A freon is more modern, advanced and safe. The boiling point, that is, the active transition from liquid to gaseous state at normal atmospheric pressure their temperature is approximately minus 50° C.

Standard factory “packaging” of various types of freons
However, as is known from the thermodynamics course, the process of phase transition of a substance from one state of aggregation in others it depends not only and not so much on temperature as on pressure. This means that, through special devices, it is necessary to create conditions for active condensation of the refrigerant outside, and, accordingly, evaporation inside the room. This is achieved by the operation of the compressor and the presence of a special throttling device (thermostatic valve).
If we take a closer look at the work cycle, it looks like this:
- At the compressor inlet, the refrigerant is in a gaseous state at a relatively low pressure.
- The compressor ensures the movement of freon through the system, while significantly increasing the degree of its compression before entering the condenser radiator. An increase in pressure is, of course, accompanied by a significant increase in temperature. The flow of cold outside air supplied by the fan removes heat, simultaneously activating the process of condensation of the refrigerant - its transition to a semi-liquid state.
- Moving through the pipes, freon, before entering the evaporator, passes through a throttling device - a thermostatic valve. Due to the special configuration of the passage, the pressure in the line decreases sharply, which causes a rapid, almost avalanche-like boiling of the refrigerant with its evaporation, transition to a gaseous state and, accordingly, a sharp drop in temperature.
- The indoor unit fan ensures that air flows in the room through the evaporator radiator. with its cooling.
- From the evaporator, the freon returns to the compressor unit, thus completing the cycle.
The design of the throttling device can be different - from a capillary tube to a complex multi-port valve, which allows not only to accurately regulate the freon cooling temperature. This joint mechanism is special in “redirecting” the activity of the units, turning the evaporator into a condenser and vice versa - this is used when switching many models of air conditioners to the “winter” mode - to heat the room.
Of course, modern air conditioners are high-tech devices with a lot of additional control, management, and service functions, but their operating principle is the same.
Main types of household air conditioners
It is impossible to understand the rules for installing air conditioners if, in addition to the principle of operation, you do not understand design features different types of these household appliances.
First of all, everything can be divided into two large categories - monoblock (collected in one building) and split systems (having two separate block or more).
Monoblock air conditioners
The entire circuit diagram of the air conditioner is assembled in one housing. The “external” and “internal” working blocks will be separated by a partition, which in many models is adjustable, allowing air to penetrate from the room to the outside and back for ventilation or recovery.
They may also differ in installation method:
- Window air conditioners– the name speaks for itself. The unit is installed in a window opening so that the main part of the housing is outside, and only the control panel and blinds remain in the room to direct the cooled air flow.

The advantages of such a scheme are obvious:
— All internal pipelines have already been assembled at the factory, refilling with freon is carried out there, that is, the installation of the air conditioner itself is greatly simplified, and comes down mainly to general construction or carpentry work.
— Such models allow you to work in the mode forced ventilation premises.
— The price of such air conditioners is low, and if we take into account the lack of need for complex installation, then from the point of view of efficiency it is — best option.
There are also many disadvantages.
— A fairly large monoblock seriously reduces the intensity of the light flux from the window, reducing the natural illumination of the room (often, to avoid this, monoblocks are mounted in a specially made opening in the wall).
— The air conditioner itself becomes a “cold bridge” from the street to the room in winter. It is necessary to consider dismantling it at this time with a hermetically insulated seal of the opening, or somehow otherwise solve the problem of thermal insulation.
— Such an air conditioner does not fit well into a double-glazed window system, unless, of course, PVC installation the installation of windows was not thought out in advance.

Monoblock “windows” fit well into the interior of the room
— A monoblock air conditioner is “tied” to one place, and will not always be able to evenly distribute cooled air throughout the entire volume of the room. In addition, window curtains, curtains, blinds, etc. often interfere with this.
— As a rule, such air conditioners have a fairly high noise level.
- Mobile monoblock air conditioners – mobile (usually equipped with wheels for ease of movement) devices that are installed as needed in a particular room. Externally. As a rule, they resemble a bedside table with a system of blind guides on the body and control devices.

Both the condenser and the evaporator are located in one housing. There must be a flexible hose to remove warm air from the condenser outside, outside the room.

Advantages of this type of air conditioners:
— The need for complex installation is completely eliminated - no connections, sealing, refills, electrical connections and so on . Everything is based on the “plug in and use” principle; you just need to bring the flexible sleeve out through a window or hole in the wall or window block. (There are, however, more complex models that even have an external unit. But this type, perhaps, can even be classified as a split system, since the installation of such air conditioners takes more than one hour, and they can only be called mobile with a very big stretch ").
— It is possible to move the air conditioner from room to room, take it with you to the dacha, and it is not at all difficult to put it away for storage in the winter when it is no longer needed.
Disadvantages of the “mobile” scheme:
— Mobility is quite conditional, since it is limited by the length of the corrugated hose for removing heated air. Usually this is no more than 1.5 ÷ 2 m from the window.
— Water condensate resulting from air cooling is not discharged outside, but accumulates in the air conditioner pan. Thus, regular maintenance is required - draining the accumulated water, otherwise the device simply stops.
— Such air conditioners are quite noisy.
— The cost of such a device is very high, comparable to the price of a high-quality split system with disproportionately lower performance indicators.
- Whatever one may say, such an air conditioner clutters the room, especially if it is a small area.
Split systems
Of all modern air conditioners, they are now the most common. Their main feature is that the condensation and evaporation units are made in different housings and are spaced apart - installed outside and inside the room. At the same time, all the noisiest components of the air conditioner (in particular, the compressor unit) are placed outside, that is, the overall noise level of such an air conditioner is minimal.
What is the approximate layout of air conditioners based on the split system principle? Of course, different manufacturers and different models may have their own characteristics, But general scheme approximately the same.
First, the outdoor unit.

The fan (item 1) on the axis of the electric motor is used to create, as necessary, an air flow to remove heat from the radiator-condenser (item 2)
Pumping the refrigerant and maintaining the required pressure in its circulation circuit is ensured by the compressor (item 3). This unit may be piston (cheaper and noisier) or spiral (more expensive, but more reliable, especially in conditions of low air temperatures).
Electronics unit (item 4) - by the way, can be located not in the external, but in the internal unit, where it will be less susceptible to influence external environment. Ensures the correct operation of all electrical and electronic systems and mechanisms.
A mandatory element is a thermostatic valve (item 5). This figure shows an option using a four-way valve, typical for “winter-summer” models that work both for air cooling and heating.
As a rule, on the right end part of the external block at the bottom (item 6) there are fitting connections, through which the connection is made with the internal block. For greater safety, this unit is usually covered with a protective casing (item 8). Usually on the same side, only on top, there is a terminal part for electrical switching of both units.
Before the line enters the compressor, a special freon filter is usually installed, which should prevent small particles, for example, copper chips or other inclusions, from entering the system along with the refrigerant.
Now - the structure and layout of the indoor unit. However, if there is usually monotony with the external unit, then several options are possible, depending on the specific type of split system.

The most common are wall-mounted units of split systems
- Thus, air conditioners can be wall-mounted - the most common in residential conditions. The indoor unit is placed on the wall in a location convenient for the user.

- If you need to organize air cooling and ventilation in several rooms, you often resort to installing a ducted split system, which is usually located above a suspended ceiling.

- The cassette-type split system unit is placed in the same plane with the ceiling and ensures uniform distribution of air in all directions. Such air conditioners fit very well into the interior of rooms with suspended ceilings of a modular design.


One external unit and several internal ones - multi-split system
- Finally, one external unit can be equipped with several internal ones of one type or another. This kit is called multi-split system.
However, as already mentioned, in the conditions of private houses and apartments, currently the most common are wall-mounted split systems. The schematic diagram of just such a block will be discussed below:

- The outer plastic casing (item 1) of the unit is essentially a grille with holes for air intake. This panel can be easily removed for maintenance work.
- Below it there is a coarse air purification filter (item 2) - a polymer fine mesh for trapping dust suspended in the air, pet hair, etc. This filter must be cleaned regularly - usually at least once a month.
- Many air conditioners also install fine filters and (or) air deodorization (item 3). They can be of various types - carbon, electrostatic and others.
- The movement of air flows in the room is ensured by a fan built into the unit (item 4), which, as a rule, has the ability to adjust the rotation speed in multiple stages.
By the way, the comfort of the microclimate in the room largely depends on the intensity of the air flow. Thus, by increasing the speed of air movement, you can save on much higher energy costs for cooling it (the effect of a conventional fan):
| Air speed flow m/s | She is also km/hour | Perceptible cooling effect (minus degrees C) |
|---|---|---|
| 0,1 | 0,36 | 0 |
| 0.25 | 0.9 | 0,5 |
| 1.5 | 5.4 | 4 |
| 3 | 10.5 | 6 |
| 5 | 18,0 | 7 |
| 8 | 28,8 | 8 |
| 10 | 36,0 | 9 |
- The process of evaporation and sudden cooling takes place in the evaporative radiator of the unit (item 5) - a system of thin tubes with refrigerant circulating through them.
- The direction of the air flow is determined by the blind systems. Horizontal (position 6) regulate the movement of cooled air in the vertical plane. They can stand still or change their position in accordance with the selected work program. Vertical blinds (item 8) direct the flow in a horizontal direction. In inexpensive models, they are most often adjusted manually, and some premium air conditioners have the ability to control them remotely.
- Indication and control panel (item 7) - usually includes a remote control signal receiver window, several LEDs and an indicator panel. Serves to display the operating modes of the air conditioner, signals possible malfunctions or system failures. Sometimes the panel may have several buttons for manual control of the system.
Several other important elements are not visible on the diagram, but require mandatory mention:
- In the lower part at the back, under the decorative casing, there are two copper pipelines with connection fittings for connection to the external unit.
- The process of intensive cooling of indoor air is always accompanied by abundant formation of condensation on the radiator tubes. The condensed moisture flows into a special tray, from where it is removed outside through a laid drainage pipe.
- Hidden under the decorative casing is an electronics board and a patch panel for connecting the electrical part of the split system. A network cable is connected here to connect the supply voltage and wires connecting the outdoor unit to the indoor unit.
Once the reader has gained an idea of the design and operating principles of household air conditioners, it will be easier for him to understand the rules for their installation.
Find out, and also get acquainted with several simple models, from our new article.
Prices for the range of air conditioners
Air conditioners
How to install an air conditioner yourself
In order not to create unnecessary illusions among readers, it is necessary to say right away that installing any air conditioner (with the exception, perhaps, of a mobile one) is a task high level complexity and increased danger. This is due to the fact that the process involves the installation of very heavy blocks, and work is often carried out on high altitude, which requires special care and qualifications of the installer.
In addition, we must not forget that air conditioners are complex equipment, the installation of which should only be carried out by specialists. Thus, carrying out independent installation, with a probability close to 100%, will deprive the owner of any warranty obligations manufacturer as per part service, and for replacement or repair work when a manufacturing defect is detected.
If the installation of a monoblock is not associated with laying pipelines, drying, filling and sealing the circuit, then when installing a split system, all this technologically complex specific process will fall on the installer. And this requires special tools, which, as a rule, are not in the usual “arsenal” of a home craftsman, and high skills in performing such operations.
Therefore, before taking on self-installation air conditioner, it is necessary to repeatedly and very deeply think through the complexity of the upcoming operations, soberly assess your capabilities, so that it does not turn out that saving on calling a team of installers can result in global losses in the form of completely damaged equipment.
However, the article will discuss the basic technological techniques for installing air conditioners - window monoblocks and wall-mounted split systems.
Installation of window monoblock air conditioner
The main difficulty when installing a “window” is to choose the right place for it, cut and design the opening, and securely fasten the block in it. There are no other difficulties - with connecting pipes and charging the system - the air conditioner, as a rule, goes on sale in a form completely ready for use.

The picture shows basic principles placement of a window monoblock. The height should not be less than 750 mm. The distance from the rear radiator of the outer part to any obstacle is at least 500 mm. The air conditioner can be built into a window or into an opening made in the wall. But in this case, the thickness of the wall should not exceed 250 mm, otherwise the side shutters of the air intake involved in cooling the condenser radiator will be closed.
- The block must be installed with a slight outward slope, about 1 degree. This is necessary so that the resulting condensate flows freely through the drainage pipe to the street without accumulating in large quantities in the pan.
- The air conditioner on the outside must be covered with a visor to protect it from precipitation and direct sunlight, especially if the windows face south or southwest. At the same time, this protection should in no case interfere with the free circulation of air from all sides of the unit.
- If the air conditioner will be installed in a window, then it is necessary to choose the optimal location for it - so that the gaps between the racks and crossbars of the frame and the unit body are minimal. In this case, it is necessary to take into account that on each side of the block there must be at least 100 mm for free passage of air for servicing the device.
- Next, they move on to designing the opening for the air conditioner. Here you will have to show carpentry skills - you need to remove the glass, install a new lintel, cut the glass to a new size and install it in place.

- To ensure that the massive block stands stable and does not vibrate, it is best to install it on a specially prepared mounting frame made of steel or aluminum angle. The design of such a frame bracket can be different, it depends on the specific installation conditions - you just need to “spread your brains” a little. The main thing is that it has reliable support on stable contraction elements (walls, ceiling, floor, upper edge of the window opening, etc.), ensuring a stable position of the air conditioner, without longitudinal or transverse play.
- Home appliance stores often sell similar installation kits. They can be made independently according to the dimensions of the monoblock, making a welded structure or a collapsible one with bolts.

- The operation of the air conditioner is always accompanied by quite sensitive vibration, so before installation it is necessary to provide damper pads (rubber or rubber-plastic).

- It is imperative to close and seal the gaps between the air conditioner housing and the frame elements (or wall). Polyurethane foam It cannot be used here - you will have to seal the holes with other elastic materials, for example, foam blocks (tape). Narrow cracks can be filled with silicone sealant. Then the openings, as a rule, are closed with additional pieces of polystyrene foam cut to size, and with decorative panels on top.

- After installing the air conditioner in place, be sure to install a discharge pipe on the drainage hole. Most often, a corrugated plastic pipe with a diameter of 16 mm is used, although some craftsmen prefer to make a more “major” drain from a metal-plastic pipe. In any case, the drainage drain should not have kinks (loops) with the formation of air pockets that impede the outflow of moisture, and should not touch the ground or the surface of the liquid in the storage tank.
- The last step is to connect the air conditioner to the mains. It is imperative to follow the recommendations for installing a separate power line with your own machine, for maintaining the required cross-section of wires, depending on, for connecting the air conditioner housing to the grounding circuit (via a special three-pin plug and socket).
- Once the installation work has been verified, a test run can be performed. In this case, it is necessary to once again check the quality of the fastening, tighten all fastening elements as much as possible in order to prevent increased vibration of the device - it itself is quite noisy, and poor installation will increase this noise many times over.
Video: installation of a window air conditioner - monoblock
Sequence of installation of a split system
Before moving on to consider this issue, it would be useful to make a number of important comments:
So that there are no complaints against the portal administration, it can be repeated that, in her opinion, it is impossible to carry out independent installation of a split system without experience similar works, do not do it. The reasons have already been discussed above.
Each air conditioner model has its own installation nuances, which are detailed in the attached technical documentation. Consequently, the sequence of work and some features may not coincide.
Many operations for installing split systems must be carried out on the street, outside surfaces of the building walls. If this — second floor and above, then such actions already relate to high-altitude work, requiring special training and special equipment or equipment (lifting equipment, climbing equipment, etc.)

Stunts like this don't end well.
Neglecting safety rules carries a mortal danger both for the masters themselves and for the people who may find themselves below. It is strictly prohibited to carry out such work yourself!
So, everything stated below should be taken only as a review article on the method of installing a split system, for example, to monitor the work of a called team of craftsmen. The text is not considered as instructions for independent implementation!
Video: tool for work and typical installation errors
Prices for popular hammer drill models
Hammers
Installation work split air conditioner are held in next sequence:
- The initial marking of the installation site for the indoor and outdoor units is carried out. The main task is to decide on the specific places for their installation, so that they comply with the basic rules for their placement (see diagram):

- Immediately, it is necessary to take into account the length of the route being laid. So, it is possible to place blocks “back to back”, but the length of the route, for technological reasons, should not be less than 1500 mm. It is optimal to calculate so that the laid pipelines do not exceed 6 meters, otherwise additional recharging of the system with refrigerant may be required. You can immediately evaluate how to “decorate” the route indoors - put it in a groove and then seal it, or hide it with a decorative plastic box.
Marking the installation site and determining the length of the route will allow you to determine the purchase of the required amount of materials - copper tubes, drainage corrugation, cable, insulating flexible tape and tape.
- The location is marked and the indoor unit is suspended. It is installed on a special mounting panel, which is rigidly attached to the wall in advance.

When marking holes for fastening the panel, it must be aligned horizontally using a building level. This is not a “tribute to beauty”, but a prerequisite for the unhindered flow of condensate into the drainage pipe, without it leaking beyond the pan.
After the mounting panel is secured, you can “practice” attaching a block to it - this will be needed later, when finally installing blocks with already connected communications.
- Now, along the planned path of the future route, it is necessary to drill a hole in the outer wall of the house. This is not the easiest task, especially if the knowledge is reinforced concrete, with thick walls. You don’t have to try to do this with a household hammer drill - you will need a powerful professional tool and a drill with a diameter of at least 45 ÷ 50 mm. In order not to run into reinforcement in the thickness of the wall, it is recommended to first select the optimal location using a special metal detector.
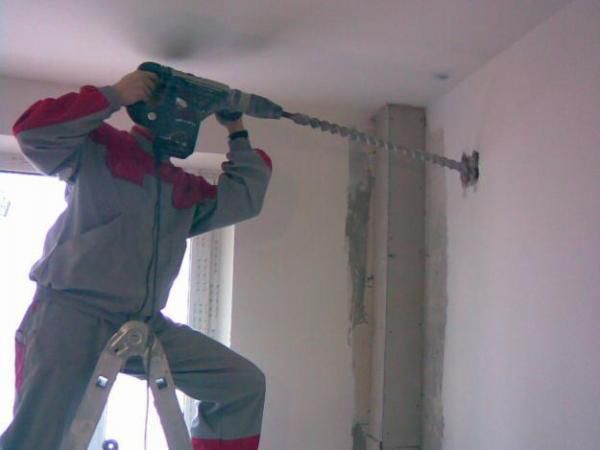
When drilling a hole, you should make a slight slope outward so that this facilitates the free flow of condensate from the indoor unit.
If you plan to hide the route in the wall, you can immediately cut out a corresponding groove up to 60 mm deep from the hole to the installation site of the indoor unit.

- It makes sense to move on to the most difficult part of the installation - installing the external unit. To do this, special brackets are attached to the building wall (sometimes to the floor of a balcony or a flat roof surface) in the designated place - they can come complete with the air conditioner, or they can be made on their own from a metal corner.

- Then, in compliance with all possible safety measures, the external unit is installed on the “platform” formed by the brackets and secured to them with special bolts.
- And now - the most important stage: laying a freon route from block to block. It is carried out in parallel with the installation of the drainage pipe and the pulling of the connection cable.
- All sealed connections on both blocks are made using plug-in connectors with copper nuts and tubes flared into them. For installation you will need special tools - a pipe cutter,

and flaring, consisting of a special vice for different diameters of copper tubes, and a cone with an eccentric head.

How to carry out flaring - it is more convenient not to describe this moment in words, but to present it on a video:
Video: flaring copper tubes
A common mistake made by beginners is that they forget to put a flex insulating tube and nut on the pipe before flaring.
When laying the route, a small margin is taken into account - about 500 mm, which will then be easy to trim during final installation.

One of the options for mounting the indoor unit is after connecting the cable and pipes
Depending on the relative position of the blocks, the pipelines can be immediately connected to the indoor unit and then carefully taken outside, or you can first lay a route and then switch it on the blocks.
- One end of both pipelines is connected to the internal block of the split system (it is impossible to make a mistake there, since the two tubes and, accordingly, the fittings and nuts have different diameters). A drainage corrugated hose and connecting cable are immediately installed. All this, after joining, is packed in one package, tightly wrapped with metallized or durable vinyl tape.
- After switching, the indoor unit is hung in its regular place - on a pre-mounted panel. Further work is carried out outside the premises.

- Outside, in compliance with all safety measures, both pipelines are flared and connected to the corresponding fittings (items 1 and 2). The fitting with a spool (item 5) is used to fill the system with freon and to pre-evacuate it. Under the protective covers (positions 3 and 4) there are valves that temporarily block the circuit of the external unit.
- Flaring and connecting pipes is carried out in exactly the same way as on the indoor unit. To avoid over-tightening the connections, it is best to use a torque wrench.
- After connecting the pipelines, you should immediately connect electrical part. The wires of the extended cable are connected in accordance with the markings of the terminal connectors on the indoor and outdoor units.
- The drainage tube is attached to the wall or moved to the side in a position convenient for use.
- Now - an important technological stage - vacuuming the system and its residues into the logs. It is carried out in two ways. The first is using a special vacuum pump, pumping the system through the spool for 10 — 20 minutes. Then the valves on both fittings open (positions 3 and 4) and the system is completely charged with freon - a small amount of gas may be lost. This method is considered the most reliable and professional.
Video: professional recommendations for installing air conditioning
In practice, many craftsmen use the “bleeding” method - by opening the valve (item 4) they fill the system with freon for literally 1 second, and then by pressing the spool (item 5) the refrigerant is released almost completely. This manipulation is repeated 2 - 3 times (with a route length of up to 6 meters), but you cannot be too zealous, since then refueling with freon may be required.
After this, the valves open, the system is completely charged with refrigerant, and it is necessary to check the tightness of the connections. This can be done by lubricating the connecting nodes with thick soap foam - bubbles will immediately indicate the presence of a leak. This means that it will be necessary to tighten the connections so that the volatile refrigerant does not escape from the system.
- The switching points of the pipeline and cable are covered with standard casings - and the installation can be considered complete (if you do not take into account finishing activities inside the room).
- Now you can connect the split system to the power line dedicated to it and perform the first start-up of the air conditioner.
So, a short summary of the publication. Installing an air conditioner with your own hands is an extremely responsible and quite complicated undertaking. Even compliance with all the rules and increased accuracy do not guarantee success the first time - a lack of experience can simply have an effect. Therefore, our sincere recommendation to all beginners is to spare no expense and still call a team of professional installers.
Video: short installation course from the air conditioner manufacturer
 (1 ratings, on average: 5,00 out of 5)

