Door repair, door frame replacement. Do-it-yourself interior door repair (photos and videos). Strengthening a loose door frame, repair sequence
If your doors do not please you with their appearance: the door is cracked, sagging and dry, and the lock has become very jammed. Have you started thinking about replacing it more often? Do not hurry! Try to fix everything yourself. Most of all these problems can be “cured” on your own, saving a lot of money.
- Review typical faults;
- How to strengthen a door frame if it is loose;
- Sags and scratches flooring, what to do;
- How to correct geometry correctly;
- Large gaps, what to do;
- How you can strengthen the panels yourself;
- What to do with cracks;
- How to replace a broken lock with your own hands;
- The handle is broken, how to replace it with a new one;
- How to replace broken glass yourself;
- Do-it-yourself repair of sliding structures.
Overview of typical faults of interior doors
Often, when the door looks respectable, we forget to “take care” of it. And yet, no matter how expensive and high-quality it is, time takes its toll and it requires cleaning, lubrication or adjustment, in short - preventive measures. When they are not done on time, the door begins to create a lot of problems for household members:
- sag, scratching the floor covering;
- a nasty creak appears;
- are spilling the beans door hinges;
- fit tightly into the door frame;
- just dry out and so on.
One of the main reasons for all defects is considered to be improper operation or quality.
Strengthening a loose door frame, repair sequence
The step-by-step instructions for repairing the fastening are as follows:
The flooring has sagged and scratched, what to do, how to repair it
A simple solution is to re-hang the hinges or replace them:

Adjustment using a washer placed on the loop.
How to correctly adjust the geometry of an interior door
Sometimes it happens that not a single repair tip helps eliminate the problem of sagging doors. Most often this happens due to the fact that it dries out or, on the contrary, swells. The solution is to adjust the edges around the perimeter.
What needs to be done, what repairs are required.

Important! Before planing the door, make sure once again that the problem is not the deformation of the frame.
Large gaps, how to repair interior wooden doors
When door products are made from wet wood, the door will definitely dry out during use, which creates a lot of inconvenience and problems during use: the tongue cannot reach the latch, there are large hinges between the frame and the door, as a result, the door sags a lot.
What to do in this situation?

How to independently strengthen panels on interior wooden doors
When interior doors dry out, problems can arise not only in the form of gaps that appear, but also in the panels. They lose their tightness. What should be done in such cases?

The only correct solution for repairs will be plywood.
- You need to remove it from its hinges;
- Disassemble completely;
- Thoroughly remove old glue and dirt;
- Reassemble the bars and connect (glue);
- The panels are put in place, then the door is secured in the clamping device.

What to do with cracks on interior wooden doors
The repair process is labor-intensive and painstaking, however, the result is worth it. The restoration algorithm is as follows:

For clarity, watch the video:
Advice! You can, as an alternative to the entire restoration process, use special decorative overlays. Moreover, after this, it will be difficult to distinguish it from the new one.
How to replace a broken door lock with your own hands if it cannot be repaired
This device bears the main load, so they very often fail. Signs that it’s time to repair or replace it: it closes very poorly, the handles turn. This indicates that the locking device cylinder is unusable and it is time to change it.

- The first thing that needs to be done is to remove the cylinder; to do this, screws are unscrewed on the end plate, after which it can be removed quite simply;
- decorative strips are dismantled along with handles;
- Carefully unscrew the remaining fasteners and remove the device body;
- after which a new locking device of suitable size (so as not to drill new holes) or a similar model is purchased and installed in the lock opening.
The repair process is shown in more detail in the video:
The handle on a wooden door is broken, how to replace it with a new one
In order to change the handle on the door panel, you need to carefully familiarize yourself with its design

follow further instructions:
- Unscrew the fasteners on both sides with a screwdriver;
- pull the handle out of the canvas;
- with help wrench unscrew it by hand swivel mechanism and remove it.

If the handle is equipped with mechanical locks (latches), then proceed as follows:
- the process of unscrewing fasteners is similar to the above;
- then carefully examine what is holding it in place. Typically, such models are equipped with mechanisms for moving a tongue and a rod, inside of which there is another rod. When removed, the handle comes out easily.
How to replace broken glass in interior doors yourself
Designs with glass inserts in apartments undoubtedly look beautiful and stylish, but unlike wood, glass tends to break. If such a nuisance happens, then you shouldn’t call a repairman, much less change the design of the interior wooden doors. We begin the repair ourselves.

Removing remaining glass:
- To do this, you need to loosen the glazing beads (wooden strips that hold the glass);
- carefully remove all remains and fragments;
- In some modern models there is a rubber gasket. It needs to be pulled out and carefully examined. If it is damaged, replace it too.
Preparatory work before repair:
- If broken glass has the correct rectangular shape, it is quite simple to repair - the dimensions are taken and a new one is ordered in the workshop. If the door has figured glass, then you can use a pencil and cardboard to sketch out the shape;
- if the broken insert was painted over or all kinds of putty or putty were used, they must be carefully removed;
- before inserting a new one, it is best to remove the door so that the glass does not break if it accidentally falls, and it is very difficult to work in weight;
- before laying on the bed, apply a layer of silicone;
- a rubber gasket is inserted and only then is it laid and secured with a bead.
Do-it-yourself repair of sliding structures
This type of interior paintings in residential apartments not uncommon, especially nowadays. If earlier they were used for attractiveness and beauty, now it is caused by saving space. Such designs are equipped sliding mechanism, which tends to fail over time.
Main faults:
- difficult to open or vice versa;
- the upper rollers may jump out of the guides;
- loosening of the upper fastening bar.
Repair sequence:
In the first case (heaviness when closing), the repair consists of cleaning off accumulated dirt. In the second case, if you are sure that the rollers need to be replaced, then you just need to repair them:
- remove it from the guides;
- remove old and worn ones, insert new ones;
- the door panel is installed in its original place.
How to do this is described step by step in the instructions or watch the video lesson:
We really hope that the tips and instructions provided will help you repair interior doors yourself and postpone the purchase of new ones indefinitely.
As you know, interior doors can lose their attractive appearance during operation. However, you should not immediately go to the store to purchase, because all sorts of deformations can be easily eliminated with your own hands. It is worth understanding that interior doors are durable and high-quality structures, so defects that appear on their surface cannot affect the parameters.
Defects such as loosening, swelling of the interior door, and the appearance of cracks can be eliminated yourself without resorting to purchasing a new door.
For example, the main problem that plagues people is the gaps that arise between the walls and the base. Because of such unsightly gaps, the door leaf begins to sag. As a result, the door may not close properly. But it is worth considering that repairs interior doors Even a novice master can do it with his own hands. By repairing defects yourself, you can save a lot of time and money.
Materials for structural repairs
You will need:
- glue;
- press;
- sawdust;
- polyurethane foam;
- metal corners;
- slats;
- dye;
- dowels

If the hinges are loose and the door begins to sag, you need to secure them with a screwdriver.
How is door restoration done with your own hands? First, make 3 holes in the walls of the box, evenly spaced along the length of the surfaces. Please note that these holes must fit the dowels.
Use dowels to secure the box. Fill the remaining defects with polyurethane foam.
As a rule, sagging doors cause inconvenience. But to fix problems you can do the following:
- The fastening of the hinges is checked (quite often doors sag due to loose hinges).
- The next stage is tightening the loops.
- Quite often, sagging is caused by a violation of the geometry of the canvas. In this case, you will need to return it to its previous shape: take a plane and process the binding with it.
- The same method is used to treat a swollen door. Sometimes it happens that the door cannot be closed due to swelling of the canvas. Typically this happens through high humidity atmosphere in the house. That is why excess moisture should not enter the premises.
- In addition, when closing the door may form gaps with the frame. To eliminate such an opening, put a strip on the box. After fixing the slats, it needs to be processed with a plane and adjusted to the doors. Then painting is done.
What to do if the door is dry?
As a rule, all people try to install wooden doors in their houses.

If the door frame is skewed, it is necessary to the right side place a wedge.
But it is worth understanding that this material is greatly affected by environment. It quite often cracks, swells, and dries out. For example, if a door has dried out, metal corners are best suited to restore it. Repairing a dry structure is not difficult.
To restore the doors better, try dismantling them. Remove them from their hinges and disassemble them. All structural elements will need to be coated with special glue. Next, the canvas can be put in order, cracks and places where there are drying out can be masked. Clamp the glued door in clamps and wait until it dries. After this, hang the canvas on the loops in the box.
To repair cracks and peeling areas, you need to use glue mixture and press. Some heavy object can serve as a press. You will need it to press the canvas on top. And with the help of glue, various deformations and voids in the structure are perfectly filled.
If there are deep enough cracks in the structure, then in this case you need to use sawdust and varnish. Sawdust is a material for masking such defects.
An interior door can last a very long time without restoration. For this you only need proper care for her. Any peeling can be easily prevented. You should know that such deformations in wood grow rapidly over time. Therefore, the sooner you find and repair small cracks, the more likely it is that they will not damage the structure.
Installing a new door

Scheme of installing a door frame in an opening.
Of course, if the doors are old, then it is more profitable to purchase new ones than to restore them.
First remove the fabric from the loops. Elimination of the old door block carried out using a mount.
It is necessary to install the hinges so that the distance from below and above is about 20 cm. Installation of the lock can be done with drills and chisels. Try to place the lock at a distance of 1 m from the floor.
Remember that the box must be installed level. After completing the work, be sure to seal the openings between the wall and the frame. Fastening the platbands is possible only after the foam has completely dried.
To install the door, use chisels, drills, dowels and screws, a water level, foam, wedges, and a pry bar.
In addition, buy accessories as well. Please note that a cheap door is usually not very strong.
Improper use of doors can cause one day the doors to become deformed, sag, or become unstuck. How can you repair interior wooden doors yourself? In this article we will look in detail at how you can restore or, as they say, revive your old doors.
IN wooden structure Cracks and gouges appear, the cladding peels off. A door frame that is not properly secured begins to wobble and sway when the doors are opened or closed. At the junction of the box and the wall, cracks are often created that are not easy to cover up and the mortar often falls off.
First, using a drill, drill three or four holes along the entire length of the door frame bars, and at least fifty millimeters in the wall, from the handles and hinges. Iron pins are driven into these holes, five to ten millimeters in length shorter than the length of the hole itself screwed into the door frame.
Often a hard wooden dowel is driven into the drilled hole. The box is placed back and secured with nails. Newly made platbands are strengthened around the perimeter of the door, leaving approximately ten to fifteen millimeters from the edges of the frame.
 If your door is severely lopsided and “forces” the holes in the lock on the top side and scratches the floor, then to eliminate this situation, you will first need to thoroughly examine the strength of the hinge reinforcement in the upper part of the door. It is clear that if necessary, tighten the screws more tightly.
However, in the case when the screws are screwed in very tightly, you need to deepen the groove, which is located at the bottom of the hinge plate, in the strapping block. In order to check whether the loop is seated correctly in the socket, fix one of the screws. Once you are sure that everything is in order, screw in the remaining screws.
The cause of the second breakdown may be the curvature of the rectangular door leaf. In order to eliminate such a flaw, you need to trim off a layer of one and a half to three millimeters thick from the wood from the strapping bars (on the side of the lock or hinges).
If the door is jammed in the door rebates, is poorly closed or opened, perhaps the dimensions of the door leaf do not correspond to the dimensions of the frame itself, or the door is swollen from increased humidity, or there is a very large layer of paint on the edges of the door and the rebate of the frame, or the hinges in the sockets are not tightly secured.
First, we examine whether the hinges are correctly fixed, and then we check the gaps around the perimeter of the door frame. If there is no gap, then open the door frame or the folds from the frame (in order to create approximately a two to three millimeter gap).
The doors scrape across the floor and sit down
What needs to be done with interior wooden doors in this case, you ask? But in fact, everything is quite simple. First, we check whether the screws (self-tapping screws) are correctly fixed. If it scrolls completely, then we replace it with a longer one, or seal the hole, place it higher/lower behind the loop itself (also, if the loop allows, you can fix it with your own hands with a thicker screw).
When the fixation of the screws is definitely strong, and the door continues to shrink (albeit almost imperceptibly), then we place one or two washers or a steel ring made of wire on the hinge rod. This technique allows you to lift the door by the thickness of the nozzle.
The door does not close tightly and there are gaps on the sides
 We clean up a large gap between the strapping block and the folds of the door frame using the following steps: we nail a thin strip to the edge of the door with our own hands. We eliminate the gaps at the bottom and on top of the door as follows: place the door hinges so that, preferably, there is one of the gaps at the bottom, and fill the gap at the top using a plank.
The gap on the side is removed from the hinge side. The plank is planed flush with the door leaf, and the cracks (between the trim and the plank) are puttied and cleaned using sandpaper.
The doors swing on their hinges and the screws don't hold.
If the size of the screws is incorrectly selected, then they cannot hold the hinge with the door leaf lowered on them. They will also wobble if the door frame is made of still damp material. And after the wood dries, the holes for the screws become spacious, or the holes are drilled with a large drill.
It would be better to replace these screws with others - longer and with larger threads. However, the size of the diameter of the cap should be such that the hole in the loop does not increase. You can also seal the old hole using a dowel. But a screw screwed into a dowel along the fiber holds worse than a screw screwed across the fiber.
 Then you need to move the loop to a different place, provided that the wood in the box is strong. If the wood is dilapidated, then we use a solid wooden insert, which is made into a thick block of box with glue and secured with screws. Next, the door hinge is attached to the insert. In some cases, the door frame is made of thin bars.
IN similar cases an insert, with a minimum thickness of twenty-five millimeters, is located between the main wall and the door frame against the hinge in a selected gap, so that the elongated screw fits much deeper into the insert that we have placed. Screws can also be wrapped in solid wood dowels.
The doors are drying out, the panel is weakly held
The doors can be fixed using steel angles on both sides. We fasten the sections from the squares to the strapping bars using screws.
Otherwise, we remove the doors from their hinges, clean them of dirt, etc. Then we again smear the tenons with glue, tie the strapping blocks together, install the panels in place, attach the doors to the clamping device, insert the dowels, and apply glue.
The panels are bursting and drying out, the frame bars and door frames are damaged.
To repair the strapping block and box, you need to change the wood section. For insertion, dry wood of any suitable length is used. We attach the insert into a pre-cut (initially dry) nest. Then glue it (additional fasteners made of wooden dowels) or use screws.
 A minor crack that appears one day in a trim bar or door frame must be covered up using oil putty or a mixture of sawdust and resin (epoxy). Large deep cracks (voids, cracks) are removed using wooden inserts and placed on glue. Any cracks (cracks) on the panels are treated with putty and inserts are laid.
Panels, as a rule, are fixed with layouts, which, if necessary, are removed and cracks are cleaned. When the panels are mounted into the grooves of the trim bars, it is clear that the doors will not be removed from their hinges and will not be disassembled. The panel, like the inserts, is placed in the groove of the trim, but “dry”, with a small gap. Repaired areas are cleaned using paper (sanded, emery paper).
When choosing interior or armored doors, the consumer is sometimes bombarded with many special definitions related to locks, doors and door production. Many of the terms are well-known, others are less well known and in most cases mean nothing to most people. Proposed dictionary door terms will help make the choice of doors easier, presenting essentially a significant part of the materials on our site in a compressed form.
If you need a more detailed interpretation of the term, you can find it in the corresponding section of our website.
All dictionary terms are arranged in alphabetical order according to the “adjective + noun” principle (example: armored door, not armored door). To make your work easier, use page search (Ctrl+F).
Door dictionary
Bumping is a method of opening cylinder locks with vertical pins (see “Pins”), based on tapping on a special key inserted into the cylinder.
Armor plate - see
"Safety accessories".
Armored door is the general name for metal doors, sometimes even of poor quality.
Backset - see "Dornmass".
The burglary resistance of doors is a set of design solutions that determine the time that doors can withstand various levels of burglary. Expressed in classes (see “Door classes”).
Entrance doors. In most cases, this definition refers to input metal doors, but some manufacturers emphasize that such doors are not intended for use under the influence of precipitation.
(see also “Cottage Doors”).
Drilling is a method of breaking locks that involves drilling into the door in the right place. For lever locks, such places are special points characteristic of each model; for cylinder locks, these are the cylinder itself. Protection against drilling is provided by armor plates.
Bent profile - see "Profile"
A door frame is a frame structure inserted into a doorway. Usually made from a profile (see “Profile”), it is part of the door block.
Door block - common name door design, In most cases, it consists of a door leaf and frame, but may contain transoms and other elements.
Door jamb - door frame.
The door leaf is the opening, movable part of the door block, placed in the door frame and attached to it by means of hinges.
A doorway is an opening in the wall into which a door block is mounted and secured.
Door hardware is the general name for mechanisms and objects hung and mounted in the door leaf (locks, eyes, handles, decorative trims, etc.)
Double-leaf doors are a door made of two leaves (leaves), one of which is active (with a lock), the second without a lock (passive).
See also “One-and-a-half doors”
Extension, additional strip is used in cases where the thickness of the wall exceeds the depth of the door frame. It is a decorative strip placed on several sides of the door in order to hide the difference between the width of the wall and the depth of the frame.
Doviator, deviator - see “Crab system”.
Dornmass (backset), backmass - the distance from the center of the cylinder or key channel to the front plate or end of the lock.
In ordinary speech, it is sometimes distortedly called dormas. Backset is synonymous with backmass. See material with illustrations of backmass.
Eurobeam - see "Solid".
Security fittings are elements made of hardened steel or its alloys that protect the locking mechanisms of metal doors from penetration through mechanical influences.
Also called armor plates (not to be confused with decorative fittings and plates), which come in internal and external types.
An impost is a strip or rail that separates door segments from each other (for example, the opening parts of doors from transoms).
Intelligent hacking methods - methods for breaking doors without using brute force physical strength and destruction of locks: bumping, picking up keys, opening with master keys, etc.
Door class.
Standardized criteria that allow doors to be classified according to certain characteristics. Most often, this refers to the burglary resistance class of metal doors (for a description of burglary resistance classes, see
in the “Steel doors” section).
Knobset is a widely used American design of handles for interior doors. Synonyms are the terms “knob handle” and “nob” (abbreviations for Knobset or Knob - round). The knobset looks like a ready-to-install kit consisting of a latch and two handles round shape, although there are also options with push handles (see the material “What is a knobset”).
Cottage doors are a variant of metal doors aimed at outdoor use and resistance to precipitation.
Crab, crab system - multi-way door locking system based on use additional devices(doviators) with crossbars, driven by the main lock using rods.
Laminate - artificial turf in the form of a film that imitates the texture of wood and is highly resistant to mechanical stress.
Used to cover fiberboard (fibreboard) in manufacturing decorative cladding steel doors, giving it moisture resistance and resistance to damage.
Left-handed (left-handed) doors open towards you with your LEFT hand. The hinges in such doors are located on the left side of the door frame.
Solid wood – quality boards natural wood, from which interior doors are made.
It can be solid (the most expensive) or glued, also called eurobeam.
MDF – fibreboard medium density, used for lining metal doors. Also made from MDF various elements interior doors.
Lever handle - (see "False handle")
Knob - see "Knobset".
Door trim - decorative finishing of metal doors with MDF boards, wood, etc.
Can also mean the metal of the door leaf (example: the door is sheathed with two-millimeter metal).
Fire-resistant (fire-resistant) doors are designed to withstand fire for periods of time specified by standards, depending on the fire resistance class of the doors.
Squeezing the door leaf is a method of breaking open doors using a crowbar or crowbar (see “Crowbar”) inserted between the leaf and the frame, and then squeezing (bending) the door leaf away from the frame.
Patented cylinder - a cylinder (see "Cylinder") with an increased degree of burglary resistance, using modern technologies, protected by patents.
The most common are patented cylinders from Abloy, Mul-t-Lock and Mottura, installed in armored doors of the highest price categories.
Cylinder pin (pin) - small elements of the cylinder (see.
“Cylinder”) in the form of small cylinders, on the coincidence of which with the pattern of the key the secrecy of a cylinder-type lock is built.
Narthex (quarter) - constructive solution, closing the gap between the canvas and the box. Usually used in relation to wooden doors. Detailed description You will find the porch with sketches in the “Interior doors” section.
One and a half (one and a half) doors - double doors, one leaf of which is larger than the second. The passive, second leaf has a small width and is usually in the closed state.
One-and-a-half doors are used in openings with a large width, where you need to fill the extra space with something.
Powder paint - widely used polymer coating, used to protect metal doors from the effects of the external environment.
After being applied in powder form to the metal, the product is fired, after which the paint acquires its properties and hardens.
Anti-burglary labyrinth is a special design of profiles of the door leaf and door frame, which, in the event of an attempt to break in, use the squeezing method (see.
“Spin”) form a “lock” that does not allow the doors to open.
Fire doors - see "Fire resistant doors".
An anti-removal ridge is a design solution that prevents the door from being removed after cutting off the hinges, in which the profile of the frame and door is curved in a special way - in the form of a niche and a protrusion (ridge).
A profile is a plastic, aluminum or steel element in the form of a pipe of rectangular or more complex cross-section, from which the frames of metal structures are made.
In the production of armored doors, a bent profile is most often used, manufactured by the door manufacturer itself from sheets of metal.
The bolt is a rod that extends from the lock and directly locks the door.
Rosette, rosette handle - a handle for interior doors, the return mechanism of which is located under a compact decorative casing (rosette) round or oval shape. The socket does not provide places for cylinders, turntables for latches, etc.
A handle on a bar or plate is a door handle, under which there is space for a cylinder, a latch pin or other mechanism is placed.
A feature of such a handle is a decorative casing of a rectangular, elongated shape, called a bar or plate.
Silumin is an alloy of aluminum and silicon used as elements of various mechanical devices.
It is characterized by low strength and is used in locks and door handles of lower price categories.
Honeycomb filler - cells made of pressed cardboard (usually honeycomb-shaped), used in the door leaf in doors of the lowest price range - “Canadian” doors, Chinese, etc.
Cold rolling steel is steel that has undergone high pressure treatment, after which the strength characteristics of the metal increase.
Used in the production of armored doors.
Door opening (opening) side.
How to repair interior doors yourself?
The direction of movement of the door leaf when the door is opened (see “Left-handed” and “Right-handed doors”), specified by the side where the hinges are placed on the door frame.
Level lock is the name of a lock, the secret part of which is based on the use of special plates called levelers.
A sign of such a lock is a safe-type key.
A transom is an additional, often non-opening door leaf, located in the upper or side part of the door block. Usually it contains a double-glazed window, although there are blind options.
Cylinder lock is the name of a lock whose secret part is located in a cylinder - a replaceable device, inside of which there are pins that generate a secret code.
In most cases, a cylinder lock is unlocked with an English key, which is inserted into the cylinder (see also “Cylinder and Euro-cylinder”).
Lock cylinder (cylinder, eurocylinder). A cylinder or cylinder is a replaceable lock element equipped with a set of keys, inside of which there are special elements - pins.
Coinciding with the pattern of the key, the pins allow you to rotate the moving part of the cylinder, which is necessary to open the lock.
A Eurodin type cylinder is called a Eurocylinder, which is the most common version of the cylinders - almost all types of cylinders in our stores are Eurocylinders.
Cylinders come in different designs - “key-key”, key-spinner (on one side there is a key, on the other there is a wing-spinner, etc.). See also Patent Cylinder.
Seals (sealing contour) - gaskets made of elastic material (usually rubber) located around the perimeter of the door frame or leaf.
Prevent the penetration of noise, odors and cold air.
A ball hinge is a hinge in which a hardened metal ball is installed inside to reduce friction and ensure easy and smooth movement of the door leaf. Ball hinges are installed in most armored doors.
Veneer - thin layer hardwood. When making wooden doors from soft wood, veneering gives them protection from mechanical influences.
Anti-cut pins are special pins in armored doors, in most cases placed on the door frame.
When closing, the doors fit into the door leaf, preventing the door from opening when the hinges are cut.
TsAM is an alloy of zinc, aluminum and copper, used, among other things, for the manufacture door handles. The alloy has become widespread and most of high-quality handles are cast from it.
Latch handle - the handle that operates the latch tongue (leaf latch) of the lock. In most cases, a halyard handle is associated with push-type handles - the staple-shaped handles familiar to us all, considered European.
Panel - a board or plywood installed in the frame of the door leaf. There are also armored doors made using metal panel technology.
A crowbar is a thieves' tool in the form of a small curved crowbar.

Steel profile

Deviator
crab system

Fomka -
famous thieves' tool

Patented cylinder
Abloy Protec

External armor linings
for protection against drilling

Lock cylinder (bottom
places for pins are visible)
 Anti-cut pin

Level castle
Repair of interior doors
Very interesting solution In some cases, it will be necessary to repair interior wooden doors. People often want to simply replace old doors, assuming that their restoration will be difficult and expensive. However, not many people remember that modern doors are made from artificial materials.
This is why renovated old structures made from quality materials can be a much better option.
In order to finally decide on the choice: to replace or repair doors, you need to evaluate all the nuances. It is important to understand all the advantages that a repaired old door will have.
It is worth deciding whether it is necessary to get rid of the worn-out structure?
Door leaf repair
A common problem is the inability to close the door.
The main reason for this is the swelling and drying of the box. In principle, we can say that the cause is the age of the product. As a result, we get a deformed door frame.
The solution to a problem like this can be quite simple:
- First, it’s worth finding out which of the racks suffered the most.
- To understand this, you need to compare the gaps between the box and the canvas.
- If there is a gap of more than 3 millimeters on one side, then the problem is in the opposite rack.
Canopies may be the cause of loose closure.
In this case, it is worth checking the quality of fastening of the screws.
Over time, they can become loose and slip out of the wood. To fix this problem, just screw them in deeper.
To repair a door leaf, there are 2 effective ways:
- If the door rubs against the frame and you can only close it with force, then you should choose this option.
Its essence: remove the structure and deepen the seating areas of the canopies. Then you can reassemble everything and check its functionality. If the problem has not been resolved, you will need complete renovation and restoration of doors: interior and entrance.
- The second method involves other repair methods.
You will need to free the door pillar from unnecessary elements. Then the space between the door frame and the opening is cleaned. The next step is to find the place where the door rests on the frame. Next, you need to work with a drill and a hammer drill.
In some cases, you can use the critical method. Although experts do not recommend resorting to this option, it takes place. This method involves directly reducing the size of the door by cutting the structure.
Restoration of appearance
Repair of wooden interior doors sometimes involves restoration appearance.
This process is very labor-intensive. In almost all cases, it requires complete dismantling of the door block. In some cases, it is equated to conventional restoration.
In general, you need to focus on the general condition of the door. For example, repairing interior doors: laminate, requires compliance with certain requirements.
However, for simple damage, minor local repairs may be sufficient.
Minor damage to interior doors includes: scratches and cracks. Elimination of such problems is carried out by puttying and grinding the damaged area on the surface. When repairing in this way, it is important to follow the sequence of actions.
First you need to delete the old layer.
Then you can move on to cleaning and restoring the door. Repair putty can be made by combining glue with wood dust. When eliminating minor damage, you need to ensure high-quality adhesion between the putty and the door. Artificially enlarging the damaged area will help with this.
Complete door restoration
The process of restoring a door block is very difficult.
One of the problems is the need to completely remove the old door covering. For this reason, you will need to dismantle the door and disassemble it into separate boards.
After removing the door, you can begin removing paint and varnish. There are mechanical and chemical methods. The first involves the use of attachments for a drill or grinder.
Its main advantage is the simultaneous restoration of the surface. In this way, you can return the door leaf and frame to a fresh look. Concerning chemical method, despite the lack of effort, it has one significant drawback - the possibility of negatively affecting health.
Don't know how to fix your front door yourself? See here.
Do-it-yourself door restoration: design in a new style
Find out how to repair a plastic balcony door from this article.
Repairing laminated doors: interior or entrance, involves working with a decorative layer that cannot be corrected with putty. The main solution is re-gluing. To do this, iron the damaged sheet through the paper and then press it to the base with a rag.
Read also:
— Prices for installing locks on metal doors
— Repairing door locks: how to do it yourself?
- Almetyevsk
- Volgograd
- Voronezh
- Ekaterinburg
- Zelenodolsk
- Yoshkar Ola
- Kazan
- Krasnoyarsk
- Moscow
- Naberezhnye Chelny
- Nizhnekamsk
- Nizhny Novgorod
- Novosibirsk
- Permian
- Rostov-on-Don
- Samara
- Saint Petersburg
- Ulyanovsk
- Chelyabinsk
- Yaroslavl
How to fix a sagging interior door

The most common failure of an interior door is its sagging, in other words, the curvature of the door’s position in relation to the floor and door frame.
Impaired performance
Over time, the interior door literally tilts towards the door handle.
At the same time, a slight distortion of the position of the door does not prevent its easy opening and closing, while significant sagging completely disrupts the functionality of the door.
The inevitability of sagging
Both light and massive interior doors are susceptible to sagging.
Naturally, doors made of metal are solid wood, however, like other relatively heavy materials, they sag much faster than light structures. But be that as it may, over time, any interior door changes its position.
Reasons for sagging interior doors
Initially, before starting to repair a sagging interior door, it is necessary to identify the cause of its sagging.
An interior door can change its position for four main reasons:

Loosening loop fixation
Loose hinge fixation is considered the most popular reason for interior door distortion.
It is quite simple to detect such a violation; to do this, you need to open the door and carefully inspect the fixation of the hinges to the door frame. If the cause of the door sagging is weakened hinges, there are several ways to eliminate the problem. In some cases, it is enough to simply tighten the screws of the hinges; this action will be cost-effective in eliminating the sagging of a light interior door.
Fixing very loose hinges
To fix very loose hinges, the screws securing them should be replaced with longer products.
If the holes for the screws are badly broken, then initially they should be filled with material. To do this, you need to remove the door from its hinges, remove the hinge halves from the door frame, and insert a bead coated with glue into the holes for the screws. Holes for self-tapping screws can be filled with wood chips, matches and similar wood elements, and the holes can be filled either completely or partially.
After the glue and material have dried, the hinge halves can be screwed back to the door frame and the interior door itself can be hung.
Door hinge distortion
Distortion door hinges becomes a consequence of their high-quality fastening to the door and door frame, but at the same time the load on the hinges exceeds the permissible maximum value.
Such a breakdown can be caused by installing a massive door on light hinges, and if all the rules for installing interior doors are followed, such a malfunction can be the cause of an external load on the door. After all, the interior door is often equipped with additional decorative elements, a massive triplex is cut into it, or a hook is screwed to the door and clothes are hung, and children like to swing on the interior doors, and all this can cause the door hinges to bend.
Detecting severe hinge distortions
It is easy to identify serious curvatures of the hinges; to do this, you just need to open the door and visually evaluate the quality of the hinges, and more specifically the severity vertical position their connecting pin.
If the hinges have strict rectangular shapes, then to identify curvatures it is enough to measure the distance between the hinges of the door and the door frame at their top and bottom points, in the hinges perfect shape this distance will be the same.
Elimination of hinge distortions
To eliminate this malfunction, it is recommended to completely replace the hinges, and it is advisable to replace them with more durable products. You can try to correct minor distortions manually; to do this, you need to remove the door from its hinges and straighten the hinge risers.
How to repair interior doors yourself
Also, to temporarily reduce the sagging angle of the door, you can place an additional washer under the lower hinge pin, taking it, for example, from the upper hinge.
Loosening the door frame
Loose door frame fastenings also cause the door to sag. The side element of the door frame, to which the door hinges are attached, may simply weaken, resulting in the door tilting.
Sagging doors are often caused by door frames that are too thin or products made from insufficiently hard wood. A low-quality door frame literally bends under the weight of the interior door, which causes it to sag.
Dynamic curvature detection
To detect dynamic curvatures, an element with perfectly flat surfaces equal to the height of the frame must be attached to the side of the door frame on which the hinges are mounted.
Such an element can be a block, plinth, lath or any other product with perfectly straight sides. If, as a result of applying the product to the box, gaps form between the upper and lower corners of contact, then distortions of the box become obvious.
Elimination of dynamic curvatures
To eliminate this malfunction, you need to securely fix the sagging part of the box by screwing several additional screws into it.
In cases where strengthening the door frame does not eliminate the sagging of the door, it is necessary to change the position of the door hinges. Reinstall the upper hinge a little higher, and the lower one a little lower, thus the deflection angle of the box element will be reduced, and in some cases completely eliminated.

Curvature of the door frame, door or floor
If the sagging of the door does not fit any of the above reasons, then the reason for this is the curvature of the door frame, door or floor:
Eliminating such faults requires certain knowledge and skills in the field of repair and construction work, so in such situations it is better to seek help from qualified employees of repair and construction organizations.
Articles on the topic
You might be interested
DIY entrance door repair
Repair of iron, steel and wooden entrance doors can be carried out independently. If the front door is sagging, the lock is stuck on it or the varnish has peeled off, then under no circumstances should you replace it. Almost all door defects can be eliminated on your own.
Repairing apartment entrance doors yourself is an excellent opportunity to save on the services of a master and develop the skills of a home craftsman.
DIY wooden door repair
First you need to decide when the doors really need repairs. All doors require regular maintenance and prevention. If you do not lubricate the door hinges, do not coat them with special compounds and do not clean their surface, then one day the doors may begin to:
- hang on hinges;
- squeak when opening and closing;
- become covered with cracks;
- does not close well or sag.
However, it is important to remember that door malfunctions are not always associated with poor operation.
Breakdowns associated with incorrect door production technology are very common.
Doorway repair
If the door does not fit well in the opening, then repair of the front door opening is necessary.
To carry it out you need to do the following:
- remove the door leaf and trim;
- align and fix the box;
- drill holes in the door posts and drive steel pins into them;
- return the trim and door panel.
If problems arise with door hinges, options are available to replace, adjust or rehang the hinges. First, you need to check the strength of the top hinge. This can be done by pulling the screws.
If the door has not yet had time to settle much, then metal washers that fit onto the hinge pin will help return it to its place. The method is especially effective for removable door hinges.
Elimination of door distortion
Repairing the entrance metal door in an apartment may sometimes also be necessary, despite its reliable design.
Self-repair in such cases may not help.
One of the most common problems with iron doors is skew. When a metal door is skewed, all its beneficial features lose their meaning.
The cause of the imbalance may be:
- large body kit;
- hinge wear.
If the reason for the skewed doors lies in too much body kit, then a special approach is needed.
Most likely, the reason will be the multi-layered material of the door. In this case, it is necessary to repair the entrance steel doors in the apartment. Carrying it out on your own is quite difficult. The only option may involve cutting off the loops and replacing them with new ones.
However, this method does not guarantee success.
If you have problems with hinges, first you need to find out whether they are screwed or welded. In the first case, there will be no difficulties in repair - you will only need to find suitable fittings. If the hinges are welded, then you cannot do without the help of a door master.
Another cause of the problem may be misalignment of the entire door frame. The right decision in this case, wedges will be driven under the base of the door structure.
You can view prices for installing locks on metal doors here. You can also order the service of installing a peephole in iron door, the cost of which is given here.
Getting rid of rust
To bring metal doors into normal working condition, it is necessary to perform a number of complex operations.
Initially, you need to prepare for door repair by removing the seals and door fittings from it. Then you need to clean off the rust and sand the surface. After this, it is important not to forget to degrease the doors with a special solvent.
The next step will be to putty the damaged parts of the door surface.
Then all that remains is to use an aerosol primer and apply several layers of paint. After each stage, it is necessary to sand the surface, which is done in order to give it maximum evenness.
After the door has dried, you can return it to its place.
Removing the consequences of a hack
Repairing the entrance doors to your home may be necessary after they have been damaged by intruders.
The outcome of such cases varies:
- damaged locks;
- damaged canvas;
- cut loops;
- other damage.
If the thickness of the door leaf is small, then attackers will resort to cutting out the lock. Welding thick metal sheets in the area where the castle is located.
Damage after an emergency opening of the door will also remain, but, as a rule, minimal repairs are required in such situations.
Of course, each door's problems are unique, so in some cases the best solution There will be a call to a door repair specialist.
Read also:
— Repair of ovens at home
— How to drill a tile without cracking?
— Replacing the cylinder in the door lock
— DIY shower cabin made from tiles in the photo and manufacturing tips
— Repair of plastic windows with your own hands
— Repair of interior doors
- Almetyevsk
- Volgograd
- Voronezh
- Ekaterinburg
- Zelenodolsk
- Yoshkar Ola
- Kazan
- Krasnoyarsk
- Moscow
- Naberezhnye Chelny
- Nizhnekamsk
- Nizhny Novgorod
- Novosibirsk
- Permian
- Rostov-on-Don
- Samara
- Saint Petersburg
- Ulyanovsk
- Chelyabinsk
- Yaroslavl
Repairing an MDF door is a very interesting activity. Structurally, it consists of a frame onto which MDF sheets are glued. The frame is usually made from wooden beam. The door is hollow from the inside, so it is light and not particularly strong.

MDF door diagram.
Repairing an MDF door is no more difficult than fixing a bug on the body of your favorite car.
Although the easiest way, of course, is to buy a new one. But when finance sings romances and there simply isn’t enough money for a new one, people’s ingenuity comes to the rescue.
The described repair methods will undoubtedly help you save a significant amount of money that you would have to pay for a new one.
When choosing the materials you will use, you need to keep in mind that you need to use those that are designed for working with wood and not metal products.
Repairing an MDF door is not at all difficult.
Before you start, you need to decide what damage has been done to it. Depending on it, two types of repairs can be distinguished:
- Scratch repair.
- Repairing a hole.
How to remove scratches
When repairing scratches on a door, you may need the following tools and materials:
- Sandpaper (marked from 150-200).
- Wood putty.
- Putty spatula.
- Primer for wood.
- Wood enamel (for MDF, a special two-component paint is used).
- Brush for applying paint.

You can remove scratches from the surface of an MDF door using grease-free colored wax chalk to retouch minor scratches, cracks and small holes.
First, you need to sand the scratch and the area around it about one centimeter.
Then you need to clean the cleaned area of the door from dust and small wooden particles.
The next step is to apply wood putty to the cleaned area, and then use a spatula to remove its remnants and at the same time try to make the surface perfectly smooth. After the putty has dried, it must be cleaned again in order to even out the remaining unevenness.
It should be cleaned with fine sandpaper.
It should be noted that applying putty to MDF surface should be done very carefully, trying not to create new scratches. To avoid this, you need to use rubber spatulas.
Then apply wood primer to the treated area in an even layer and wait for it to dry.
After the soil has dried, cover the entire door with an even layer of wood enamel (paint).
How to remove a hole
When repairing a hole, you must have the following materials and tools:

To repair the door you will need the following tools: hammer, saw, plane, chisel, screwdrivers, pliers.
- Construction knife.
- Newspapers or something similar.
- Polyurethane foam.
- Polyester or epoxy resin(both can be purchased at any car market).
- Sandpaper (marked from 150-200).
- Wood putty.
- Putty knife.
- Primer for wood.
- The paint that was specified for the first case.
- Brush for applying paint.
When repairing a hole, you first need to cut a hole that is slightly larger than the hole itself.
The easiest way to do this kind of work is with a construction knife. In this case, if possible, you should try to make a chamfer to a depth of about 0.5 cm.
Then, from the inside along the edges of the hole, you need to fill it with newspapers or just paper.
If this is not done, then when filling the door it may be necessary to a large number of polyurethane foam. After this, the hole must be filled with foam.
Do-it-yourself restoration of a wooden door: features, methods and recommendations
As soon as the polyurethane foam has dried, the protruding part of it needs to be cut off to create Smooth surface.
Polyester or epoxy resin must be applied to the resulting surface to form a solid surface. It is best to carry out this operation while wearing rubber gloves, since when it comes into contact with the skin, the resin easily sticks and can only be removed with a solvent. And the solvent, in turn, like the resin on the skin of the hands, can cause irritation.
Once the resin has hardened, wood putty must be applied to it.
The dried putty must be sanded with sandpaper to obtain a smooth and even surface. You should use paper with the markings indicated slightly above.
After cleaning, you need to apply wood primer to the putty. It is best to do this several times with a time interval of at least 20 minutes. After the primer has dried, the selected paint must be applied to the surface of the entire MDF door.
It should be noted that the primer is best applied with a small paint brush: this will help avoid streaks.
As can be seen from all of the above, repairing an MDF door is not so difficult.
And the time spent doing DIY repairs compensates for a significant amount of money.
Are you sadly looking at a sagging door with a jamming lock and peeling varnish? Are you planning to replace it as soon as possible? Do not hurry! Making such a drastic decision is the easiest way. But why not try to cope with the problem? Most door defects can be successfully “treated” at home, without the help of professionals. Repairing doors with your own hands is a real opportunity to save a decent amount of money and once again make sure that a born master lives in each of us.
Do-it-yourself wooden door repair: eliminating typical defects
When do doors need repairs?
While the doors look presentable and there are no difficulties with their operation, the absolute majority does not even think about the need regular care behind the structure. But from time to time, even the most excellent and high-tech samples need inspection and preventive manipulations - cleaning the surface, adjusting and lubricating hinges, coating with special compounds. If you don't do this, one day you will find that the doors:
- sagged and scratched the floor;
- creaking;
- hanging on hinges;
- they don’t close well, fitting into the box too tightly;
- dried out, cracks appeared in them;
Problems with the box (wobbly), decorative exterior decoration canvases (the veneer has peeled off, the paint has peeled off).

Worth knowing! The cause of malfunctions or damage to the appearance of a structure is not always due to improper operation. Often the “root of evil” lies in the quality of the door itself, in violation of its production technology.
Strengthening the door frame
A box that does not hold well in the opening can be strengthened using this simple algorithm of actions:
- Remove the trim and door leaf.
- Level the box.
- Lock the box in the correct position.
- Drill two or three holes each in the hinge and lock posts (be sure to go deep into the wall).
- Drive wooden dowels (hardwood) or steel pins pre-lubricated with epoxy glue into the holes.
- Re-hang the canvas and attach the trim.
Note! It is necessary to correct the position of the box taking into account the door leaf - the convenience of opening/closing the door should not suffer.

Troubleshooting hinges
If the door touches the threshold or floor, closes poorly, or hangs loose, then the hinges may need to be replaced, adjusted, or re-hanged.
First of all, check how firmly the top hinge is held: tighten the screws if necessary.
A slightly sagging door can be “returned into place” using a metal washer or a wire ring placed on a hinge pin (this advice is relevant for structures equipped with removable hinges).
None of the tricks help? You can try to deepen the recess for the hinge plate (in the strapping beam).
When working with hinges, it also happens that the screws turn and it is impossible to tighten them - especially if you are making repairs old door with your own hands. What to do in this case? There are several options here:
- Replace the fastener with a longer standard size.
- Seal the holes for the screws with matches.
- Move the stitches a little higher or lower.
Adjusting the web geometry
Sometimes even a cursory inspection helps to understand that the faults of the door “lie” not in the frame, or even in the hinges - but in the door leaf itself. More precisely in its geometry.

The canvas may swell from moisture or dry out. Also, after several staining or varnishing, a too thick layer may form on it. protective equipment. What to do?
Be careful! Before planing, it would be a good idea to make sure once again that the problem is definitely not a deformed box.
Large gaps are not a problem
A door made of unseasoned wood will inevitably dry out during use. And this can lead to a lot of problems. Large hinges between the canvas and the box, a latch tongue that does not reach the strike plate, and a generally sagging design - you must agree, this is not very pleasant. What to do?
- Rearrange the hinges to pull the door up.
- Attach a strip to the bottom end of the canvas required sizes, trim it flush.
- Eliminate side gaps using a strip screwed to the hinged end of the door.
- Fill the gaps between the trim and the slats and clean them.
- Paint the trims.

Strengthening panels
A dry door isn't just about gaps. These are also panels that do not hold well in the grooves of the trim.
In this situation, it is recommended to re-glue the strapping bars. To do this, the door is removed from its hinges, disassembled, and thoroughly cleaned of old glue and dirt. Then the bars are connected (glued), the panels are inserted into place and the transformed structure is placed in the clamping device.

Cracks in the door
Repairing interior doors with your own hands often involves sealing cracks. You'll have to tinker, but the result is worth it.
Algorithm of actions:
- Place the door on the table/trunks.
- Remove any existing coating from the surface - you can use sandpaper, special liquid products, etc.
- Sand the canvas using fine sandpaper.
- Fill small cracks and scratches with wood putty/a mixture of epoxy glue and sawdust.
- Sand the dry surface again.
- “Mask” large gaps (including through ones) with wooden inserts coated with glue.
- Fill any visible imperfections.
- Prime the entire surface of the door.
- Cover the canvas with varnish or paint. If it is not an interior door, but an entrance door, the varnish should be applied in at least two layers.
Repairing metal doors - what can you do yourself?
Metal doors are a more reliable structure than wooden ones, although repairing them on your own is sometimes not so easy.
The door is skewed
It is impossible not to notice the distortion of the door - it begins to scratch the threshold, stops closing well, its sound and thermal insulation properties deteriorate sharply. There may be several reasons for this phenomenon.
The first of them is too much weight of the metal sheet. If the door is made of thick multi-layer steel, even the highest quality hinges will one day fail. Repairing the front door with your own hands in this case is extremely difficult. You can try your luck by cutting off the old loops and replacing them with new ones.
The second is natural wear and tear of the hinges. If they are “screwed” and not welded, then it is not difficult to correct the situation. The main thing is to find high-quality fittings with a suitable “design” among the assortment of stores.

The third is the skew of the door frame. They can be eliminated by driving wedges under the base of the structure.
The door is rusty
It especially “gets” its lower part.
To put rusty metal doors in order, you will have to perform a number of rather labor-intensive manipulations.
- Prepare the structure for repair - remove seals, fittings, etc.
- Use a wire brush to remove any rust and any loose paint.
- Sand the surface.
- Degrease the doors with solvent.
- Putty the damaged areas (it is recommended to use a car cleaner).
- Sand the surface again, aiming for perfect evenness.
- Prime the door with aerosol primer.
- Apply the first coat of paint.
- Sand (if necessary) any stains that have formed.
- Apply a second coat of paint.
- Install the fittings and seal on the dry, repaired door.

How to repair a plastic door?
Plastic doors are considered exemplary, aesthetically pleasing and reliable. But with a long service life, some “failures” in their operation are not excluded. Therefore, it is still worth knowing how to repair plastic doors with your own hands.
Door handle malfunction
This breakdown is one of the most typical for plastic construction. To replace the fittings, turn the decorative plate at the base of the handle ninety degrees and unscrew the two screws.
If the handle is intact, but turns with great difficulty, it is quite possible that the lubricant has simply dried out. To save yourself from suffering, purchase lubricant and treat all moving elements of the mechanism with it.
Door sagging
To fix this problem, you should adjust the door position using a hex key. It is inserted into the lower loop and turned clockwise - thus, the canvas rises.

DIY door closer repair
Door closers are extremely popular in Lately mechanisms. They are responsible for the quiet and smooth closing of the structure. Devices, contrary to popular belief, are installed not only on massive and heavy office doors or entrance doors, but also entrance and interior doors.
What malfunctions can befall the “faithful assistant of silence and comfort”? Can you deal with them on your own?
Leakage of working fluid
This breakdown is the most common among door closers. The working fluid begins to flow out through the depressurized seals. Most often this phenomenon is observed in winter period. It leads to the door closer losing the smoothness of closing the door - the device turns into a very ordinary spring. Since it is not possible to disassemble the closer, in such a situation replacing the mechanism is indicated.
Broken rod (lever)
The rod is one of the few parts of the closer that, if broken, can be repaired with your own hands. What usually happens to her?
- bend;
- jamming in joints;
- break;
- damage to the fastening point.
Minor damage to the rod can be repaired by welding. In case of serious malfunctions, a reasonable solution would be to replace the part. This will cost less than replacing the entire mechanism.
If you have a working rod that matches the parameters from another closer, you can use it.

Subtleties of adjustment
Long-term operation of the closer clearly affects the quality of its work. Fortunately, most minor defects can be eliminated with proper adjustment.
- if the door closes too quickly or, conversely, unusually slowly, turn the adjustment valve clockwise/counterclockwise;
- the “after-clap” speed is controlled by the second adjustment valve;
- The tension force of the spring is adjusted with a nut;
- To use the closing delay function, you must tighten the lock with the door open at a right angle.
Summary
As you can see, many door faults are not difficult to fix. It can be more difficult to decide on the appropriateness of such actions. If the condition of the doors is too critical or repairs require expensive equipment that you do not have, it will be easier and more correct to acquire a new interior element.
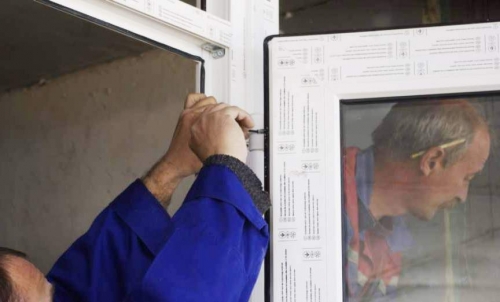
A door with an old metal frame (on the right) and new doors (on the left).
An old metal frame next to an old-looking door is ugly. And of course, many want to replace it with a more modern wooden one, or even together with the door wing. But you shouldn’t be afraid of dirt and dust during this work. You can repair the door frame quickly and without destruction.
A set of portals, slopes and platbands are installed near the old metal ones. This is done quickly and cleanly: in one day you can repair the door frame of about 5 doors.

1. Repairing a door frame without destruction begins by removing the old doors. After this you need to break off the old hinges with pliers.

2. After the doors are removed, the individual parts of the door frame are folded.
These kits are sold different sizes, depending on the size of the doorway and the thickness of the walls. It can be installed on any type of wall - panel, brick, drywall.
,
3. After applying the glue, the joints are secured with metal clamps for greater stability.

4. For safe rotation of the door wing, the door frame must be balanced with a building level both vertically and horizontally.
Except best view, you can change the opening direction from left to right and even the way the doors open. We will save space if we replace swing doors with sliding or folding ones.

5. The next step during installation is to humidify and fill the space with low expansion polyurethane foam, which will attach the frame to the doorway.

6. After applying the foam, you need to install transverse spacers in the installed box. Where spacers are installed, you need to check that the dimensions of the box are correct.
Old frames have no seals and the sound of a closing door can be heard throughout the house. The set of new boxes has embossing on three sides; besides, wood absorbs sounds, unlike metal. You will especially appreciate this in the bedroom or children's room.

7. In order to drill holes correctly, it is better to use ready-made templates. After that we will hang it on the supporting part.

8. Platbands are installed on the other side of the doorway and pressed firmly. For fixation, you can again use mounting adhesive.
You will find useful tips for your home on the World at Home website by subscribing to news updates
 (1 ratings, on average: 5,00 out of 5)