DIY stained glass at home sketches. Do-it-yourself film stained glass window: master class with photos. Video: master class on making stained glass using poured technique
The oldest example of stained glass art that has survived to this day dates back to the 7th century BC. No matter how strange it may sound, the process of creating colored glass is so simple that even children can learn how to create stained glass with their own hands.
Stained glass styles
Behind for a long time Since the existence of this type of creativity, the technology for creating glass drawings with your own hands has significantly improved. New types and technological features have appeared.
Having studied all the techniques, you will be able to choose the one you need, each time planning new interesting stained glass windows.
Classic way
The classic technology of creating stained glass with your own hands has survived to this day. The master draws sketches on the main glass, cuts them out, and using these blanks prepares the details of the future composition from colored glass. The particles are inserted into a pre-prepared forged frame.
After installation of colored glass is completed, the iron partition is sealed for greater strength. The finished product is a beautiful picture of large geometric elements with a clearly defined metal outline.
In ancient times, wide openings of buildings were decorated in this way. Stained glass was especially often used to decorate windows in Christian and Muslim churches - the ideas for the designs were taken from biblical and Koranic motifs.
The beauty of the classic method is that it allows you to connect large parts with your own hands. Unfortunately, the design turns out to be quite bulky and heavy, so it is not recommended to use it to decorate the ceiling. In addition, rough metal does not make it possible to create a pattern from small curved parts.
Tiffany stained glass
The improved technology was developed by the founder of the Tiffany jewelry company, Louis Tiffany, at the turn of the 19th and 20th centuries.
He proposed a fairly simple solution, thanks to which the stained glass windows began to look different. Instead of using lead rods, Louis began wrapping glass parts with thin strips of copper with his own hands. As a rule, the strip protrudes slightly above the plane of the part.

After drawing up the drawing, the parts are treated with flux to prevent rust and are soldered together. The protruding edge of the copper tape is leveled above the surface of the glass, creating additional protection from parts falling out of the frame.
Thanks to Tiffany's technique, stained glass windows turned into real works of art! Thin filigree patterns consisting of small particles allow you to achieve a smoother color transition and a more natural image.
Tiffany stained glass can be used to create almost any product due to its lightness and beauty.
Fusing glass
The amazing fusing technique allows you to create the most various products- from glass inserts in doors and furniture to painted dishes. But this method is too labor-intensive to make stained glass windows with your own hands. large sizes.

The peculiarity of the technique is that colored elements are laid out on top of the main transparent glass. The workpiece is sent to a furnace, where under the influence of high temperature the parts are fused into each other. This way you get colored glass without iron partition.
Another disadvantage of fusing is that it is difficult to find a kiln in which large products can be placed.
Pseudo-stained glass
Modern technologies have given people the opportunity to create stained glass windows with their own hands without learning the labor-intensive process of forging, metal working and glass cutting.
All you need is a piece of transparent glass of a certain size and a special film with colored patterns that allows light to pass through. There are several types of film:
- self-adhesive - a sticky layer is applied to one side of the material;
- a film that must be attached to the glass using a special colorless glue.
Film stained glass windows help save on interior decoration, while maintaining an interesting appearance glass
In addition to the film method, the use of special stained glass paints is also widely used. Transparent gel-like mixtures are applied to the workpiece in the form of a specific pattern. After they harden, the glass takes on the appearance of a transparent stained glass product.

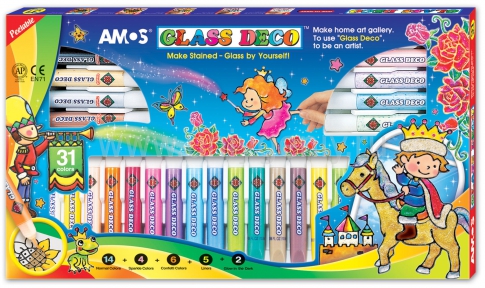
This technology is so simple that Lately Children's creativity kits began to appear, allowing you to create painted stained glass windows with your own hands.
Tiffany stained glass: master class
Tiffany stained glass is very easy to create even at home. Prepare colored glass fragments, a glass cutting knife, thin copper foil, soldering iron, grinder, flux, soldering tin.
- Create a blank sketch - the more T-shaped connecting lines in the drawing, the tighter the stained glass parts will hold.
- Print 2 copies of the sketch in life size. Number the parts on each sketch and cut one of them along the joint lines.
- The second whole sketch is covered with tape and inserted into a wooden working frame.

After working on the sketch, you can begin preparing the parts.
- Attach the cut out parts of the first sketch to the fragments of a certain color.
- Take the glass cutter and start cutting out the colored element, holding the tool at an angle of 45 degrees relative to the surface. Try to cut the part in one continuous line, respecting constant force pressure, otherwise you may experience chips and cracks.

- After the glass cutter, microcracks formed in the glass. With barely a tap on it, you can separate your piece.
- Use a sander to smooth and roughen the edges of the glass before the next steps.
- Now wrap the piece copper wire. Use folia - a special thin long copper material with one adhesive side.
- Fold and smooth the protruding edges of the foil onto the product.

- Install the finished element in the overall picture using nails driven around it.

- When all the parts are in place, remove the nails and flux the gaps between them.

The preparatory stage is completed - you can start soldering!
- Place the tip of the tin wire over the joint and heat it on top with a soldering iron. In this way, gradually process all the seams with your own hands. Don't keep the soldering iron in one place for too long - you can overheat the foil and glass, as well as melt too much tin.

- After soldering the pattern is complete, remove the wooden frame and bring the iron blanks to the sides of the painting.
- Using tin, solder them to the image where they touch the seams.
Leave the product to cool in a dry, ventilated area for an hour or two. When it reaches room temperature, rinse the painting thoroughly with a sponge, water and non-greasy detergents.
Now your creation can be hung on the wall or placed on a shelf.
Filled stained glass: master class
Try making stained glass windows with your child - your child will surely enjoy the process of non-standard drawing. The main thing is to follow safety rules: after all, your main material- glass - can cause injuries and cuts.
Prepare stained glass paints - they are easy to find in large office supply stores - and a small square piece of glass. Pre-insert it into a frame with rounded corners to protect your child from sharp edges.
Using dark paint, draw thin sketch lines on the glass with your own hands. The most commonly used color is black. You have formed defined hollow areas. Near the black color, but not on it, drop a few drops of the colored shade - it should spread on its own throughout the cell.

You can create beautiful stained glass windows with your own hands to decorate a candlestick by watching the following video.
Using this technique you can decorate a glass photo frame, a cabinet door or a window in a nursery.
The art of making stained glass has been known since ancient times. Such pleasure is very expensive. Those stained glass windows, photos of which can be found on the Internet, are made by experienced craftsmen using unique technologies and materials. But you can make stained glass windows with your own hands or their imitation at home.
Stained glass on a window or door creates an image of an authentic room design. To create a stained glass picture, choose a sketch that suits your taste and the available technology. The pattern of stained glass can be anything: a geometric pattern, flowers, ornament, birds or animals.
Types and choice of stained glass technology

- Filled stained glass windows are made by applying paints to glass. For contour lines, special paint is used in tubes with a tip adapted for drawing lines. It can be purchased at any art salon. After the contour lines have dried, the free gaps are filled with multi-colored glass dyes of a more liquid consistency.
- Film stained glass– the simplest and most inexpensive method of stained glass on glass. Translucent self-adhesive multi-colored film is cut out according to templates and glued to the glass. It turns out to be a kind of application. To imitate full stained glass, the seams are decorated with self-adhesive lead or bronze flexible tape.
- Stained glass, according to Tiffany's method, is the closest to real stained glass. It is made from pieces of colored and transparent glass. You will need some skills in working with a glass cutter and the ability to solder.
Manufacturing of stained glass

- A sketch of the drawing is made in pencil and drawn with a marker on a sheet of paper corresponding to the format of the glass being processed. Select colors for the sectors to be filled and label them. Degrease and dry the glass to be processed. Place the sketch on the table, and glass on top of it.
- The easiest way to apply contour lines is with thick, raised paint. Tubes of special paint are equipped with nozzles for lines of various thicknesses. They are produced different colors, including simulating metals. Let the paint dry.
- You can make wire aluminum stained glass windows. To do this, take aluminum wire with a diameter of 1.6 mm, bend it along the contour lines and lubricate it with PVA emulsion. Place it on the glass and press it down with a weight. Drying time is an hour and a half.
- Prepare aniline color. Dilute it with distilled water and filter through cheesecloth. The consistency of the paint should be like thick sour cream. Paint should be applied progressively with a clean brush. If the saturation of the area is weak, let it dry and paint again.
- After the paints have dried, turn the glass over to the other side and decorate the places where the aluminum wire is glued with self-adhesive metallized tape. Front side For reliability and aesthetic appearance, open with transparent varnish.
Techniques for making film stained glass

- You will need a lot of scraps of translucent colored or multi-colored self-adhesive film. A sketch of a stained glass design can be made on paper and then transferred to glass. Having placed the sketch under the glass, transfer the contour lines onto it with a marker or watercolors.
- Carefully glue the details of the design cut out according to the templates onto a fat-free surface. Gently smooth any air bubbles to the edges with your fingers or a roller. Poke small bubbles that cannot be removed with a thin needle and carefully squeeze with your fingers until the swelling is completely eliminated.
- To create a relief contour, self-adhesive lead tape is used. Places of connections and joints are processed with a soldering iron.
Tiffany stained glass manufacturing technology

- For such stained glass windows you will need a set of multi-colored glasses, preferably of the same thickness. The ability to cut glass according to a curved pattern and solder tin will also come in handy. When sketching a design for a Tiffany stained glass window, keep in mind that the abundance of “T”-shaped intersections of the contour seams contributes to the strength of the stained glass structure.
- On thick paper, draw a sketch of the stained glass window. Use scissors to cut it into individual template pieces. Table being covered soft cloth, a template is placed on it, and colored glass on top. Glass cutter, it is better to use a liquid one. Smoothly, with light pressure, make a score along the contour and beat it with a glass cutter until a crack appears on the glass. Use pliers to remove excess pieces of glass. Internal arches can be done in stages. Deviation from the contour line is acceptable within 4 mm. The edge should be processed with a grinding machine and a fine-grained file - remove the chamfers along the edges.
- Each fragment of a stained glass panel is wrapped in foil. Folia – thin copper foil. The foil is applied from the end part with a small but uniform launch onto the plane on both sides. The stained glass parts begin to be laid out on the plywood sheet from the top corner to the sides and down. The parts of the stained glass panel are fixed with small nails.
- The space between the seams is treated with flux, degreased and prepared for soldering. The flux removes oxides from the copper foil and promotes the ductility of the tin solder. You can treat the surface with soldering grease or mix it with soldering acid. Tin solder POS-61 is suitable for making Tiffany stained glass windows.
- The tip of the tin wire is applied to the groove between the glass parts and, using a heated soldering iron, is filled with molten tin solder. Adjust the seam height yourself, but try not to overheat or stain the glass. Soldering is done on both sides.
- Areas close to the perimeter do not need to be soldered; leave room for the frame. Select a U-shaped tin profile corresponding to the thickness of the glass, cut frame slats from it with angles at the edges at 45°. Taking the stained glass panel into the frame, carefully solder the joints at the corners with a thin seam.
The stained glass window is cleaned of visible defects, the seams are corrected with fine sandpaper, and washed with soap and water. After drying, it can be installed on a door or window.
The name "stained glass" comes to us from Latin. This concept denotes a structural construction, transparent or translucent texture, imitating a special ornament or plot. The uniqueness of the stained glass composition lies in the skillful and successful combination of light rays and glass surface. These components, in conjunction with a significant third - color - create real masterpieces of art.
Stained glass as a decorative element
Stained glass windows in the interior are, first of all, a decorative element. Their direct purpose is to refract light streams and transform the area inside the room. The active development and use of stained glass art dates back to the Middle Ages. Unfortunately, it is not known where and when the first stained glass composition was first produced. Information has survived to this day that the ancient Romans tried to use blown and cast glass in architecture.
In today's interior decorating, stained glass is back in fashion. Of course, the idea of decorating a room in this way rightfully belongs to ancient architects, but thanks to innovations in modern technologies, stained glass windows have improved and entered a new round of renewal and improvement.

Stained glass is considered not only a decorative element, but also a central element of the interior. You can admire them at different times of the day, regardless of the angle at which the sun’s rays hit the structure. Based on this, it becomes clear that the stained glass composition will look appropriate in the hall, in the kitchen, and even in the bathroom.
Stained glass in the interior
Those who dare to decorate at least one of the rooms with a stained glass composition are guaranteed to receive a unique transformation of the room, as well as color lightness and originality. Designers advise making stained glass exactly in the style in which the entire room is decorated. Thus, the design will be unified, holistic and harmonious.

The most commonly used style of stained glass is classical. Its main characteristics are naturalness, sophistication, simplicity and uniqueness. This style is considered relatively low budget, which is quite relevant today. The main attraction of stained glass classics is symmetry. The subjects depicted can be completely different from natural landscapes to geometric bodies. Such compositions are mainly performed in either dark or pastel colors. They are most often used when decorating screens, window openings, and partitions.
No less popular style- stained glass neo-gothic. The idea of the style is as follows: in a room with a large area - a fairly dense filling of window openings with a stained glass composition, and in a room of not large size - a base of transparent or colorless material was supplemented with colored splashes.

With the advent of the twentieth century, a style was formed and strengthened modern. Its main features are smooth transitions, intricate fancy patterns, soft lines and patterns imitating plants. The color scheme of the style welcomes all soft undertones. Art Nouveau style is distinguished by its extravagance and sophistication. Modern stained glass windows combine perfectly with almost all types of interiors.
The creation of stained glass today is done through the use of various technologies. Unfortunately, some of them are quite complex and require not only the skill and experience of the artist, but also the use of special equipment. You cannot use such techniques at home. And now it’s time to find out what are the features of creating different types of stained glass windows.
Classic or soldered stained glass

Work begins by making a sketch, then, in accordance with each line, a metal profile is laid into which prepared glass fragments are inserted. At the joints, connections are made by soldering. Then do artistic painting stained glass

The profile can be copper, brass or lead; its cross-section is similar to the letter H. Fragments cut from colored glass are inserted into the grooves of the H-shaped profile. You can use glass with a thickness of no more than 4 mm. The profile structure is quite rigid and does not allow images to be given curved contours. Another disadvantage of this technology is the relatively large profile width (up to 6 mm). which does not allow the seams to be made graceful.
The quality of the light transmission characteristics of such stained glass depends on the glass that is used in production; the best manufacturers today are considered to be: Wissmach, Spectrum, Glashutte Lamberts, Armstrong, the glass produced by these companies is colored in bulk, they never fade.
It is rational to use the classical technique of creating stained glass when making large stained glass canvases.
Tiffany

Tiffany stained glass is considered the most beautiful, but its production is somewhat complicated. They are realistic and very similar to paintings; they are made using colored glass fragments of different sizes and shapes, including concave and convex. The assembly of such stained glass windows is carried out exclusively by hand, i.e. Each work can be considered the author's.

Work begins with creating a sketch and dividing it into fragments. Next, structural parts are cut out of the glass, ground to the desired shape and dimensions, the fragments are connected by soldering with lead-tin solder an adhesive copper tape in which each of the prepared fragments is wrapped. Guide profiles are not required when creating stained glass using this technique.

Usage copper base for attaching fragments allows you to create convex and three-dimensional images.

Tiffany stained glass windows will not be damaged by sharp changes temperatures, regardless of the fact that they consist of individual fragments, their strength is no less than that of products made from a solid glass sheet. It is possible to make such stained glass windows with your own hands, provided you have the appropriate materials and tools, artistic taste and imagination, and the ability to work with great care.
Fusing

The process of creating stained glass using the Fusing technique is very complex; it involves sintering at very high temperatures. high temperatures made from glass fragments of artistic compositions. Although this technique has been used since the construction of the Egyptian pyramids, its use in modern industry is relatively recent.

Like the techniques described above, it requires creating a sketch, cutting glass fragments, assembling them on a flat glass base using fixing glue, sintering in ovens at temperatures from +650 to +900 C. The assembled picture is covered on top with a second glass base, thus forming a kind of sandwich . The glass sintering process is a multi-stage process: first, the glass is slowly heated, then kept at the fusion temperature for some time, and quickly cooled.
Stained glass windows using the Fusing technique are distinguished by their multi-layered nature and relief; they are made without metal broaches. Of course, it is impossible to use this technique at home.
Cast stained glass

A fairly complex technique that involves blowing or casting each glass module by hand, giving them a special surface texture capable of effectively refracting light rays. The thickness of each fragment can vary between 5-30 mm. Glass modules are connected using metal reinforcement and cement.
Faceted stained glass windows

A special place among stained glass windows is occupied by those made using the bevelled technique. They are extremely attractive and original, looking appropriate in luxurious interiors, emphasizing their features and the high level of wealth of the owners of the house. Glass for such stained glass is processed in a certain way - a chamfer (bevel) is removed along the edge of each, which significantly increases the refractive properties of the material. Specially cut, ground and polished glasses can also be used. Only thick, heavy glass is used, and accordingly, the frame for them requires a particularly strong one. To connect the prepared glasses, a hard metal profile is used: brass or copper. Once assembled, the stained glass window is patinated, giving it the appearance of aged bronze, silver, gold or brass. In such a frame, the light-refracting glass looks like real gems.
Smalt
Original ancient technology, which consists in assembling pictures from glass fragments and metal oxides and then firing them in ovens over a long period.

The resulting material has high strength qualities, an attractive appearance, reminiscent glass mosaic. Smalt amazes the imagination with its depth and richness of shades, special deep light, and the ability to look completely different when illuminated by different light sources.
Filled stained glass

This technique is quite in demand and is available for execution. Of course, to create something interesting stained glass the performer will need to have some experience and talent as a makeup artist. In appearance, the stained glass window resembles one created using the Tiffany technique. After creating a life-size sketch, its contour lines are transferred to the degreased surface of the glass base, using polymer paint, to create an imitation of a metal broach. After the contour lines have completely dried, the resulting cells are filled with paints or varnishes of the corresponding colors. The stained glass window takes 24 hours to dry.

The technology for manufacturing stained glass windows allows the use of partial automation of the process, in particular:
- computer drawing design,
- drawing a contour using programmable equipment.
You can use a wide variety of stencils for stained glass; they are easy to find in finished form in the Internet. Stained glass made using poured technology is quite durable and does not lose quality when exposed to environment, they are safe and environmentally friendly.
Film stained glass

The most inexpensive technique for making stained glass can be called film. Of course, a drawing created in this way on a glass canvas can be conditionally classified as stained glass, because its creation consists of applying a special colored film to the surface of the glass, in accordance with the selected design sketch, and then attaching it along the contours with a lead or tin border.
Such stained glass windows have a flat, smooth surface - the basis for their production is sheet glass. They are easy to maintain, light weight and safe to use.
The stained glass film for the manufacture of such stained glass is made of lavsan, the procedure for making stained glass film is as follows:
- creating a life-size sketch,
- transferring the design to the glass surface,
- laying of the belt circuit,
- filling the resulting fragments with Mylar film.
The use of solid glass allows you to create large-sized film stained glass windows.
Painted stained glass

They can be made using any technique, the main condition is the application of paints to most stained glass windows. As an additional decoration, such stained glass windows involve the use of glass that has been folded or cut. A stained glass window will be considered painted even if the only single piece of stained glass glass is painted.
Other types of stained glass technology

You can also find such stained glass windows in interiors as:
- Silhouette, in the assembly of which round disc elements are used, the free spaces between them are filled with concave glasses, and all fragments are connected with a brass or lead frame.
- Sandblasting, made of mirror cloth or colorless glass, with a matte pattern applied using a special sandblasting device, which have an interesting appearance and fit perfectly into a classic interior.
- Patterned, assembled from glasses folded into patterns, single-color, often consisting of textured glass oriented in different directions.
- Mosaic made of glass, it cannot be used as a light transmitting material in window or doorways, but its preservation of the properties of translucent glass allows the material to be used as a cladding material; usually panels and multi-colored ornaments are created from it, filling the entire room with reflections of the sun.
- Mosaic stained glass windows, assembled from multi-colored glass using lead threads, are characterized by a repeating pattern, serve as an excellent background, but can be used as an independent decorative item.
Photo printing

This variety appeared quite recently, but with its help, designers were able to significantly expand their interior design capabilities. Photo printing involves applying a design to glass in different ways:
- straight - the design can be printed on a solid base,
- film - first the design is printed on film, then it is glued to the glass surface
- triplex - the pattern is applied to the film and lies between the surfaces of two glasses.

The attractive aspects of photo printing are:
- possibility of copying classic stained glass,
- product manufacturing speed,
- affordable price.
Collage

The technique of making collage stained glass is based on the use of modern equipment, but is somewhat similar to Tiffany’s technique. After developing the sketch, blanks of the required sizes and shades are prepared, connected with a polymer solution, using ordinary glass as a base.
Such stained glass windows are distinguished by the absence of clear lines, smooth color transitions, transparency and lightness. They look natural in any interior, and the unique technology allows you to reproduce any complex images in glass.
Combined stained glass

They are the most universal; when making them, the master himself decides which techniques and styles can be used in the manufacture of a glass picture, although it is not entirely forbidden normal use traditional techniques. Due to the unique principles of their production, combined stained glass windows make it possible to achieve a special expressiveness of the works, a uniqueness that is difficult to achieve within the framework of any individual style. This unique technique allows you to create the effect of a three-dimensional image, surprising with its special depth and volume.
After reading the description and watching video recommendations, we learned how to make a stained glass window. Of course, to get a real work of art you will need to put in a lot of effort, effort and imagination.
Stained glass is a welcome decoration for any interior. But professionally made stained glass is expensive. Meanwhile, there are different types of stained glass techniques, and some allow you to make stained glass with your own hands. The simplest ones make it possible to make, for example, a stained glass ceiling window that is very similar to the real one, if you don’t look closely closely. And for more complex, but accessible to the DIYer, the result is a work that even a specialist, without disassembly, cannot distinguish from a “do-it-yourself” one.
The main secret of technology
The manufacturing technology of any stained glass window does not require deep knowledge. But you definitely need an accurate eye, correct and steady hand and utmost accuracy. The smallest errors, accumulating as production progresses, ultimately give the product an unattractive, or even simply sloppy, appearance. So the main conditions for success are skill, ingenuity, and training. If after three trial compositions the size of a large book you come up with a good real one, you are a gem.

About sketches and scissors
The basis of any stained glass window is an element-by-element sketch. Stained glass sketches are always made in duplicate. If they are made on a computer and printed, there are no problems: the printouts are absolutely identical.
However, for a large panel, the sketch must be drawn by hand and then copied on a photocopying machine. Despite such a serious name, the simplest photocopying machine is just a sheet of glass (which will later be used as a base), laid on two chairs, and a light bulb under it.
To make a stained glass window without errors, you need to firmly remember: the assembly is carried out according to the PRIMARY, most accurate sketch, and a copy from it will be used as templates. Otherwise, inconsistencies are inevitable, and adjusting fragments along the way complicates and spoils the work.
You need not simple scissors, but special template ones, with three blades. The third cuts a strip 1.76 mm wide. Before cutting, the secondary sketch is pasted onto a sheet of thin but dense cardboard (the ideal case is 0.5 mm electric cardboard) and the paper-cardboard puff is cut. Otherwise, when making fragments, it will be very difficult to trace the outline on soft paper.
When gluing, be careful - paper soaked from any glue stretches when smoothed, and you need to glue over the entire plane. Each finished template is verified according to the primary sketch. By the way, the pieces of both sketches must be uniformly numbered before cutting.
Classic or glass stained glass is a window made of many colored glasses, transparent or milky; milky in this case means - opaque colored in the mass. Frosted glass is “roughened” on one side and is transparent at the break.
Fragments of stained glass are sometimes called stained glass smalts, so as not to be confused with the smalts from which glass is made. Stained glass came from mosaic. Sometimes they even just say “smalt”, because... There are many more stained glass windows made than glass mosaics. Further in the text there is smalt – stained glass smalt is everywhere.
Each smalt is framed with a U-shaped profile made of lead, tin, copper or brass. Then the smalts are laid directly on the primary sketch, and the seams are soldered. The result is a window framed from H-shaped profiles. A frame of brass angle is immediately placed on it for strength, and soldered along the contour. The resulting picture is inserted into a window frame or into an opening illuminated from behind. In this case, smalts are matte or milky.

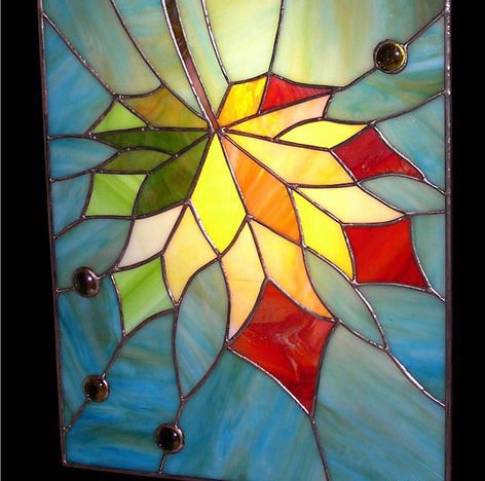
The picture in the previous section shows one of the world's greatest stained glass masterpieces, the stained glass window in the south window of St. Vincent in Blois. In the picture above - modern stained glass classic type. In both cases, a combined technique using fusing is used, see below. Classic stained glass is very difficult to work with, labor-intensive and not particularly durable. They were not installed in casement windows - they could crumble from the clap of the open sash.
From simple to complex
Film and ceiling
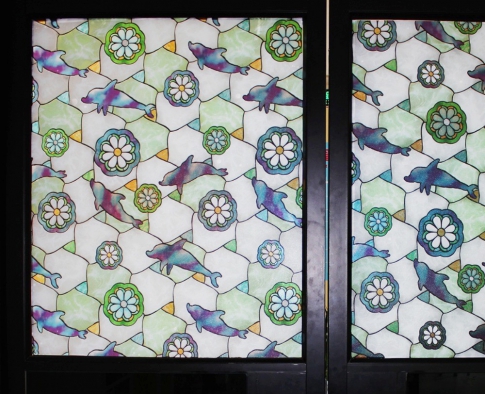
Film stained glass (first from the left in the next figure below) refers to false stained glass: on a glass base, transparent, matte or milky, a pattern is applied in one way or another to imitate borders between the smalts. In this case, it’s just a self-adhesive film; We’ll talk about simulating contour borders below; it’s not at all difficult.
Making a stained glass window from film is no more difficult than simply covering something with self-adhesive tape. The main thing is to degrease the glass well with a solution of dishwashing detergent in water 1:5-1:20 and then rinse with distilled water. The bubbles on the film are pierced with a needle and disappear within a day or two without a trace.
Modern films are quite durable, but up close you can immediately see that this is only an imitation. And from the reverse side it has no view at all. Therefore, film stained glass windows are most often installed on the ceiling. There they are exactly in their place - cheap and cheerful.
Previously, ceiling stained glass windows were not very common: the base is heavy, fragile, and extremely dangerous if it collapses. Due to the properties of the material, stained glass on glass should not be hanging at all. Now the best basis for ceiling stained glass windows - acrylic.
Try bending or breaking your computer drive. This is the strength of acrylic plastic with a thickness of only about 1 mm. A person throws a sheet of acrylic 3x3 m 2-3 mm thick with his hand, and under own weight it does not sag for many years. What if he falls out - quietly planning, swaying. And the film on acrylic holds very firmly. True, acrylic is much more expensive than glass.

Jellied
Second pos. on the left is a stained glass window with paints, or flooded. From the face it is already very similar to the real one, but from the inside the fake is still noticeable, even if it is designed at the same time as the face in a mirror image.
We will further consider the stained glass technique in more detail: from skillful hands Such compositions look very impressive on the face, but getting them is not so easy. To complete the effect, light rays need to pass twice through the base glass; therefore, a smooth or textured reflective surface underneath. Therefore, the most common application of the pouring technique is stained glass on a mirror.
The fact is that paint, when poured correctly, forms a meniscus, see below. Rays, direct and reflected from the mirror film, pass through its sections with different curvature, and the stained glass window plays with colors with might and main. Diffraction at the boundaries of the border also affects it, so it is better to make it dark but shiny, also see below. The “fill” effect is especially effective on acrylic mirrors with a reflective tantalum-niobium substrate.
Tiffany
Stained glass Tiffany (next position from left to right) is a real, full-fledged stained glass window made of smalt glass. The only difference from the classics is that the binding is not made from cast or forged grooves, but is formed directly along the end of the smalt from soldered metal foil, which they did not yet know how to make in the Middle Ages.
When using brass foil, hard fusible solders (which were not available in the old days) and semi-active fluxes, Tiffany is quite durable. It will also work as a stained glass window, incl. swing or French, and through the door. The Tiffany technique allows you to “stained glass” three-dimensional rectangular and curvilinear structures. To do this, the side edges of the smalt are made beveled at 45 degrees or at the required curvature angle. No industrial equipment is required for this. We will also analyze the Tiffany technique further.
Facet
Faceted stained glass window, penultimate position. – an indispensable sign of a prestigious interior. Bevel – a wide, low-angle, optically precise polished chamfer on a thick, from 6 mm, glass plate. The bevel angle must be precisely matched to the optical properties of the glass in order to obtain the so-called. diamond facet, which gives the greatest light refraction.
Smalts for faceted stained glass are made transparent, colorless or colored, from special types of glass - potash (light, with a lower refractive index) and lead (heavy, with a high refractive index). Particularly impressive are beveled stained glass windows made from skillfully selected combinations of both (crown flint bevels).
Faceted smalts are assembled in special, piece-made profiles made of durable aluminum alloy, due to their high weight. In general, beveled stained glass requires high skill and industrial conditions for manufacturing. Most often, smalts are ordered in batches at optical-mechanical enterprises, and are collected in small/medium production conditions.
Fusion
Fusing stained glass, or fusion stained glass (from the English fuse - melt, melt; last position) is made from smalt heated to softening (300-1200 degrees, depending on the type of glass), laid out in a stencil on a heat-resistant plane. The entire set is rolled, resulting in smooth color transitions, which in other stained glass techniques unattainable.
Fusion is the pinnacle of stained glass art. Even when manufactured by robots in an industrial environment, due to rolling, each product is unique. Large fusion stained glass windows cost a lot of money; True, with the development of robotization, prices are steadily falling; here, as they say, China is ahead of the rest of the world. The fusion technique itself has been known since ancient times; it was on this basis that smalts with faces, etc. were and are made. for classic stained glass windows.
Video: stained glass using fusing
Making a simple stained glass window
Imitations
Film stained glass has already been mentioned, and there is nothing complicated about it. But, before moving on to the colorful, let's talk about imitation lead binding; it is common in both cases. A decent-looking imitation of stained glass is largely determined by the similarity of the applied border to natural metal binding.
Curbs
There are three ways to imitate the binding of a classic stained glass window for both film and paint:
- Gluing the borders of the fragments with lead tape. Specially sold for stained glass cases;
- Forming contours from soft wire, see below;
- Drawing contours with contour paste.
First way
Lead tape is real, unquote, tape: a strip about 1/8 inch wide made of lead foil, an adhesive layer, the same as on regular tape, and a protective film. Unwinding the roll, lay it out along the contour, cut it, remove it protective film, apply, press down - that's it. For film stained glass windows - after gluing, for flooded windows - before pouring.
Second way

The contour is bent from the wire and glued (film - after; filling - before) with PVA. But not simple, but dishonest. It is a little more expensive than the “paper” one, and the label says: “For gluing glass and porcelain products.” Chemically active adhesives are not suitable, especially cyanoacrylate “Superglue”. On top of that, it is also unusually liquid and flows everywhere where it is not needed.
The wire using this technique is traditionally used aluminum and then patinated, as for Tiffany, see below. But the author of this article has repeatedly successfully used copper winding wire in high-strength enamel insulation (enamel wire). It bends more easily, and in radio stores and radio markets it can be found with insulation in literally all colors of the rainbow, see Fig., with a diameter of 0.02 to 2.5 mm round and from 1 to 16 mm flat (busbar).
The tire is rare and expensive. But each contour curved from a round wire can be aligned and slightly flattened by strongly squeezing it in a bench vice between two even flat steel plates 8-12 mm thick. The isolation of even an almost pre-war PEV does not deteriorate from this.
Copper wire contours are especially good for stained glass windows on mirrors; this has already been discussed. If you need dullness and patina, just rub the finished piece with sandpaper, and the exposed copper will soon itself be covered with a real, uninduced patina.
Third way
Prepare contour paste according to the recipe:
- Tableware PVA – 50 ml.
- Natural black mascara (the best is Dutch) – 20-30 ml.
- Aluminum powder (silver) – 30-40 g.
Add mascara to the PVA, stir thoroughly and add silver powder in small portions while stirring until a creamy paste is obtained. If you need a brass-like binding, replace the silver with bronze powder. The “leadness” depends on the ratio of the carcass to the silverfish; it is checked with a test, completely dried drop.
The pasta is prepared as needed; it is not stored. When using, you need to stir all the time - the silverware floats to the top. Apply along the contour with an artistic brush, applying it generously so that it forms a sausage of equal thickness; this requires good skill. A small pastry syringe gun is more convenient for a beginner, but then, even after washing, it is not suitable for use for its intended purpose.
Video: DIY English film stained glass window
"Jellied"
Filled stained glass is performed in the following sequence:
- We are preparing an assembly table: a flat panel covered with white calico, felt, flannel or flannel.
- We put a stencil on it - a numbered primary sketch.
- We degrease the glass base and place it on the stencil. We take the ends with our hands wearing new textile gloves; You cannot use a suction cup or leave your fingers on your face.
- We bend, straighten and flatten the contours, one at a time, from the left (for left-handers - right) upper corner.
- We adjust it as needed and glue it with PVA. We dry it for a day.
- Fill with paint (see below). Adjacent cells of one color are poured one by one as the previous ones dry out: if it leaks, the dried drip can be easily removed with a safety razor blade.
- Let it dry for another day after filling the last cell, insert it into a metal frame - ready for installation!
For the preparation of paints, see the following, but for now let’s focus on pouring; This is the most responsible procedure. We pour the paint with a generously soaked brush or syringe from the inside along the contour, but under no circumstances touching the curb (see figure)! The paint should naturally flow into the meniscus! If the color comes out a bit runny, after drying, pour it again in the same way.

Pouring/topping up paint in the middle is unacceptable. If you need a thicker stain there, you need to outline it and pour more there. In this case, two fillings into the frame (along the outer and inner contours) are done without delay, one after the other.
The fact is that the “blyamba” in the middle will disrupt light refraction. The “bokeh effect” known to photographers will appear, and a single such element will disrupt the integrity of the perception of the composition. And if there are a lot of them, then the entire stained glass window will turn out sloppy.
Paints
There are four types of homemade stained glass paints:
- PVA and aniline are the easiest to prepare and the most unstable;
- Soviet-rare ones - on BF-2 glue and ballpoint pen paste;
- Gelatin-aniline - fragile and on straight sunlight burn out, but give an ideal meniscus;
- Nitro-oil ones are the most expensive, but have all the advantages without the disadvantages.
First. PVA-aniline paints are prepared simply: dilute 50-100 ml of tableware PVA two or three times with distilled water. Then, in the hot distillate, add aniline dye for fabric according to the instructions for the tablet, and filter through calico, gas or thin women's tights. Drop a few drops into the PVA emulsion, stir, drop a drop on the glass and check the color. Lightened – add a pigment solution; over-darkened – emulsions.
Second. BF-2 is diluted twice with acetone and a hand paste is added dropwise to the solution with stirring. The color is checked with a test drop, as indicated above. It gives an excellent meniscus, the stand is bright, but - alas! – circulation of pure acetone is limited, because it is used in artisanal illegal drug production. But it cannot be replaced with nitro solvent or alcohol.
Third. 6 gr. Edible gelatin is diluted in 200 ml. distillate at 40-50 degrees. A solution of aniline dye, the same as for the first paint, is added drop by drop after cooling to the same temperature and the color is checked in the same way. Strength and resistance to fading can be increased somewhat by covering it with clear acrylic varnish after drying. Aniline with PVA is not possible, it will float.
Fourth. We are preparing a composition of 60% by volume transparent furniture nitro varnish and 40% 647 solvent. Squeeze out artistic oil paint directly from the tube into pea-sized balls, stir, and check the color for a drop. Suitable for acrylic coating; At the same time, the strength is acrylic, and the durability is almost unlimited.
Notes:
- Sometimes the paint doesn’t stir, but instead gets created. This means that the manufacturer is a deceiver: it is not prepared with natural hemp oil.
- Colors can be mixed, as artists do, but following the rules for mixing minerals oil paints. Otherwise, it may turn out like with Ozerov’s paintings.
Video: master class on stained glass
Tiffany
Tiffany stained glass windows are an order of magnitude or two more difficult to work with than those described above, so we will deal with them step by step. There are complexities and subtleties at all stages, except, perhaps, patination. And neglecting technology on any of them will ruin the work. In addition, you need to acquire some special tools and materials.
Tool
Glass cutter
The main key to success when working on Tiffany is a glass cutter, because you need to cut out small curved pieces of glass, and stained glass is very tough. Therefore, you only need a diamond glass cutter. The advisers themselves are unlikely to be able to make do with a roller Pobeditov through the window.

Diamond glass cutters come in two types: with an edge (diamond pencils) and with a curved cutting edge. The first ones are suitable only for straight cuts, and the second ones are suitable for curved ones. The type of cutting part and method of cutting are indicated in the certificate for the tool, and in appearance - a glass cutter with a curved edge is necessarily massive, with a backing for tapping/breaking, see fig. After cutting with a pencil, the cut piece simply breaks off.
It is not advisable to buy it second hand - in 90% of cases they sell it because the diamond is chipped and does not produce a clear cut (see below). There are also glass files - thin steel strips coated with diamond. They produce quite decent curved cuts of large parts (glass for cabinets, etc.), but they are unsuitable for smalt - you cannot cut a small radius.
Notes:
- Diamond, so you know, although it holds the record for hardness, is fragile. Ancient myth about slaves who were promised freedom if they broke a diamond with a hammer on an anvil - only a myth. It pricks even when dropped on a stone floor. Therefore, the glass cutter must be stored in its standard case and handled with care.
- Glass cutters different manufacturers very, very different in cut quality. A sign of good quality is a case made of genuine leather with a felt lining.
Soldering iron

Tiffany soldering is done using the capillary method, so an electrical/radio soldering iron with a long red copper tip is unsuitable. You need a tool with a bronze nickel-plated tip; it serves only for heating, and the solder does not stick to it during the soldering process. You can recognize this type by its initially short white shiny tip (see below in the picture with soldering accessories), and they are sold under the Long Life brand. Power – 100 W, no more and no less.
Abrasive
To polish the smalt after cutting, it is advisable to have a glass grinder, see fig. But it costs a lot, and in any case, for precise finishing you need three grinding stones number 220-240 and 12-20 mm wide: square, semicircular and triangular. The latter is also necessary if you have a machine for selecting sharp internal corners; in drawings, say, with leaves, it is very difficult to do without them.
Notes:
- For smalt volumetric stained glass windows, a grinder is absolutely necessary. It is impossible to accurately maintain the required bevel angles of the side faces with your hands.
- It is also advisable to have a diamond needle file with a lenticular cross-section - for finishing the same corners on very small fragments.
You should look for bars made from natural garnet or corundum, heavy and very strong. The “sand” wonders of powder technology do not sharpen glass, but grind against it themselves. But grinding smalt even on the best block needs to be done under a layer of water, for which purpose the block is immersed in a bowl, baking sheet or some other suitable tray when turning.
Patina spatula
We make the spatula for applying the patina ourselves - from a toothpick and a piece of dense foam rubber 5-6 mm wide and 3-4 mm thick. Place it on a toothpick and secure it with a thin soft wire.
Materials
Glass
Tiffany smalts can be made from ordinary glass by painting it as for “poured glass”. But it is better to buy special stained glass. Translucent, matte or milky. In sheets it is expensive, but the same companies sell the battle (the material is valuable), but we don’t need much.
Notes:
- There is no need to immediately order cutting into smalts according to the sketch. Expensive, and you won’t be able to adjust it later. You need to cut the smalts yourself.
- Since Tiffany is assembled using soldering, the temperature of which the paint does not maintain, it is plain glass You must first assemble it completely, and only then fill it. You can use different colors on both sides, which will give the picture a shimmer when viewed from different sides.
Folia
Foil for framing smalt - folia - is sold in art stores especially for stained glass along with lead tape. A unit of goods is a roll of ribbon 4-7 mm. It is not advisable to cut a sheet of foil into strips yourself: the stained glass window will come out sloppy.
Soldering
Materials for soldering work are shown in the figure, including a soldering iron. Pay attention to the inscription: “Without rosin.” Thread-like solder with rosin inside (harpius) is not suitable for soldering stained glass. Soldering flux (this is the jar in the picture) is needed with borax or another semi-active one for soldering electronics. Residues of active flux (with orthophosphoric acid, etc.) cannot be removed from the binding, and it will eventually be corroded.

Usually, POS-61 solder is recommended for Tiffany soldering due to its low fusibility - 190 degrees. From ordinary tin-lead solders (240-280 degrees), smalts sometimes crack. But POS-61 is fragile, very soft. There is also POS-61M with a copper additive, 192 degrees, but it is only slightly stronger.
The best solders for Tiffany are those with cadmium additives: POSK-50-18 (145 degrees, in the figure) and Avia-1 (200 degrees, strength - like duralumin). POSK-50-18 is weaker, but still much stronger than POS-61/61M. It is inexpensive and, unlike Avia-1, it is easily accessible.
Patina
Nowadays, art and construction stores sell various types of blacksmith patina. It is better to buy liquid, ready-to-use. Preparing the composition yourself from powder will be only slightly cheaper, but it will be difficult, and the quality of the coating will be worse.
Stages of work

Sketch/stencil
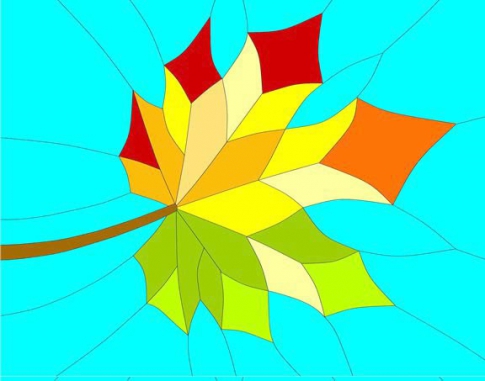
Already when choosing a design, you need to take into account the features of the technology and its weaknesses. S-, N- and deep U-shaped bends of the edges of the smalts are unacceptable: due to the difference in the TCR of glass and metal, the smalts along them will begin to crawl out and fall out over time. Ideal smalt is an area limited by convex smooth curves. If a non-monotonic bend is needed, it must be assembled from pieces, albeit of the same tone, see fig. Suddenly, due to the binding, the finished composition turns out to be flickering/clumsy - nothing can be done, you need to change or refine the drawing.
Note: drawings for stained glass windows are a separate area of painting. There are many ready-made ones on the Internet for different techniques, but if you want your own unique piece, you need to turn to a stained glass artist or look for your creative abilities.
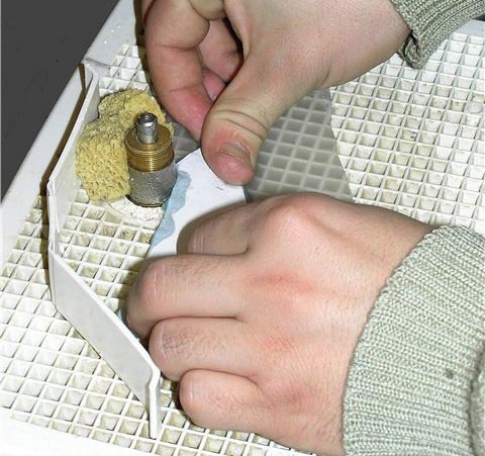
Cutting smalt
First you need to make a base, the same as for stained glass. With the correct cut, the residue breaks off with the slightest push, so there is no need to immediately bring it out to the overhang: after the cut, a thin strip is slipped under the glass behind the cut, and lightly press the residue with your finger. It didn’t break off – you can tap it while hanging.
Try cutting a piece of regular window glass. If the cut is creaky, a scratch is visible, and you need to tap it several times to break it, it’s too early to take on the smalts.
When cut correctly, the glass produces a quiet, subtle ringing sound, and the crack is completely invisible. To break it, just light pressure or a light push from below is enough. To obtain such a cut, you need to maintain the angle of inclination of the tool in the direction of the cut (about 45 degrees, or according to the specifications for the glass cutter) and keep it strictly perpendicular in the transverse direction.
The second condition is a strictly constant pressure force. The skill of angle and force must be developed to the point of complete automaticity when cutting lines of any kind. This is called placing your hand.
Note: The exact angle and pressure are individual for each diamond glass cutter. Therefore, ace glaziers do not use other people’s tools and do not offer them for rent.

But that's not all. A curved cut along a curve will never crack in itself, even if you crack it. It will go both ways and, according to Murphy’s First Law, exactly where it will do the most harm. What to do?
Auxiliary cuts along a tangent, the thicker the more curved, see fig. General rule– the deflection between two adjacent auxiliary cuts should not exceed two glass thicknesses. By the way, this circumstance also needs to be taken into account when developing a stencil. Therefore, if you order a drawing from an artist, then immediately specify the stencil. However, good craftsmen a stencil is attached to the drawing without anything.
If there is a corner on the smalt, a tangent from its beak to the least convex side is required. An important conclusion follows from the above: do not try to cut out many single-color smalts from a large piece at once. Almost all expensive material will go to waste. In general, smalts are cut one at a time as the stencil is filled, see below.
Here the question arises: how to trace smalt templates? The glass cutter is not the blade of a razor or a mounting knife; it is quite thick. But that's what stencil scissors are for. The width of the third, middle blade takes into account the resulting indentation.
Set to composition
Before starting to assemble the stained glass, the stencil is secured to the assembly board with even slats on the left (for left-handed people - on the right) and at the top. The smalts are laid from the corresponding far upper corner, see on the left in Fig.

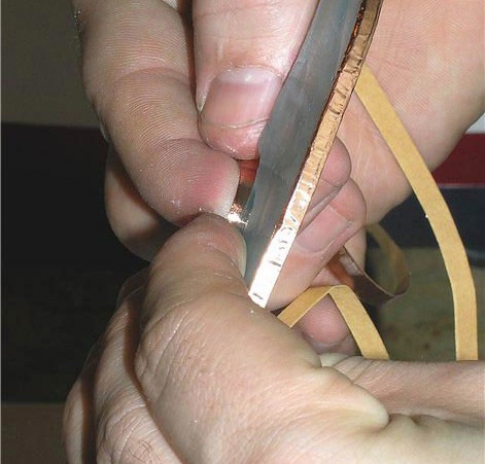
The smalts are cut out strictly one at a time, otherwise the whole set will spread out before reaching half. Having cut one out, they finish it and check it according to the stencil (you need an indentation inward from the contour of 0.5-0.7 mm for soldering). Then they wrap it in foil and roll its edges with a round piece of wood or plastic (middle position). After rolling, iron the side edge with the same smoothing iron; For internal sharp corners, it is convenient to use a school plastic ruler with a wedge-shaped edge or a plastic knife from a set of disposable utensils, and then re-roll it.
Now the smalt is placed in place before soldering, pressed tightly against the previous ones or the side, and the template for the next one is checked using a stencil. If necessary, cut the template with curved nail scissors, and only then return to the glass with a glass cutter. On the filled part there should be no visible gaps between the smalts, right pos. in Fig.
Note: the most the best stained glass windows are obtained by typing on a photocopying machine covered with calico or baize. The slightest crack is immediately visible.
Crimping and fluxing
After laying all the smalts, the composition is carefully crimped horizontally with slats, now on the right (left) and below. If the smalts begin to stick out at an upward angle, the foil is smoothed and further rolled, and pressed down from above. After this, fluxing begins.
The used smalt templates are laid out next to the shield in accordance with the composition and numbering. You don't need any special precision, as long as the pieces don't get mixed up. Now the fragments are transferred to this intermediate stencil, starting from the corner opposite to the initial one, i.e. in reverse order of assembly. This is so that the flux on the ends of the smalt does not dry out.
Next, the smalts are transferred one by one back to the working stencil in the same way as they were collected. In this case, the foil frame is coated with thin layer flux (it has the consistency of Vaseline) using a match or toothpick. Having assembled the composition again in the old place, they crimp again, but the right (left) and bottom slats are now secured with nails. You can start soldering.
Soldering
The main condition when soldering is not to do too much at once. Due to the difference in the TCR of glass and metal, when overheated, the entire composition may swell and fall apart. At a time, you need to solder a section of one or two men's palms, then let it cool, and solder further. Soldering is carried out in the order of installation.
Tiffany is soldered using the capillary method. First, along the contour of the next smalt, pieces of solder thread the width of a soldering iron tip are dripped onto the seam in increments of 1-1.5 cm. The operation is carried out in weight, without touching the solder thread or the sting of the foil. This is painstaking, exhausting and responsible work, so take your time and take breaks to rest.
Then the seams are soldered. Each drop or sausage of solder on the seam is heated until it all goes into the seam at once and spreads along it inside. If the flux evaporates and burns out earlier, this may not happen, so flux generously, but without dirt. The missing flux during the soldering process can be added only after the soldered area has cooled. There is no need to scatter the set; the flux can be applied on top and heated a little so that it flows into the seam.
Video: technique for working with Tiffany stained glass (eng)
Framing
The composition is also soldered into the frame. There is no need to glue it on epoxy or acrylic: due to the difference in TKR, stained glass will not last more than 5-7 years. The frame is made from a brass or bronze corner.
The frame must be solid; one is allowed solder connection in the overlay at the junction of the contour. Therefore, a U-shaped profile is not suitable: how can you fit a stained glass window into it, a solid one? You can, however, slip it piece by piece under the stained glass window, but then you need soldered scarves in the corners, which will be visible on the finished product. However, again, it’s a matter of taste. You can immediately coordinate the design with the scarves.
The inside of the frame is cleaned with a school eraser until it shines (semi-active flux does not dissolve the oxide film on brass) and thoroughly washed with a cotton swab heavily moistened with alcohol. Then they wipe it with a new, unused microfiber cloth for glasses.
Now the frame is coated from the inside, and the edge of the stained glass from the face and side is coated with flux, the frame is placed on the composition, and soldered like smalts, piece by piece. After cooling, the stained glass window is carefully turned over, flux is applied to the back of the gap between the edge of the composition and the frame, heated until it spreads, and the gap is soldered. All that remains is to rinse off any remaining flux and patina it.
Flushing
There is no longer any need to waste liters of alcohol to remove flux residues: they do an excellent job of removing them detergents for dishes. A particularly gratifying circumstance for a non-drinker: from “him, my dear” during alcohol rinsing such a spirit...
They wash the stained glass window (now a stained glass window) in the bathroom under the shower with a foam sponge soaked in detergent. Particularly stuck flux residues are removed with a toothbrush. They do not give in immediately, so a simple operation turns out to be painstaking: you cannot press hard or cut them off. Often a stained glass window has to be soaked for a day in a bathtub, into which a whole bottle of Fairy is poured, until the flux soot becomes limp and comes off under the sponge.
Patination
The final stage is patination of the binding. The operation is simple: we cast it into a small consumable container, scoop it onto a spatula and apply it to the binding. After drying, the excess is washed off with the same dishwashing sponge under the shower without any difficulties.
There is only one nuance when patination: it is a caustic and harmful thing, ready-to-use blacksmith's patina. Therefore, you need to work in a ventilated area, wearing protective gloves, goggles, and, preferably, a petal respirator.
After washing off the remaining patina and drying, the stained glass window is ready - you can put it in place in the frame and admire it.
About matting
Film and flood stained glass windows, used with backlighting, look good if the underside of the base is matte. Do-it-yourselfers are sometimes offered recipes for chemical matting, but these recommenders, it seems, have not smelled this chemical themselves, since they are alive: chemical matting uses deadly volatile components - hydrofluoric acid and its compounds. Matting with silicic acid is no better: concentrated sulfuric acid is needed, and toxic volatile products are also formed.
The easiest way to matte the back of the base yourself is to take and apply plastic tracing paper from the inside. Lasts for more than 10 years. If the matte base is visible from both sides, then there is a labor-intensive but completely harmless method:
- We buy 10-50 g, depending on the area, of corundum powder of the smallest fraction (0.05 mm).
- Scatter in small piles over the glass area.
- We drip flaxseed, rapeseed, Palm oil or spindle until you get a paste; The list is in order of preference.
- Rub with light pressure with a polish made of whole, not double, rawhide; A piece of an old, rough, wide waist belt will work well.
- The three front (smooth) sides of the polish, alternating longitudinal-transverse and circular movements. With some skill, in this way you can even get frosted glass for photographic equipment.
- Wash off the remaining abrasive with water, dishwashing detergent and a sponge.
Note: You need to flush it into a tray, not a bathtub, otherwise the plumbing will be ruined.
Video: program about making Tiffany stained glass windows
Finally, about aluminum
Someone, after reading the article, will remember: wait, what about furniture glazing? Why not stained glass? In standard duralumin profiles, cheap, beautiful, shiny. And you can bend them.
No, it's not stained glass. Stained glass is a separate transportable product in a solid frame, soldered or cast. Okay, let's solder. Aluminum is soldered, and even without argon - there are special “scraping” solders (TSOP, for example) and not particularly caustic fluxes based on oleic or palmitic acid.
Yes, but the temperature is needed at 350-400 degrees; glass does not keep this in close contact with the metal. If you heat the entire set very slowly on a fireproof shield, it will swell and disintegrate due to the difference in TCR. Give allowances for thermal expansion - it shrinks and falls apart when cooling.
So “real-life” stained glass windows with aluminum binding, not using glue and resins, are not yet available. If someone figures out how to make them, it will certainly be a revolution in stained glass art: aluminum alloys lightweight and comparable in strength to steel.
(1 ratings, average: 5,00 out of 5)

Stained glass is a special decor that enriches and adds value to the interior, making it original and sublime. However, what makes the interior expensive is not only the highly artistic quality of the stained glass products, but also their considerable cost. And this is quite justified, because stained glass is a painstaking creative work, art, and skill in such a matter is highly valued. In this case, reasonable questions arise as to whether it is possible to master this craft on your own and how to make stained glass with your own hands.


DIY stained glass windows - where to start?

Do-it-yourself stained glass windows, naturally, begin with a great desire, and if closer to the point, with the development of a sketch. If we talk about classical techniques and their imitations, then the sketches should be:
- V full size stained glass on paper and cardboard;

- with clearly drawn contours of details, breaking the drawing into separate figures;

- on cardboard indicating the color and material of each fragment;

- for type-setting stained glass - possibly indicating the direction of the glass fibers and numbering the parts.

In theory this may seem complicated, but in practice everything is simpler: the appearance of a complete stained glass window diagram is similar to a coloring book for children, on separate parts on which numbers, arrows or other necessary symbols are drawn, which facilitates the assembly of the stained glass window. Depending on the complexity of the design and the technique of making stained glass, more or less of them will be required.


Advice. To save time and effort on developing a sketch and stencil, you can download and print a ready-made stencil for stained glass. To transfer the design to the glass you will need a disappearing marker.

Stained glass manufacturing technology

The manufacturing technology is selected, including, based on what the stained glass object will be: whether the stained glass is planned on a window or on a door, on a mirror or on a vase, or perhaps it will be stained glass lamps or glass paintings. Each individual case will have its own manufacturing and installation features that make a certain technology a priority.

The following three techniques are most suitable for producing stained glass at home:
- Tiffany stained glass;

- film false stained glass;

- contour stained glass window.

They do not require specific expensive equipment, such as a fusing furnace, or the presence of an equipped workshop in connection with working with chemicals, abrasives and harmful fumes, such as, for example, for frosting glass or making stained glass windows using the classic lead-soldering technique.

The Tiffany theme essentially combines all three methods, since film and stained glass windows- these are ways to imitate classical techniques.

How to make Tiffany stained glass

In short: according to the finished sketch, templates of parts are cut out of cardboard, they are traced on glass, the parts are cut out with a glass cutter, polished, each element is wrapped with copper foil around the perimeter, all parts are laid out in a single pattern, the position of the edge elements is fixed with nails, the foil at the joints is treated with flux, soldering is carried out with tin solder on one and then on the other side of the product, the stained glass window is inserted into the frame from metal profile and soldered to it.

At each stage of creating a stained glass window, you should take into account a lot of nuances:
- in the drawing, details with several sharp corners(N-shaped smalts) or sophisticated S-shaped curves: soft bends of curved lines are best;

- It is not sheet glass for stained glass that will cost less, but broken glass; glass cutting should be done diamond glass cutter, having previously practiced on ordinary glass; for curved figures it is necessary to make auxiliary cuts tangentially;


- the production of parts and their placement in the pattern is carried out simultaneously: each part, starting from the upper corner, is cut out, polished, applied to the pattern, wrapped in foil, applied again to the pattern and, after checking, fixed in the appropriate place; It is more convenient to assemble stained glass on a surface illuminated from below;


- for soldering you need a 100-watt soldering iron with a nickel-plated tip and low-melting tin solder without rosin; To prevent the glass from cracking, you should not solder too large areas at a time, you should let the stained glass window cool, etc.


DIY stained glass windows, master class:
How to make film stained glass
Making film stained glass is a simpler task than assembling Tiffany stained glass.
- The glass is cleaned; According to the sketch placed under it, the contour lines are laid out with lead tape. The ends of each line should overlap the next piece of tape. When all the contours are pasted over, the tape is rolled with a roller;
- The glass is turned over, wiped; elements from the film are cut out along the contours formed by the lead tape, glued to this reverse side and also rolled with a separate film roller;
- The joints of the films are covered with lead tape, following the contours of the tape on the first side, and rolled with a roller; The finished stained glass window is wiped with detergent.
To decorate false stained glass, you can use real glass parts mounted with special glue.


How to make a stained glass window
For poured stained glass, a polymer contour and stained glass acrylic varnish or special paint are required.
- A sketch is drawn or printed, which is placed under transparent glass or transferred with a disappearing marker onto a matte or mirror base;
- The glass surface is cleaned and degreased;
- A polymer contour is applied according to the drawing, forming closed areas;
- After the outline has dried, each element is carefully filled with liquid paint.
Apply a drop of paint near the outline, without touching it. The paint should not be smeared, it should spread naturally, so that the result is a beautiful stained glass window that plays with light.
DIY stained glass windows, video:
 (1 ratings, on average: 5,00 out of 5)

