DIY lampshades for chandeliers: original ideas and decorating workshops. DIY paper chandelier Paper ball chandelier
The idea of creating designer furniture or decorative items with your own hands has always enjoyed special recognition. Have you ever tried to make something interesting, a chandelier for example? At first glance, it seems that nothing worthy will come of this idea, and this is the privilege of designers. Moreover, you need to spend a lot of time buying necessary materials, and have straight arms, otherwise the result will be disastrous. But this is only at first glance. In fact, you can create magnificent beauty from absolutely any things you have at hand or gathering dust in the attic. And there is absolutely no need to be a great master. All you need is a little ingenuity, imagination, free time - and the chandelier, made with your own hands, is ready.
Fluttering tenderness
A great option for a “test of the pen” is a chandelier made of butterflies. It’s very easy to do it with your own hands, and if you use your imagination and slightly change the idea, the result can exceed your wildest expectations. So let's get started.
What will it take?
We can say that you will need nothing at all:
The base of the chandelier itself with a socket and a light bulb (quite suitable from an old one); if desired, it can be repainted in a suitable color;
The frame for the lampshade can be taken from a previous chandelier or use a hoop from a hoop;
Pieces of tulle and ribbon or fabric, the main thing is that the color scheme is harmonious;
Lighter, fishing line and hot gun (matches, strong threads, glue);
You can cut butterflies from fabric, thick paper, plastic, in general, from any material that may be suitable for these purposes and is available;
A shaped hole punch for butterflies; if you don’t have one, you can use scissors.
Let's put this miracle together
First of all, we wrap the hoop with tape, securing it with inside glue and decorate it. Cut a ribbon of a different color into small pieces and tie them around the hoop in a circle, making indentations. Instead of scraps of ribbon, you can tie small, neat bows, as your imagination tells you. We singe the edges of the ribbons with a lighter so that the threads do not unravel. We knit pieces of tulle into the free spaces between the bows (shreds). We attach four equal strips of tulle or ribbons to the hoop; they will hold our future lampshade based on the chandelier. Tie them together with a bow at the top.
Let's move on to the butterflies. You can cut them yourself different shapes and sizes. We use multi-colored materials, and, if they allow, we give the butterflies a shape and relief. They can be painted or covered with glitter.
It is better to first unwind and straighten the fishing line so that it does not gather in curls. Place a piece of fishing line on the table and hot glue the butterflies to it with a hot gun. The distance can be completely different. You can insert beads between the butterflies themselves for added beauty and also secure them with glue. Let the glue dry.
Tie the finished sections of fishing line with butterflies to the previously prepared hoop. You can evaluate the overall result and add as many as you wish. The butterflies can be placed either at the same level or along the entire length of the fishing line.

In our case, a chandelier consists of three shades. You can also design the top mount with your own hands, or you can buy a suitable one. It should hide all wire connections, set the distance and fit tightly to the ceiling.
All that remains is to put all the parts together. We connect the wires, attach the lampshades and... enjoy a job well done!
It will take a lot of time, but it's worth it, believe me.
Below is another great option. paper chandelier. Tell me where it is possible to buy one? Unless you do it yourself.

How to make this beauty?
We need a paper lantern, a glue gun and coffee filters. You will need a lot of them; one such chandelier takes almost 400 pieces.

The beautiful airy and fluffy lampshade is ready!
A little bit of nature
DIY chandelier made of wood. Do you think it's difficult? Not at all. Let's look further.
Materials
Here you will need:
Frame from an old chandelier;
Grape twigs and willow vine;
Twine, wire cutters and spray paint.
Front of work

We select grape twigs of suitable size, clean them of all excess and fasten them to the frame of the chandelier with twine. Each branch should smoothly fit against the bends of the metal, braiding it, and be well fixed.
Use willow twigs to wrap the string fixation points. They are more flexible and can be used to cover all difficult places. The DIY wooden chandelier is almost ready, all that remains is to paint it. The color range is very different, from white to blood red.
Another interesting option. A large one is used vine. You just have to give it a shape and weave it into a ball. The vine may not be very pliable; you will have to wet it well and only then form the sphere. In this position it will have to dry. Carefully fix each strip and set the tone for the frame of the chandelier. It’s not a day’s work, but the result is worth it, incredibly beautiful.

With the aroma of Burgundy
What do you do with empty wine bottles, you're probably throwing it away? But in vain. They may turn out original chandelier from bottles. It's quite easy to make it with your own hands. You just need to stock up empty container, preferably not from too dark glass (otherwise the lighting will be dim), a glass cutter, wires and cartridges. Now we will tell you how to make such a chandelier with your own hands.
Master class with bottles
First, rinse the bottles thoroughly and remove the labels. You will need to cut it off afterwards. bottom part. We only need the top one, it will be the lampshade. Draw a straight line with a glass cutter and walk along it, lightly tapping it with a hammer. Afterwards the bottom can be beaten off. Process the edges of the cut; it is better if they do not remain sharp. Place the wire inside the bottle and connect the cartridge. Screw in the light bulb. Ready!
You can use several bottles on the same level or different ones, combine them by glass color or shape. Your imagination has a green light!

However, not only glass bottles can be used. Plastic ones are just as suitable for this role. A little effort - and you will make a chandelier with your own hands! You just need to prepare the material; the more bottles you collect, the better. They can be of different shapes, sizes and colors. Cut off the lower parts, connect them together with fishing line and attach them to the base. Voila! And the best part is absolutely free.

The ideas for creating such unusual things are very interesting. You can invent, complement and create from absolutely everything. The field for activity can be not only chandeliers, but also floor lamps, table lamps and even sconces. They can be changed completely or improved with small additions that will bring harmony to the interior and create even greater comfort. Inspired by such ideas, you can make a beautiful thing not only for yourself, but also as a gift to a loved one.
Fantasize, search and try, and you will certainly succeed. Perhaps you will come up with something special, original. You can make not only beautiful, but also useful things, such as, for example, the popular Chizhevsky chandelier. You can make simple ones with your own hands, but really worth it products. Good luck in your endeavors!
Making something with your own hands and then decorating your home is not a source of special pride? Homemade items allow you to unleash your creative potential and save a lot of money at the same time. AND self-production lamps are no exception. Today you can find various ways how to do lighting fixture with your own hands. To do this, just type into the search bar “how to make a paper lamp with your own hands.” But you no longer need to do this, because in this article we will try to give the most complete answer to this question. Here we will touch on the most pliable material for a lamp - paper.
Our article will also help you understand whether you can cope with such work, and whether it is suitable paper lamp to suit your interior.
Paper - what could be simpler?
Light from a paper lamp
Lightness and airiness are what many associate paper with. Therefore, the paper lamp will also take on these properties, bringing with it to various interiors:
- unusualness;
- softening and smoothing out angularity;
- creating diffused and subdued light, giving the atmosphere romance and mystery.
Today, paper lighting fixtures are associated with Asia and the East. It was here that not only paper, but also products made from it first appeared: umbrellas, lanterns, etc. The East, as they say, is a delicate matter. This statement is perfectly brought to life with the help of paper and creativity, which is reborn into unique and unique lamps.
Despite the fact that China is considered the birthplace of paper, paper lighting fixtures can be safely made in different styles:
- Japanese;
- Chinese;
- pop art;
- eclecticism;
- country;
- vintage, etc.
Note! Only by making a lamp with your own hands will you be able to perfectly match it with the rest of the interior, emphasizing or connecting together all the directions of the design used.
Since working with paper is quite easy, and you can find it in almost unlimited quantities in the house, today there are a wide variety of options for assembling paper lamps. Let's look at the simplest and most popular of them.
Since paper was first made in China, it is logical to start with the creation of a lighting device in chinese style.

Chinese style lamp
Many people prefer to make lamps from paper in the Chinese style, since in this case they can bring brightness, vibrant colors and a sense of celebration to the interior. All this can be achieved with a Chinese lamp.
Materials you will need:
- paper. It can be rice or regular. It is desirable that the sheets of paper be translucent, colored or white;
Note! For the closest possible resemblance to the original Chinese folk lamps, you should work with rice paper.
- cartridge. It can be bought at the market or taken from an old chandelier;
- bulb. Since the lamp will be made of paper, unheated light bulbs should be chosen as a light source. It is best to opt for LED bulbs.
In addition to the materials themselves, you will also need some tools:

Chinese lantern diagram
- pencil and ruler;
- stationery knife;
- awl;
- a thread.
The lamp assembly will proceed as follows:
- make markings on the back of the paper. This way you can create a relief. To make a Chinese lantern, you need a diagram, according to which the markings are made;
- We bend the paper according to the markings to get an accordion in the right places. Do not rush in this matter, since how smooth and beautiful the flashlight will turn out will depend on the accuracy of execution;
- we assemble the socket and the light bulb together;
- Make holes in the bottom with an awl and thread a thread through it;
- wrap our cartridge around paper lampshade. The edges of the paper sheet can be glued or simply placed on top of each other. Last option will help you quickly change light bulbs without damaging the lampshade.

Ready-made flashlights
The difficulty here can only arise in the correct folding of the base of the lampshade. As a result, you will get a beautiful and almost authentic Chinese lantern. To make it more beautiful appearance, you can paint the lampshade with Chinese characters or stylized designs.

Lamp frame
In Japan, paper products are also very popular and widespread. Therefore, you can safely use Japanese motifs when creating a paper lamp. Paper (preferably rice paper) is also the main element here. But now it will be supplemented with bamboo sticks. Note! Bamboo grows in Japan, so this element will look great in the overall display of the lamp.
Here you will need the following list of materials for work:
- tracing paper (in the absence of rice sheets);
- ceramic cartridge with a small base;
- thread, preferably thick;
- stain;
- piece of MDF. Can be replaced with plywood;
- wire with switch and plug.
Tools you need to have on hand:
- PVA glue;
- sandpaper;

Finished Japanese paper lamp
- scissors;
- file;
- square;
- brush.
For the base we take plastic corners, bamboo/wooden slats or wire. We assemble the lamp base according to the following scheme:
- We clean the slats with sandpaper and cut them to the height we need. This will be the height of the entire lamp;
- We make markings on the slats at the gluing points. They will help to make an even and beautiful frame;
- We coat the joints with glue and assemble the slats into a single structure. For strength, corner joints should be knitted with thick thread. This will help strengthen the base and also give it decorative look. The frame itself can be round or square;
- MDF sheet will be used as a cover. We make a hole in the sheet for the cartridge;
- after that everything wooden elements the structures are covered with stain. You can apply varnish on top of it. Such protection will make the tree resistant to negative influence moisture and protect it from wood insects;
- Now all that remains is to attach the paper sheets to the frame. They can be left clean, but it is better to first apply a Japanese pattern or hieroglyph here. We simply glue the sheets to the frame.
This is a slightly more complex version of the lamp in terms of implementation. But it turns out to be more durable and of higher quality, which will have a positive effect on the service life of the lighting device.
Glass and paper
The easiest thing to make with your own hands is a glass lamp. This is a portable table lamp that is very quick and easy to make. To make such a lighting device you will need:
- a thin sheet of paper (you can print a specific pattern on it);
- round and tall glasses;
- wire with a thickness of 1-2 mm;
- candles-tablets.
The tools you will need are:
- scissors;
- PVA glue;
- pliers;
- stationery knife;
- scotch.
The algorithm of actions here is as follows:

Bent wire
- bend the wire using pliers so that it takes on the appearance shown in the photo. A candle-tablet will be placed on its lower part. The length of the wire should ultimately be slightly greater than the height of the glass. This will make it much more convenient to remove the candle from the container;
- The glass itself should be decorated with a sheet of paper on which the pattern you like is applied. Carefully glue the sheet to the glass. The top of the container can be decorated using plaster or polymer clay.

Ready glass
As you can see, this requires a minimum of effort and time, and as a result you will get a beautiful lamp, perfect for a romantic dinner or just a quiet, relaxing evening of relaxation.
Paper straws
Probably the most original and unusual lighting device in our “paper” history will be a lamp made from paper tubes. You can decorate any lamp with this lampshade:
- chandelier;
- table lamp;
- floor lamp;
- wall sconce.

Tube lampshade
Such a lampshade will provide a soft and subdued light, which will become a real highlight of any interior, made in any style. Here, as you might guess, the main and only elements of the entire structure will be paper straws. They can be made from both newspapers and colored paper. The main thing to remember is that the appearance of the lampshade should complement the existing interior in the room.
The number of tubes depends on the size of the lamp on which it will be placed. The “pipe minimum” that should be wound is 100 pieces. The tubes are attached to each other using the same PVA glue, thus forming the required shape:
- round;
- oval;
- square;
- arbitrary.
First, the first row is laid out, and then the entire structure is built on it.
Note! The walls here need to be built in such a way that the lampshade expands towards the center. To do this, the diameter of the mold must be gradually increased, and after the middle - gradually reduced.
If desired, the resulting lampshade, after it has dried, can be painted with spray paint. The result is a solid product without flaws.
This is far from full list possible options making a lamp from paper. But these are the most popular methods that are implemented easily and quickly.
Conclusion
As you can see, making a paper lamp with your own hands is quite simple. Not needed here expensive materials or a lot of time. If you strictly follow the instructions, you will be able to quickly complete the task, and your home will have a new, beautiful and, without unnecessary modesty, original lighting fixture.
A chandelier in any room is no longer exclusively a lighting device. It would not be an exaggeration to say that this is the piece of furniture that is the main decoration in any room.
Of course, a DIY chandelier will be a particularly valuable thing. This will not only highlight the special taste of the home owners, but also their creative mind.
Despite the fact that if you decide to make a lampshade with your own hands for a chandelier, you will need to spend quite a lot of effort, because the process requires special concentration - surely the work time cannot be considered wasted, since the work will bring incredible pleasure and will even leave a pleasant aftertaste, and in the future you will definitely want to repeat this kind of work again.

If you are thinking about how to make a chandelier, then you have probably already seen that today you can use the most various materials and sometimes completely unusual. For example, very often the lampshade for a chandelier is made of wood or glass.
However, if you want something even more incredible, then you can also use cardboard, wooden skewers, and even wine bottles. The choice here depends solely on the ideas that the creator has, as well as on various kinds of wishes of the apartment owners.

In addition, a chandelier from scrap materials must also be created taking into account general interior rooms.
Chandelier made from plastic spoons
Disposable spoons, which most people are used to using exclusively for picnics, can actually also be one of the simplest and yet easily accessible materials for creating an interesting chandelier option for any room.

If you look at a photo of a chandelier of this type, you will be struck first of all by the variety color range, and in the future it will be easy to understand that the material will last a long time.

Moreover, in order to create such interesting subject interior, you will need a minimum of financial and material investments.

What materials will be needed?
- Any empty bottle made of plastic. The only condition– its volume cannot be less than five liters.
- Any plastic spoons. Their number depends solely on the chosen size of the future chandelier.
- Glue that allows you to glue plastic together.
- A socket from an old, no longer working chandelier.

The process of creating an original chandelier
Prepare plastic bottle. First of all, you need to get rid of the label and bottom, and also dry it properly.

Remove the spoons from the plastic and use a knife to remove any handles that are not needed. The only thing you need to do is leave a couple of centimeters above the so-called “scoop” level.

Glue the blanks to the base of the prepared bottle. On the “tail” that remains, you need to apply as much glue as possible and then press it to the surface.
It is very important to continue to cover the entire bottle in this way directly in a circle until the entire prepared perimeter is “occupied” with plastic spoons.

It is best to arrange them in a classic checkerboard pattern and move them slightly together.

This way it will be possible to reduce the number of “free spots” to a minimum.
- The shade is removed from the old prepared chandelier and placed in a dried bottle.
- If desired, decorative ones can often be done in a similar way.

That's all. All that remains is to install the chandelier in the chosen location, and also check its operation by connecting it to the power supply.

One more interesting option chandelier is a chandelier with decorative butterflies. It is worth noting that when going to almost any master class on making a chandelier, designers always offer to learn how to create it, which is not surprising, because it can fit perfectly into almost any interior of the room.
Note!

Besides that this option it looks truly luxurious and expensive, even a child can make it with the help of an adult, so its popularity is easily explained.

DIY chandelier photo


Note!


When starting to arrange the interior space, it is important to think through every little detail. After all, we all subconsciously strive for comfort and that is the smallest details are able to create a special atmosphere, convey general idea, mood and character of the room. Professional designers claim, and interiors clearly prove, that right choice Chandeliers can not only decorate the interior of a room, but also make life brighter and more fun. The lamps give special grace and gloss beautiful lampshades for chandeliers with original design. You can find out how to make them yourself and what materials are best to use for this in this article. Detailed, step-by-step master class, and visual photo, will become for you great help in this exciting process.
Material selection
When making a chandelier, it is difficult to single out one material that would meet all the requirements. Each of them has its own individual characteristics and features. For example, paper, which is the simplest and available material, lends itself well to transformation.
Lamps made from glass shards and strips of metal have a dazzling shine and beautiful appearance. Wood and fabric add warmth and comfort to the interior. Lace lampshades are distinguished by their special beauty, captivating everyone at first sight.
In a word, you can make a chandelier with your own hands from anything, the main thing is to be smart and use your imagination in time.


Chandelier from paper napkins- a rather bold but justified experiment
We will describe in detail how in an ordinary object you can discern its creative potential to create an exclusive decorative element in this article.
Step-by-step instructions, with a description of each step, will help you make from available materials incredibly beautiful and unique lamps that will be an excellent addition to your favorite interior.
What you need to pay attention to before making a chandelier
Many people are interested in how to properly make a chandelier in and other rooms. After all, you want this element of the interior to be not only beautiful, but also functional.
On the one hand, a chandelier is a lighting device that can provide the proper level of lighting in an apartment. After all, a lot depends on the choice of light in the room, including eye safety. On the other hand, I want ceiling structure complemented the interior design, creating a special atmosphere of warmth and comfort.
When making a chandelier, first of all you need to take into account the height of the ceiling. For example, for low people a chandelier with a bar mount is suitable. So, the ceiling will look visually higher. If the ceilings are high - 3 m and above, then it is better to make your choice in favor pendant lamp with hook fastening.


Lamp selection
For any room you need to take an individual approach to the intensity of its lighting.
For a small bathroom you will need 80-100 W.
Kitchens require a lamp power of at least 120-150 W.
The living room and hall cannot do without light bulbs in the range of 150-300 W.
The number and power of lamps is calculated based on established standards - 20 W are required per 1 m². electricity. It is also necessary to take into account the parameters of the room, its dimensions and reflective properties.

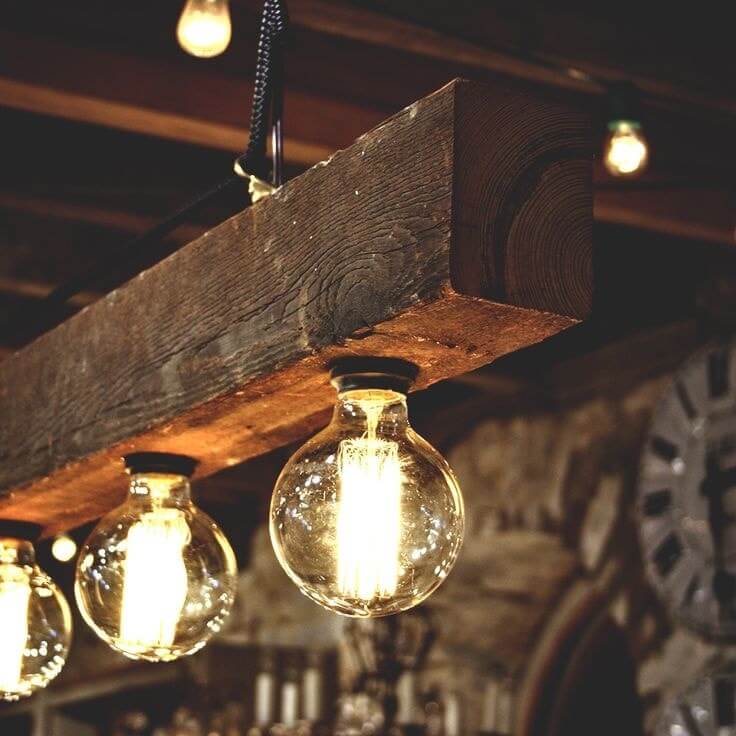
Designer Edison lamps - look beautiful and unusual
Design of the lampshade
The appearance, decor and design of the lampshade occupies an important place in the design of a chandelier. It is selected to match the interior of the room, depending on the style. Crystal for classics, metal and glass for, wood fits perfectly into country or chalet style, fabric and silk are perfect suits the style Provence
To illuminate a room in several levels, you can additionally make wall sconces or floor lamps.


Step-by-step master class on making
To make a beautiful ceiling decoration, you don't have to start from scratch. Look around, you probably have something in your house that you haven’t used for a long time. And who knows, maybe it will become the main item in production original lamp. Moreover, there are now more than enough ideas and inspiration for creativity on the Internet.
Important! The best place to start searching for the things you need is in the kitchen or balcony. It is there that we store all sorts of rubbish that we once needed so much and which, as often happens, is so difficult to part with later.
Spectacular chandelier made from mugs
No matter how strange it may sound, it is from dishes and other kitchen utensils that the most unusual and interesting models lamps. For example, tea mugs are an ideal material to make a spectacular lamp.
For work we will need:
- Mugs
- Saucers
- Drill
- Porcelain drill with special hole

We make it quickly and easily
- In the bottom of the mug, use a drill to make a small hole for the wire, attach the electric cartridge and bring the wire out. It is advisable to seal the hole with a plaster mixture.
- Next, the mug must be glued to the saucer, where there should also be a hole, insert a light bulb and hang the newly made lamp in in the right place.
As you can see the original and fashion design can be obtained from completely ordinary items.


Mesmerizing yarn chandelier
Since this is quite a simple product, to make it we need a minimum of things, namely:
- Wire with a cross section of 4-5 mm.
- Wire cutters
- Thin thread
- Multi-colored yarn
Manufacturing instructions:
- A ring is made from wire, the diameter of which will correspond to the future size of our chandelier. To get a perfectly even circle, it can be wound on some object that has a cylindrical shape.
- We bite off the excess wire with wire cutters, leaving a reserve of 2-3 cm on each side. We tie the ends with a thin thread.
- All that remains is to decorate our chandelier beautifully and brightly. To do this, we cut the yarn threads so that the length of each segment is twice the height of the lampshade.
- One by one, we tie the resulting strings onto a knot until we hang them all over the ring. From the same yarn we make a fastening for the hook.
This lampshade can be used both as a chandelier and as a decorative element decorating the interior of the room.


By combining the skills of macrame and papier-mâché you can get stylish chandelier for the bedroom
Important! To make such a lamp, instead of wool yarn, you can use any other thread. The main thing is that it harmoniously fits into your interior.
Unusual lamp made from a teapot
How to make your own chandelier from regular teapot, you will learn from this master class. Here's what we need for this handmade masterpiece:
- Kettle
- The wire
- Electrochuck
- Metal chain
Step-by-step manufacturing guide
- First of all, the lower part of the teapot is cut out. This is done in such a way that the resulting cutting edge is not sharp, otherwise you could get hurt on it.
- Next, an electric cartridge is fixed to the lid of the kettle, the wire of which is led out through a small hole drilled at the top.
- A chain is attached to the handle of the kettle, and a wire is threaded through the links. The lamp is ready.


Let's breathe new life into bottles
Glass bottles, especially if they have beautiful shapes, can be used to make a wonderful chandelier. Required material:
- Thin rope
- Flammable liquid (alcohol or gasoline)
- Glass bottles (preferably colored)
- Edison lamps (having a beautiful spiral)
- Wire and electric cartridge
Do it yourself
- We wrap a rope around the bottom of the bottle, after wetting it in flammable liquid. Then we set it on fire and let it burst, and we begin to slowly rotate the bottle around its axis until the rope burns out completely. After this, we lower the bottle into a container with cold water, wrap it in a towel and, with a little effort, break off the bottom.
- To ensure that the cutting edge is not sharp, it must be sanded. To do this, it will be enough to swirl the bottle in sand or fine gravel for a couple of minutes.
- All that remains is to mount the electric socket correctly, stick the wire through the neck, and screw in the light bulb. From the remaining bottles, the remaining lampshades are made in a similar way.
This chandelier will fit perfectly into any interior, especially if you hang it above the bar counter.


Decor from cans
Lamps made from cans are no less beautiful. They are made in the same way as from bottles. The only difference is that the bottom of the jar does not need to be cut off, since clear glass is usually used for lampshades.
We need:
- Beautiful thick-walled jars (preferably with a relief pattern)
- Hammer and nails
- Wire, electric socket
- Spray paint
- Edison lamp
How to do it right
- To begin with, using a nail and a hammer, holes are punched in a circle in the lid, after which inner part gently squeezed out. The diameter of the circle must correspond to the diameter of the base in the cartridge.
- We insert the cartridge into the cover and mount the wire.
- Next, we paint the lid together with the cartridge in the color of our choice. Metallic paint with a golden shimmer will look best.
- All that remains is to screw in the light bulb, close the lid and install the lamp in its proper place.


We all know what a globe is, but not everyone knows what amazing things can be made from it. For example, a cute lampshade for a chandelier that will fit perfectly into the interior of a children's room.
Here's everything we need:
- globe
- Bulb
- Electric chuck with holding element
Step-by-step master class
- Usually the globe structure is not solid, so in order for us to get required element, it is necessary to divide it into equal two parts (hemispheres).
- Next, at the top point of the hemisphere, you need to make a hole for the cartridge. For this, it is best to use a drill with a crown.
- The electric cartridge is installed in place and securely fixed by the holding element. Congratulations, your chandelier is ready!


Hanging structure made of horns
Making a unique lighting device from deer antlers is quite simple, the main thing is to have the necessary material on hand.
Such designs are famous for their special sophisticated appearance and are best suited for rooms with high ceilings. Such chandeliers are used in many interiors, but they look especially attractive in country, chalet or rustic style.
As a rule, the shades of such chandeliers have various shapes, and only natural material is used for their manufacture.
We will need:
- Antler
- Rope
- Copper wire
- Electrical socket and wire
- Bulb
Make a chandelier like this
- Observing the safety rules, we connect the wire to the electric cartridge according to the diagram.
- Next, the wire needs to be wrapped beautifully decorative rope. For better fixation, you can use universal transparent glue.
- By using copper wire, in the lower part of the resulting rope, horns are attached, placing them 2 cm above the cartridge.
- We repeat a similar procedure with the remaining lampshades, later combining them into a single composition.


Ideas for making beautiful lamps (photo, video)


Do you dream of adding brightness to the nursery or refreshing your workplace in the house? Or maybe you are a lover of the East, where the fashion for these such delicate little things came to us from? Then you should definitely read how to make a lamp out of paper with your own hands - unusual, original little things will instantly add a bit of magic to any corner of the house!
We guarantee that your guests will be asking for a long time where you bought this designer lamp, and having learned that you made it yourself, they will ask you to tell you how to make a paper chandelier with your own hands and its step-by-step instructions.
In this master class we will show you four ways to make a lamp out of paper, take a look and choose the option that’s right for you.
To create this delicate lamp, prepare:
- Colored paper of any color;
- PVA glue or glue stick;
- Paper clips;
- Compass;
- Scissors;
- Fishing line;
- Colored yarn;
- LED lamp ( );
- Wire with switch.


Step-by-step instruction:
Step 1
- Using a compass, draw semicircles 1 cm wide on a colored sheet of paper.
- With each line we increase the diameter of the semicircle.
- Please note that you will need quite a lot of sheets. Then cut out semicircular strips and cut them into pieces of 2-5 cm.


Step 2
- Roll and glue the resulting strips, making one side larger than the other - this will make it easy to glue them together into a dome-shaped shape. After that, you can connect them with glue in pieces of five.
- Glue the clusters together, strengthening them with paper clips until the glue dries. Glue until you have a circle, with a small hole for a lamp.
Of course, you can fantasize, and your lamp will be a little different than ours.

Step 3
Now, while our glue is finally drying, let's decorate our wire. To do this, take yarn of any color you like and carefully begin to rewind the wire with it. Try not to leave any uneven spots when wrapping the yarn over the previous layer.
You can add a drop of glue to the end of the yarn to strengthen it.


Step 4
Let's make a holder for an LED lamp. To do this, we tie a fishing line on three sides (it is advisable to measure the distance evenly) to our glued strips, and the other ends to a paper clip, which we first straighten to the shape of a triangle.

All! All that remains is to place the lamp in the circle and screw it to the wire. You can hang such a lamp either separately or in combination with, for example, .

Master class No. 2: Chandelier made of rice or parchment paper
We present to your attention new master class, where we will teach you how to make lamps from rice paper. There is nothing complicated in manufacturing, as it may seem at first glance, and you can connect to this exciting activity all household members. The designer lamp is suitable for both the nursery and your bedroom.
Instead of rice paper, you can buy a roll of parchment paper for baking

So, to make a lamp you will need:
- Unnecessary lampshade;
- Thin wire;
- Several rolls of rice paper;
- Iron;
- Paper cutter;
- Sewing machine.
Self-production
Step 1
Take a lampshade you don't need (you can buy inexpensive new) and remove everything from it, leaving only the base. If your lampshade is similar to ours, then add a wire in the middle, securing it well.

Step 2
- Prepare the parchment paper by unrolling the rolls and cutting them into roughly equal rectangles.
- Iron the sheets until they become completely even and smooth.
- Fold each sheet like an accordion, measuring equal distances of strips, and use a paper cutter to cut equal, even circles.
- Try to use the cutter more carefully and don't leave a lot of extra paper– you will need a lot of circles.


Step 3
- Connect all the circles together by stitching in the middle. Make connected circles of equal length and begin to strengthen them around the circle of the lampshade.
- Once you complete the first circle, go around the subsequent ones, decreasing the length each time.
- Carefully secure your lamp in the desired location, straightening all the threads.
Remember to only use LED bulbs, to avoid fire.


This beautiful chandelier- the result of painstaking work, after completion of which you will admire your work and be proud of yourself for a long time. On our website you will find many more ways to diversify your home lighting, for example:
- you can or .
- , for lovers of modernism.
- Or for lovers of eco-style.

You can also at your discretion, paint the rice paper circles in any shade, based on the color scheme of the room. If you want to hang this lamp in a child's room, you can add, for example, glass angels on long gold threads - again, choose the right accessories for your child's room. different rooms, this will add warmth and originality.


WARNING: Be aware that incandescent lamps produce very hot temperatures and may cause paper to ignite. For paper lamps and fixtures, use only LED lamps.
Master class No. 3: Origami chandelier made of paper

This beautiful bright lamp really resembles a ripe berry!
To make it, take the following:
- 2 paper bags, so that when gluing you get a one and a half meter bag (preferably with an interesting print);
- LED lamp (never an incandescent lamp );
- Wire with switch;
As soon as you decide that training is no longer necessary, we begin preparing the paper bag. Remove the handles and cut the bottoms off the bags and glue them together to make one large paper bag.

Fold the resulting bag in half, and then fold the halves like an accordion so that you get 16 identical folded strips. Then fold the two outer strips diagonally.


Follow the simple diagrams and you will get wonderful lamps to decorate your home. You may have to practice a little to fold origami perfectly, but you won’t regret it, because origami is a whole world of various interesting things created with your own hands. And your children will simply be amazed by your skillful hands!

Master class No. 4: Corrugated paper lamp

To make unusual lamp you will need:
- Corrugated paper 88×44cm;
- Ruler;
- Spoke;
- Glue;
- A thread;
- Cable;
- LED lamp ( never an incandescent lamp ).
Step 1 
- Using a ruler, mark a sheet of paper at equal intervals and fold like an accordion according to the markings.
- Helping yourself with a knitting needle, fold the folded sheet of paper diagonally, first on one side, and then unfold it on the other side.
- Unfold the sheet - you should have it double sheet marked with diamonds.
Step 2
- Connect the marked lines according to the photograph; it is advisable that the sheet is not very wrinkled at this time - otherwise the appearance of the lamp will be spoiled.
- All that remains is to connect the top of the lamp with a thread so that it does not fall apart, and secure the cable with the LED lamp.

Be safe - do not use regular incandescent lamps, they heat up the paper and it may catch fire.

Paper butterfly chandeliers
The most popular paper chandelier is the butterfly chandelier. And such love for this product is not just:
- Firstly she looks very chic and expensive.
- And secondly The production is very simple, even a child can be involved.
Such an elegant lamp will go well with any interior style, and it is also appropriate in the living room or dining room and even in a children's room.

Manufacturing technique:
- It is taken as a basis old chandelier or a frame from it. If this is not the case, then you can take a regular metal or wooden rim. If there is no such thing, take a thick wire and make 2-3 coils of yourself, so that you get a circle.
- Cut out butterflies according to the template (butterfly template below)
- We take a nylon thread or fishing line and attach butterflies to it. There can be two types of fastenings: either we pierce the butterflies or we put them on silicone glue. Whichever is more convenient for someone.


Butterfly pattern
To make a chandelier with butterflies, simply take a template and scale it to your size. It looks very nice if you make butterflies of several sizes, for example 3-4 diameters. Using a pencil, draw the sketch on paper and cut it out.
- It is best to cut with stationeryknife or straight manicure scissors without curves.
- It's better to use paper more dense and which does not attract dust, for example velvet structure. Since you will have to vacuum such a chandelier often

It is also a very beautiful option if you make a ball out of wire, take an old pendant from a chandelier as a basis and place several butterflies using a glue gun.


Paper ball chandelier
Such chandeliers are based on ready-made chinese lamp rice paper ball. They are usually very cheap, down to 1-2 dollars. But you can decorate it however you like with paper tartlets, an unnecessary map, newspaper or sheets of old books. We are publishing several ideas for decorating a ball chandelier with paper.


Paper New Year lamp
A regular idea for the New Year is to use an old lampshade and string snowflakes on a string various forms. Very impressive and beautiful. Below are a few photo ideas such decor for the new year.


To polish your skills, as well as add to your collection of unusually beautiful lamps, look at more ideas and. We are sure that among them you will find many that you will definitely want to create!
2 ratings, average: 5,00
out of 5)
 (1 ratings, on average: 5,00 out of 5)

