Crafts for the home: DIY interior decor ideas using scrap materials. DIY home crafts: ideas for decoration and interior Make a cute thing from an old bottle
The interior design ideas you see below contribute to more effective use space and reasonable storage of household items, and will also help hide unaesthetic elements and decorate your home.
1. Install drawers under the stairs
Design: Deriba Furniture
2. Hide the unaesthetic-looking router in a nice box


3. Turn cords into Bob Marley's hair

4. Store pet feeding bowls in a drawer

5. Use invisible bookshelves


"This shelf holds up to 15 pounds of books. Screw the frame directly into the wall and voila - you have an invisible bookshelf! The maximum stack height is 16 inches. The kit includes everything you need, you only need a screwdriver. The Conceal Book Shelf has already won design awards as an innovative, inspiring and creative product.". (Designer: Miron Lior)
6. Turn your headphone cord into a power line


7. Store your jewelry behind a picture.

8. Disguise your router as an old book


9. Hide the air conditioner behind a useful board with a list of important things to do


10. Transform your cable into a beautiful vine

Sold on Amazon
11. Hide wires behind a neat fence

Design: Karl Zahn
12. Install a ladder with drawers

13. Use ribbon to decorate your washer and dryer

14. Decorate light switches with stickers to remind kids to save energy


15. Hang a screen over your desk to hide wires from view.

16. Hide alarm buttons, thermostats, etc. behind artwork.

17. Disguise your garden water pipes with fake rocks.


18. Create a charging box for all your electronics

19. Decorate the refrigerator


Every woman dreams of arranging her home so that it becomes the coziest corner where she always wants to rush from work and gather with her family, celebrate holidays or simply enjoy the tranquility of home. DIY home decorations are becoming increasingly popular today. After all, as you know, various little things add coziness to the house, which are in harmony with the decor and with the mood of all household members.
And of course, who doesn’t want to decorate their home before the holidays - for example, a birthday or New Year - with various little things of a suitable theme! But you will have to spend a lot of money on decorating the rooms, because such trinkets in specialized stores are not as cheap as they seem. That's why the best option You will be able to make home decorations with your own hands, the creation of which will also become a fun activity for you and even for your children.

It is possible to complement and refresh the interior of any room with the help of exclusive flower pots, and for this you don’t have to run to the stores, you just have to look for old pots that are lying around idle. Using scrap materials and faceless, lying around pots, you can make wonderful crafts to decorate your home with your own hands.
There are many ways to decorate flower pots. So, for example, you can use paint from balloons or wrap them with coarse multi-colored threads, glue fringe or ruffles around them.

Using scrap materials and faceless, lying around pots, you can make wonderful crafts to decorate your home
Another one of interesting options is covering old flower pots with beads, beads, sequins or appliqués, which are finally varnished.
The knitted clothes with which they are wrapped will bring originality to the pots. To do this, you don’t have to start learning knitting yourself; just choose an old knitted sweater or a boring scarf and, using scissors and a needle and thread, create a new fashionable garment for flower pot.

It’s a little more difficult to make a colored mosaic for pots, but the result will be so impressive that you won’t regret the time spent. So, to decorate with mosaics you will need the following material:
- colored glass, pebbles or pebbles;
- “hot” glue (PVA is also possible);
- tile grout;
- brush.
In order not only to paste over the pot, but also to lay out a drawing, you should prepare glass pieces of several colors. Initially, the desired design is laid out on paper and only then transferred to the surface. First, glue the image and only then process the rest of the flower pot.

After the entire pot is decorated with glass, tile grout is applied on top. If at this moment some pieces of glass fall off, it’s okay: in a day, when the pot has dried, you can glue back the fallen elements.
After treating the pot with grout, you need to wait 15-20 minutes and use a damp rag to wipe it off the glass. The grout is reapplied after a day and also washed with a rag. After another 24 hours, the product is finally coated with varnish - and original decoration, what you created is ready.
No one else will have cushions like these again.
When there is a sofa in the living room, it’s just furniture, but if you decorate it with a couple of cute pillows, the room immediately feels cozy and warm.
Advice! To decorate pillows, you can embroider a pillowcase yourself, and not just with threads, but using beads, ruffles or other elements.
It’s easy to sew sofa cushions yourself. If you don’t have enough time for this, you can buy a couple of inexpensive small pillows in the store and, using your imagination, create a lovely decoration for your home from them, inspired by some suitable photo from the Internet.

It’s easy to sew sofa cushions yourself
For greater convenience, it is better to make appliqués not on the pillow itself, but on top of the pillowcase, which can be removed and washed or changed. And there are many options here. You can prepare the applique yourself and sew it on. Or use an iron to glue a finished purchased decorative element - this will not be difficult at all. The material for the pillowcase can be silk, velvet or any other fabric that matches the interior of the room.
Modern sofa cushions don't have to be square shape- you can make them round, like little animals or in the form of letters, for example. If you still decide to sew a pillow yourself, you can use scraps of different fabrics rather than a uniform fabric. For padding, it is better to choose hypoallergenic material.
DIY decorated vases
Everyone knows perfectly well that in stores you can choose a vase to suit every taste, color and size, but it is not always possible to spend the amount written on the price tag for the vessel you like. And sometimes you just want to decorate your home with something original and exclusive.
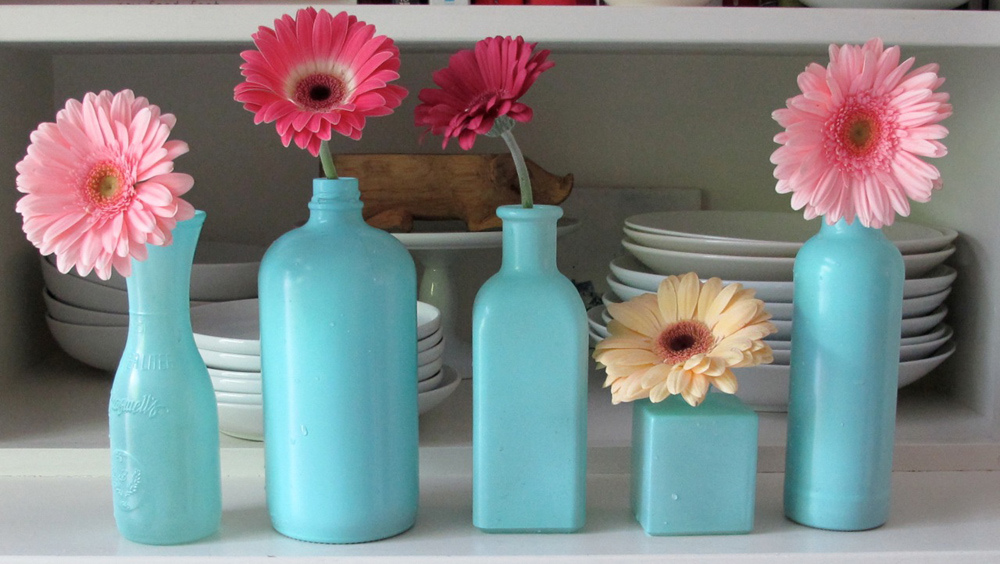
Advice! Light and great solution will be used glass bottle any original form.
After first removing the label, remove any remaining glue from the bottle, then place a bouquet of dried flowers in the bottle. And finally, the entire composition is sprayed with spray paint in a silver or golden color, or any other color - the main thing is that the craft looks harmonious with the room decor.

Original decor You can create vases with your own hands from paper, and since it’s also simple, feel free to connect your child to this exciting activity- ultimately a decoration for the home and good mood guaranteed. For such a vase you will need:
- glass bottle, glass or jar;
- corrugated paper of different shades (or you can use pieces of pages from a fashion magazine);
- PVA glue;
- small scissors.
The selected paper should be cut into uneven pieces different sizes. Apply glue to the prepared bottle and apply pieces of paper one by one in a chaotic manner. Treat the entire bottle this way. Next, when the first layer is pasted, apply glue on top again and add more pieces of paper. We do this until the entire surface is covered. At the end, we treat the craft with glue again and wait until it dries. If there is acrylic lacquer, you can coat the product with varnish, but even without this coating the vase will look great and will become another home decoration, made with your own hands from scrap materials.
We complement the interior with a tree made from coffee beans
The coffee tree will not only decorate the rooms, but also fill them with a magical aroma. Made with your own hands, this original and beautiful tree will be an excellent present for any occasion, as well as a cute decoration for your home.
To make a tree from coffee, you should prepare the following material:
- large coffee beans;
- plastic ball;
- brown paint;
- glue;
- gypsum;
- small flower pot;
- Styrofoam.

The coffee tree will not only decorate the rooms, but also fill them with a magical aroma
First of all, we color the ball in Brown color, so the original shade will not appear from under the grains glued on top. After the paint has dried, we pierce a hole in the ball into which the tree trunk will go, and begin to cover it with grains.
For the trunk, you can use any stick or branch, which will be wrapped with rope, ribbons or anything else you wish. We insert the barrel into the hole made in the ball until the end, and we also glue coffee beans around it for better fixation.
Before securing the tree in a pot, you should wrap a piece of wire around the base of the trunk. We put the finished tree in a pot and cover it with polystyrene foam, then dissolve gypsum in water and pour it into the pot. When everything is dry, the craft is ready. If you want, you can decorate it further.
How to decorate your home for a birthday
Birthday is a wonderful holiday for every person, regardless of age. Therefore, many people like to decorate their home to maintain a festive atmosphere and, of course, to the delight of their children.
First of all, when decorating rooms, they remember balloons, without which no one can do children's party. But in order for the balls to really bring pleasure, it is better, of course, to make a composition out of them, to come up with something original - then it will not be just a bunch of balls, but a real decoration.
Pictures made from multi-colored balloons attached to the walls or ceiling will look beautiful; you can also use ribbons for decoration.

When decorating your room, think about balloons
Another fun option is to scatter inflated multi-colored balloons randomly across the floor. This idea will appeal to children who will happily play with the balls.
Advice! If the balloons are filled with helium and tied instead of threads satin ribbons, then you can attach interesting photos to your feeds.
Various hand-made jewelry can highlight natural beauty. suburban area and bring hidden design talents into reality (and almost all of us have them). But before you get started, examine your supplies first. And don’t forget about one sacred rule of all summer residents: don’t throw anything away.
To create original garden decorations you will need absolutely unnecessary, seemingly unnecessary things: old dishes and furniture, holey shoes, car tires, barrels, plastic bottles, trimmings building materials, firewood, etc. The most effective methods are the use of plastic, stones and wood. For example, from old tin cans you can make such a cute Tin Woodman, who, as you can see, still managed to find his heart.

And cans of beer and other carbonated drinks can be used to create cute balloon lanterns that can be hung next to the window.

The main thing when making various decorative elements is a sense of style. Therefore, first decide on the style direction, taking into account the area of the territory, the existing design style, as well as your capabilities and wishes.

All ideas for decorating a garden can be divided into two large groups:
- non-functional;
- functional.

Let's get acquainted with the features of each of them.
Non-functional decorations
This includes those decorations that perform a purely decorative function, that is, they have no practical use. These are various figures, souvenirs and crafts. However, many of these decorations can be the real highlight of any garden. Here, for example, are crafts made from smooth stones painted with acrylic paint (although you can use any other paint). Moreover, for greater effectiveness, you can use fluorescent paint.

Great crafts can be made from old boards and stones. Additionally, you can use beads, multi-colored pieces of glass and the same acrylic paint. From all this you can make funny figures people, animals, gnomes or insects. At night, such sculptures will look like magic lanterns if the stones are painted with fluorescent paint. And from the usual steel wire and golf balls you can make these cute ants.

Note! You can involve your children in working with applications and paints. Trust me, you'll have a great time.

Even old cutlery can come in handy. From them you can make, for example, a dragonfly.

But the most economical of materials is plastic, or rather, old plastic bottles of various sizes. You can make literally anything from them - piglets (more on this a little later), elephants, proud swans or cute sparrows that can be planted on fences. And if you also take some nail polish, you can decorate the garden with these colorful butterflies cut out of plastic bottles.

IN Lately It is very fashionable to decorate the site with all sorts of colorful characters made with your own hands. From old spoons you can make a hanging decoration in the form of a fisherman and small fish.

But let's get back to plastic. It can be used to create not only animals, but also various plants(palm trees, cacti, roses, daisies, etc.). It could even be a fabulous flower that will delight the eyes of science fiction fans.

Note! It is recommended to place decorative elements made from plastic bottles as far into the garden as possible, especially if there are small children in the family. The fact is that you can accidentally cut yourself on the cut edges of bottles.
Many decorative elements can be made from rusty metal sheets, pipes, as well as old tools. For example, this woodpecker, for the manufacture of which corrugated sheeting and a circular saw were used.

Metal decor in the shape of a bird
To create multi-colored mushrooms in the garden, you can use dishes (including disposable ones) and unnecessary children's toys.

Video - Original ideas for the garden with your own hands
Functional jewelry

These are elements that successfully combine decorativeness and functionality, that is, they are not only beautiful, but also bring certain benefits. If you have old plastic/iron bathtubs or other containers, you can use them to create garden ponds. You can plant them in ponds aquatic plants or launch fish. Additionally, you can use tiles, pebbles or boulders, and also decorate the banks of reservoirs with other elements - for example, lighthouses made from painted plant pots.

You can line the boundaries of the pond concrete blocks or granite as shown in the image below.

Don't forget about plants - you can use car tires, buckets or plastic bottles to create extraordinary flower beds. Moreover, many people make flower beds from chairs, beds and chests of drawers. It’s also better not to get rid of old stumps, because you can make excellent flowerpots out of them by planting flowering plants. Well, even a work boot can be painted, placed on a mosaic ball and something can be grown there.

An old bicycle, which can be completely painted if desired, is also perfect for the role of a stand for pots.

Note! If you use stumps as flowerpots, then plant flowers in clay pots, since you should not plant them directly in wood - it will rot from moisture.

Very simple, but at the same time beautiful element can be done using paint cans (preferably with drips) as flowerpots.

Don't rush to throw away the old ones wooden chairs- can be made from them beautiful swing and paint them with bright paint.

And here's another one original version– using an old hanging birdcage to plant succulent plants.

Rare gardens are complete without the ringing sound of birdsong. And to make the birds feel comfortable, you can make beautiful birdhouses for them, decorated with decoupage and other decorative elements. You can make the birdhouses yourself from old furniture or the remains of boards.

A bright birdhouse can be made from an old Lego construction set that children no longer play with.

And if you live near a park, you can make a squirrel feeder. To make it, you will need a toy chair, which should be attached to the tree with two self-tapping screws. Screw a head of corn onto a long self-tapping screw attached to the chair, which you will then periodically change.

We make garden decorations with our own hands
We offer you several step by step instructions for the production of original decorative elements.
Piglet made from plastic bottles

To make this decoration you will need:
- plastic bottle 5 l or 6 l;
- 2 liter plastic bottle (you will use it to make ears);
- four cups (can be replaced with cut bottle necks) for feet;
- scissors;
- a pair of large buttons (they will be used for the eyes);
- moisture-repellent pink paint;
- Super glue;
- wire;
- marker;
- brush.
Once everything is ready, proceed directly to work.
Step 1. Clean the bottle first big size from stickers.
Step 2. Cut out ears from a two-liter bottle. At the base of each ear, leave approximately 5 cm for fastening.
Step 3. Make slits on the head for the ears. Insert the ears there, fix them in the desired position and glue them with superglue.
Step 4. Glue the legs with the same glue, then attach a wire twisted into a spiral - it will serve as a tail.
Step 5. Paint the resulting structure with pink paint, trying to distribute it as evenly as possible.
Step 6. When the figure is dry, glue the buttons, draw the snout and the contours of the ears.

Note! You can make a few more smaller piglets to make a mother with babies.
You can also make piglets into flowerpots, as shown in the image below.

To do this, make a cutout in the back, then pour soil for flowers inside the body. Then you can sow the seeds.
You can check out several more options for making bottle pigs.


Small decorative piglets for garden decoration

Bat
An original garden decoration can be bat, hanging from a tree, fence or even next to the front door.

To make such a mouse you will need:
- wire;
- rubber tube or large tire;
- nylon threads;
- foam sponge;
- double sided tape;
- feathers or pieces of fur;
- black fabric (necessarily elastic);
- acrylic paints corresponding colors.
Step 1. In accordance with the planned dimensions, cut out a piece of rubber of the required size. To do this, draw the outline of the animal. To add volume to the ears and paws, you can cut them out separately.
Step 2. Cut out the body and muzzle from a washcloth and cover them with elastic fabric. Sew the resulting elements with a rubber blank using nylon threads. If desired, you can additionally secure the elements with wire.
Step 3. Glue the legs to the body, passing the wire through. Cut narrow strips from rubber that will give the wings volume. Glue the strips using double sided tape, holding it with threads for extra security.
Step 4. Start painting. Color the ears, draw the nose and mouth. Make the chest a little lighter by adding a few black strokes to imitate fur. Tape the fur onto the neck, ears and paws.
Plastic swan lantern

You can make a beautiful and unusual swan from plastic film. And if you additionally equip the bird with lighting, the garden will look even more sophisticated and charming.
For work, prepare:
- scotch;
- 6-7 m of polyethylene (preferably 150 microns - this is the film used in greenhouses);
- aluminum wire;
- 5 liter bottle;
- isolon.
After this, proceed to the main manufacturing stage.
Step 1. Having thought over the dimensions of the figurine, make a frame from wire and a bottle as shown in the image below.

Step 2. Cut the isolon into thin strips and wrap them around the frame. For greater security, secure the strips with tape.

Step 3. Slice plastic film to the stripes. Give them a fringed look by making small cuts on one side.
Step 4. Wrap strips of film (fringed outward) onto the frame, starting from the tail. Periodically burn the film (use a heated screwdriver) to adhere it to the main element.
Step 5. In the same way, make wings separately and attach them to the body.
Step 6. There are a few possible options how to make the backlight in this case. You can, for example, take an ordinary round lantern and insert it into a bottle, after making a hole. You can also decorate the outside of the bird with flexible LED tubes.
Note! It is advisable to place the swan near a pond.
And in conclusion, here are a few more interesting options for garden decorations.

Decoration: wire butterflies


If you have a fabric umbrella, it can be easily converted; all you need to do is take:
- transparent elastic film;
- scissors;
- wide braid;
- thread with a needle.
Make a small round cutout in the center of the cellophane circle. To make this place durable and not tear, it is better to also sew braid here. Place the cellophane cover on the umbrella and sew it from the bottom to the knitting needles using your hands, piercing the braid with a needle. After this, you can cover the sown seeds.
There are others interesting ideas vegetable garden, garden, which you can create with your own hands is very easy.

This is how beautiful signs can be indicating what is planted where. Write on dark stones with white acrylic paint, and on light stones with colored paint.
Pets will not trample the beds with still weak shoots if you stick disposable plastic forks here, left over from a picnic. Knives made of the same material will also be used. You can write on them with a simple pencil where what is planted.

Speaking about what interesting ideas for a vegetable garden you can quickly bring to life with your own hands, let’s focus on the following. Summer residents know how quickly the soil in outdoor pots dries out. If there has been a heavy downpour, water may, on the contrary, stand in the pot and lead to rotting of the plant's roots. Create optimal humidity Regular baby diapers will help to fill the soil in such a container. They will absorb excess moisture and release it during drought.
To do this, simply place a diaper on the bottom of the flowerpot, fill it with soil, water it, and plant the plant. Now you don’t have to worry about how your green pets feel in the country while you’re in the city at work.

How to make a pond out of a tire at your dacha?
Using interesting creative ideas, you will create it with ease. Look at the photo of the master class, which shows the stages of work. Then prepare what you need, this is:
- tire;
- durable film;
- decorative stones;
- plants;
- cement;
- sand.

Clean the tire from dirt, leaving only one side part of the wheel, cutting off the second with a sharp knife.
To make cutting the tire easier, lubricate it with laundry soap. Cut the cord with a hacksaw.
The tire can be completely dug into the soil or only a third. Put it in place, draw the outline of the wheel with a shovel. Dig the soil to the desired depth. If you want to make a decorative pond to decorate an area where people will not swim, then lay thick cellophane inside the tire. Secure its edges with stones.

Make sure that the film is not too tight, but is placed loosely in the tire so that the cellophane does not tear during use.
Prepare a solution of cement, sand and water. Using it, place the remaining stones along the edge of the pool. When the concrete has dried well, all that remains is to pour water, and you will have a decorative pond in your country house ready. It’s nice to plant aquatic plants near it with your own hands.
If you plan to swim in it, then you need to dig holes in the soil along the contours of the wheel, select the soil, pour a gravel-sand cushion, and fill it with cement on top. When it dries, place a tire on the platform, pour 2 more buckets of concrete into it, level it so that there are no holes left between the bottom and the walls of the pool.
IN decorative pond Water can be cleaned using a net or by periodically adding preparations to the water to purify it. And in a self-made pool, the water needs to be drained after it gets dirty in order to be replaced with clean water. Look at how the drainage system works.

Creative ideas will tell you how to decorate such a pond or pool in the country. Before filling with water, it can be painted inside and outside.

If you plant moss along the edge of a dug-in pond, such a pond will also look great. You can place small pebbles inside.

Looks good exterior decoration a pond made of stones that are “planted” on a concrete solution.

If you don’t have a summer house, but want to have a small decorative pond, make it from a large flowerpot and place it on the windowsill. Among indoor flowers this looks wonderful and creates the humid microclimate they need.

For a small home pond you will need:
- flower pot or pot;
- a strip of roofing felt, corrugated iron or other waterproof material;
- clay soil;
- water;
- aquatic plants.
And if you have not one, but several tires at your dacha, then, in addition to a pond or swimming pool, you can make a swing for children. For the first, you need to first cut a notch on the side of the tire and turn the tire over to the other side. Both sides are cut in the form of petals. It remains to tie 2 strong ropes, and the children's swing
ready for the dacha.

You can also make a swing like this for kids. For similar use:
- tire;
- wooden board;
- bars;
- saw;
- paint;
- self-tapping screws

How to decorate a mirror in your home?
Not only on summer cottage You can create a lot of interesting things with your own hands; ideas for your home will tell you how to decorate your homestead or city home at the lowest cost.
See how to decorate a mirror to make it unique. If you spent a vacation at the seaside and brought back shells from there, use this design element. You can also buy them in the store. To decorate a mirror, take:
- mirror;
- degreasing solution;
- shells;
- glue.

When decorating mirrors rectangular shape Place large elements in the corner. Arrange identical shells in groups.

The pebbles also look beautiful. See how a mirror is decorated using these smooth pebbles.

To ensure that shells and stones stick well, do not forget to first degrease the surface and then glue these decorative elements to it.
And here are other ideas for the home that are also interesting to implement with your own hands. See how to decorate a mirror using mosaics.

For work take:
- sheet thin plywood or hardboard;
- jigsaw;
- glue;
- mosaic tiles;
- double sided tape;
- mirror.
- Place the mirror on a sheet of hardboard or plywood, outline it, leaving equal allowances for the frame on all sides, and cut it out. If you have a ready-made wooden or plastic frame, use it.
- Attach the mirror to the base using double-sided tape
- When applying glue to the frame, place the mosaic elements here. You can leave them like this or apply grout at the end of the job, let it dry, and remove the excess with a soft cloth.

For this idea use:
- thick cardboard;
- scissors;
- plastic spoons;
- spray paint;
- pencil;
- mirror.
- Cut off the handles of the spoons. We won't need these elements.
- Place the mirror in the center of a sheet of cardboard and outline it. Draw an outer line along which to cut the frame.
- We begin gluing the spoon blanks inside first, stepping back from the place where the mirror will be glued. Having completed the first row, move on to the second, then to the subsequent ones.
- When all the blanks are glued, cover them with spray paint and let it dry.
- Glue a mirror to the center of the frame.

Having cut off the handle of the metal fork, bend the remaining part with pliers and get this original ring.

A grater will help you store your earrings in an original way and never lose them at home.

Crafts from kinders
Children love to receive Kinder surprises, eat chocolate, and get a toy. Don't throw away plastic packaging, they will also give you many interesting ideas for your home and garden.
Let there be a vase of flowers on the table that will never wither. For this interior decor, take:
- plastic packaging for Kinder surprises of different colors;
- green cocktail straws;
- scissors;
- small glass jar.

To secure it, cut it with scissors or tie it directly in the tulip above the hole with a knot.
After the Kinder toys are removed from the eggs, the plastic packaging can be used to make interesting entertainment for young children.

For this you will need:
- Kinder Surprise packaging;
- hammer;
- nail;
- pliers;
- lace;
- caps from plastic bottles.

And in plastic container do it with a hot nail. When the pieces have cooled down, you can use them. Pull the string through the hole in the plastic egg and tie a knot on the reverse side.

Educational toy for children is ready to use. Let the child string the lids on the string.
To prevent the end of the lace from fraying, lubricate it with natural glue made from starch brewed with boiling water. Do not use artificial glues for such a children's toy.
To diversify useful entertainment, invite your child to string lids with holes onto the pyramid, and its elements onto a string.

Such a pyramid and a kinder toy also look good in the interior, as does a tea set.

For this, the child will need:
- Kinder Surprise containers;
- plasticine;
- sheet of glossy cardboard.
The sugar bowl is made using the same principle and the cups are decorated. The saucers are made of plasticine.
From thin paper strips you can make elements using the kanzashi technique and attach them to make: a teapot, a samovar, cups, a sugar bowl.

Such DIY home ideas will help you bond with your child and make the living room even more comfortable. After all, then you will play tea party with him, seating dolls and animal figurines nearby. To do this, make these stools with your children, for which you need:
- hair bands;
- toothpicks;
- cardboard;
- scissors;
- glue.
Blanks made of rubber bands are glued or sewn to cardboard, then you need to glue 4 toothpicks to each stool - these are the legs.

The Kinder collection requires several chocolate eggs. And from the remaining container you can make a Christmas wreath or just a home decoration. To do this, plastic packages need to be painted with acrylic paints and then glued together in the shape of a ring.

If you want to get such funny chickens, then glue red legs on them from colored paper. Make eyes and beaks from the same material.
Having put 4 black elastic bands on each yellow kinder package, you need to bend the wire in the form of antennae, glue paper wings, and paint the face. You will get such mischievous bees.

Here are other creative ideas that will decorate your home. Let children's works be displayed on the stand. Show them how to use plastic containers Using Kinder Surprises and plasticine, make these adorable animals.

And if you cut strips out of cardboard, roll each one into a pentagon, and glue them together, you will get a honeycomb like this. Plant bees here and you will have a natural corner at home.

Similar material will be useful outside the city. Such ideas for a summer house will tell you how to decorate a mesh fence.

And to make juicy strawberries, take:
- Kinder egg packaging;
- acrylic paints;
- brush;
- pencil;
- wire;
- green plastic bottle;
- scissors;
- candle.
- If your kinder packaging is not red, cover it with paint of this tone.
- When it dries, dip a pencil lead into black paint and make dots on the berries.
- Cut off the neck of the bottle. Next, using scissors, cut the ribbon from the bottle in a spiral. To attach it to the wire, heat sections of it over a flame and wrap it with plastic tape.
- Cut a small circle from the bottle and make its edges zigzag. These are berry greens.
- Heat the remaining free tip of the wire over the flame, first pierce the green “berry” with it, then the berry itself. Bend this edge of the wire with pliers.
- Use glue or flame to attach the green plastic leaves to the trunk. That's what it is garden figurine you got it.

If you want to see other interesting ideas for a garden using scrap materials, watch the video.
Here's the second one telling you how to decorate mirrors with film and rhinestones.

Original ideas garden decorations with your own hands will help to emphasize the natural charm and bring to life the hidden talents of the designer (and everyone has them). Before embarking on a critical mission, inspect your supplies... and go ahead!
Advice! Remember the sacred rule of a real dacha owner: you can’t throw anything away!
To create extraordinary things you will need things that are completely unnecessary at first glance: dilapidated furniture, old dishes, car tires, plastic bottles, firewood and scraps of building materials, tubs, barrels, shoes with holes, etc. Using stones, wood and plastic for decoration garden and dachas are the most effective ways.
DIY garden decorations: dedication to garden design art
The most important condition in creating decorative ornaments- sense of style. First, outline a style direction for yourself (taking into account the size of the territory, the style of the garden and own preferences). All decoration ideas for decoration garden plot can be divided into two groups:
- functional;
- non-functional.
DIY garden figures: functional ideas
This includes elements that harmoniously combine aesthetics and useful functionality.
Magic ponds.
If you have old metal/plastic bathtubs or other containers, use them to create tranquil ponds. Plant aquatic plants in your ponds. You can even get unpretentious fish. Decorating flower beds and ponds on a summer cottage can be entrusted with boulders, pebbles or tiles.Crafts for the garden from bottles and garden decoration with flowers (photo)
Flower world. Original flower beds made from plastic bottles, old tires, unnecessary shoes, iron buckets. Here you can even decorate an old bed, chairs, bicycle or chest of drawers. If there are large stumps left on your site, do not rush to uproot them. From them you can make magnificent ones with your own hands. flowerpots for the garden and plant flowers there.
Advice! For flowerpots made from stumps, additionally use clay pots(to plant flowers). You should not plant flowers directly into a tree - it will rot from water.
Romantic buildings. Plastic bottles can be used (you can build an entire gazebo from them). What do you think of cozy benches with a canopy in the spirit of French villages? Untreated logs are used for this. various sizes. You can build cozy ones from old armchairs or chairs. swing or unusual crafts for decorating the garden with your own hands.
Wooden crafts for the garden and a decorative birdhouse for the garden with your own hands
Favorite birds. Our magical garden simply cannot do without the shimmer of birds. To make the birds comfortable, you can come up with original wooden birdhouses for them. Decorate them decoupage, painting, decorative details. For the birdhouses themselves, you can use the remains of boards and wooden furniture. Birdhouses made from old large boots look great. You can awaken your imagination and create a real miracle of a birdhouse idea from corks or large porcelain teapots.
Advice! It is best to hang birdhouses on deciduous trees, with a slight tilt. And make the roof removable to make it easier to clean.
DIY garden sculptures: decor
A world of pure aesthetics reigns here, which pleases the eye and gives a special charm to the entire appearance of the garden. Various souvenirs, funny animal figurines, garden crafts– this kind of DIY garden decoration from scrap materials will be a real “highlight” yard design.
Crafts from stones for the garden
- Fantasies made of stone or wood. You can make wonderful things from stones or leftover boards. Acrylic paints, beads, and fragments of multi-colored glass can help you. You can create funny gnomes, little men, or just wonderful little animals or insects. And if you paint the surfaces of stumps or boulders with fluorescent paint, you will get magical night lanterns.
Advice! Involve your children in exciting work with paints and applications. You will have a wonderful time with them!
- The revival of plastic. The use of plastic bottles of different sizes in design is the most economical option garden decorations. What type of garden decoration made from plastic bottles do you want?
 (1 ratings, on average: 5,00 out of 5)

